
The new Photos app in Yosemite has finally linked together Apple’s image storage and editing ambitions – here’s how to use your iPhone’s own Photos app to bring it all together
The Photos app got a big overhaul in iOS 8. Where it used to be nothing more than somewhere to keep images after you’d taken photos with the iPhone’s camera, it’s now a fully-fledged editing and management tool.
Along the way, it’s inherited some features of the now defunct iPhoto, and introduced a new way to sync photos with other devices, iCloud Photo Library. Furthermore, thanks to the new Photos app that just landed in a new update to the Mac’s operating system – OS X Yosemite – the iPhone has become a hugely powerful link in the unified photo taking, editing, and storing chain that’s been carefully built by Apple.
Introducing iCloud Photo Library
Where previously, PhotoStream would let you sync up to 1,000 of your most recent photos and view them on another iOS device, a Mac, or Apple TV, iCloud Photo Library allows you to put your entire photo collection in iCloud and access it immediately from another device. What’s more, any edits you make, on any device, are shown on other devices.
You can access iCloud Photo Library from the new Photos application on a Mac, if it’s running the latest version of Yosemite, and from a web browser, by logging into your iCloud account.
Another very neat trick is that iCloud Library allows you to push the hi-res versions of all your photos to the cloud and keep only low-res previews on your iPhone or iPad, in order to save space. Cleverly, however, it only does this if your iPhone or iPad is low on space, if not it leaves the originals on your iPhone or iPad. To enable this, go to Settings > iCloud > Photos, and then ensure iCloud Photo Library is switched on by toggling that option, then finally tap Optimize iPhone Storage.
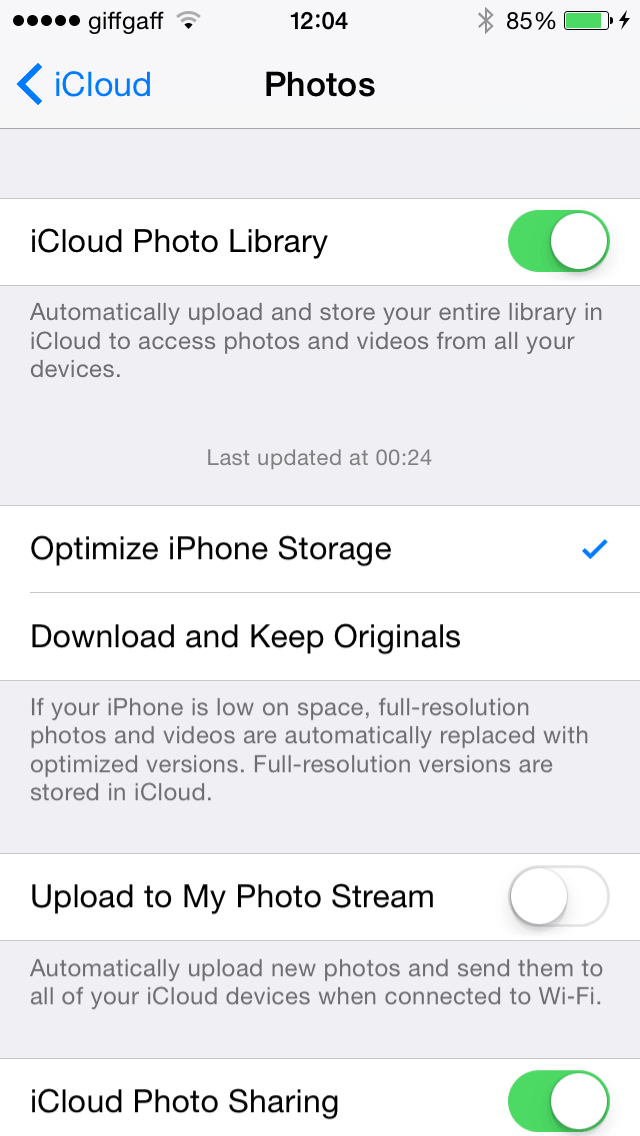
iCloud Photo Library can hold your hi-res originals, leaving low-res previews on your iPhone.
Sharing images through the Photos app
Photos allows you to share selected images or albums with anyone in your Contacts app. You can either tap the Share button next to an album name and then type in the names of the contacts you want to share it with, or tap a specific photo and use the Share button and the iCloud Photo Sharing Share Sheet to share the image.
People who accept your invitation can add comments and share their own photos in a shared album. If you have Family Sharing turned on, Photos automatically creates an album on all family members’ devices and anyone in the family can add photos to it, view photos that other’s have added, and comment on them.
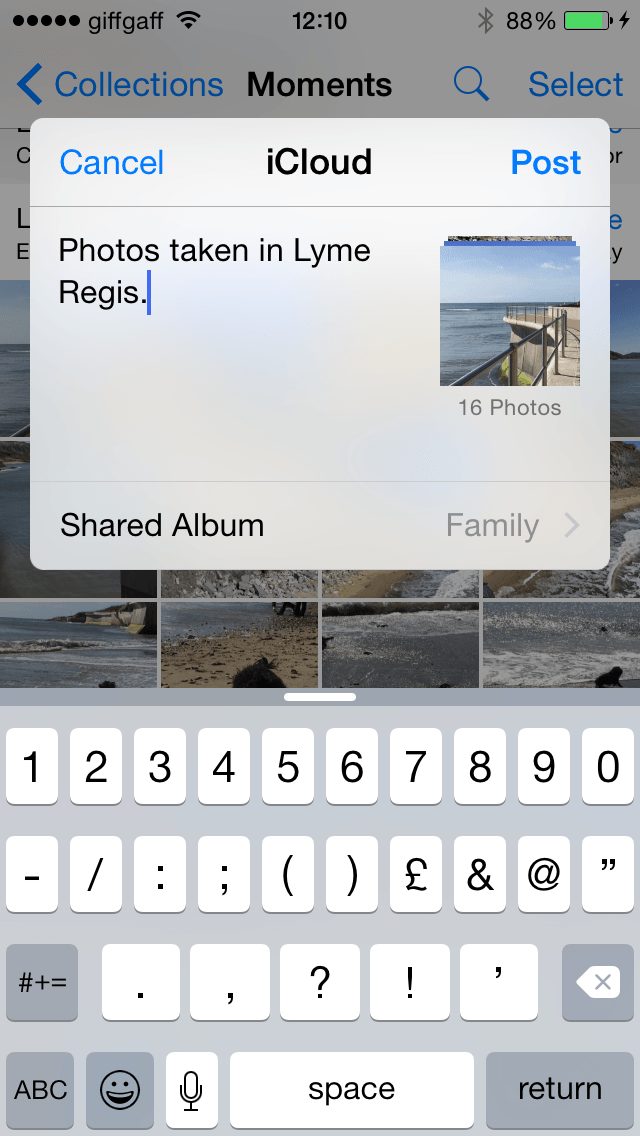
You can share individual images or a whole album, very easily.
You can also share an album publicly on the web. Set the ‘Public Website’ setting to on when you share an album and a URL will be displayed. Navigate to the address in a browser and you’ll find a gallery of photos in the album. You can then email that URL, or post it on Facebook or Twitter so that others can click on it and see your photos.
An Activity view in the Sharing tab in the Photos app shows you at a glance who has recently uploaded photos to a shared album, or commented on photos already there. It’s an easy way to keep track of shared images. You can also ask to be notified whenever there is activity on a shared album.
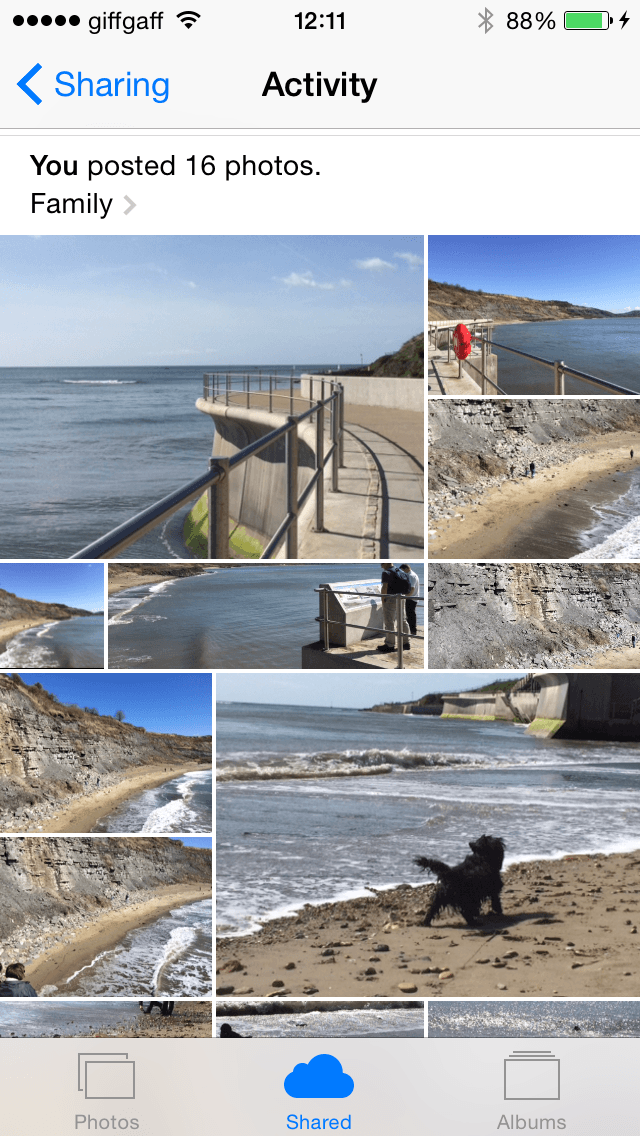
Activity view shows you who has recently uploaded to or commented on a shared album.
Organizing your photos
In addition to sharing, there are two other views; Photos and Albums. The latter displays the albums you’ve created or which have been created by other photo apps you use. Tapping on an album displays the photos in it. The other view, Photos, shows all your photos, organized chronologically and by location. Tap the Collections button at the top left of the screen in this view and you’ll see photo thumbnails grouped by location over a set time period.
So if you go out of town for two weeks in August, it will group photos taken in that location on the dates you were away and display them as a Collection — a bit like Events in iPhoto, except that Collections can span multiple days.
Tap the Years button at the top left of the screen, and your photos are shown as tiny thumbnails grouped by the year they were taken.

Collections make it easy to quickly scroll through hundreds of photos.
Editing photos
Editing features in the Photos app have also been beefed up. Open any photo and tap the Edit button at the top right of the screen and you’ll see the familiar magic wand icon at the top right. Tap this to automatically enhance the image.
Three buttons at the bottom of the screen offer finer, manual control. One allows you to crop and straighten, the next to add a filter, and the third to manually adjust things like exposure, shadows and highlights, and colour saturation.
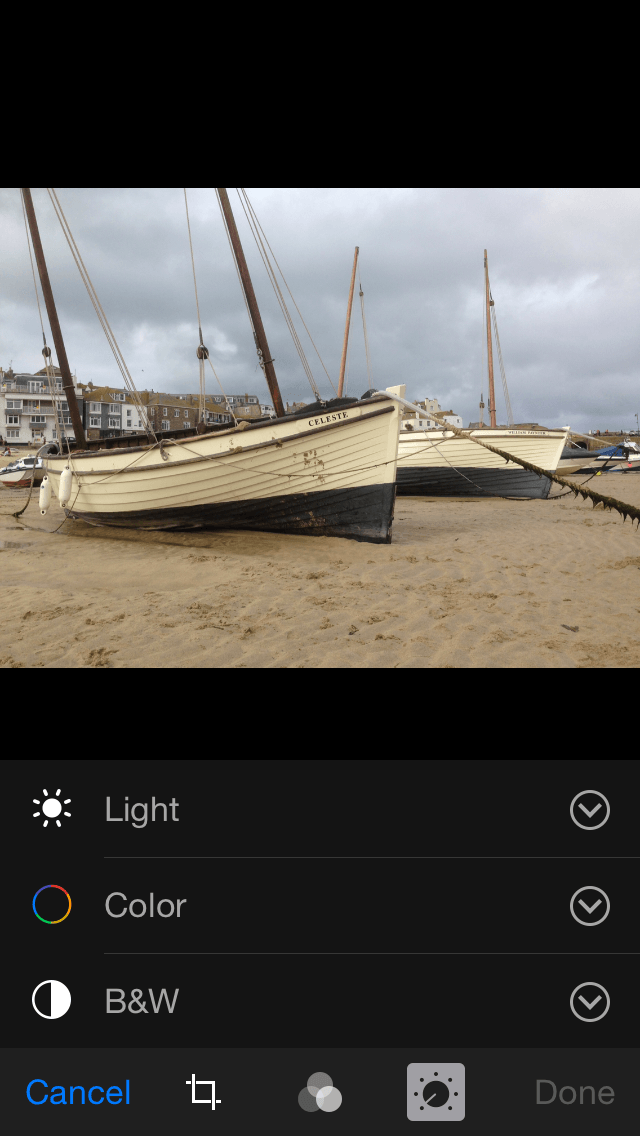
Photos has excellent editing features, giving you fine control over your images.
Tap the three circles icon at the top left of the screen and you can switch to another photo app to edit the image, provided the app is installed on your device and is compatible with iOS 8’s Extensions feature.
Photos and iCloud Photo Library are excellent tools for managing photos you take on your iPhone or iPad. If you have a Mac and can use Photos on it, you’ll be able to edit, manage, and share your photos from wherever you are.