
More and more of us use our iPhone as our main, and often only, camera. Why? Because as every photographer knows, the best camera is the one you have with you. And most of us have our iPhone with us all the time.
Great though the iPhone’s camera is, however, it does have several limitations. For example, there’s no optical zoom option, so you’re stuck with a fixed focal length and the only way you can zoom in is to do it digitally, which isn’t ideal.
Also, the iPhone’s sensor is small. Very small, in fact. And packing eight millions pixels onto a tiny sensor inevitably involves compromising image quality, particularly when the light it low. And then there’s the problem of keeping the iPhone still while you take a shot. Thats not easy, particularly if you’re using a selfie stick.
You can, of course, buy all sorts of add-ons and accessories to mitigate some of the limitations. For example, you can buy lenses which provide a wider angle, or multiply the focal length of the lens. And there are all sorts of contraptions for keeping the iPhone steady while you shoot, from the excellent GorillaPod tripods to gyroscopic steadicams.
The problem with all of those, however is that they can be expensive, and you can almost guarantee that you won’t have them with you at the very moment you need them to grab that once in a lifetime photograph.
1. Poor Light

Photography, all photography, relies on light. Without it, there’s no photo. It’s the nature of the light that makes the photo so think carefully about how you deal with low light situations. The obvious solution is to use your iPhone’s flash but, while that’s fine as a last resort, it’s not ideal. The flash only illuminates the foreground, and does so with a very bright, harsh light which often results in washed out faces and startled expressions.
Before you resort to using the flash, try adding light from other sources. If you’re indoors, could you go outside? Or, if not open the blinds wider or move nearer the window? The more natural light you can capture in your photos, the better. If that’s not possible, use a lamp in preference to the flash. It should be neutral in colour, and have a neutral, if any, shade. Don’t shine it directly at your subject, otherwise you’ll cast long shadows. Instead, bounce it off a white surface or white muslin or other fabric to diffuse it.
If all else fails, and you can’t add more light, use your iPhone’s camera controls to make sure it maximises the exposure. Some apps, like Camera+ allow you to set the focal and exposure points independently. But you can still use the native Camera app and have some control. By tapping and holding on the iPhone’s screen when you compose a shot, you lock both focus and exposure at that point. If that makes the resultant image too dark, however, and you’re using iOS 8, you can drag your finger up the screen after locking to increase exposure.
2. Bright sunlight
At the opposite end of the scale, you might find yourself taking photographs in bright sunlight. The iPhone’s camera will adjust its shutter speed and ISO to account for the brightness, but it can do nothing about the ugly dark shadows that the sun’s light casts.
Happily, you can. The simplest solution is to position your subject, if it’s easily moveable away from the sun’s glare. That usually means in the shade, though you need to be careful that the shade is even – putting someone under a tree, if the sunlight is visible through the branches, will leave them dappled in light and shade.
Another option is to do what the professionals do and use a reflector, if you can find something suitable. A piece of white card, for example, strategically positioned, will bounce the sun’s rays back towards your subject and soften the shadows.
If your subject isn’t mobile – a building or landmark, perhaps – you need to work with nature. Wait until the sun hides behind the clouds, if you can. If not, and you’re able, go away and come back later in the day. Sunset, and sunrise, are known as the ‘golden hours’ by photographers for a reason. At that time, the sun is low in the sky and its light diffused by the earth’s atmosphere, which gives everything a golden hue. While shadows are longer at those hours, they’re also softer; there are very few photographs which aren’t improved by shooting at the beginning or end of the day.
3. Shooting through a window
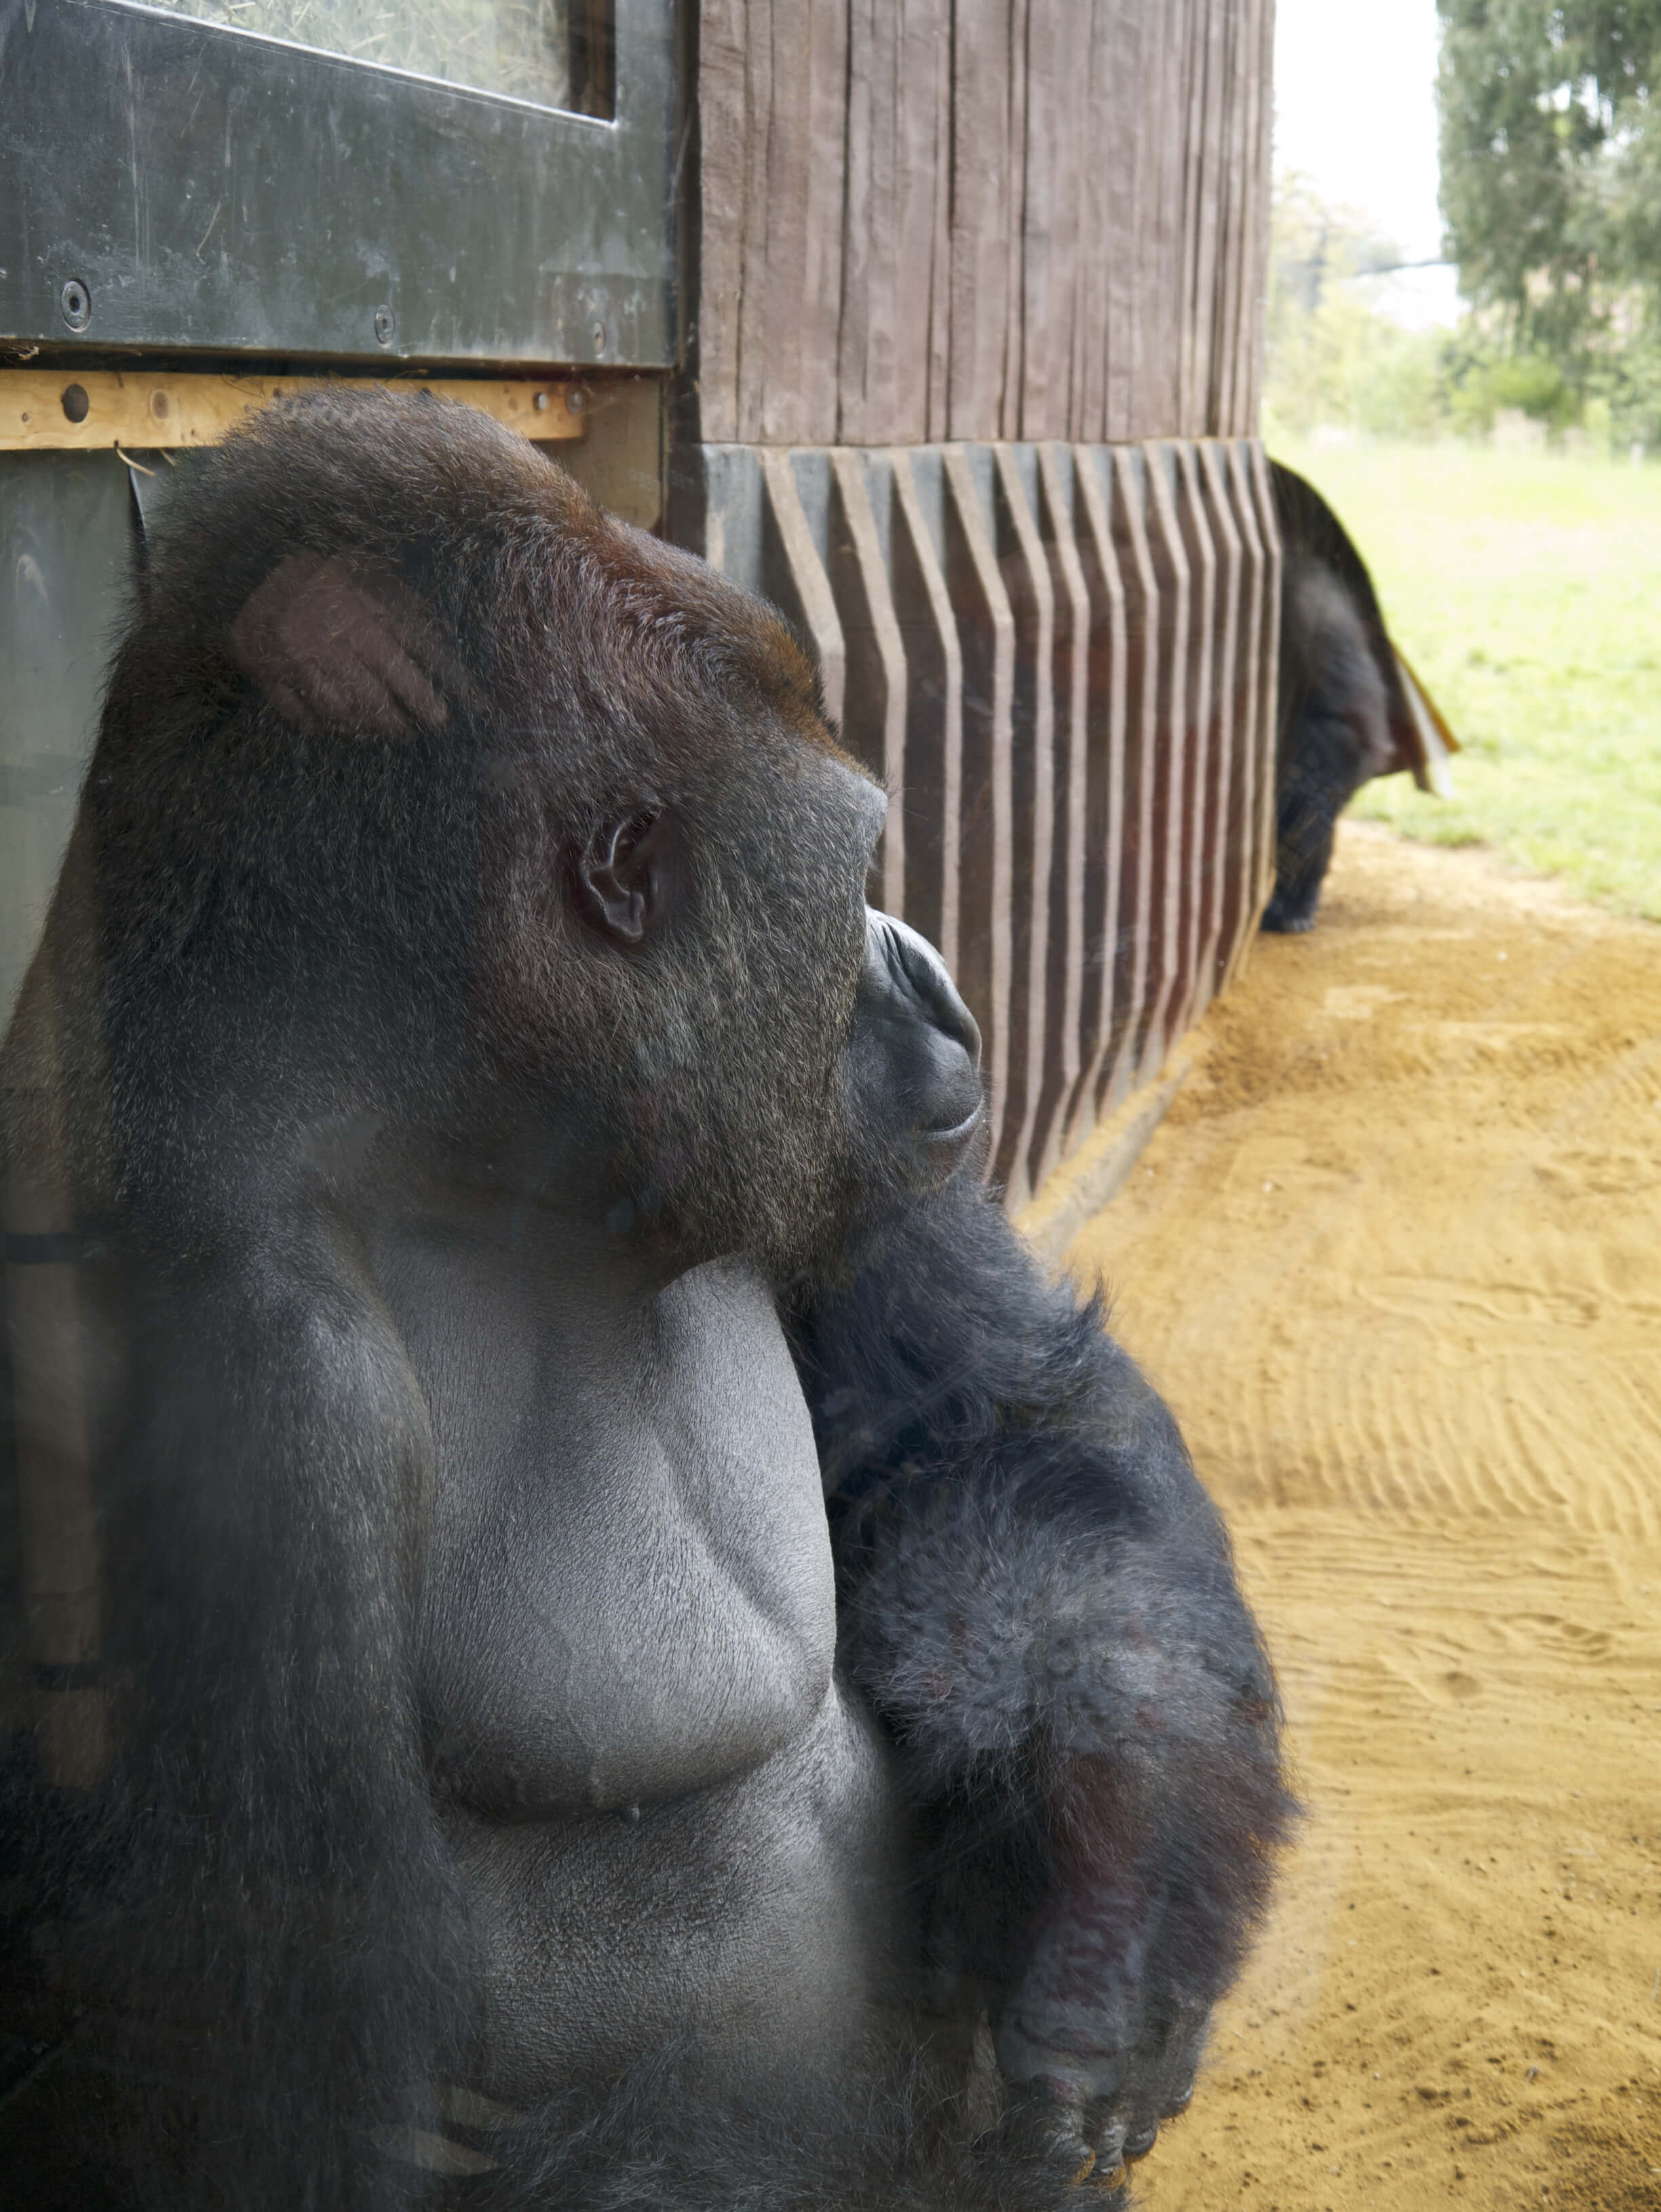
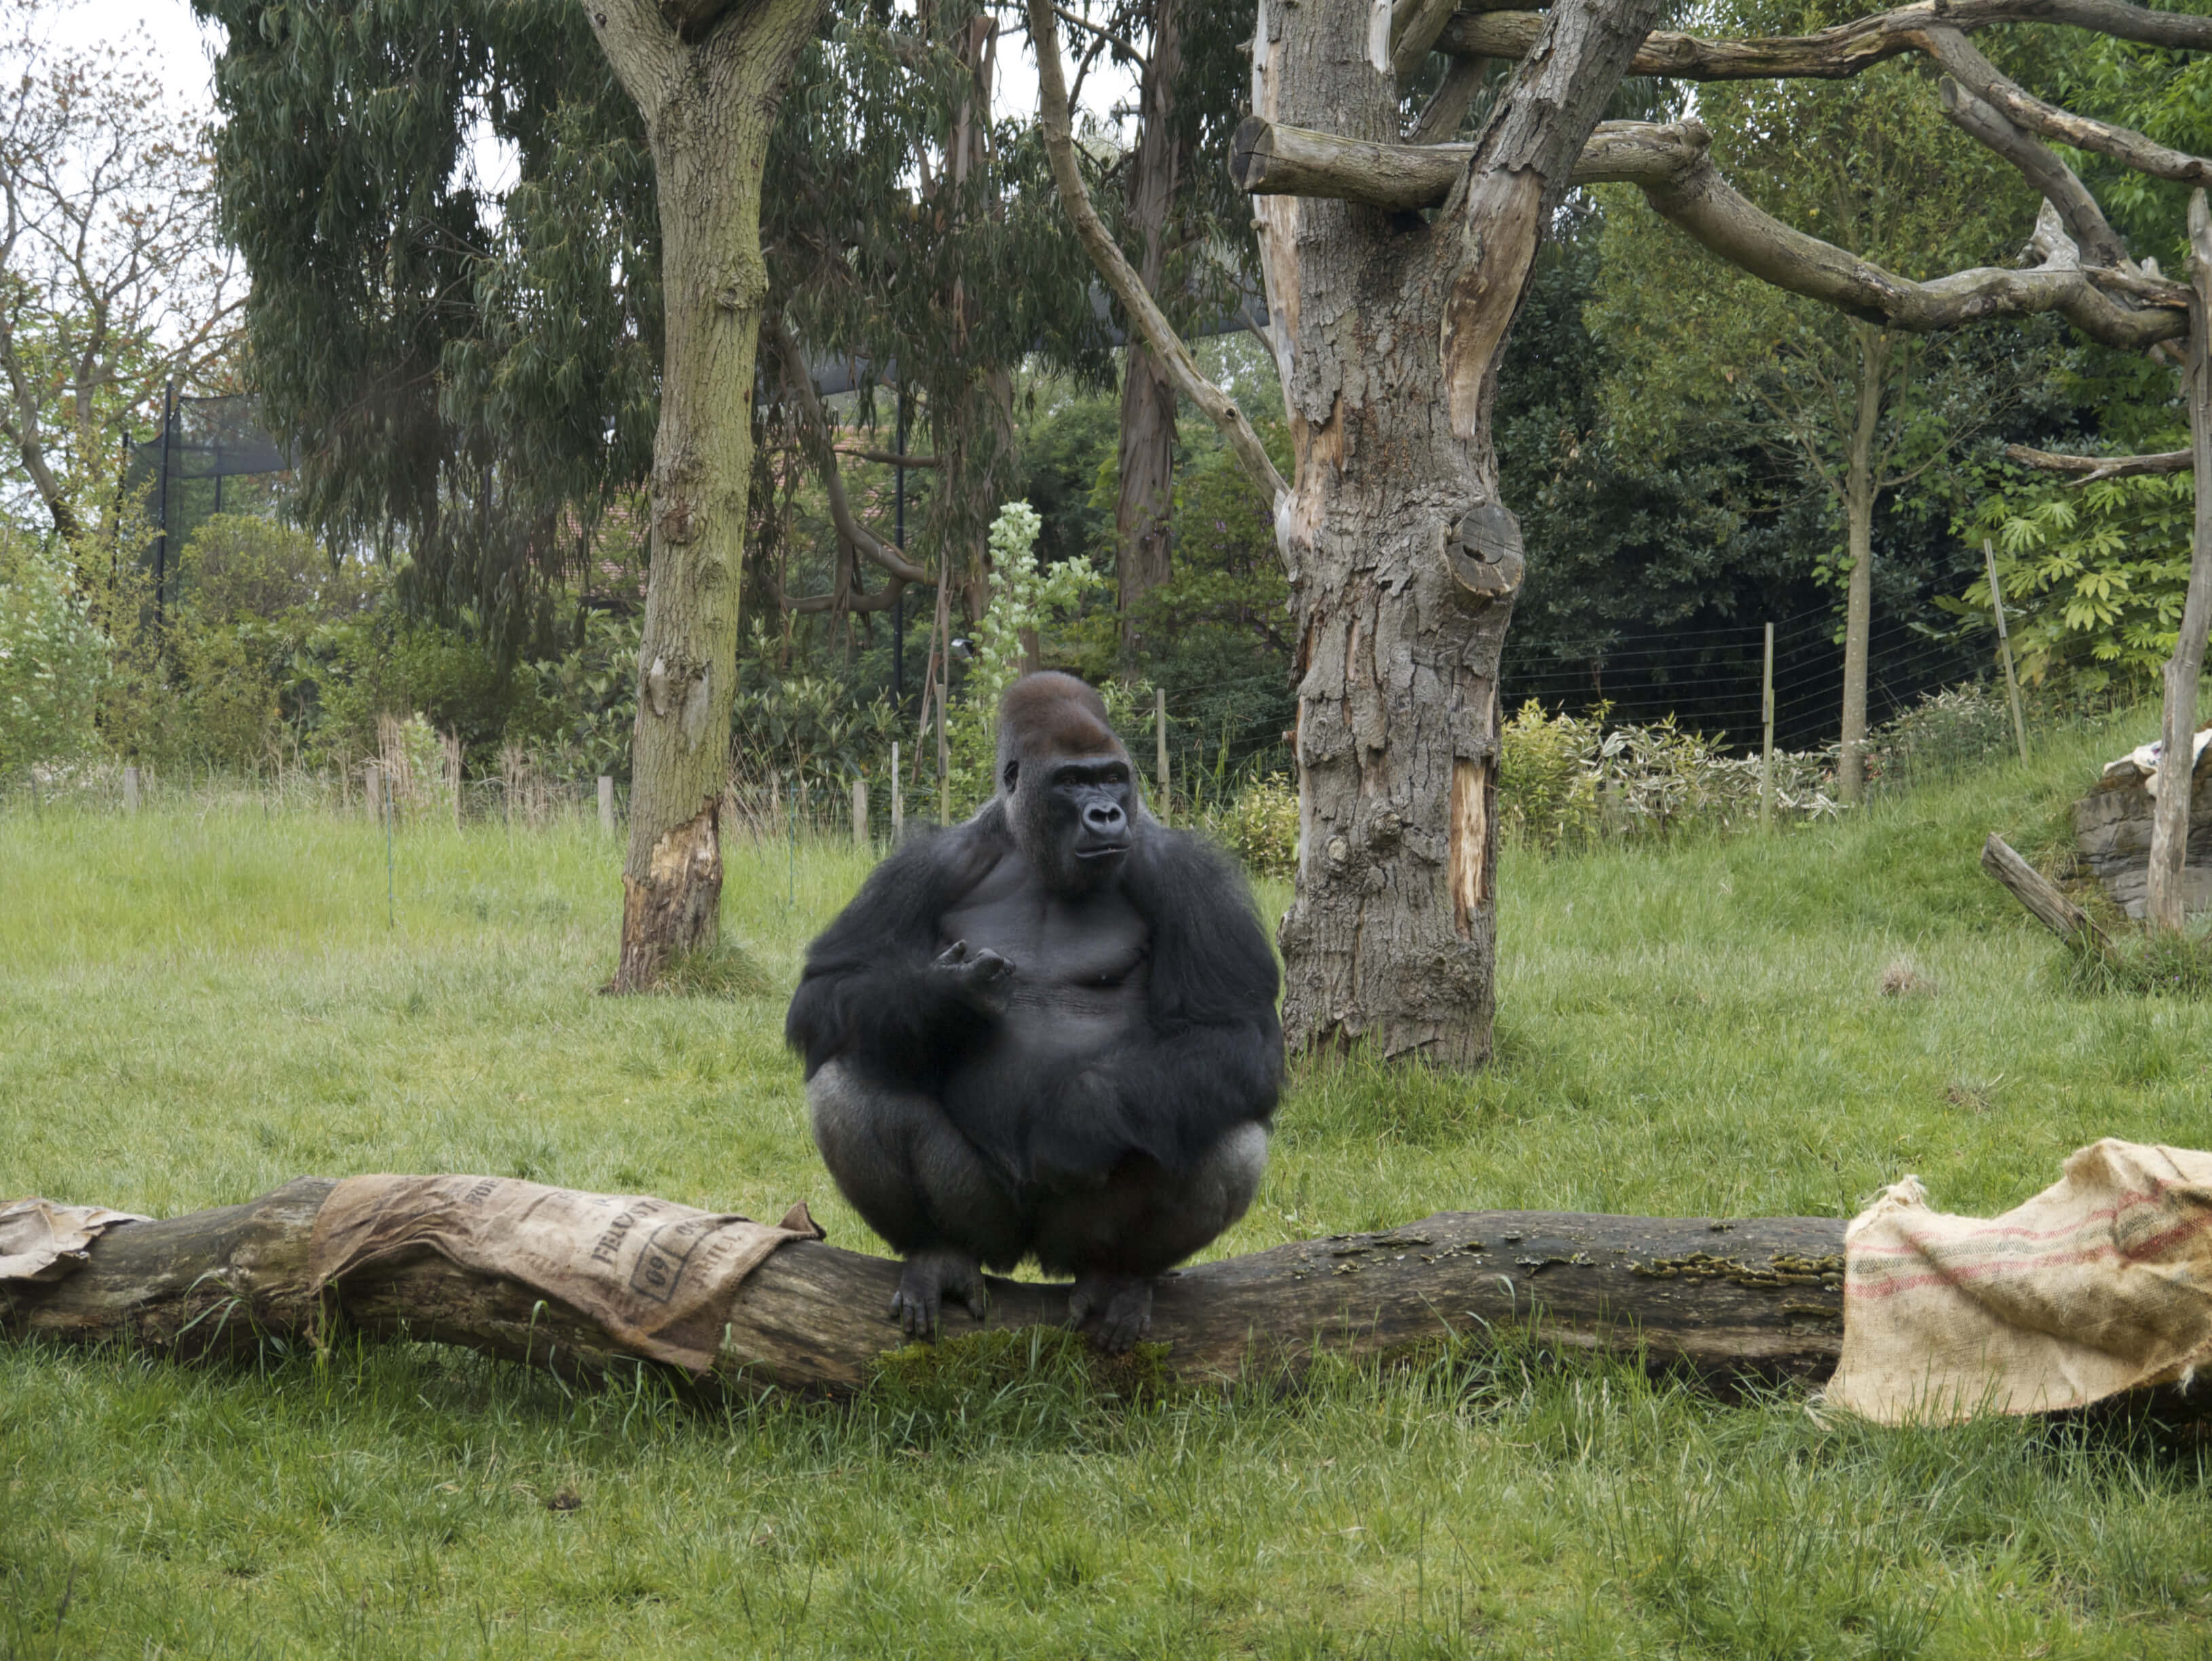
In the first shot we couldn’t get close enough to the window and keep the gorilla in focus, so you can see a reflection. In the second, the iPhone is pressed against the glass
The first rule of shooting through a window is: don’t. If there’s anyway you can possibly put yourself on the other side of the window and still get the shot, do it.
If you have to shoot through the window, for example, if you’re sitting in the passenger seat of a car on the motorway and want to capture the glorious scenery as you pass through the Lake District on the M6, there are a few things you can do to giver yourself the best chance of getting a good shot.
Firstly, make sure the window is clean. It takes a couple of minutes to give it a wipe, but could be the difference between a good shot and a terrible one. Secondly, put the iPhone’s lens as close to the glass as possible. If you can, press it flat against the window. By doing that, you minimise the chance of a reflection from the glass (see the reflection in the gorilla’s fur in the first shot, above?). Finally, keep the iPhone steady when you take the shot. You might need to use the red button on the iPhone’s screen to take the shot, rather than the ‘+’ volume control, depending on how close to the window your iPhone is.
Ideally, assuming you’re not in a moving vehicle, you’d put the iPhone down on a flat surface, pressed against the window and set the timer, so that you get the shot without touching the iPhone as it takes it.
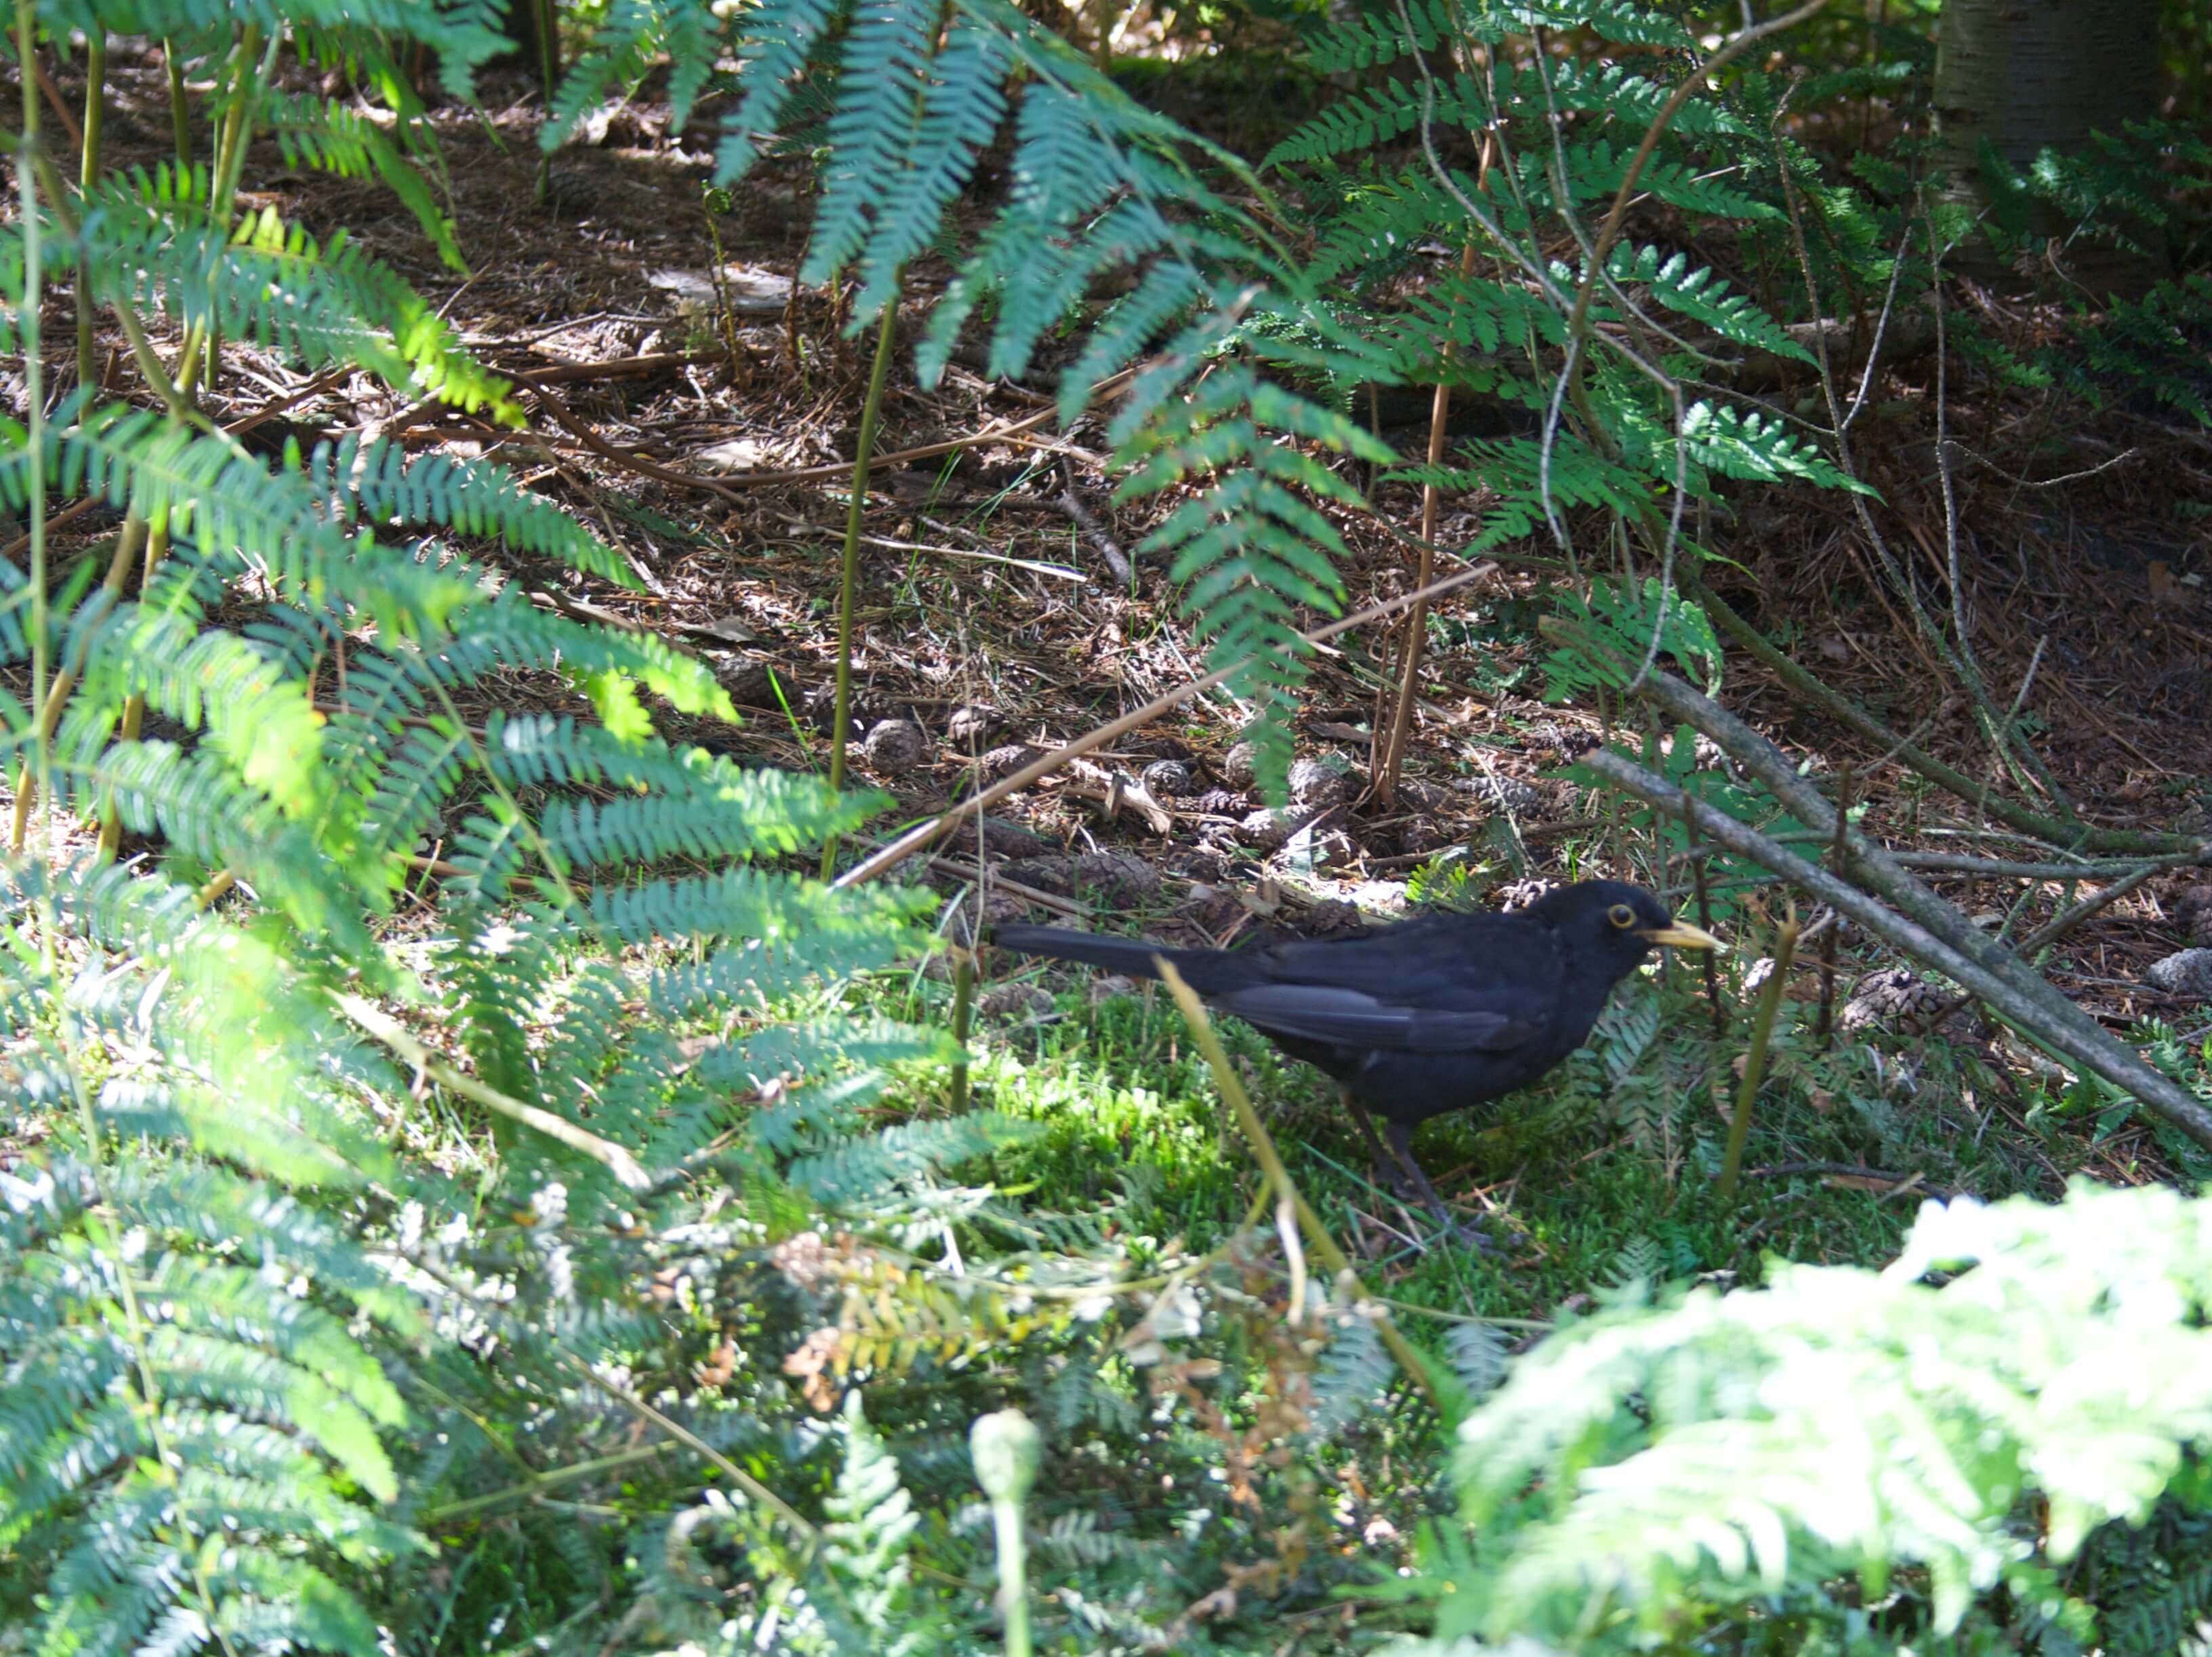
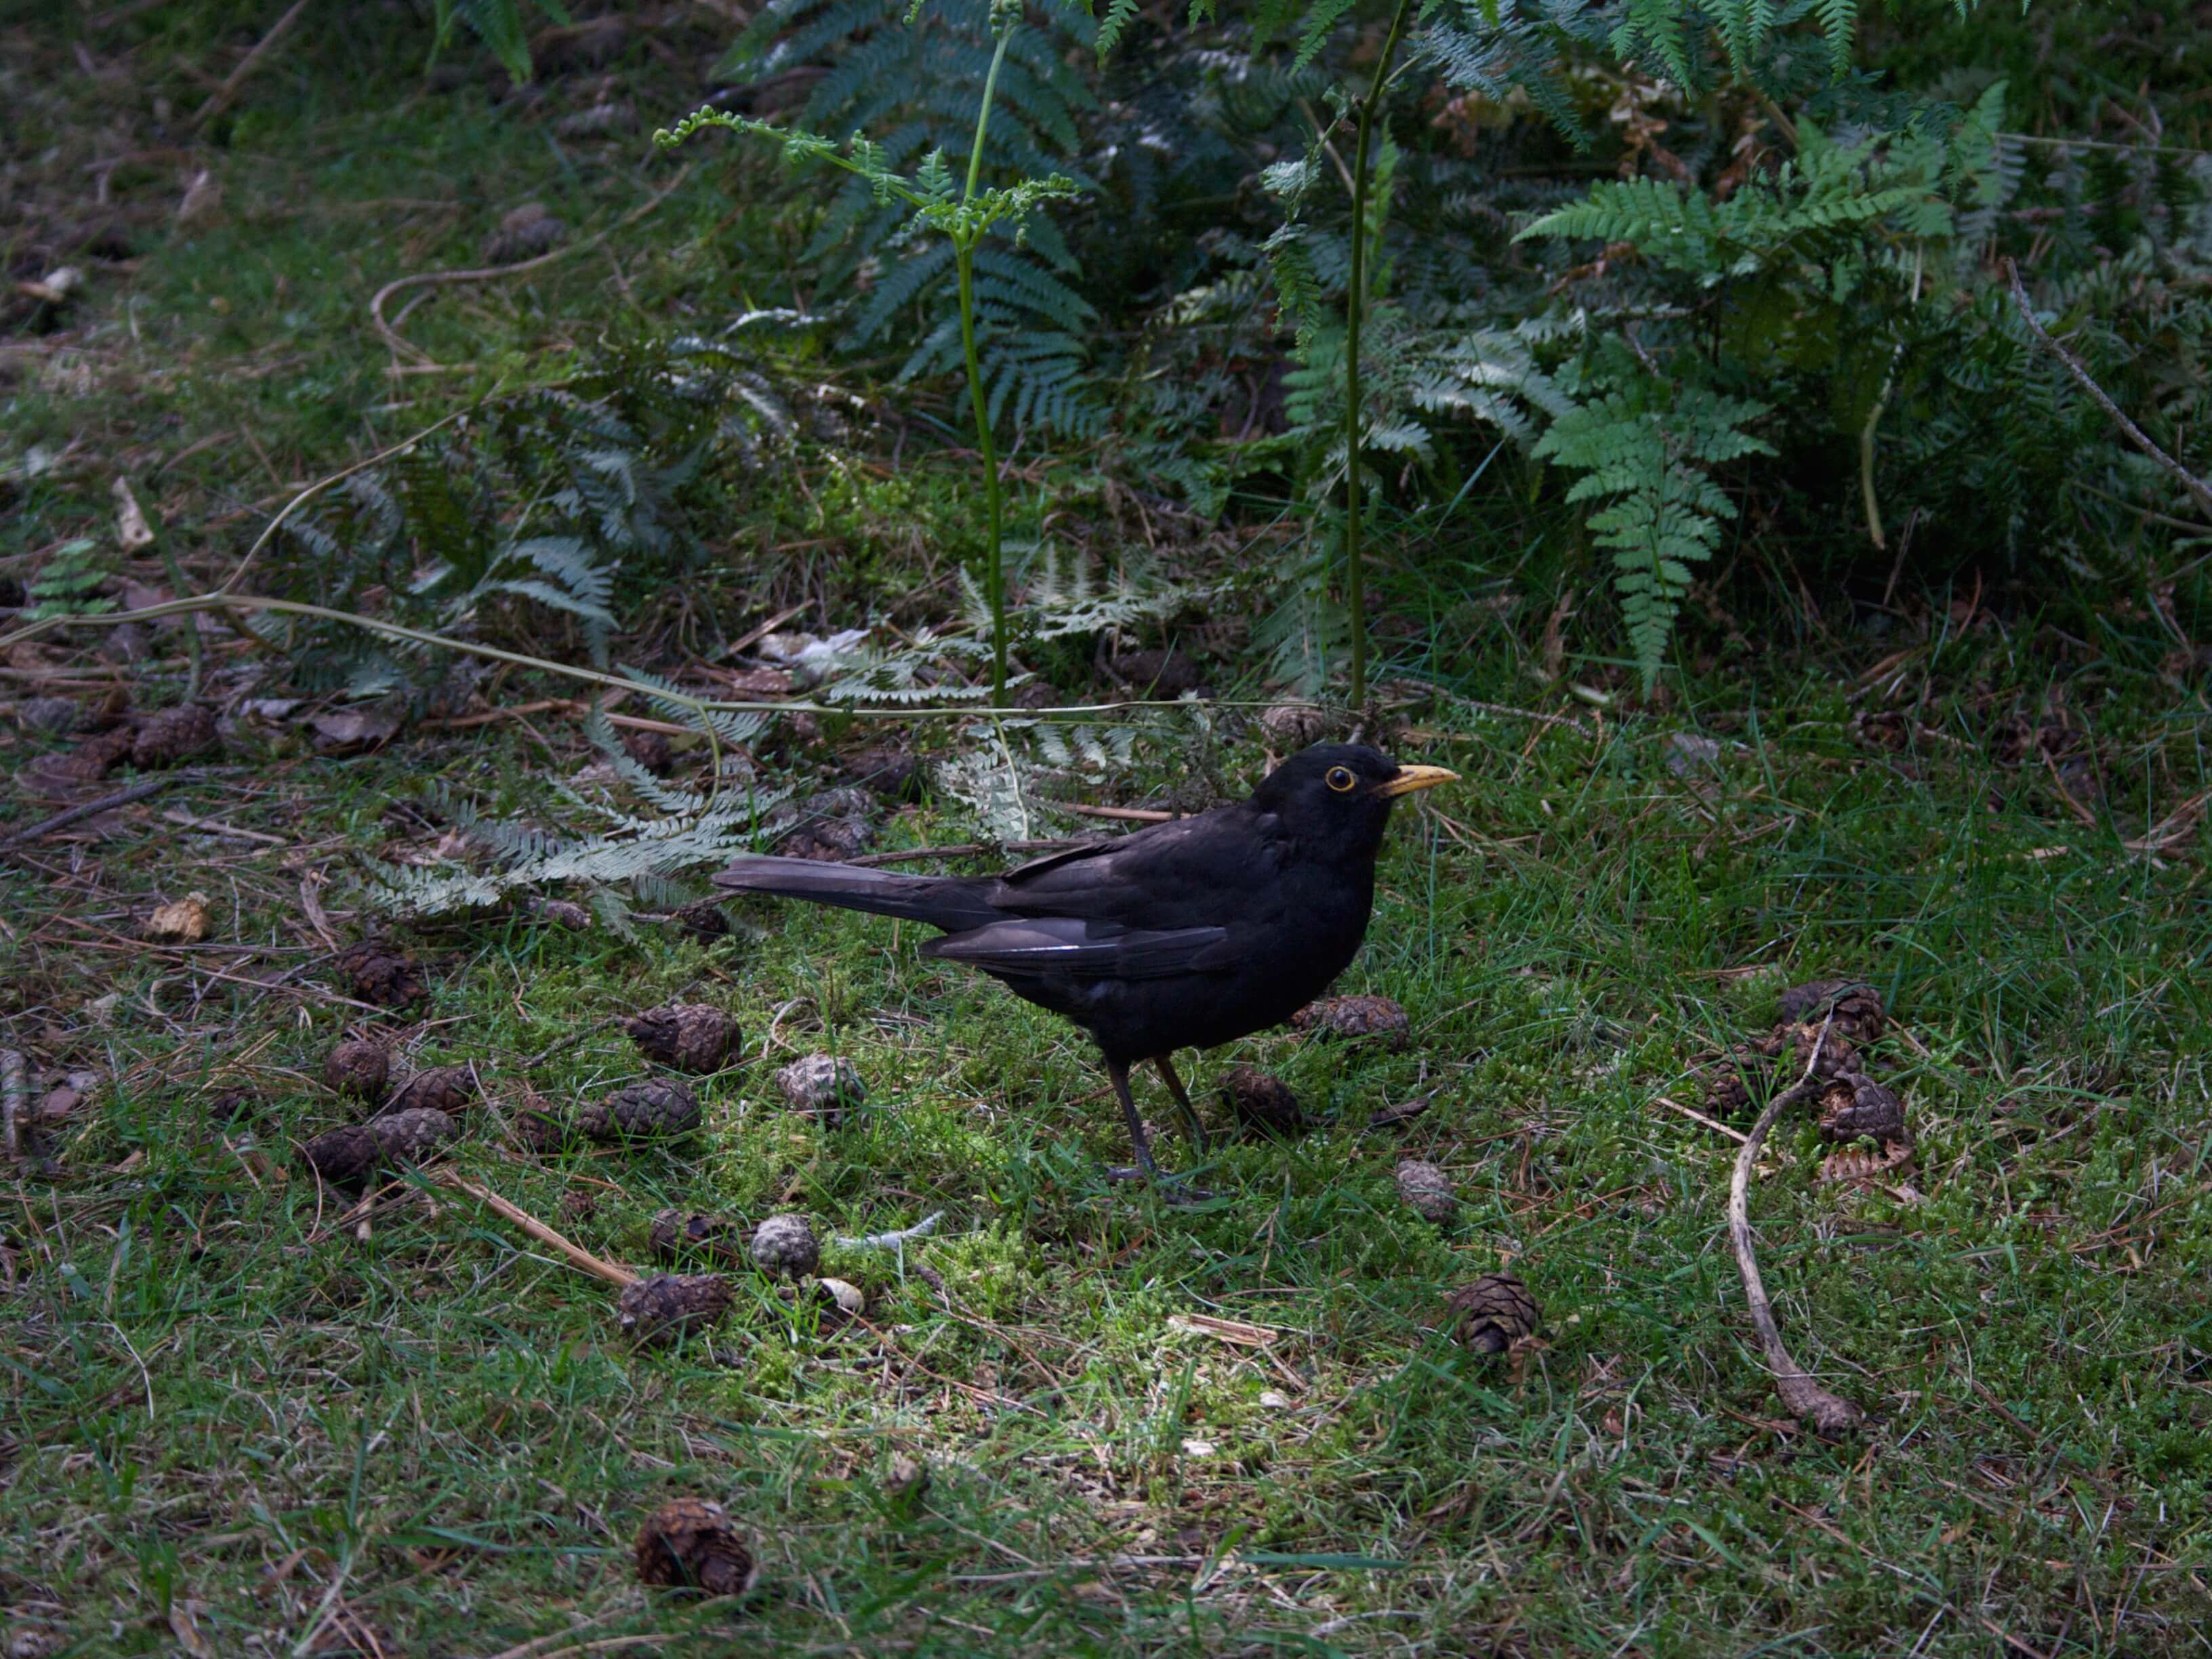
4. Subject is far away (or just small)
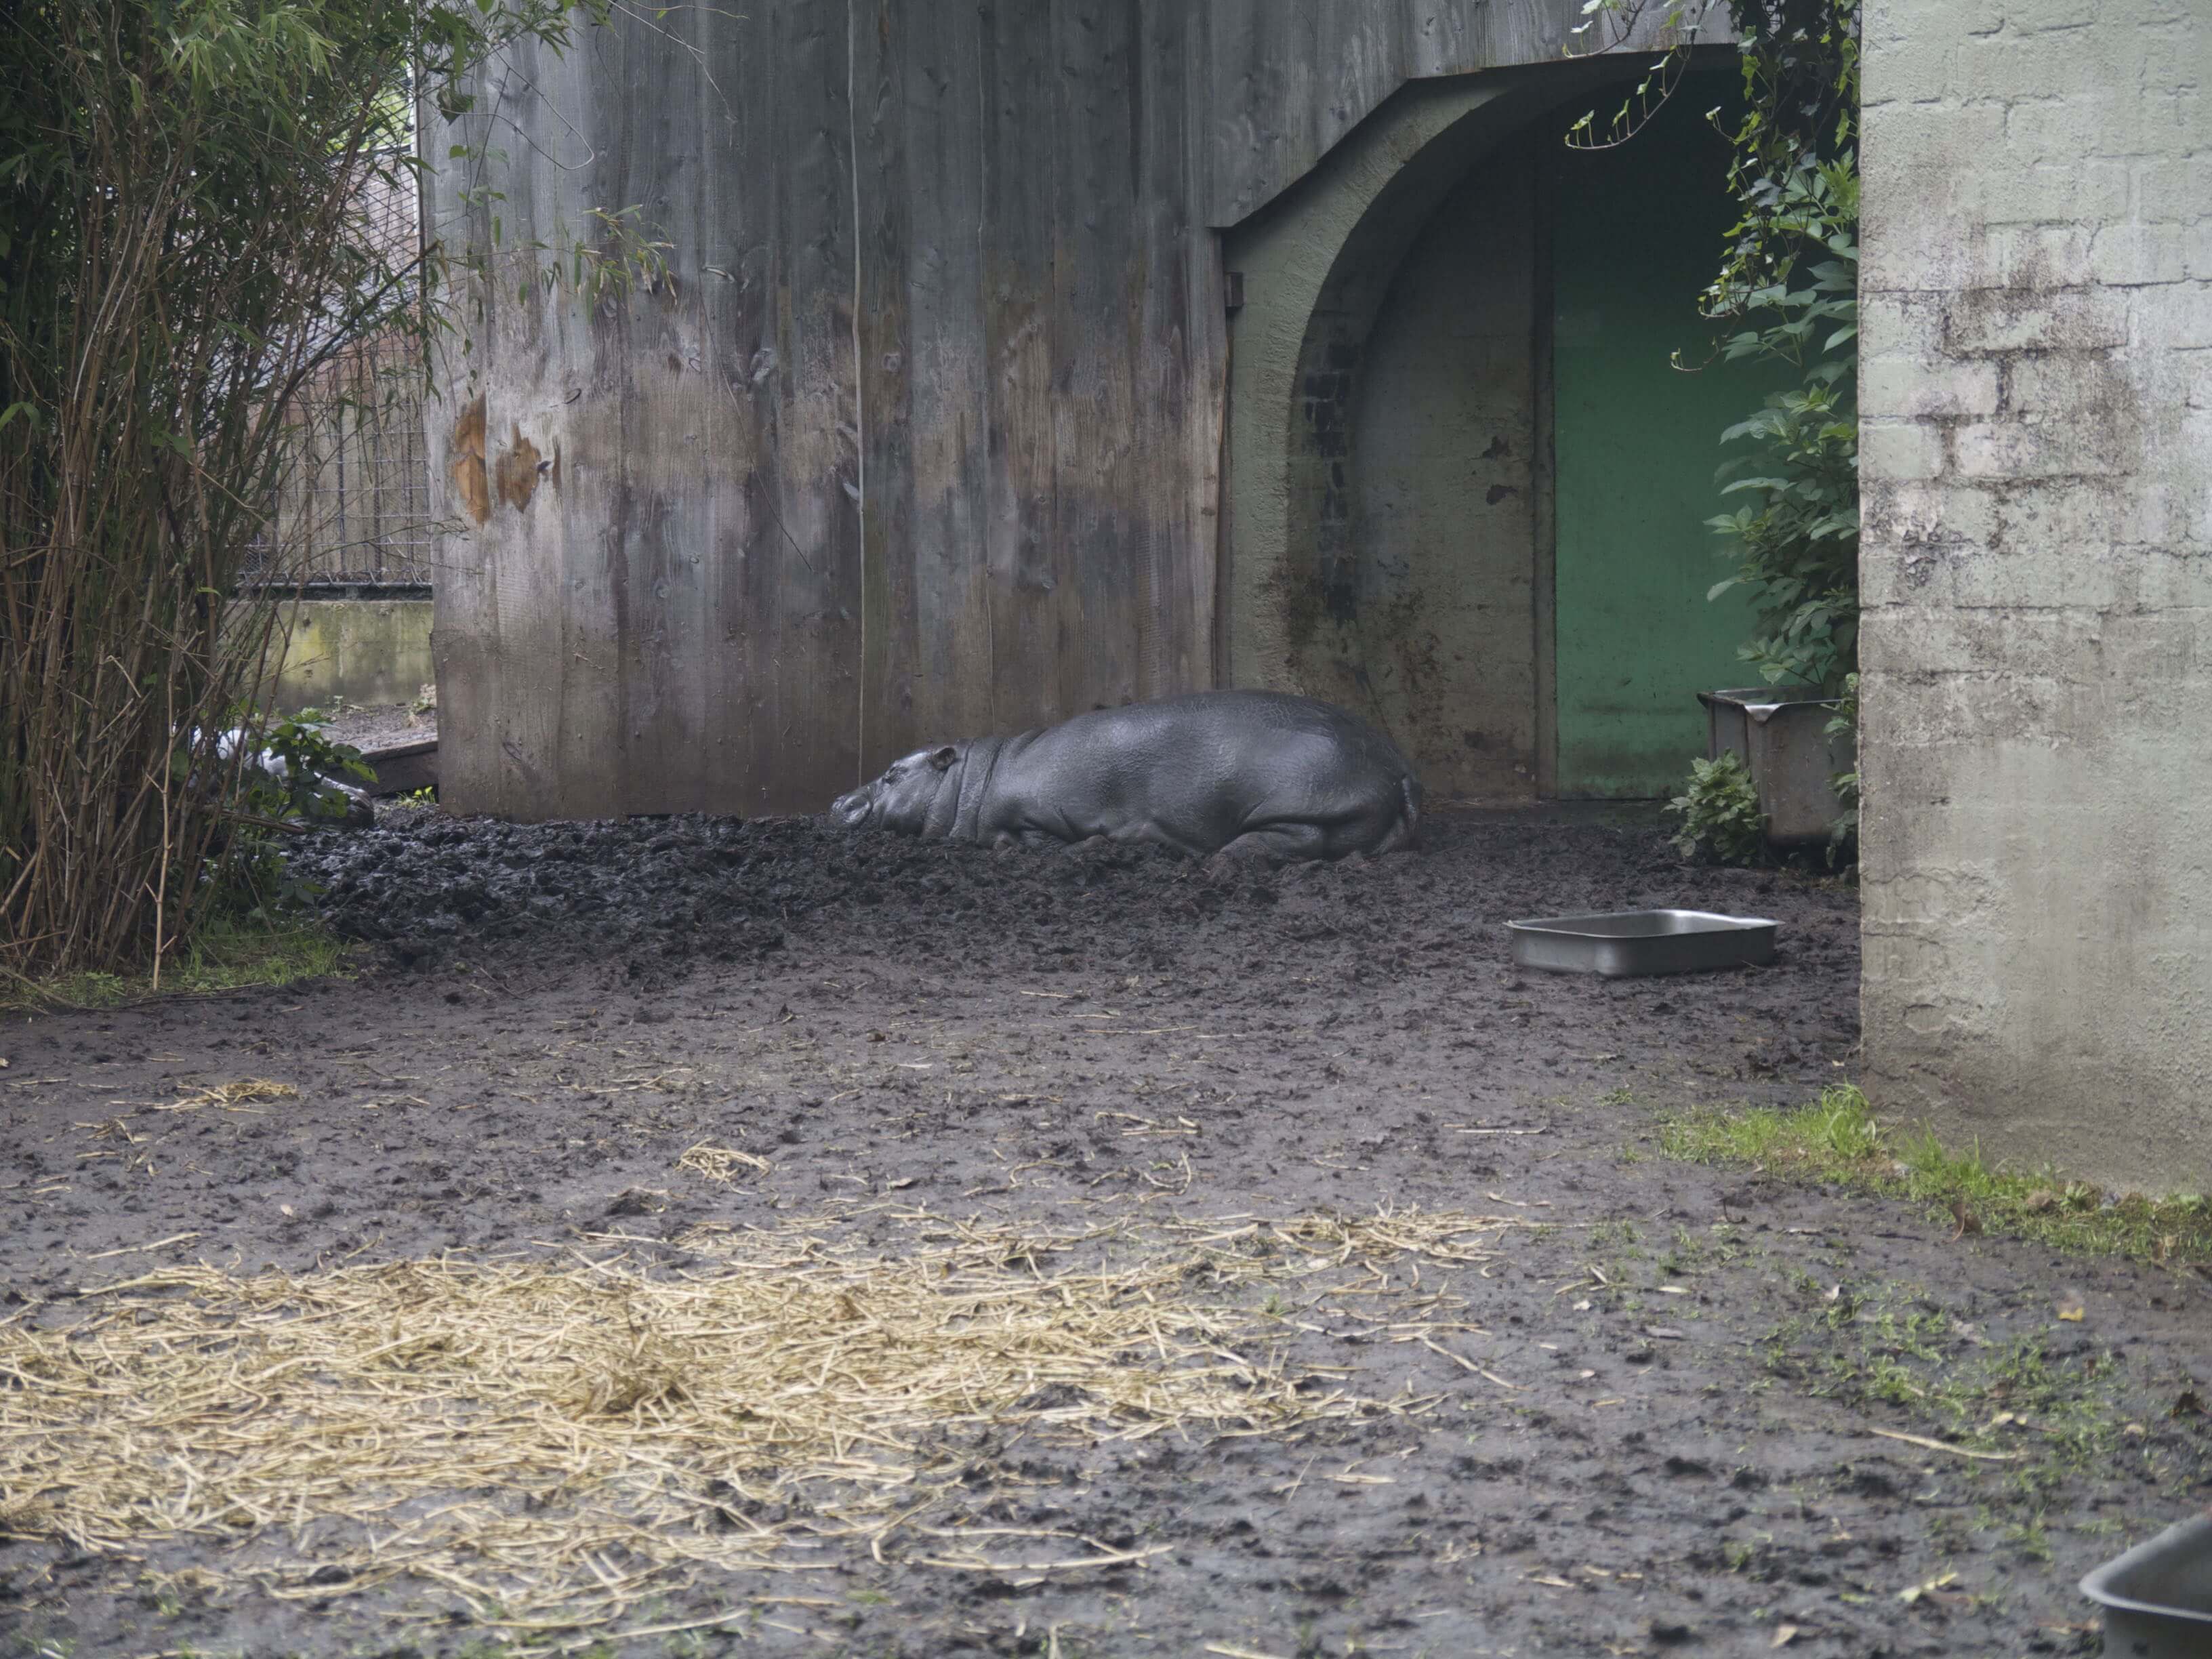
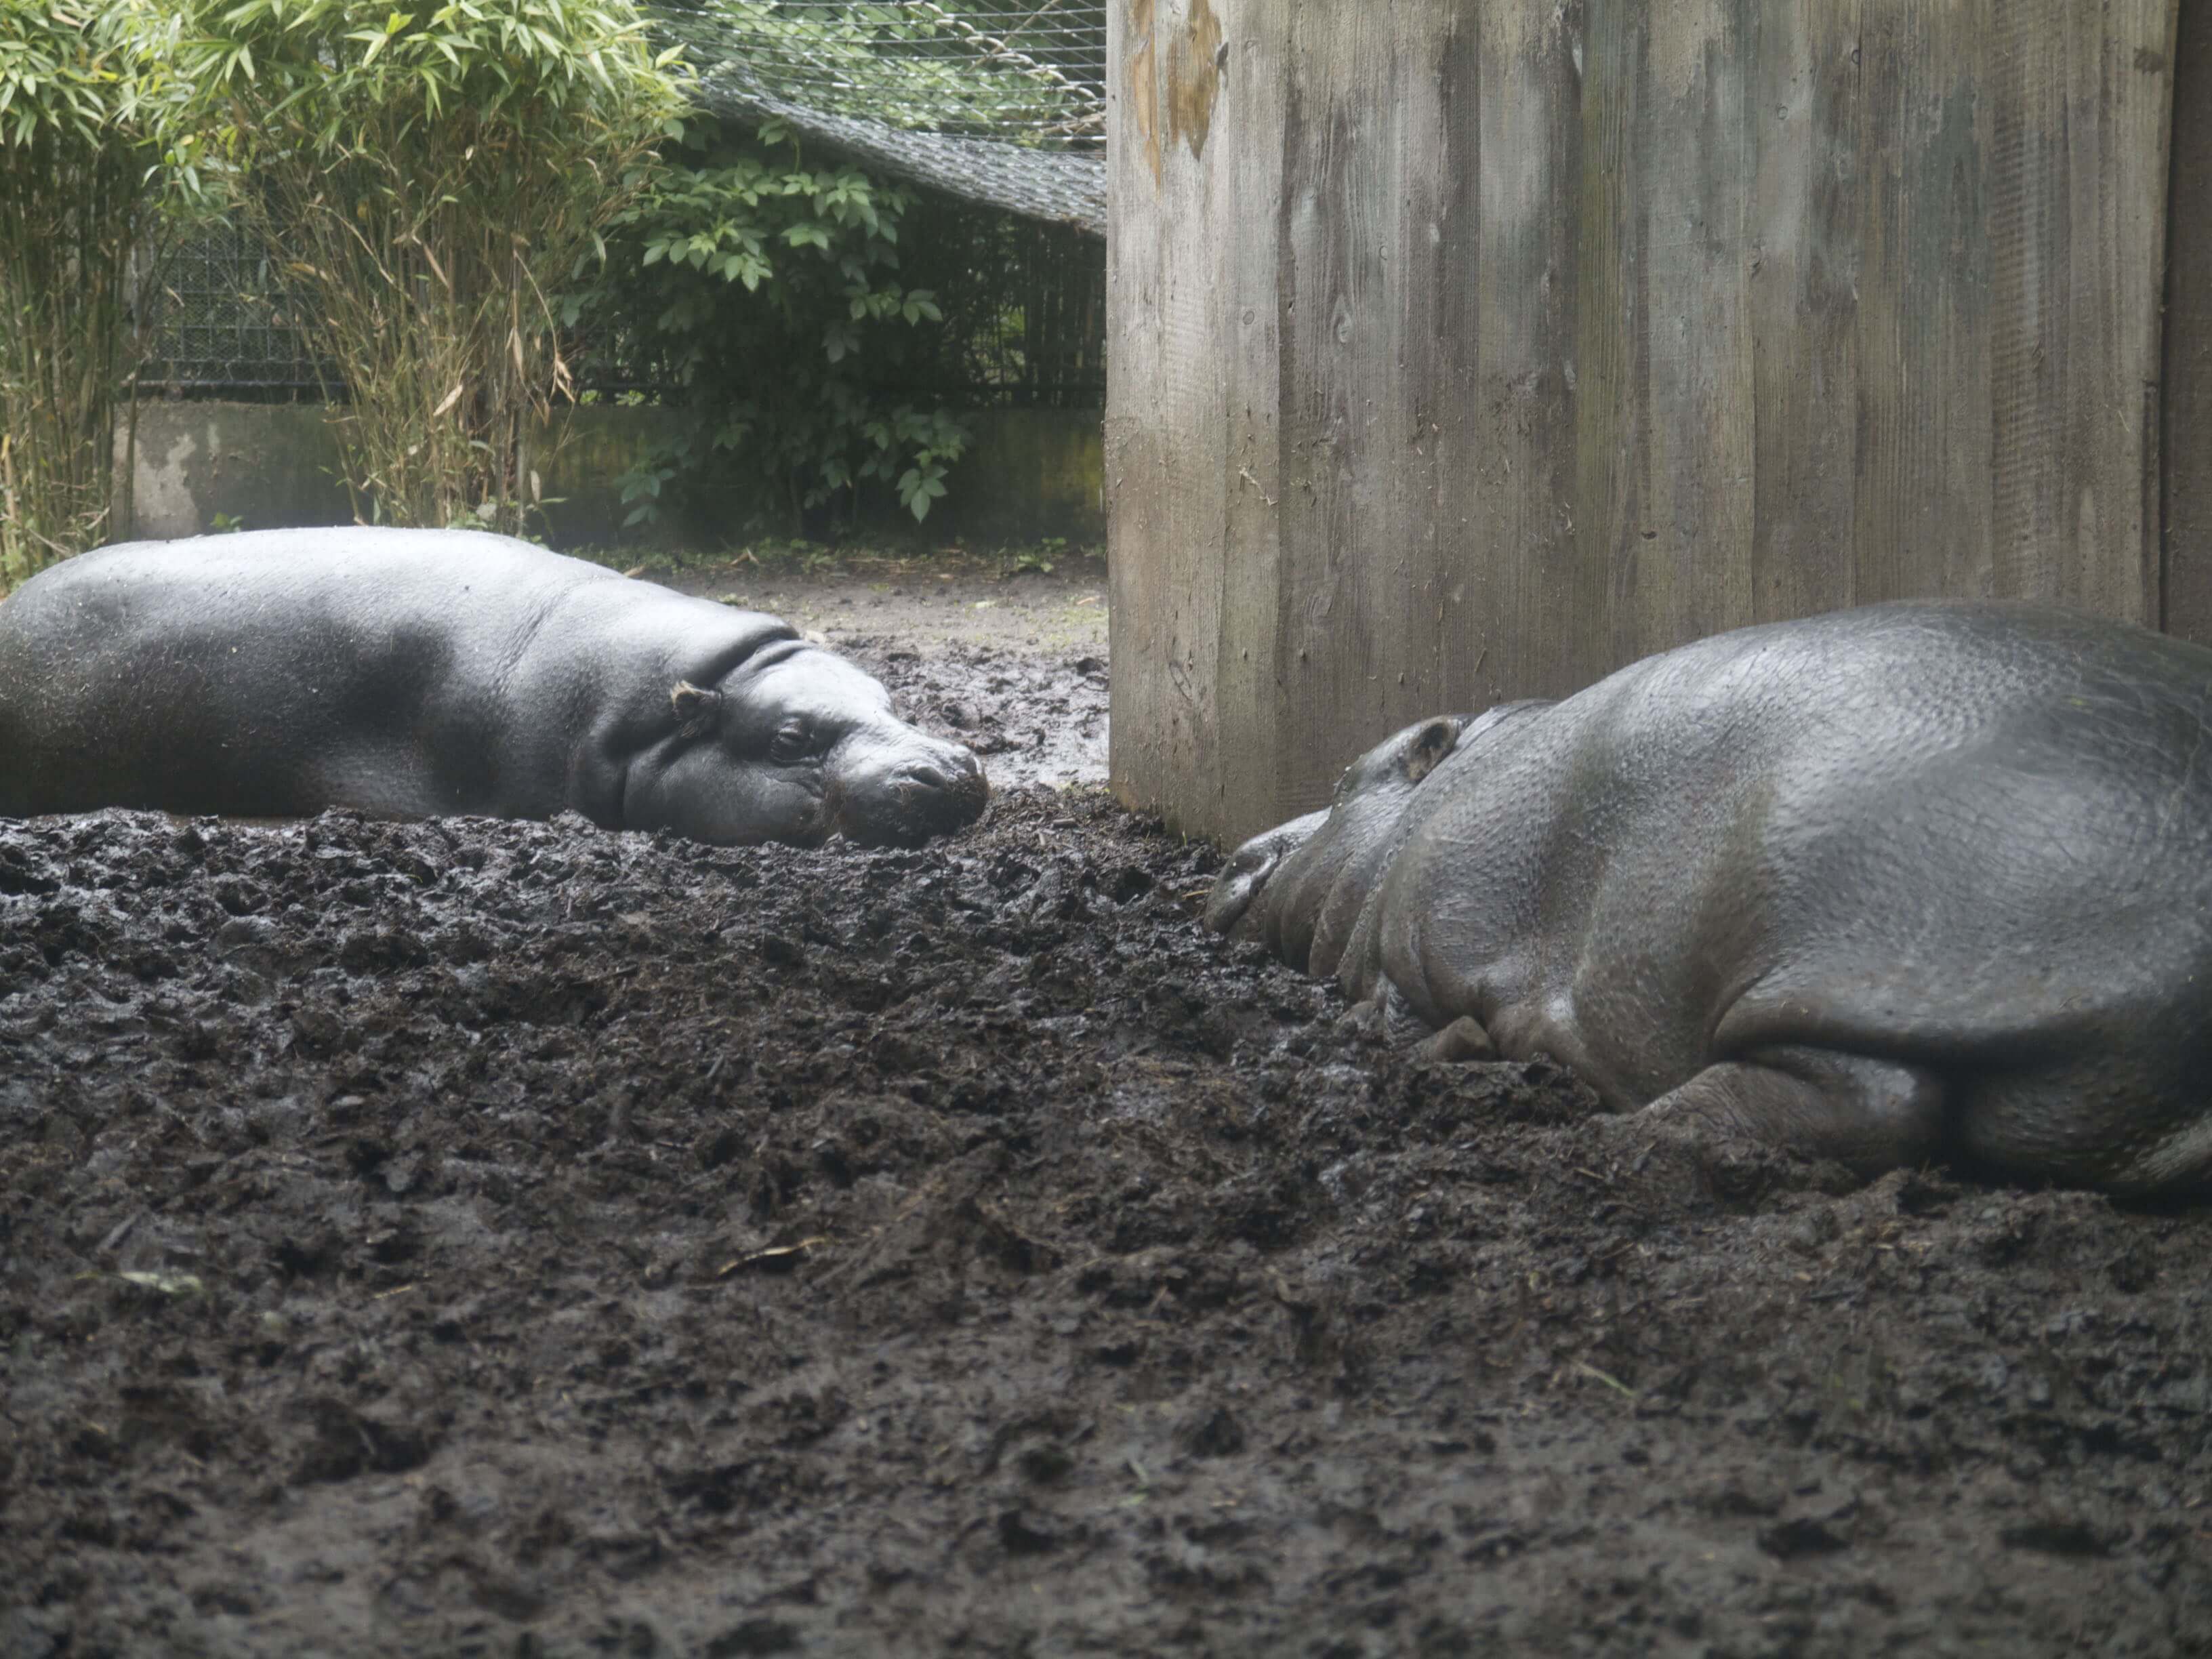
You can barely make out the hippos in the first image. By walking a few yards round their enclosure, however, the result is very different
Whether your subject is small or just far away, the solution is a simple one: move closer to it. Moving your feet is the single best way to improve any photograph. If you’re shooting a landscape or landmark and it looks too small in the frame, walk towards it. And keep walking until you’re close enough to get the shot you want.
If the subject is actually small, you’ll be limited to how close you can get by the iPhone’s minimum focusing distance. That’s about 10cm. Any closer and the iPhone’s autofocus won’t work properly. If you’re around 10cm from the subject and auto-focus still won’t work, try putting something else in the frame, something that reflects light, next to your subject. Focus on that, tap and hold the screen to lock focus, and then remove the object.
You can create a neat shallow depth of field effect when you shoot close to a subject. A shallow depth of field occurs when the distance between objects in the frame which are acceptably sharp is small. The result is that your subject is sharp and the rest of the frame out of focus. It’s an often desirable effect. Depth of field is affected by several factors, including focal length, aperture size and distance between camera and subject. With an iPhone, the only one you can control is the latter, and the closer you get, the shallower the depth of field. Experiment with it.
5. Photo is noisy/ blurry
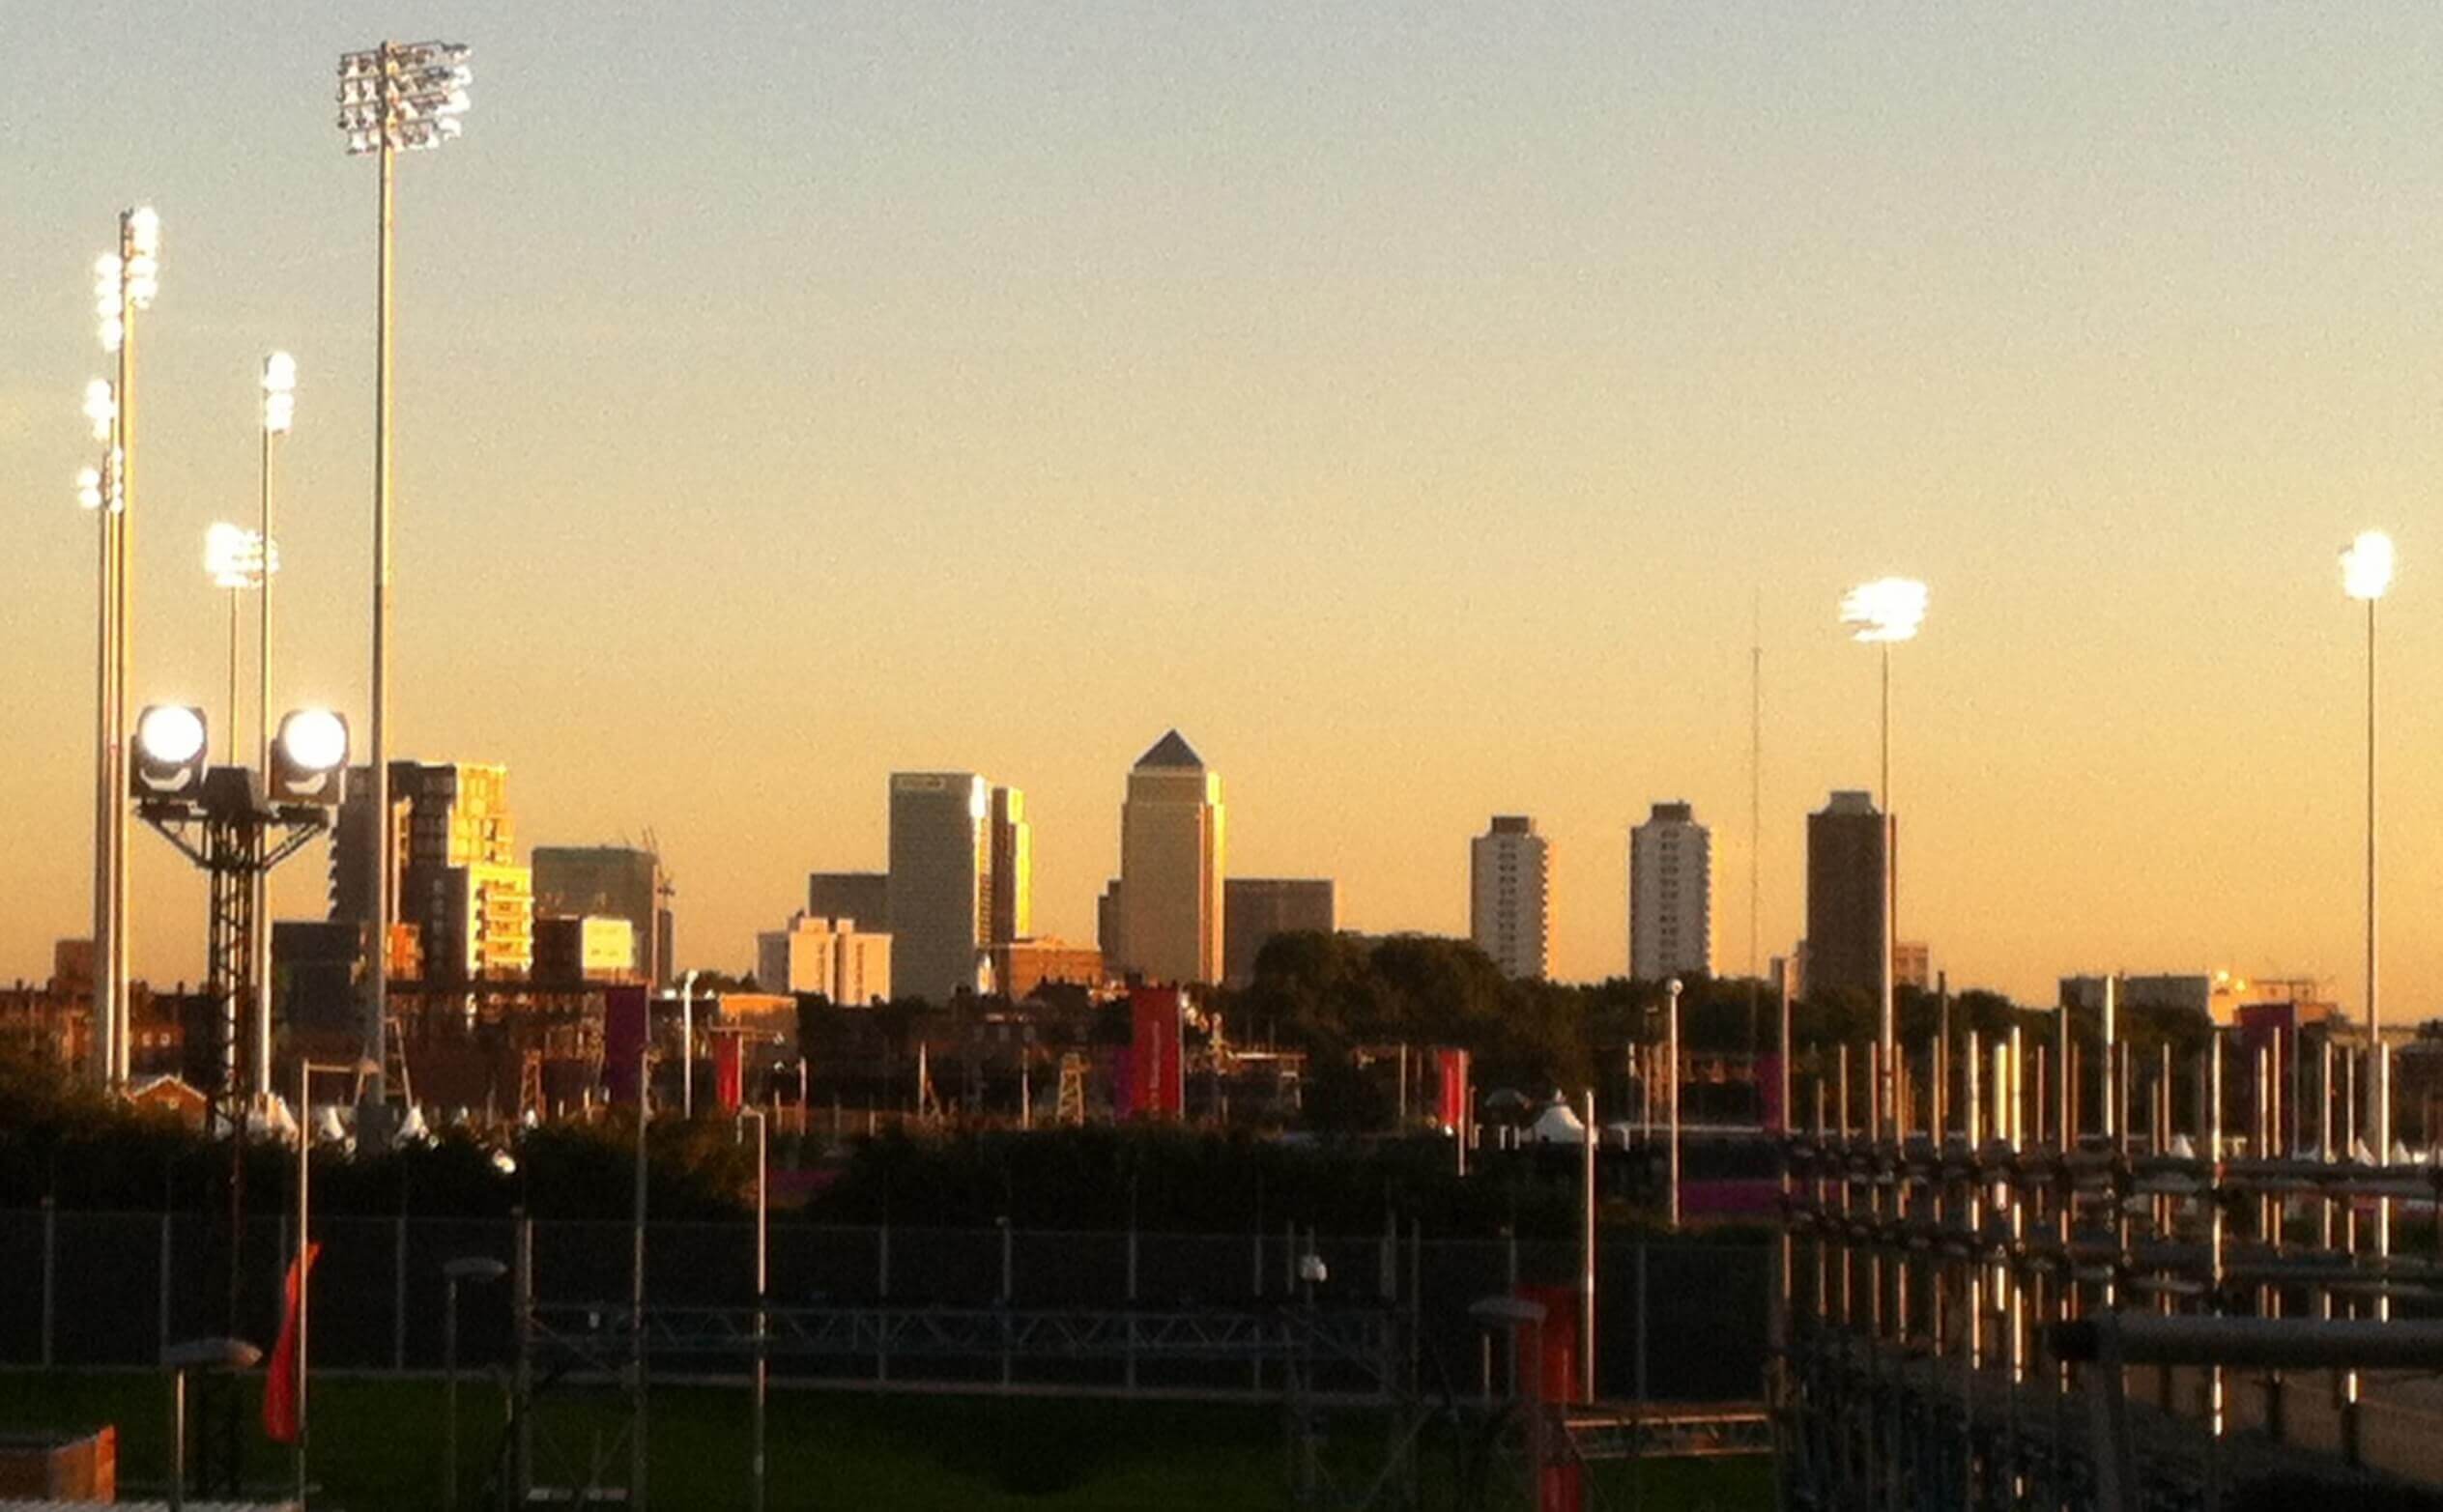

This shot of the Docklands skyline in London is very noisy, due to the low light. So we made a virtue of that by adding film grain and a film strip effect
If you’ve already taken your shot and discovered to your dismay that it’s not what you hoped it would be, you have two choices. You can re-shoot – always the best option if it’s possible, or you can make the best of what you have.
If the problem is that the photo is noisy, perhaps because there wasn’t enough light, you can make that a virtue by applying grunge effects to it so the noise forms part of the effect. The Photos app has some effects, but nothing that really fits the bill. There are, however, several other apps, including Camera+, and the free Instagram app, which can import photos from your Camera Roll and add effects to them.
Choose the right effect, adjust it carefully, and your noisy, blurry photograph can be a work of art.
Conclusion
The iPhone has its limitations as a camera, but that doesn’t mean you can’t take great photos. You just have to be a bit more creative. The trick is to work with the limitations, to use them to force yourself to come up with interesting solutions to the problems they create. Move your feet rather than relying on a zoom lens, for example. Find a way to light your subject evenly, rather than allowing the flash to take charge.
Do that and not only will you take better pictures, you’ll have a lot more fun too.