
Apple launched its music streaming service Apple Music back in June 2015 and since then we’ve been using it pretty relentlessly. As a result, we’ve discovered and built up an enormous range of tips, hidden tricks and hacks and figured now was a good time to share them.
Not only have we discovered some amazing hidden aspects of Apple Music, but Apple’s also introduced new features in just the last few months. So, if you’re a regular Apple Music user then make sure you make yourself familiar with these top tips:
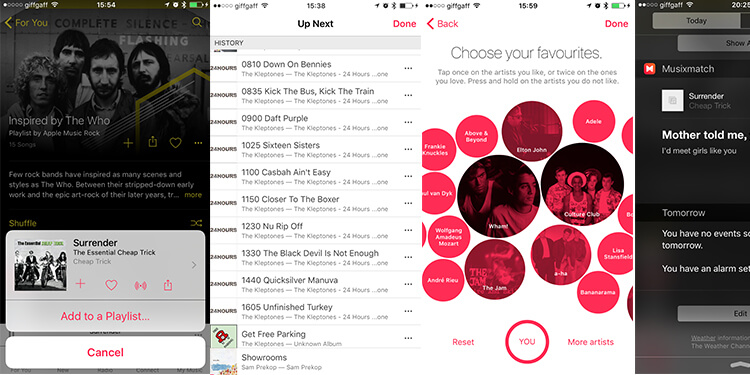
1. Up Next and track History
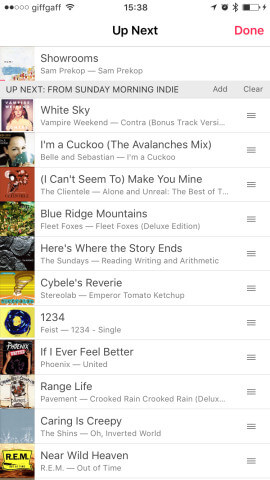
The Up Next window in Apple Music is used to rearrange track listings and to view track history
You know about Playlists and album track lists, but what you might not have spotted is Up Next. This is a track listing that sits behind every track you play, and lines up the tracks that follow. Normally you don’t notice the Up Next list, because it lines up with your current Playlist or album listing, but Apple Music becomes much more versatile when you learn how Up Next works.
Start playing a track and tap the Mini Player (the gray bar at the bottom displaying the track name) and the full player window will display, complete with song artwork and shuffle controls. More importantly, to the right is the Up Next icon (three horizontal lines) – tap it to see the Up Next list.
At the top is the track currently playing, and down below are upcoming tracks. Next to each track is the same three-line icon; tap and drag to rearrange the song order (the playlists and album lists do not change, just the order that they’ll come next). Two buttons: Add and Clear allow you to manually manage the Up Next playlist.
Slide your finger down and Up Next backs up to reveal the History list. These are all the tracks you’ve played in Apple Music. Tap a track to start playing it (you’ll then move back to whatever was in your Up Next list).
2. View the Album (or more by that Artist)
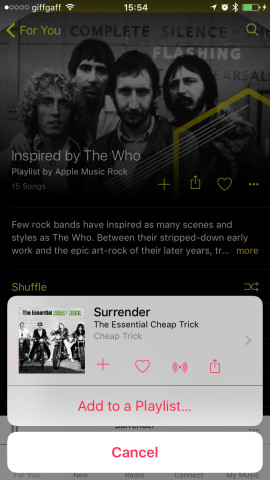
Tap the album artwork on a track to go to its album and view more tracks by that artist
When listening to a track you often want to hear more by that artist, or see the album that the track came from. The trick is to tap the small icon with three dots (…) in the Mini Player. Now tap the song artwork; this takes you to the album listing. Here you can view other songs from the same album, and if you scroll down you’ll see More By the artist and You May Also Like options allowing you to find similar tracks.
3. Get better recommendations in Apple Music
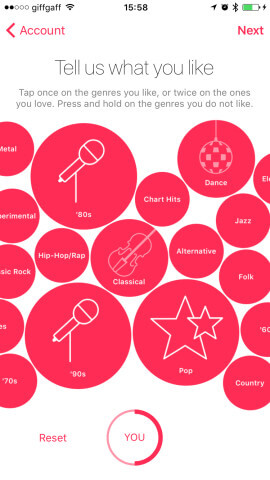
If you’re getting bored with Apple Music’s recommendations, try using the Tell Us What You Like option
When you first start up Apple Music, you get to choose artists and music genres that you like. This personalization is great, but as time goes on you will find the recommendations don’t match up as well as you’d like.
So it’s time to go over your choices again. Tap Account in the top-left of the main screen to view your account details. Tap Choose Artists For You to bring up the Tell Us What You Like window (this is just the same as when you first started using Apple Music.)
Tap the red circles to shrink or grow the genres of music you enjoy, or tap Reset to bring everything back to normal. Tap Next to view your favorite artists and Done to go back to your music. You’ll find the For You recommendations now reflect your new choices.
Don’t forget to tap the Heart icon next to tracks, playlists, albums and artists you like (or remove Hearts from items you’ve accidentally liked as a group, but now want to hear less of).
4. Manage Apple Music Connect
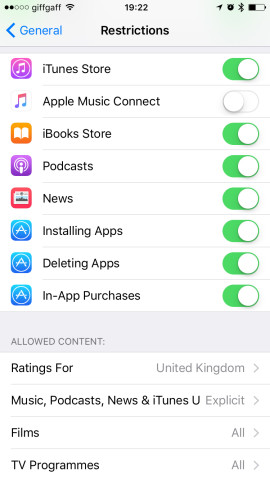
Use Restrictions to turn off Apple Music Connect
Connect is one of the Apple Music features we don’t use as much as we’d like. Even if you don’t use Apple Music’s social media service, Apple connects you with artists whenever you tap the Heart icon. So over time, you will find Connect fills up with artists you’re not interested in. Tap Account and choose Following. Now tap Unfollow next to any artists you don’t like, and set Automatically Follow Artists to Off to stop connecting with artists every time you like something.
While you’re in your Account, you can change your Name and Nickname. This info is displayed when you make comments in Connect or create Playlists. Tap the Edit button to make changes, and tap Edit underneath the circle to add a photo to your account.
If you hate Connect, then it is possible to hide it entirely using Restrictions. You’ll need to enable restrictions. Tap Settings > General > Restrictions and Enable Restrictions. Enter a four digit restrictions passcode (this is separate from your iPhone unlock passcode, but it’s wise to pick something you’re not likely to forget). Scroll down and set Apple Music Connect to Off. Now when you go to Music, you will see For You, New, Radio, Playlists and My Music but not Connect.
5. Catch up with Beats 1 shows
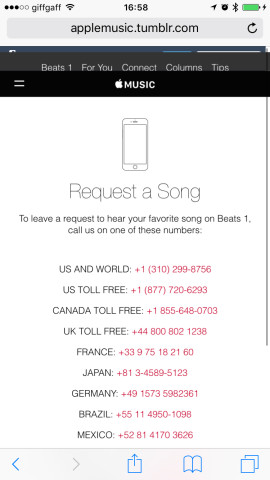
You can call up Beats1 and request a track
Beats 1 is Apple’s radio station and we think it’s great. Beats 1 has fantastic radio shows from big name artists like Elton John, Dr Dre and Mary J. Bilge – to listen to it you simply need to tap Radio then Listen Now.
Like all stations, Beats 1 plays live 24 hours a day, but you can also catch-up with radio shows. Scroll down to discover recent show. Tap Playlists and you’ll see the tracks played on each show (although these don’t feature the show host).
You can also call Beats1 and get a song played on the radio station by calling up Apple’s Request A Song hotline. Apple keeps the numbers on its Apple Music Tumblr website. These phone numbers are toll-free in the US, UK and Canada. We know you can hear any song you want; but having it played on the radio is still special.
6. Sleep and wake up to Apple Music
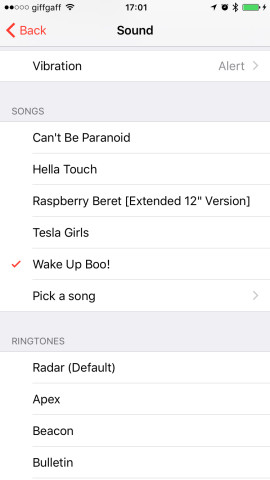
Apple Music tracks that you’ve added to your library can be used as an alarm
Did you know you can wake up to Apple Music tracks by setting them as alarms in the Clock app? First you have to download the track though. Find the track you want to wake up to in Apple Music and tap the three dots icon (…) next to it. Tap Add (+) to download the track into your music library. When it’s downloaded you can use it as an alarm.
Open the Clock app, tap Alarm and add a new alarm. Set the time you want to wake up and tap Sound and Pick a Song. You can choose from Artists, Albums, Songs and Playlists or use the Search Music box to find any track you want.
Another neat trick is handy for late night listening, or if you’re on public transport and don’t want to bug people with headphone noise. Open Settings > Music and tap EQ. Scroll down to find the Late Night settings. This tones down the loud bass sound, and turns up the quiet parts to level out the music. Other people on the plane or train will thank you.
7. Get track lyrics in Apple Music

Using MusixMatch to get lyrics in Apple Music
It’s possible to get lyrics along with Apple Music by installing a free app called MusixMatch and using its Notifications widget. Install MusixMatch from the App store and open Notification Centre, scroll down and tap Edit, and tap the green icon next to MusixMatch.
Now play a track in Apple Music, and swipe down to reveal Notification Centre. The MusixMatch app will identify the song and start displaying lyrics as the song plays. You can also open the MusixMatch app and identify songs from inside it.
Enjoy getting more out of Apple Music!