
Apple’s Portrait Mode has proven to be a true breakout iOS feature. The ability to add a pronounced bokeh effect to your close-up photos (provided you have a dual-camera iPhone) really serves to make your subjects pop.
What Apple hasn’t done is enable you to manually adjust the strength of that Portrait mode effect after the image has been taken. The data necessary to do this is all in there, however, and with iOS 11 Apple made its depth mapping data available to developers.
Slør is one of the best apps we’ve seen at utilizing this data. While it’s relatively intuitive to use, however, Slør provides precious little in the way of instruction. Here, then, are some tips on how to edit your Portrait mode shots with Slør.
Get Slør
Before you do anything, you’ll need to download Slør. It costs $4/£4, and if you’re not sure whether its worth it check out our full review before purchasing.
Pick your photo
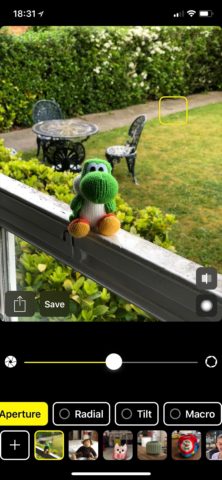
There’s no messing with Slør. Boot it up and you’ll be presented with you most recent Portrait mode shot. If you want to edit a different one, scroll right through the sequentially arranged thumbnails below.
Choose your focal point
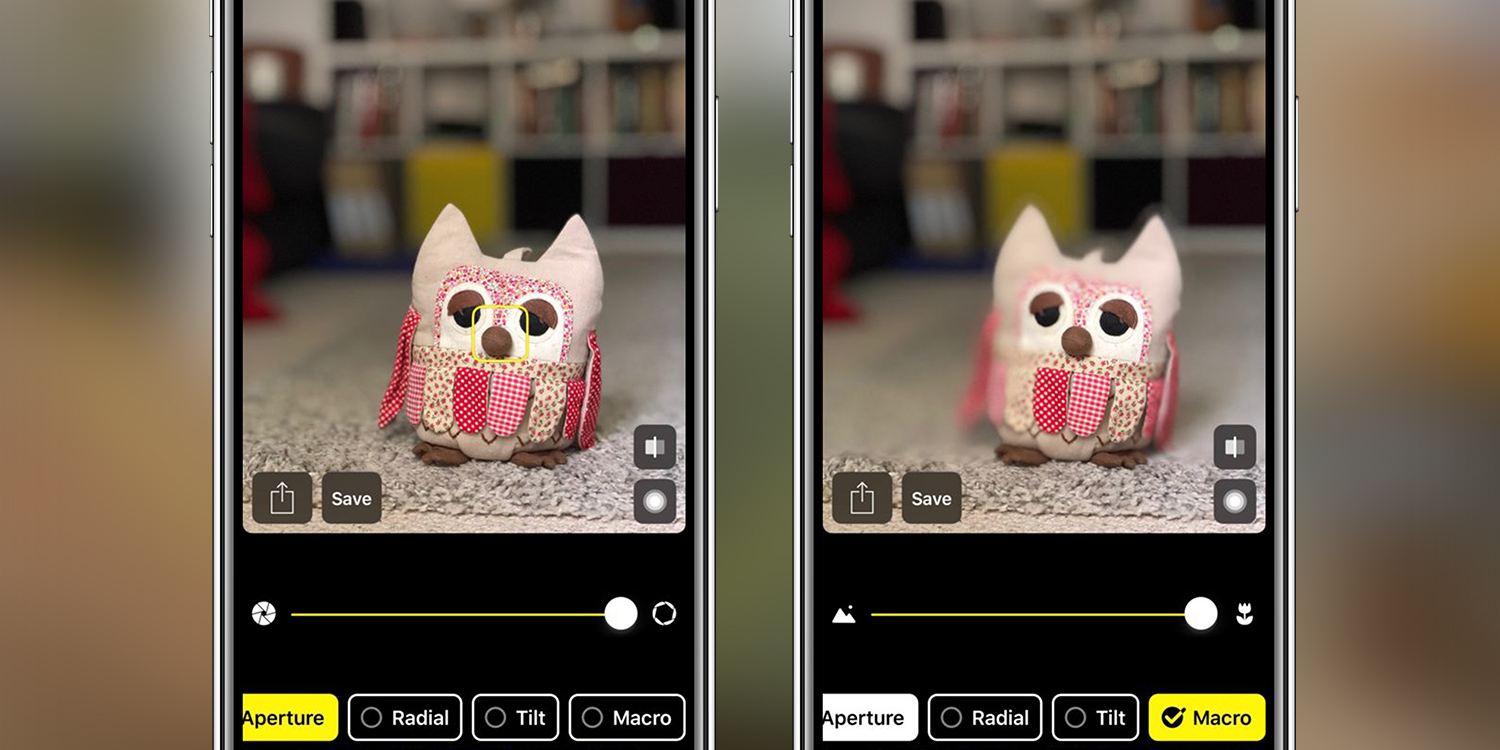
You’ll notice that the image before you isn’t displaying the Portrait mode effect, and that there’s a yellow box hovering somewhere over the background. Touch and drag that box over the area of the picture you wish to focus on to get a live preview of the effect.
This will probably be the foreground subject, but you might want to pull a little more detail out of an object or person in the middle of the scene.
Anything behind that focal point will blur out to some degree. You can increase or decrease this ‘bokeh’ effect by adjusting the Aperture slider.
Check out the depth information
Perhaps you’re wondering why some of your images provide more scope for adjusting details in the middle of the scene than others. This is simply down to the depth data that your iPhone’s camera captured in the first instance.
Apple’s dual-camera iPhone system captures up to nine distinct layers of image depth. You can get a clear idea as to which of these have been applied to your image by pressing firmly on the picture (or pressing the circular button to the bottom right of the image), which will provide a heat map delineating the various layers of depth information.
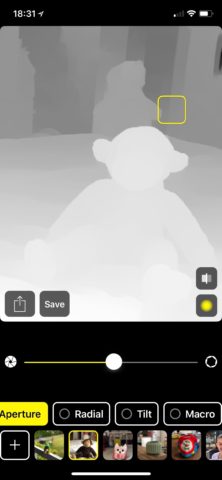
This should serve you inform you which images will be most open to manual adjustment, and which specific areas of those images to concentrate your attention on.
As well as the main Aperture setting, there are three additional depth effects you can apply in Slør:
Radial effect
Tapping on the Radial option will let you sharpen everything (as much as possible given the original depth data) within an adjustable and movable circle and blur everything outside of that – even including the foreground.
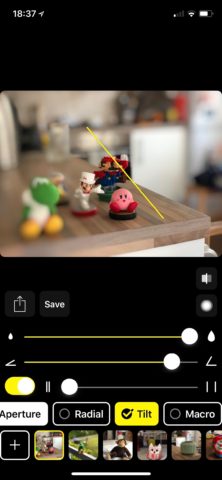
Tilt effect
Tilt adjusts the focal plane, or the angle of the area of focus. Frame your shot correctly, and you can use this ’tilt-shift’ effect to create the appearance of miniaturization. The toggle here lets you increase the size of the focal point.
Macro effect
The Macro setting, finally, emulates the super-close-up mode common to many dedicated cameras (not to mention smartphones). It essentially blurs background layers far more aggressively and extensively than the others, even including parts of the foreground subject. This lets you create that super-close-up effect even if the subject wasn’t particularly close to the camera.
Save or share your images
When you’re happy with your adjustments, tap the Save button. Note that this will replace the original version of the image in Photos with this new one.
Don’t worry, though – all the original depth data is retained, and readjusting or rolling back the image is a simple matter of opening it up in Slør again.
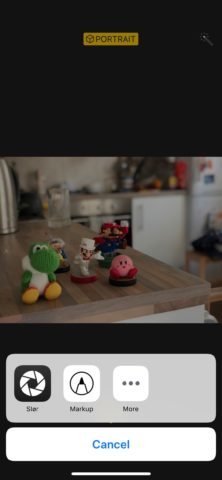
Alternatively, hit the Share icon to bring up the familiar iOS share menu.
You can also access Slør by going into Photos, selecting a Portrait image, hitting Edit and tapping the three-dot ‘more’ button. From there you’ll be able to activate the Slør extension, which lets you jump directly to the picture within the app for a Slør edit.