
From VIPs and mailboxes to attachments and notifications, your iPhone (or iPad) makes managing email easy
Email is the bane of many people’s existence, but it needn’t be. With iOS, you can swiftly and effectively manage your email, freeing up time for more important things. This guide shows you how.
Edit your mailboxes
On the Mailboxes screen, tap Edit. You can then decide which mailboxes you’d like listed, and in which order they should appear. Are you most concerned with email from specific people? Turn on VIP (more on that in the next step) and drag it to the top. Never venture into Trash? Turn it off.
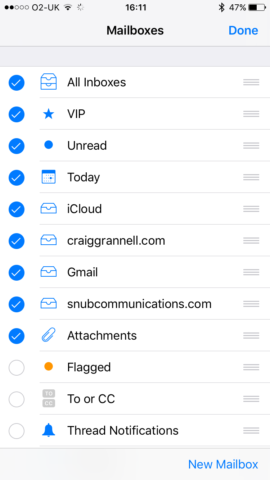
Apple also enables you to add specific mailboxes to the list through the Add Mailbox link. You then navigate to the relevant account, tap the folder in question, and tap Done. (Oddly, to remove a folder from the list, you have to repeat this process, but untick the folder.)
Make important contacts VIPs
The VIP mailbox is an interesting one. Rather than being based around accounts or times, it houses emails from people who you consider your most important contacts. It’s a good way to filter your emails and quickly get at the most essential ones, and – as we’ll see later – can be useful for taming notifications.

To make a contact a VIP, open an email from the person, tap their name, and then tap Add to VIP. Messages from VIPs are also differentiated in other mailboxes through a star icon appearing next to their names.
Use IMAP email hosting
Each Apple ID comes with an @icloud.com email address. (Apple notes older accounts may offer additional aliases, too.) A benefit of icloud.com email is it’s IMAP-based, and so changes made on one device sync to others. However, the address you get isn’t entirely your own, given that iCloud is one of Apple’s brands.
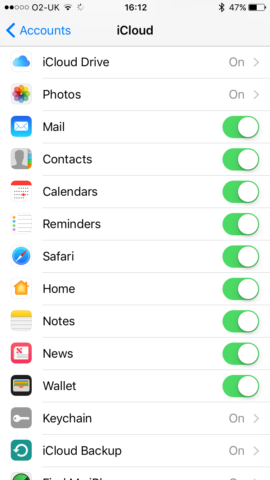
An alternative is your own custom domain and email hosting. Dealing with that is an article in itself, so we won’t go into detail here; but we will recommend you ensure any email hosting you buy offers IMAP. Older POP-based email won’t sync changes (mailboxes on each device effectively act independently of each other), which hampers productivity.
Browse and add email attachments
It’s commonplace for people to send documents via email. Fortunately, Mail makes it easy to browse messages containing attachments by way of the Attachments mailbox. Alternatively, tap the filter button (bottom-left of the screen) in any mailbox, tap the filter criterion, and choose Only Mail with Attachments. Note that Mail remembers filter settings on a per-mailbox basis.
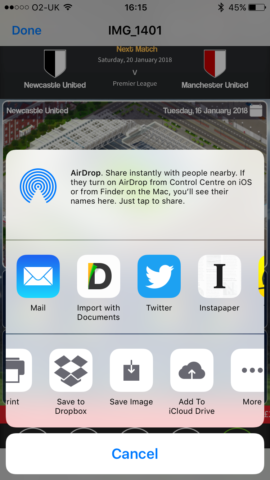
Attachments can be saved to cloud storage (iCloud Drive, Dropbox, and so on) – either preview an item and use the share button, or long-tap an item to access the Share sheet.
You can also add attachments to an email you’re composing: double-tap a blank space, and tap the right-facing arrow until you see Add Attachment. Tap that and then choose a document to attach from iCloud Drive or any other configured location.
Smart search by date
Sometimes, you might not recall who sent you something, but may remember when it was sent. If that’s the case, drag downwards when in a mailbox, and tap the Search field.
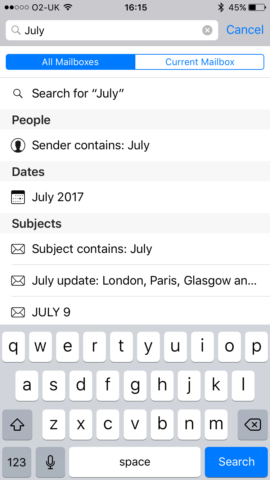
Start typing a month, date or day, and Mail will provide links under the Dates heading. Tap one of these to quickly list all emails received during that particular time period.
Emails will be listed from all mailboxes or just the current mailbox, depending on the button selected at the top of the pane.
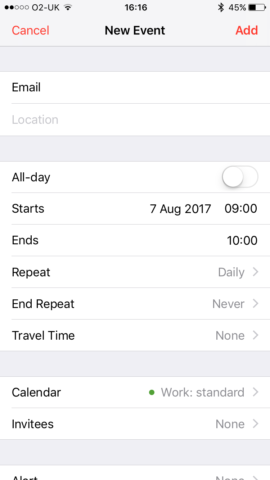
Make email a daily task
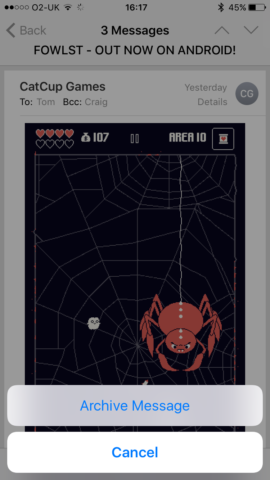
Because emails can arrive at any time, they can keep interrupting your day, becoming an ongoing distraction. If you often find yourself being torn away from important tasks, in order to deal with email, schedule some time every day to specifically deal with your messages.
Decide on a period – or periods – of time you’re happy to dedicate to email and stick to them. Avoid checking email at other times. For emails you can deal with in under a minute or two, do so and then archive them. For messages that require more thought and perhaps research, flag them (swipe left and tap Flag in a mailbox), so they’re easy to spot later.
Tame email notifications
Notifications are also a distraction. It’s not good for anyone if you’re always fishing your iPhone out of a pocket or bag when it starts buzzing or making noise.
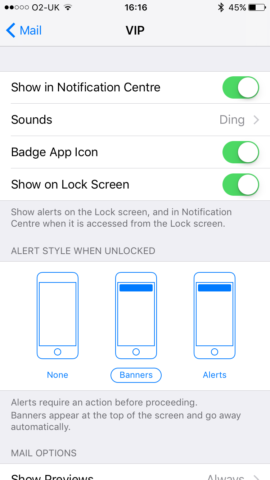
With email, there’s little sense in being alerted to everything you’re sent. In Settings > Notifications > Mail, a good bet is to disable notifications entirely. Alternatively, turn them off for all accounts, but set up a small list of VIPs and enable notifications just for those.
Coherently file old emails
Some people leave every email they’ve ever received in an increasingly bulging inbox. Some dump read stuff into a huge archive. Others methodically file emails into per-sender/job/client folders. None of these options is inherently better or worse than the others, but it’s important you figure out how you want to deal with old emails, and do so consistently.
One thing to avoid doing is simply deleting everything. Sure, you’re unlikely to need a notification about an expired special offer again, but conversations with friends and clients, receipts, and software keys are all things worth keeping around, so you can refer to them again in the future.
Create custom signature files
It’s hard to blame Apple for adding a marketing line to every email you send. (OK, it’s not – Apple absolutely should not have done this.) But leaving ‘Sent from my iPhone’ lurking at the foot of your digital missives isn’t smart.
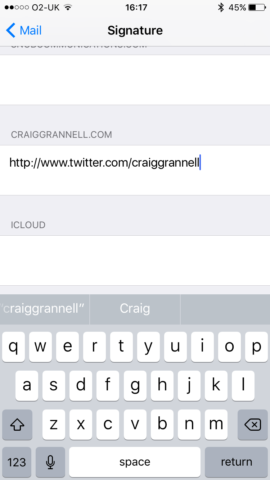
So in Settings, head to Mail > Signature, and delete Apple’s line. You can then add things that are actually helpful: website addresses; social media details; Skype ID; phone numbers. Your custom signature will be automatically added when you compose a new email, although can be manually deleted prior to sending it.
But no-one needs to know every time they hear from you that you have an iPhone!