

Learn how to make use of Google’s free image editor to make your photographs shine
There are plenty of photo editors for iOS, but Snapseed is our favorite. This free app from Google has a huge range of features, making it great for quick adjustments and corrections; but it’s also capable of helping you work on more creative photographic endeavors that involve filters, textures, and text.
This feature aims to get you started with the app, from loading your first photo to creating your own custom filters. It’s also worth noting that some of the edits we show will be a bit extreme in nature to make it obvious things have changed between steps – typically, you get better results with subtler tweaks than those we’re using here.
Get started with Snapseed
Install Snapseed from the App Store. On launch, it will invite you to open a photo.

Tap Open or the invitingly large + button and you’ll see a preview strip housing recent photos. You can alternatively access the default iOS image picker with Open from device, snap a new photo with Camera, or open your most recent image with Open latest image.
When your photo is loaded, you can tap the i button to view its details (time stamp; file type; camera used). You can also use Snapseed in portrait or landscape, depending on which is better for the task you’re working on – and the photograph you’re working with.
Apply a Snapseed ‘look’
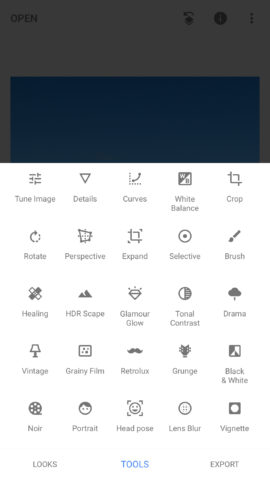
Snapseed has three main tabs: Looks, Tools and Export (represented in landscape, respectively, by a rainbow icon, a pencil, and the share button).
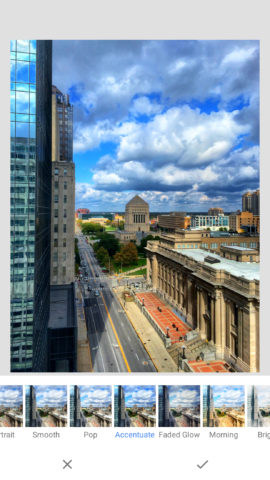
The interface defaults to Looks, and provides options that include Portrait, Smooth, Pop, and Fine Art. Tap any given look and it’s applied to your photo. You’ll then be asked to confirm your selection – tap the tick to do so.
At this point, Snapseed probably doesn’t seem much different from even the most basic photo filters app. The difference here, though, is the filters you apply can be edited…
Work with Snapseed stacks
Tap the history button at the top of the screen and you’ll see options to Undo, Redo, and Revert your image.
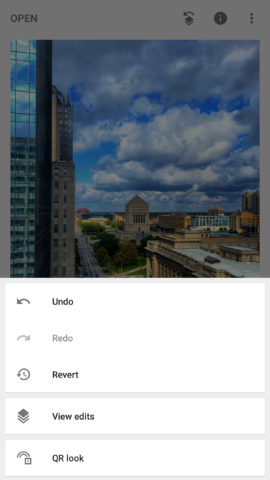
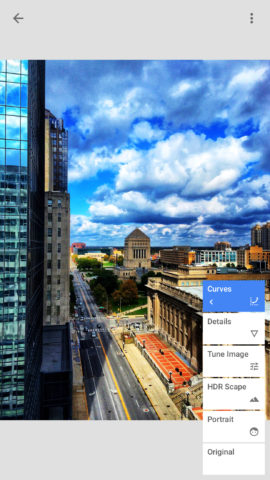
Below those is the all-important View edits. Tap that and Snapseed opens up the stack for the currently applied look.
The stack has two purposes. First, it acts as a history. Tap an item in the stack to disable later edits above it, showing how your image looked at that point. This is most relevant when working with individual tools (see later).
With looks and custom edits alike, though, the stack also enables you to edit an item’s parameters. To do this, double-tap the item – one tap selects and the second opens a fly-out menu. The buttons within, from left to right, are Delete, Stacks Brush, and Edit.
Delete removes the item entirely from the stack; the Edit button (depicted by sliders) enables you to make adjustments to parameters and values.
Edit a Snapseed stack
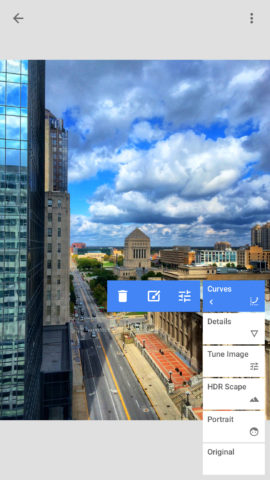
Open a photo and apply the Accentuate look. Open your image’s stack. Tap Curves and then its Edit button.
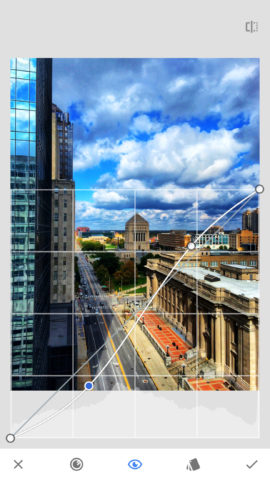
You’ll then see the curve applied to the image as part of the look you chose. It resembles a shallow S. Try making the S fatter by pressing and dragging its nodes to make the colors of the image pop.
Tap the tick to return to the stack. Now tap Details. The tool defaults to the Structure parameter. Drag across your photo to the right to increase its value, further bringing out the fine details of your image.
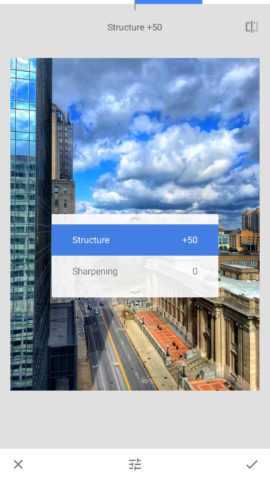
At this point you’re not seeing the final edit, though, but the edit to the point the Structure tool appears in the stack. To see how your photo appears with every tool/filter applied, tap the tick to return to the stack and tap the topmost item.
This workflow takes a little while to get your head around, but once mastered unlocks plenty of potential for editing. You soon come to realize that nothing you do is ‘burned in’ (which is rare, even in paid photo editors), because Snapseed supports non-destructive editing. At any point, you can open your stack and make tweaks to a previous step. This lack of risk means you’ve scope to experiment and be creative with Snapseed’s many tools.
Work with Snapseed tools
Speaking of tools, Snapseed has loads of them. Open a new image and tap the Tools tab. You’ll see a possibly bewildering grid of icons. Now drag the pane upwards – there are even more hidden below the fold.
One of the most useful tools is the first one, Tune Image. It’s also a good way to get to grips with a natural and tactile interface convention used heavily throughout Snapseed.
On selecting the tool, you’ll see your photo and a toolbar across the bottom of the screen. Drag up and down on your image and you’ll see available parameters. On selecting a parameter, drag left or right to change its value.
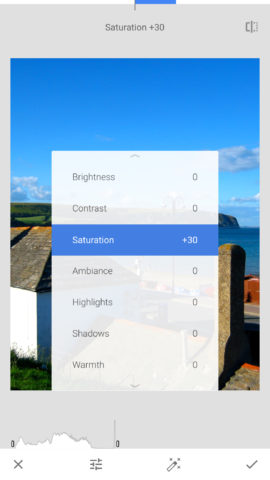
Use the comparison button at the top-right of the window to switch between your edit and how the photo looked prior to working with the current tool. If you’re happy with your changes, tap the tick; cancel with the cross. Again, remember that changes you make can always be adjusted or removed later, without affecting subsequent work.
Discover great Snapseed tools
With there being 27(!) other tools nestled in Snapseed, we can’t cover all of them in this feature. However, some warrant a mention, due to being particularly useful or interesting:
Details – shown earlier – provides a useful spin on sharpening, which is designed to recover lost details in a soft image. The Structure parameter is the one to go for, which intelligently works with local contrast to bring out fine details. It often works wonders on landscapes and cityscapes.

The Details tool
Curves we’ve already mentioned as well. A common trick in photography is to use an S curve, in order to make an image look more dynamic. Don’t overdo the effect, or the resulting photograph will look very fake.
Perspective gives you a range of tools for tilting, rotating and transforming your image. The Free [transform] option can prove handy when you’ve got an architectural shot you want to correct, or a head-on shot that needs squaring up. Carefully drag the four corners until everything looks as you want it to.
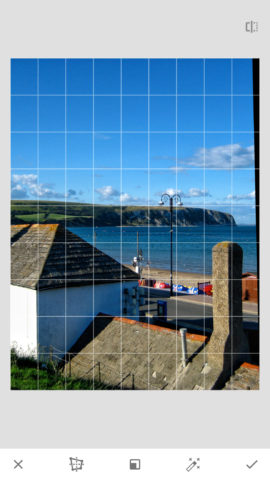
Adjusting perspective
Healing is to be used carefully and sparingly. It attempts to use information surrounding a brushed area to correct blemishes – be they damage to a photo or spots on skin. You can even remove unwanted people from your pictures! Just paint over the spot you wish to “heal” with your finger. This is best done with the image very much zoomed in.
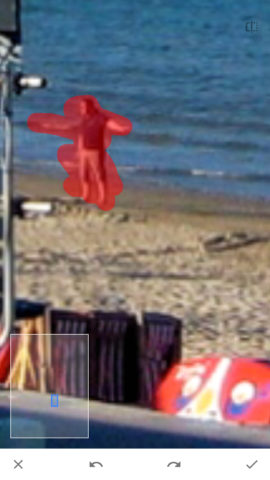
Removing something with the Healing brush
Grunge is one of Snapseed’s more advanced filters, and a good example of how much control they can afford you. Tap the random button and you get a new look every time. But if you want to adjust specific parameters, do so as explained earlier on in this feature.

The Grunge filter tool
Lens Blur provides the means to focus on a particular area of your image by blurring the rest of it. You can switch between elliptical and parallel blurs, and the strength and transition of the effect can be tweaked.
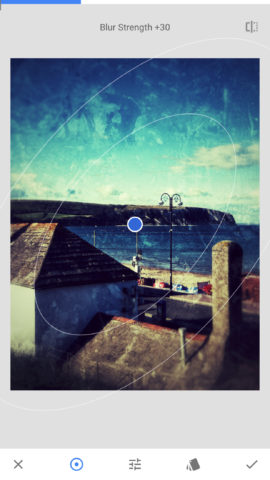
Using lens blur
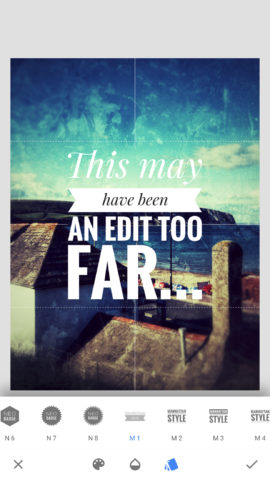
Text enables you to add lettering to your photo. Double tap the text to add your own words. Then use the toolbar buttons to change the color, opacity (which includes an invert option for making the text a mask) and style.
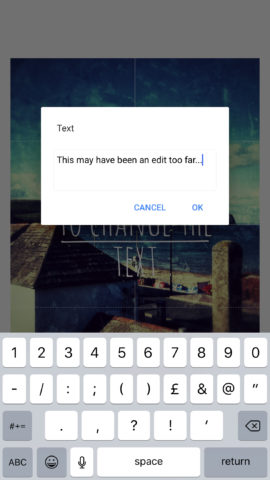
Editing text
Like everything else, text is not burned in nor rendered – you can later edit each text instance by selecting it from your image’s stack.
Export your Snapseed work
Tap the Export tab and you can begin the process of sharing and/or saving your work. Share and Open in both load the standard iOS Share sheet, which you can use to send your photo to another app, or share it via services or apps like Mail and Messages.
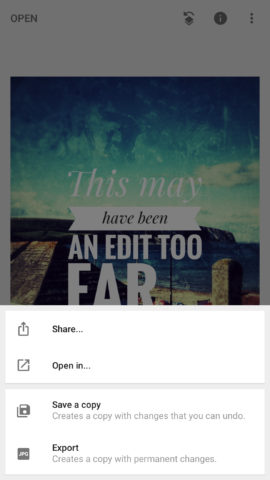
Tap Save and Snapseed will save your work to Photos. iOS will ask for permission to do so. Changes can be reverted (as in, removed) in the Photos app. But if you’re not keen on this, use Save a copy instead, which leaves your original alone and creates a copy with your changes. Export creates a copy with the changes burned in permanently.
Settings in the ⋮ menu (top right) govern some aspects of image export. By default, images are not resized and are saved as 95 percent quality JPEGs. Both settings can be adjusted.
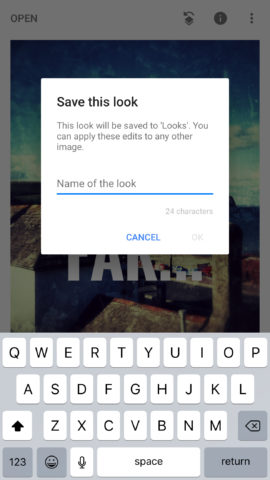
As a final note regarding saving, you can store custom looks in Snapseed. When you create a stack you think you’d like to use again, go to the Looks tab, scroll to the end of the list, and tap +. Name your look and it will be saved, ready to be applied to other images in the future.