It has a dreadful name but this is the best bill-splitter we’ve seen
So: the name. It’s awful. Fortunately, the rest of the app isn’t. SpliTron2 is an iOS 7 overhaul of webtron’s original bill-splitter and tips calculator, the equally terribly named SpliTron. It provides the means, over several screens, to input and manipulate a total, figure out how much everyone needs to pay, and to also check all the money’s come in.
The app’s reminiscent of Sophiestication’s Tipulator, an app potentially on borrowed time now its creator’s off to Apple. Tipulator still has the edge over SpliTron2 in terms of immediacy and simplicity: you tap in an amount and local taxes, decide on a tip, and spin a wheel to define the total per person. SpliTron2, though, is the richer app overall in terms of features and flexibility.
On the Amount screen, discounts and change can be added, and then on the second screen, guests can be split into arbitrary groups. On the third screen, these groups can each have their own amounts to pay assigned. The app initially (and rather dubiously) provides ‘men’ and ‘women’ options for groups by default (depressingly using gender-stereotypical blue and pink markers), but we can think of better use cases for this feature.For example, you could split a bill and give the driver a discount for not having had anything alcoholic to drink, or cater for someone having forgotten their wallet and not having enough on them. 
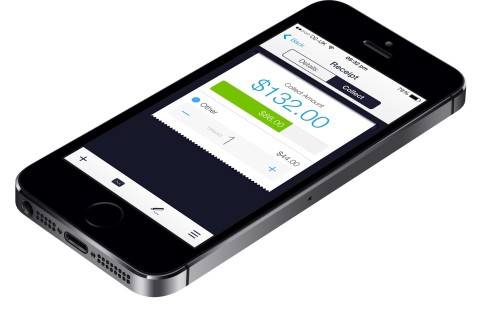
Once you’re satisfied, you’re sent to a Receipts screen, which outlines your sums in a clear and concise manner. A Collect tab enables you to tot up the cash that’s come in, and completed receipts can be emailed, have notes assigned, and be accessed from the app’s history. You may not necessarily use all these extras, but they showcase the thought that’s gone into SpliTron2; similarly, you can adjust various settings, such as the default currency, local taxes, and how rounding works, along with disabling the sound effects if they get annoying.
Price: $0.99/£0.69
Size: 5.5 MB
Version: 2.0.0
Platform: iOS Universal
Developer: Iter9 LLC
Splitting a bill with SpliTron2
1 Enter the bill amount
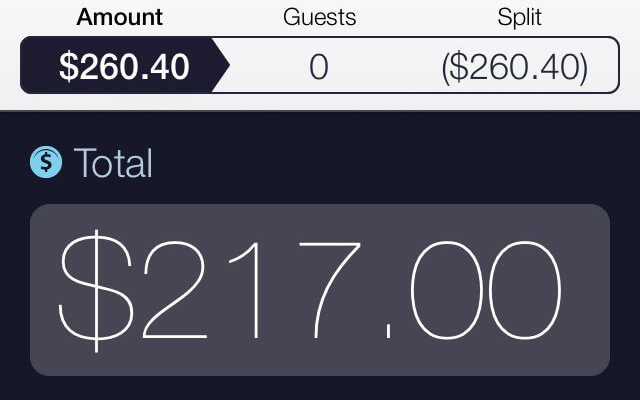
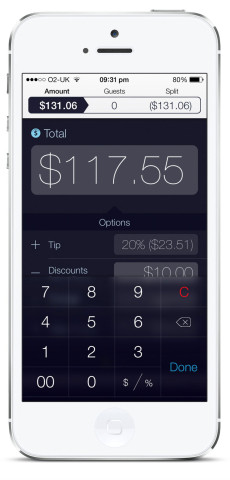
Tap the Total figure to bring up the keypad and tap in your bill. To add a tip, tap the numerical field next to the label and type an amount. By default, this will be a percentage, but you can change this to a set figure by using the $/% key. Tap Done to continue.
2 Define your guests
Tap Next or swipe from the right to access the Guests screen. Define how many people are in your group, using the +/- buttons or by tapping the numerical field and setting a figure. If you want to define distinct groups, tap inside the fields and set figures for them. To add a different group type, tap New Group and define a label.
3 View payments
Swipe to the next screen and you’ll see your payments outlined – in groups if you’ve used them. Payments will be evenly split, and also rounded depending on the options defined in the app’s settings (accessed via the three-bar button at the bottom-right of the screen).
4 Change payments
To adjust the payments for any one group, tap the group to select it, use the +/- button to decide whether they should pay more or less, and enter an amount. Alternatively, you can define a specific currency amount by tapping the value and inputting a figure.
5 Collect money
When content with your settings, tap Receipt. You’ll see how much everyone has to pay. If you’ve made an error, you can use Back to adjust things. Back in the Receipt screen, tap Collect and you can use SpliTron2 to track incoming payments. Groups are stamped ‘completed’ when everyone has paid.
6 Email your receipt
Tap Details to return to your receipt. Drag the receipt down and you can provide a name for the event. Using the envelope and pencil icons, respectively, you can email the receipt’s figures or add notes to it. Tap + to start a new calculation; older ones can then be accessed via the History option from the menu mentioned in step 3.


