
One of the long-lasting effects of the pandemic is that many jobs are now remote, online conferences are more common, and it’s increasingly likely that you’ll be required to record a video talking straight to camera.
Whether that’s for a speech, a presentation, an audition, an advert, or even a video CV, using a teleprompter to remember your lines makes the whole experience easier – and a lot less daunting if you’re inexperienced on camera. The end result is a video that feels leagues more professional than trying to wing it from memory or scraps of paper.
For this guide we’ll be looking at the Teleprompter for Video app by Norton Five Ltd. It’s not the flashiest teleprompter app, but in testing it was one of the most reliable and most affordable solutions we found. Win-win.
For free, the app allow you to record short scripts – around the length of this article so far. For anything beyond that, you’ll pay a one-off $15/£15 IAP to remove script restrictions and unlock the ability to add a logo to your recordings.
Download the app and register for an account using your preferred method. (We recommend Sign in with Apple). Allow access to the camera and microphone so the app can record you speaking as you read the prompts.
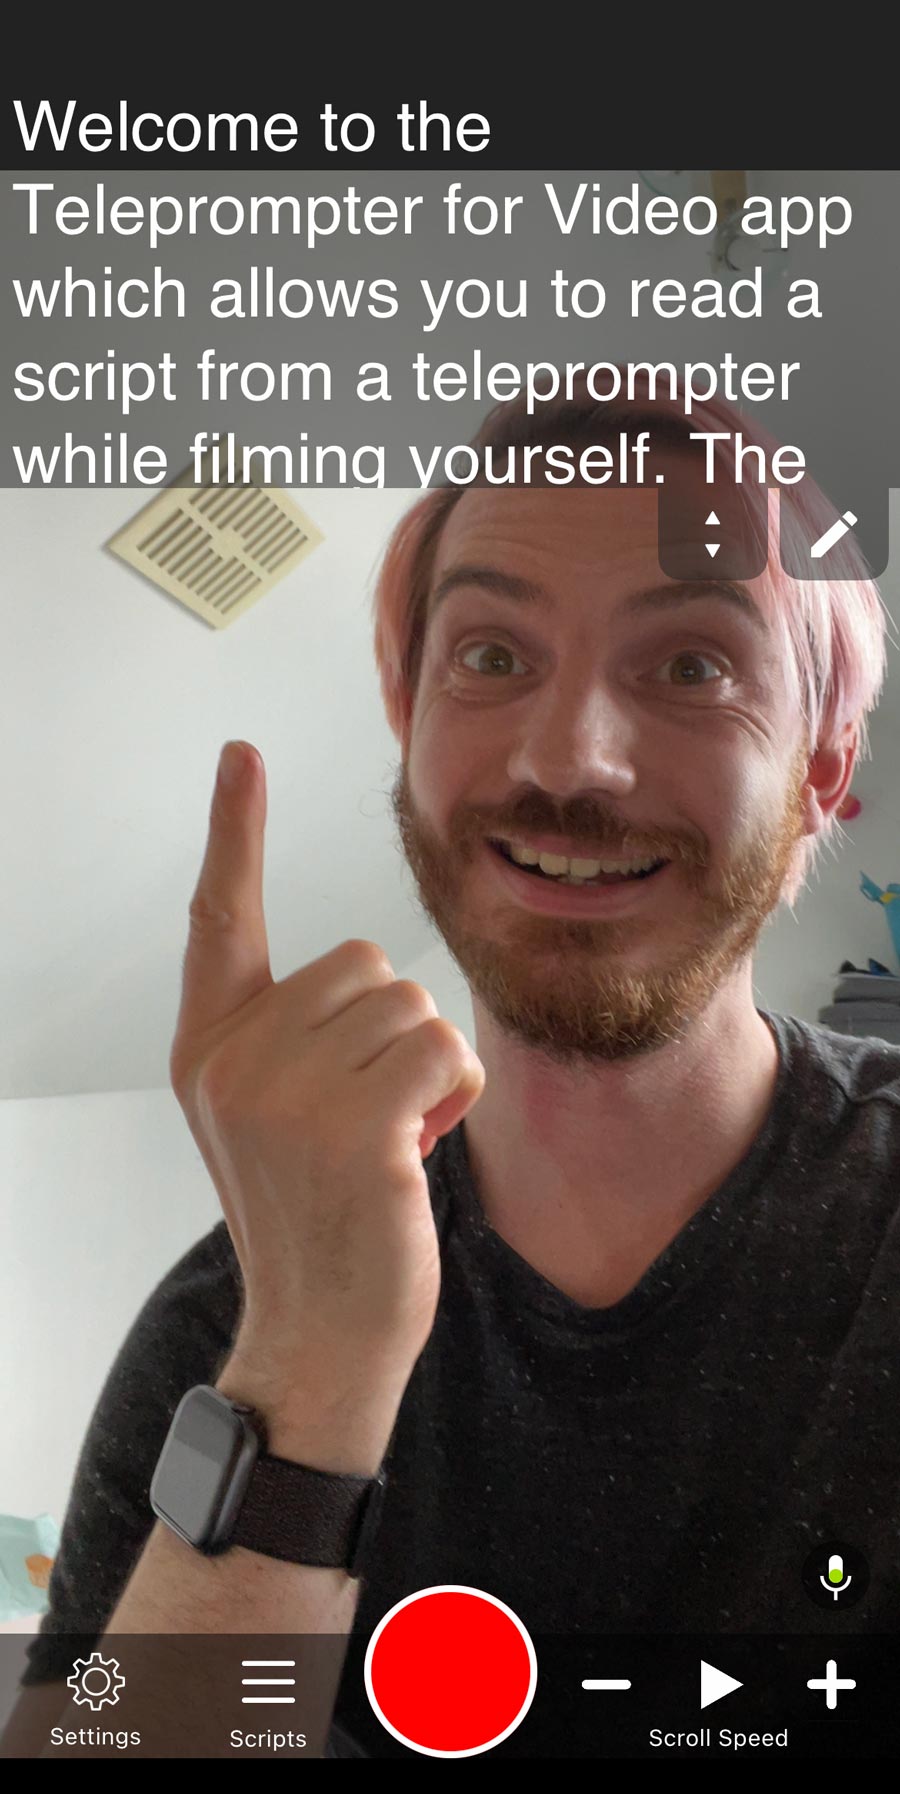
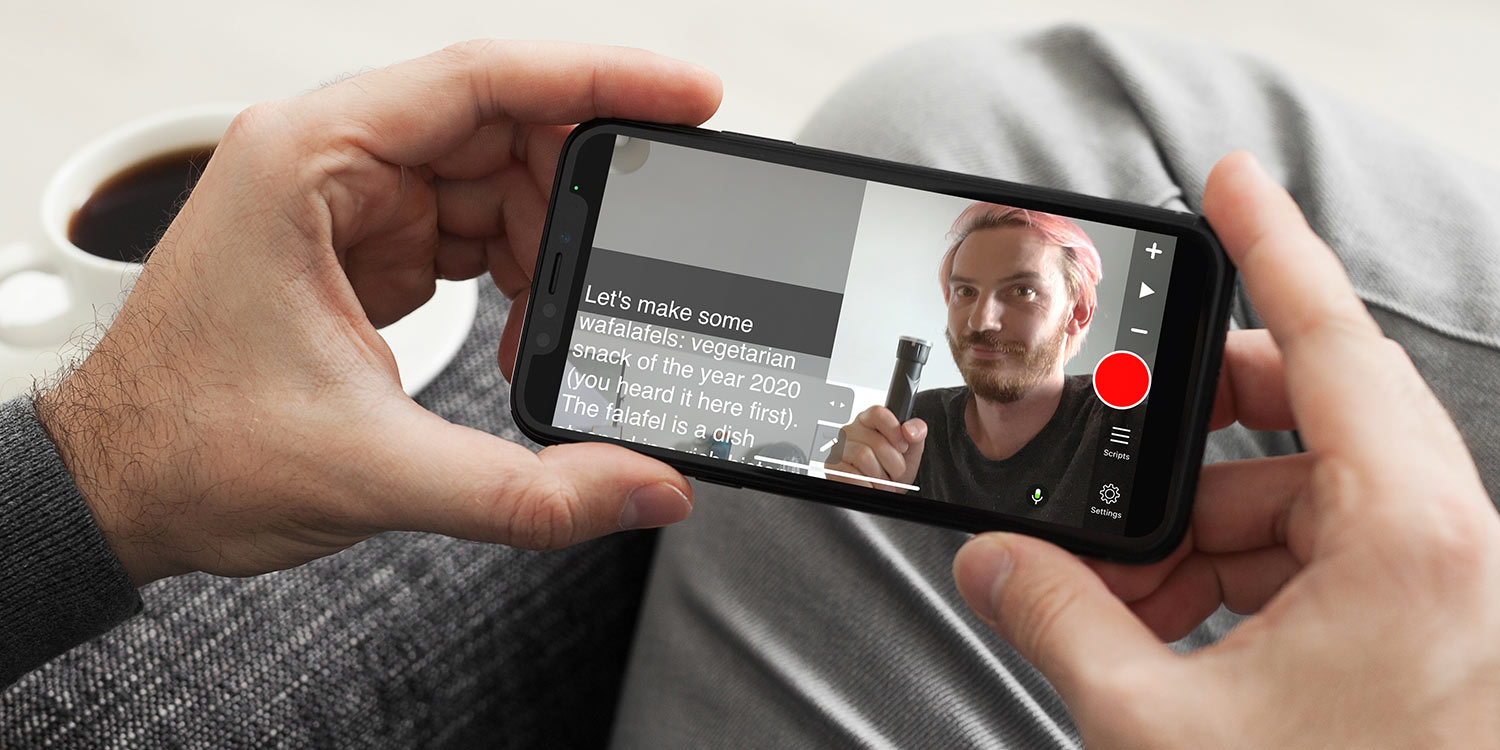
You’ll then see yourself pop up on-screen, with a default script overlaid at the top of the display. Whatever text you’ve chosen will automatically scroll in this section, which is cleverly placed next to the selfie camera so it looks as though you’re looking into the lens when you’re reading. It makes a massive difference over reading from off-screen notes.
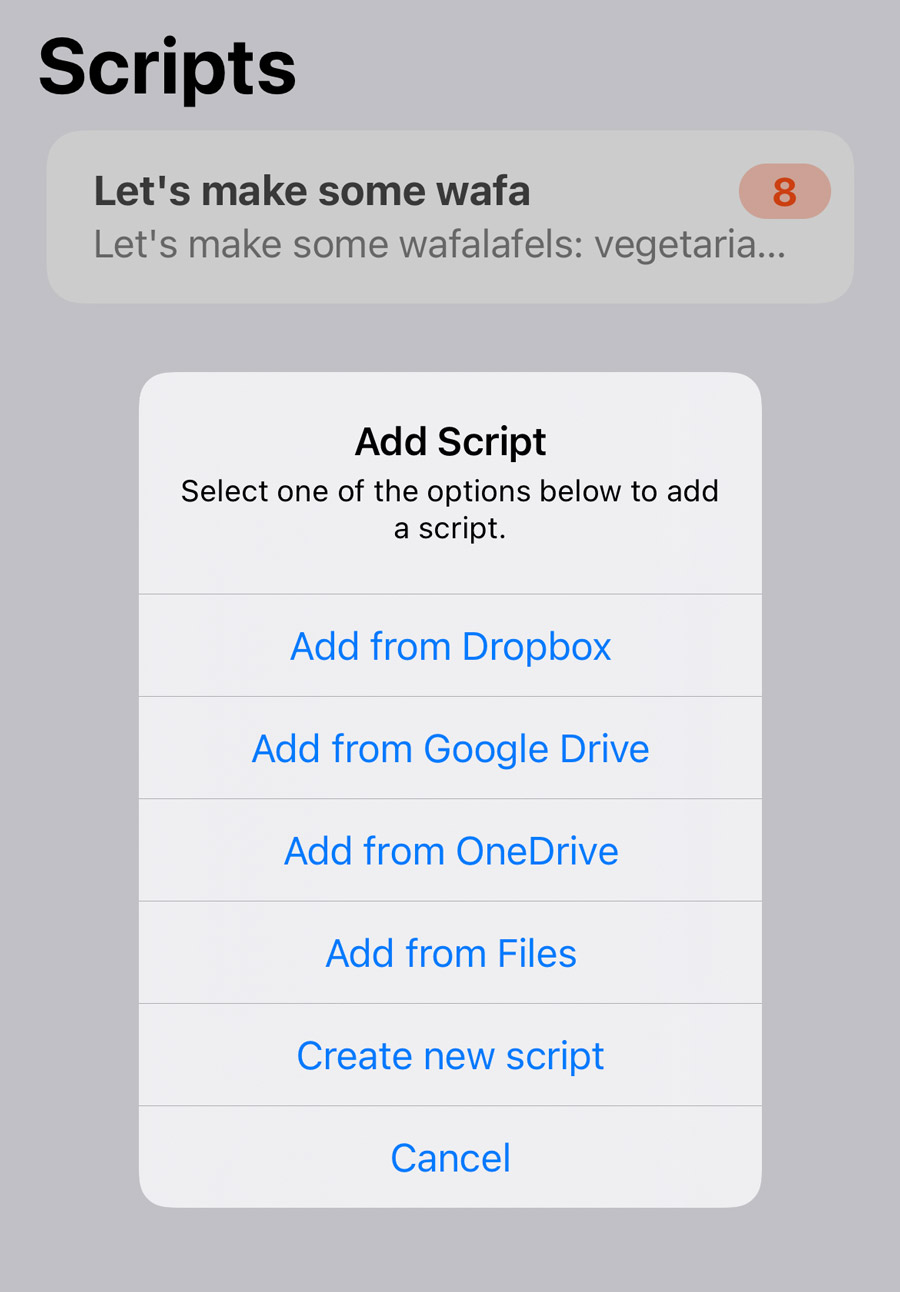
You can drag the arrows to change the size of this text box, though be aware that if you make it too big you risk losing the illusion of eye contact. The pencil icon allows you to quickly edit the script, or you can use the + button in the Scripts tab to create something new or import something you’ve written elsewhere.
Scroll speed can be adjusted using the controls in the bottom right, and we’d recommend tweaking this setting “live” during a practice run to get a feel for the right pacing for you.
More options can be found in the Settings section, with plenty of control over display and recording technicalities. Customize to your heart’s content.
When you’ve loaded up your chosen script – and propped your device somewhere steady, like a tripod or phone stand – simply hit the big red record button to get started.
When the recording is finished, play it back to check you’re happy. You then get access to several more features thanks to a handy Edit menu. Here you can automatically add subtitles, add your logo (if you bought the IAP), and add custom text.
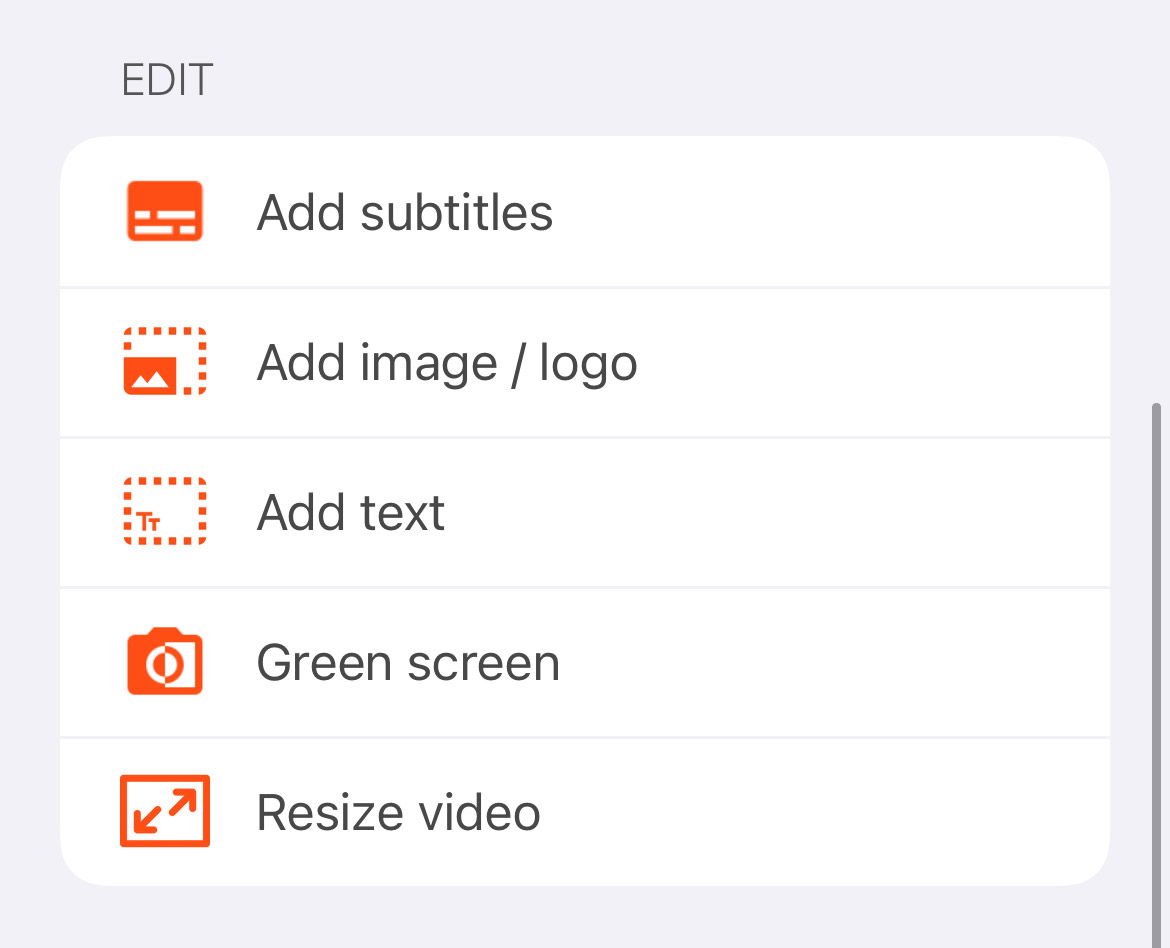
If you have a green screen or blue screen, you’ve also got the options of removing the background of the video and replacing it with something else. Pick a background image and adjust the Tolerance slider until things look right.
Finally, you can hit Resize Video to change the aspect ratio, which is achieved by either cropping or adding black bars. This is handy if you want to publish your video to multiple places that use different formatting.
When you’re done, tap Save Video and it’ll appear in your camera roll. That’s all you need to know to crack on and impress your friends/coworkers/clients with super professional video clips – enjoy!