

Accessibility matters. Apple has a whole site devoted to it and builds relevant features into iOS that can be life-changing for people with vision, hearing, mobility, or cognitive needs. The perhaps surprising bonus: many of these tools can improve the iPhone experience for everyone. Here’s how to get the most from them.
Get started
Some quick tips before the deep dive…
- You’ll find all tools and features discussed below in the Accessibility section of Apple’s Settings app – unless otherwise noted.
- Features are grouped into sections, which have the following headings: Vision, Physical and Motor, Hearing, Speech, Accessories, and General.
- Head to Accessibility Shortcut (under General) and select one item to later toggle it via a triple-click of the side button. Or pick several to bring up a menu – see pic below.
- Use Per-App Settings (also under General) to customize key accessibility features for specific apps – for example, to have bold text only on the Home Screen.
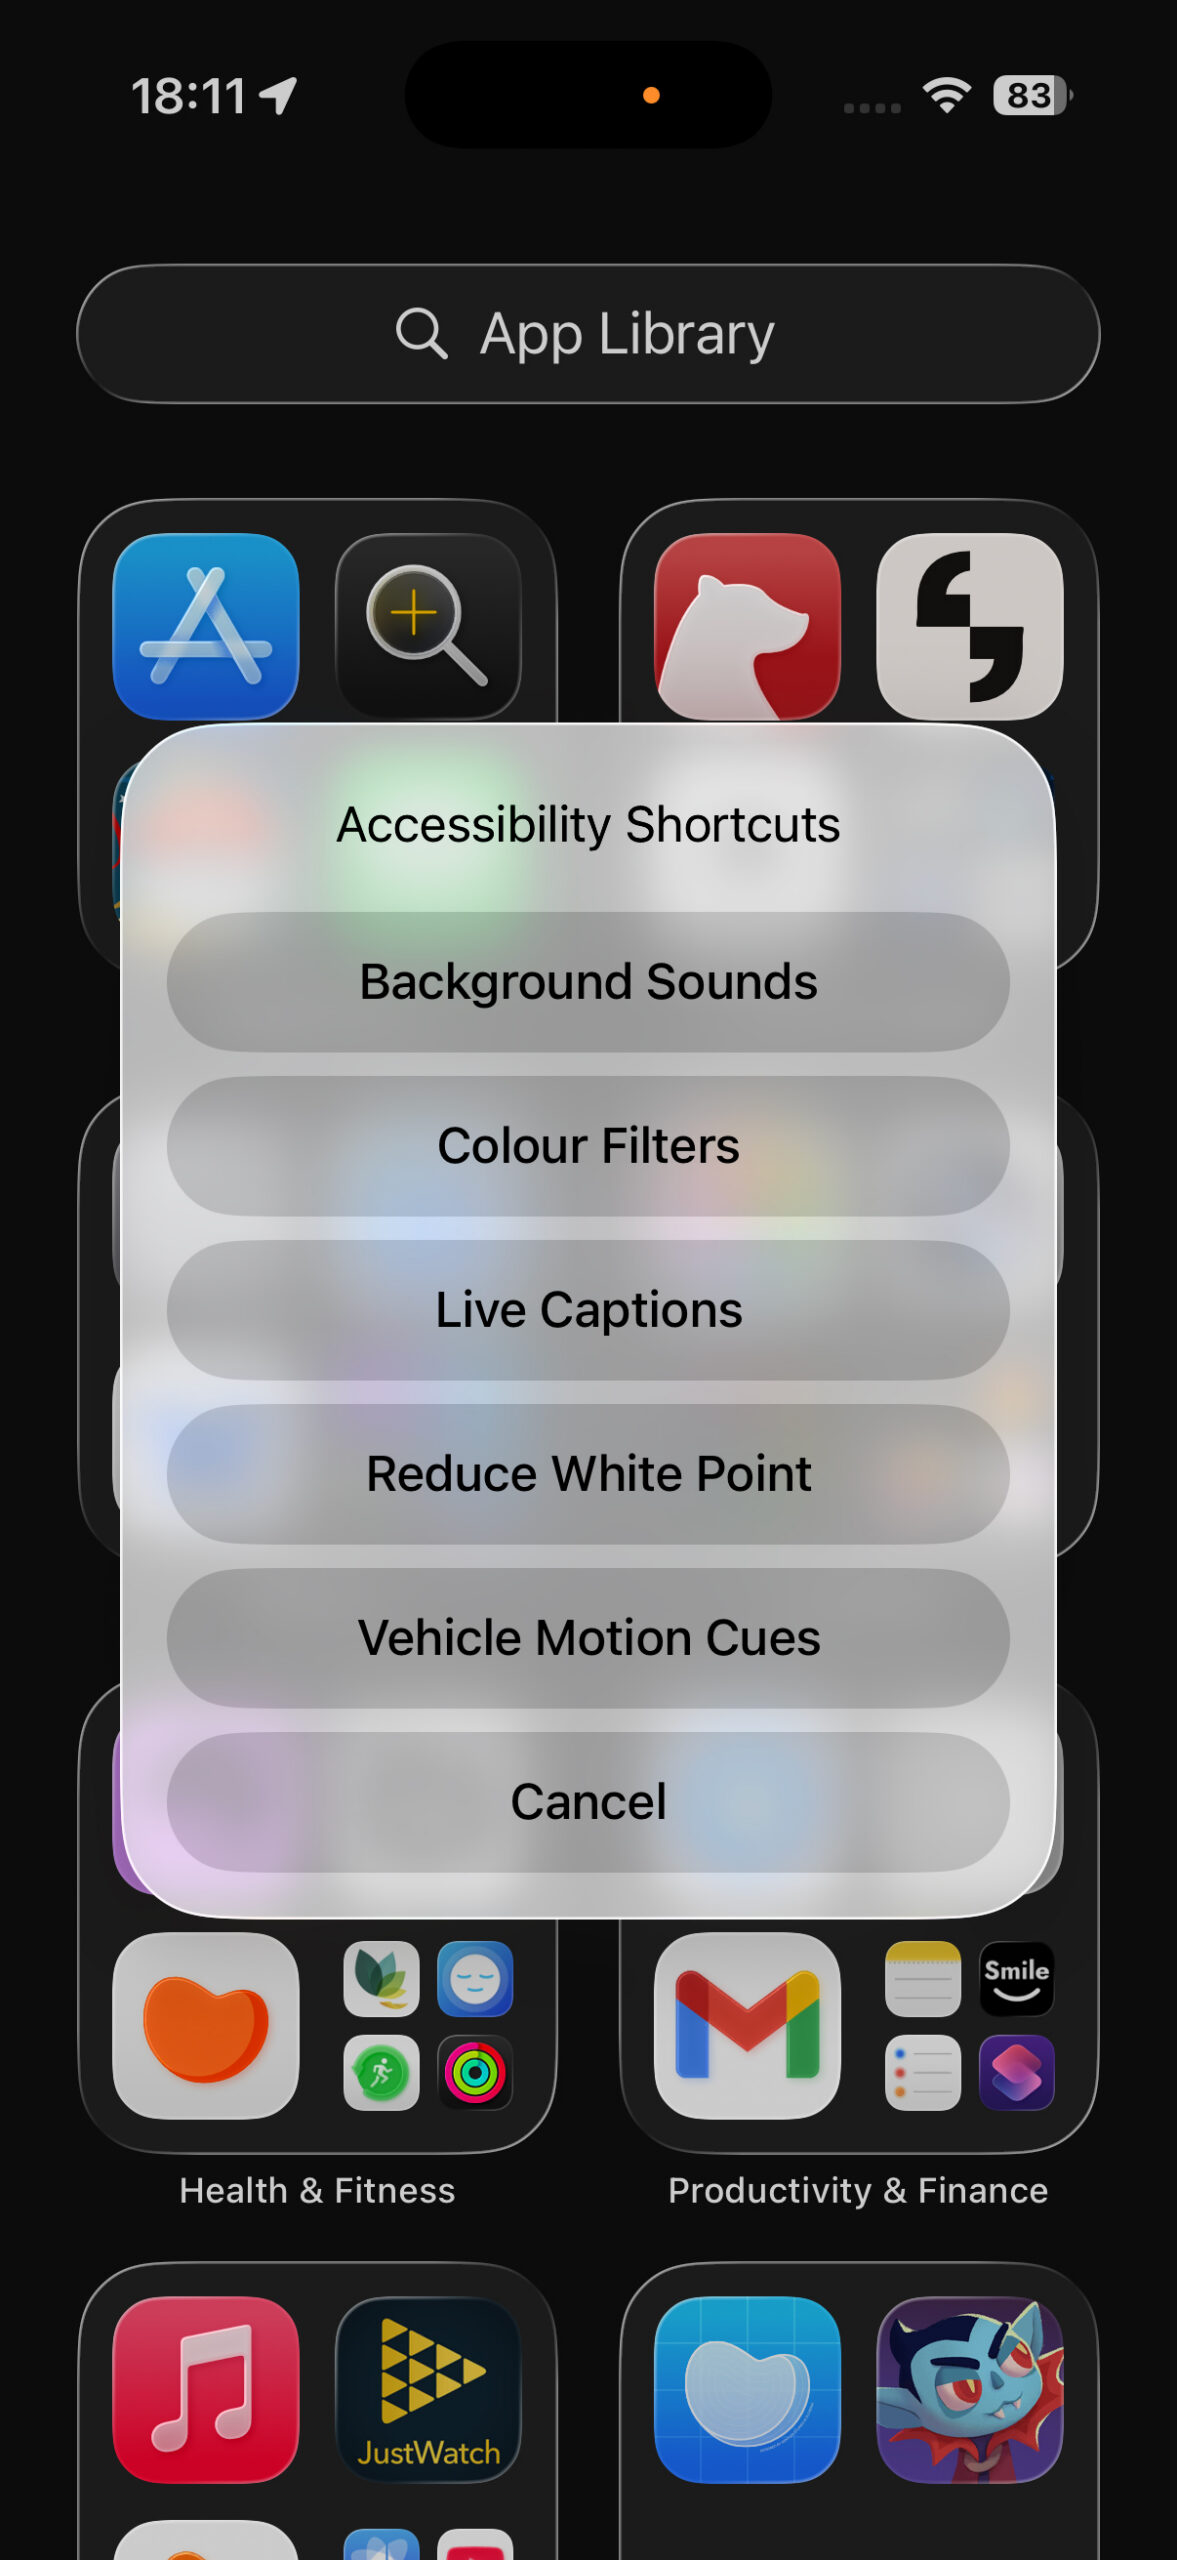
The Accessibility Shortcuts menu.
1. Magnify everything
From the Vision section, tap and then turn on Zoom. Drag the magnified region to zoom what’s displayed beneath it on your iPhone’s screen. Double-tap with three fingers to toggle the feature, or double-tap and drag from the second tap to adjust the zoom level. Drag three fingers to move the zoomed area.
2. Improve clarity
Back in Vision, Open Display & Text Size. Use Reduce Transparency to soften the effect of Liquid Glass. Turn on Show Borders to add thin borders to buttons, making them more obvious. Experiment with text size and boldness. Note: Display & Brightness > Liquid Glass within Settings also has Liquid Glass opacity settings.

Display options.
3. Quieten animation
Animations can provide a sense of place but also be disorienting. Stop Home Screen folder zoom animations and similar effects by turning on Motion > Reduce Motion. Add Prefer Cross-Fade Transitions to remove additional effects, such as slide animations between menus.
4. Reduce car sickness
Still in Motion, turn on Vehicle Motion Cues > Automatically in Vehicle. Dots will appear on the screen when movement is detected, mirroring the vehicle’s motion. This aims to better align what you can see with what your inner ear feels. Use Customize Appearance to change dot style.
5. Change your iPhone’s voice
In any app where you can enter text, select some words and then Speak from the pop-up menu. Your iPhone will read it – handy for proofing. Back in Settings, head to Accessibility and open Read & Speak. Adjust the voice and speaking rate if you like. Turn on Speak Screen and two-finger swipe from the top of the display to have your device read all on-screen content.
6. Set up vocal shortcuts
Under the Speech heading, tap Vocal Shortcuts. Tap Set Up Vocal Shortcuts and choose an action from the list of shortcuts and system items. Define a custom phrase and the shortcut will activate when you use it. (Avoid using this feature for any actions that already work with Siri, because there’s no point.)

Reachability.
7. Reach the top of the screen
Stop wishing you could grow banana thumbs to reach the top of your screen one-handed. Instead scroll down to the Physical and Motor section and turn on Touch > Reachability. Then swipe down over the Home indicator to pull down the display. When done, tap the space above the clock to get things back to normal.
8. Trigger actions with taps
Still in Touch, scroll down to and tap Back Tap. Define actions (such as Screenshot or Shake) for Double Tap and Triple Tap, which you then activate by quickly performing taps on the rear of your device.
9. Adjust click rates
Leave Touch but stay in the Physical and Motor section. Use options in Side Button and Camera Control to adjust click speeds, if you find them tricky. Note: there’s no such provision yet for adjusting back tap speeds.
10. Play background sounds
Under the Hearing section, go to Audio & Visual > Background Sounds. Turn the feature on, select a sound, and your iPhone will become an ambient noise machine. Use options to silence or lower the sound while media plays, adjust the balance (Equalizer), and stop sounds after or at a specific time.
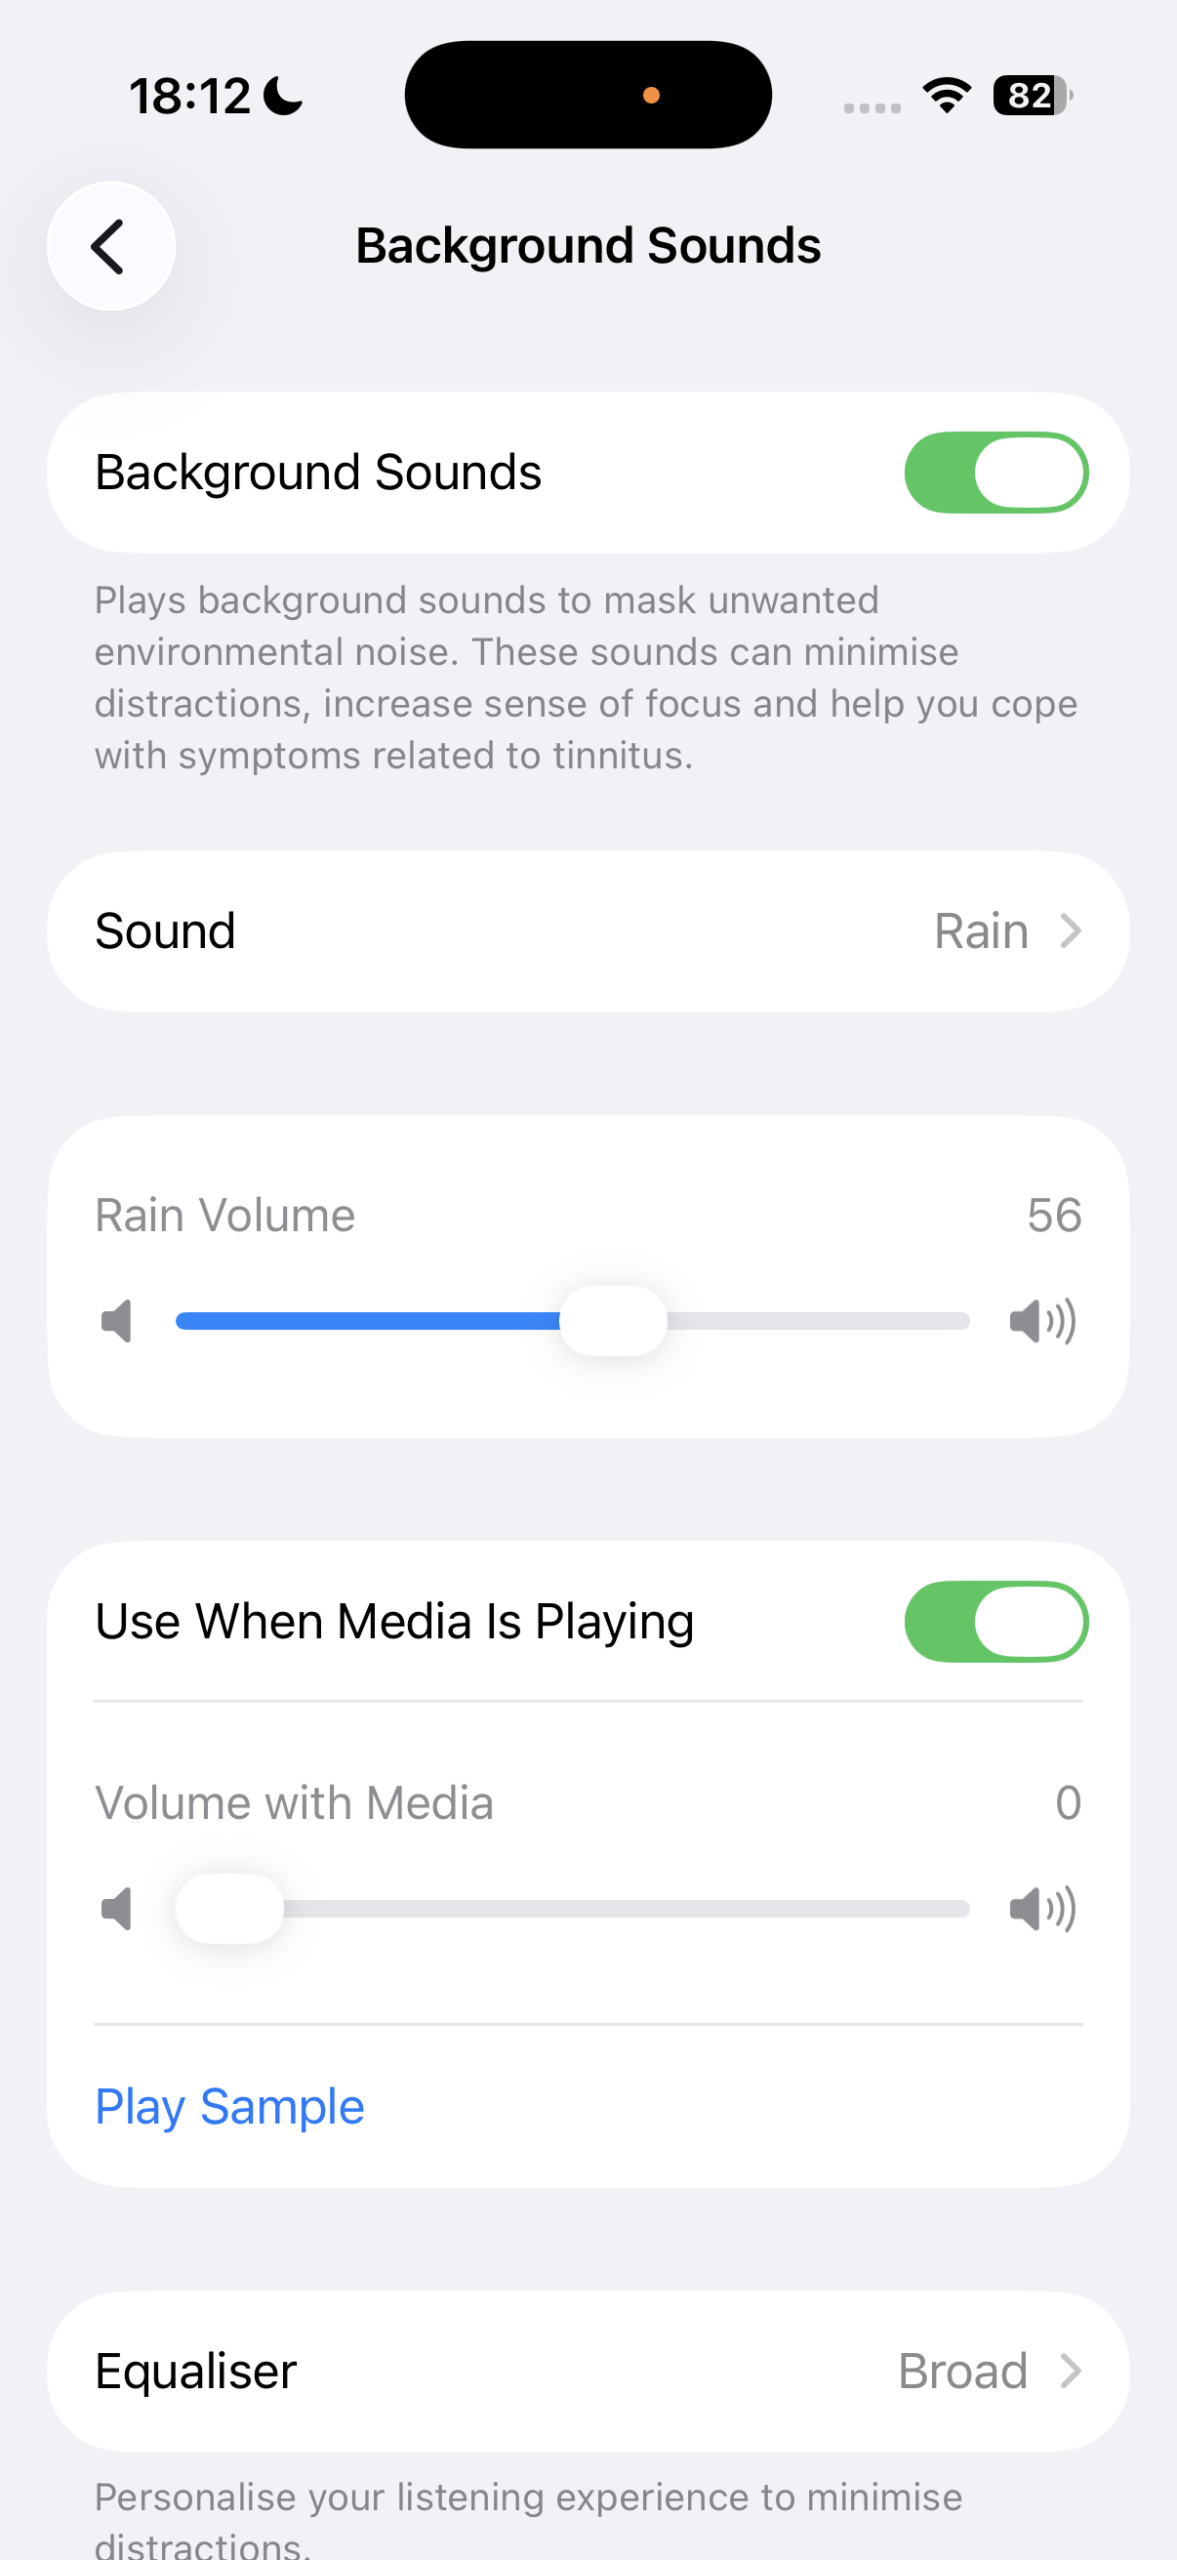
Background sounds.
11. Get sound alerts
Still in the Hearing section, tap Sound & Name Recognition. Then define noises your iPhone should listen for – such as animals, sirens, doorbells, or your name – and you’ll get alerts when it hears them. This feature is designed for people with hearing impairment but can be useful if your ears are otherwise distracted.
12. Balance audio
In Audio & Visual > Headphone Accommodations, tune and customize audio output from supported Apple and Beats headphones to your personal preferences. Use Mono Audio and/or Balance if you don’t hear equally well through both ears, or to “merge” stereo audio when using a single earbud.
13. Show live captions
Again under Hearing, select Live Captions, and turn them on. Your iPhone will attempt to provide live captions for everything it hears. Change this to app audio by tapping Microphone and then choosing iPhone Audio.
14. Lock down an app
Under the General heading, turn on Guided Access. When activated (use the side button triple-click), your iPhone will be locked to the current app – useful when handing your iPhone to a young child, or for ensuring you don’t accidentally swipe out of games and other immersive apps.
Controlling an Apple Watch from an iPhone.
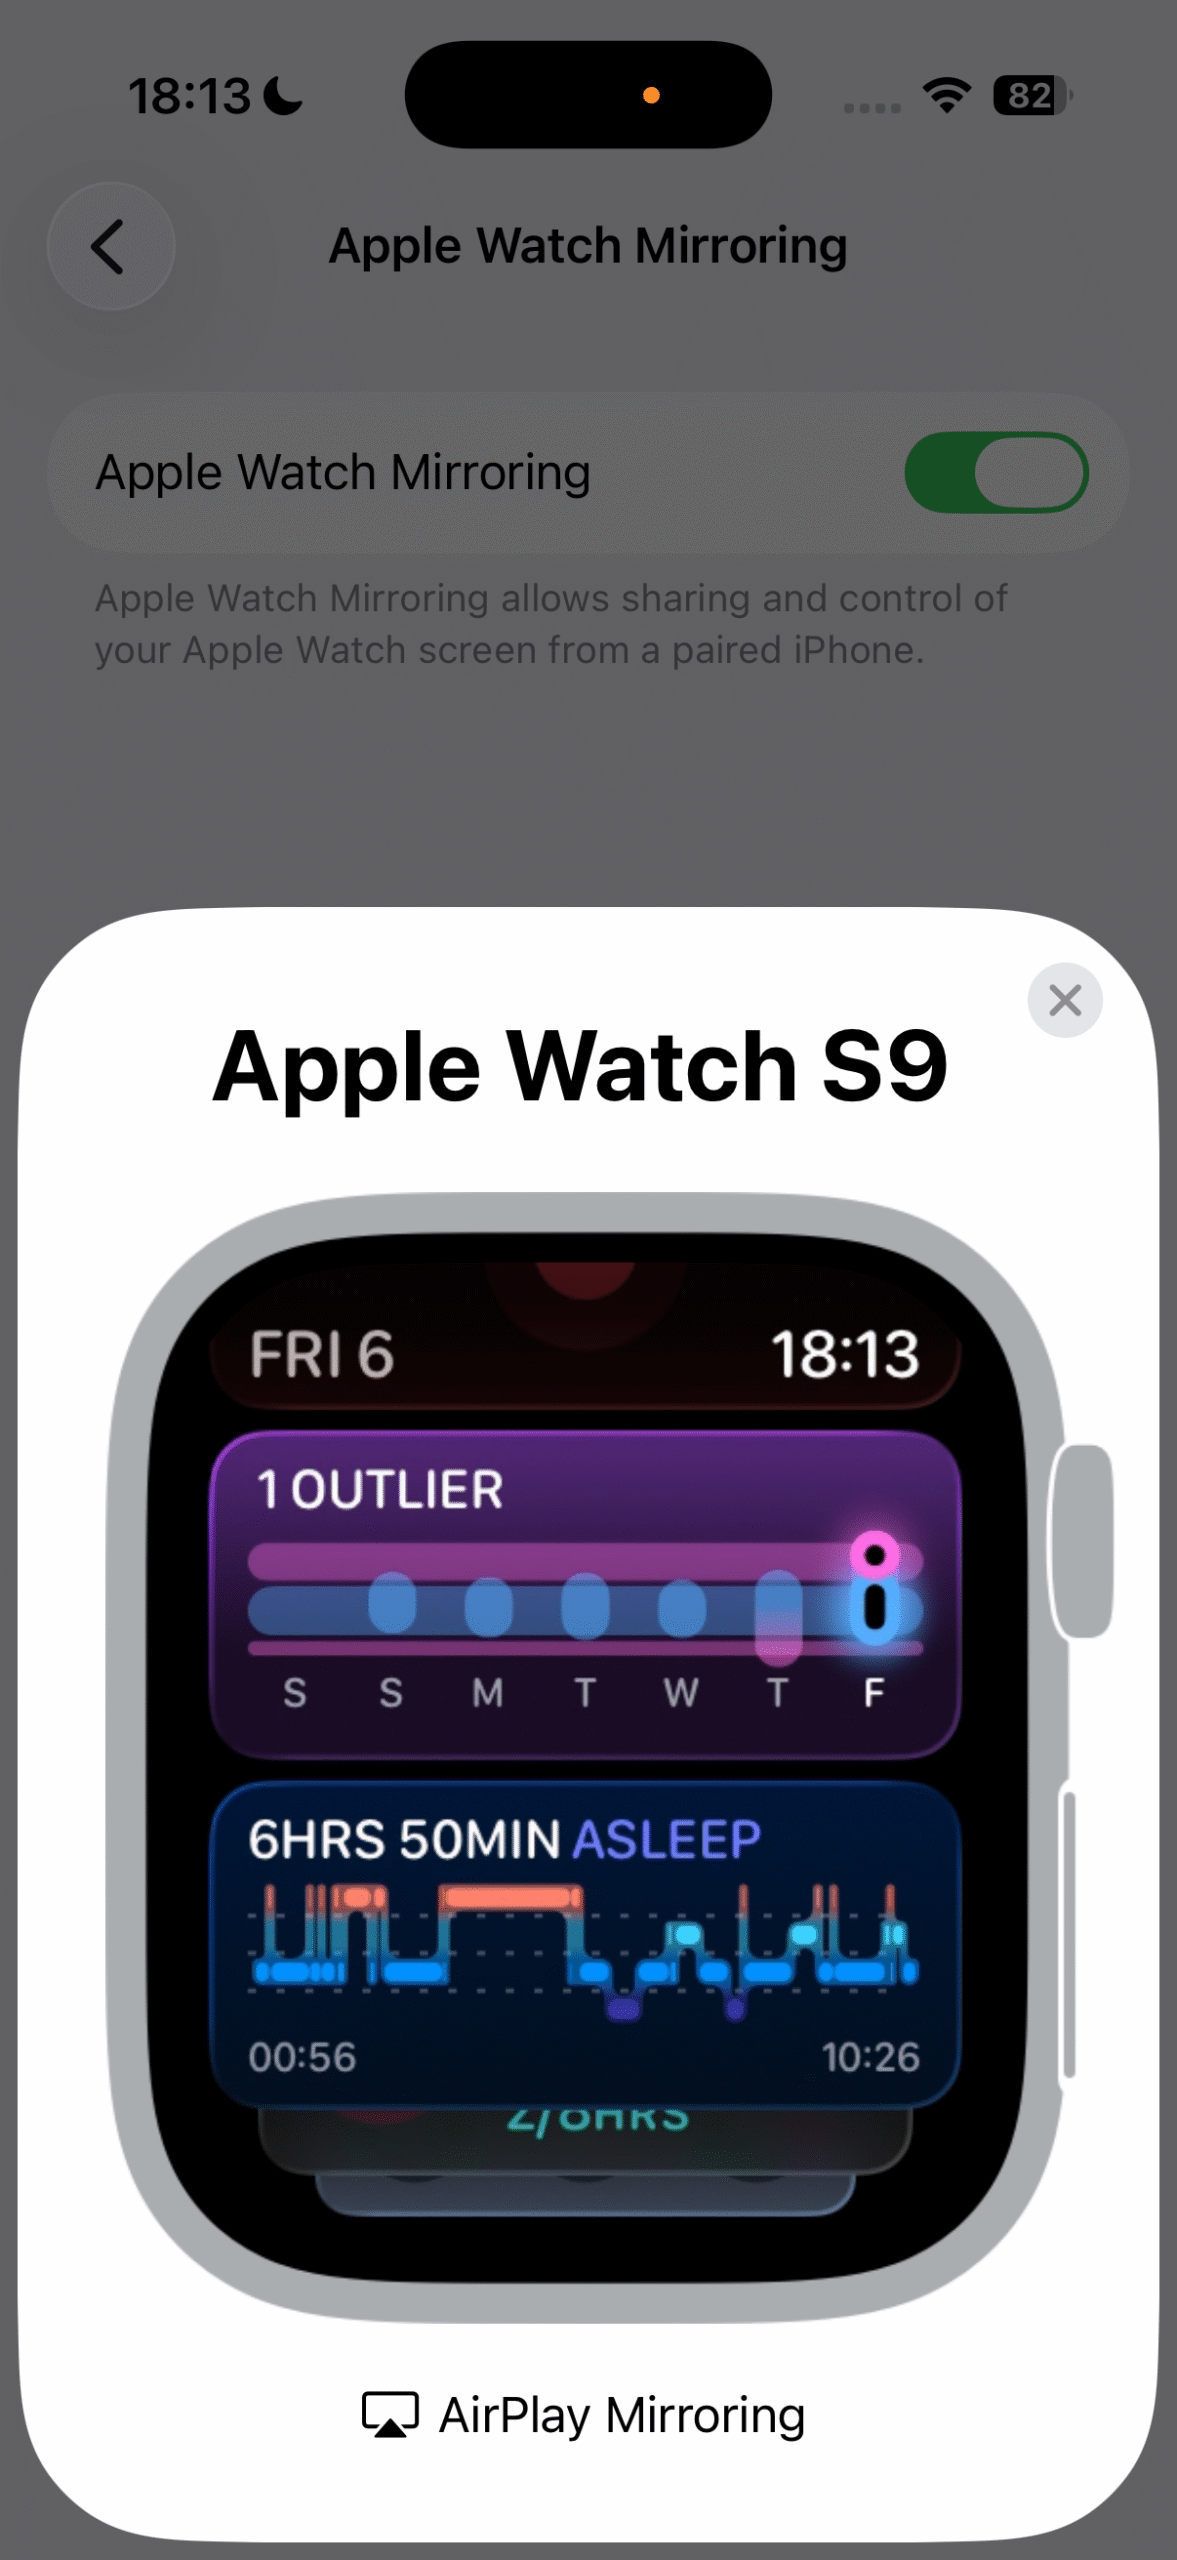
15. Control other devices
Under the Physical and Motor section, use Apple Watch Mirroring to control your unlocked and nearby Apple Watch from your iPhone. Or use Control Nearby Devices to perform a small range of actions, such as pausing media or opening Notification Center, on a nearby iPhone or iPad using your iCloud account.
16. Share settings
In the General section, tap Share Accessibility Settings. Turn on Sync to iCloud to make custom settings readily available on your other devices. Tap the Share Accessibility Settings button to temporarily send your settings to another device. They will be removed when you’re done.