
In this series, we take a closer look at apps worth your time, exploring what they do, why they’re great, and how to get started. This time, we’re checking out Obscura Studio, a refined and thoughtful photo editor for fine-tuning your snaps.

What is Obscura Studio?
An editor designed to help you quickly tweak exposure, curves, and color, and even turn your edits into reusable one-tap filters.
What makes Obscura Studio great?
The app is clean, focused, and approachable, just like Obscura Camera from the same creator. But even though Studio is simple to use, it offers plenty of depth.
How can I get started with Obscura Studio?
The tips below assume you’ve installed the app, granted it access to your photos, and started the one-week free trial.
Select a photo: On launch, Obscura Studio shows your recent photos. Use the toolbar to switch between recents, favorites, and edited images. Tap the albums button to browse albums or filter your collection by flagged and rated images. Tap any photo to open it.
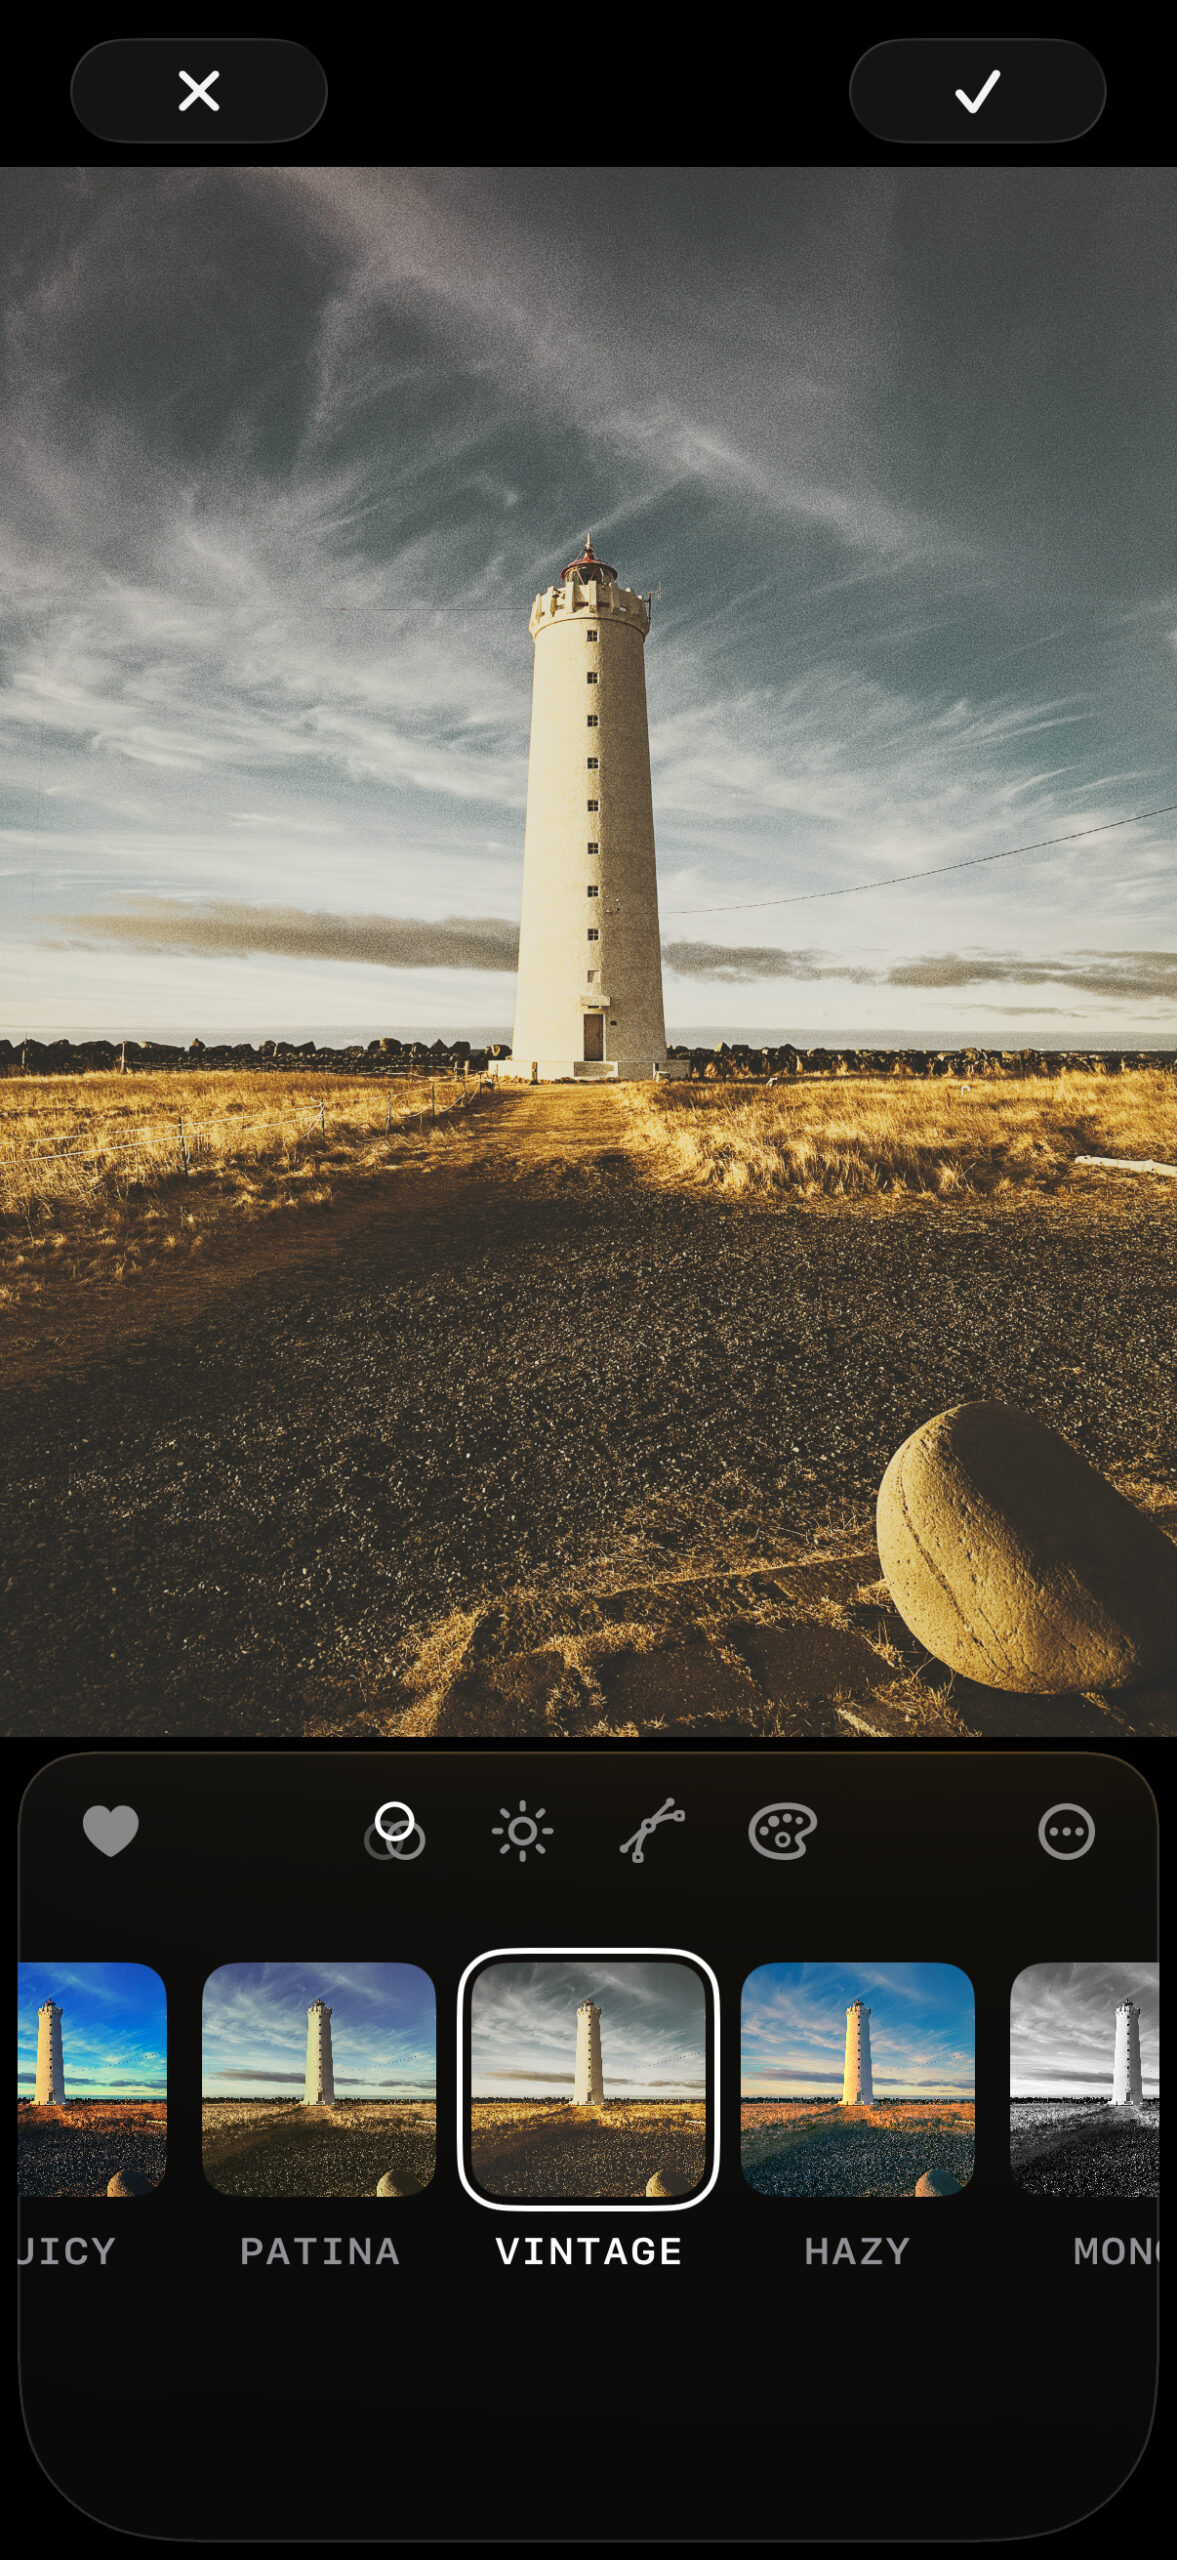
Apply a filter: Tap the Filters button (three circles). Original will be selected by default. Tap another filter to apply it. The presets cover a range of looks inspired by film stocks and classic photographic effects.
Save your image: Tap the tick at the top-right corner and choose Save to keep your edit. All edits are non-destructive, so you can always remove them later. Alternatively, choose Save as New to save your edit as a separate edited copy.
Make custom changes: Whether you’re starting from scratch or have applied a filter, you can refine your photo further by using tools in the Adjustments (sun icon), Curves (curve icon), and Color (palette icon) sections…

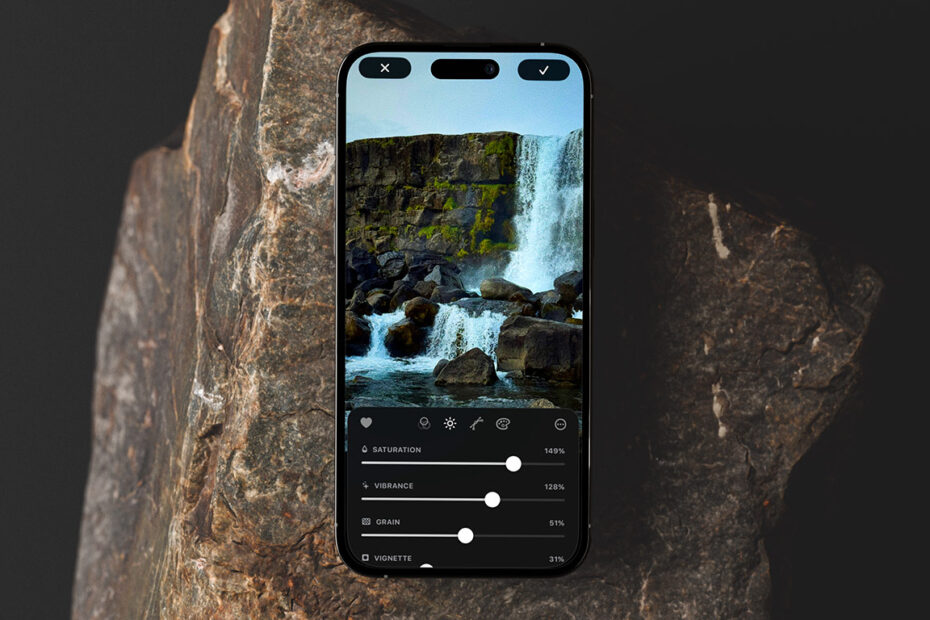
Adjust levels: In Adjustments, drag sliders to tweak exposure, contrast, highlights, shadows, saturation, and vibrance. Try each in turn to understand their effect. For punchier photos, increase contrast, saturation, or vibrance. For black and white, set Saturation to 0.
Update white balance: If a photo looks too warm – common with indoor lighting – scroll to White Balance and drag the top slider left. Small changes work best unless you’re deliberately aiming for a cooler look.
Add grain: Within the same section, use the Grain slider to add film-like texture. This works especially well with black-and-white images and pairs nicely with a vignette.

Apply a vignette: Increasing the Vignette value darkens the edges of a photo. Heavy use can create an atmospheric, stylized look. Used more subtly, it can gently draw attention toward the subject.
Edit curves: The Curves tool helps you reshape brightness across an image. Shadows sit at the left of the grid and highlights on the right. Darker tones are at the bottom and lighter ones at the top. Drag the control points to remap tones. For example, drag the leftmost control up to lighten dark areas of your image. Or make a gentle “S” curve to boost contrast.
Fine-tune colors: This selective color tool lets you target specific colors to adjust their hue, saturation, and brightness. Scroll down to adjust the tint and intensity of shadows, midtones, or highlights. For example, select Shadows, keep the tint red, and increase Intensity to add a reddish cast to darker areas.
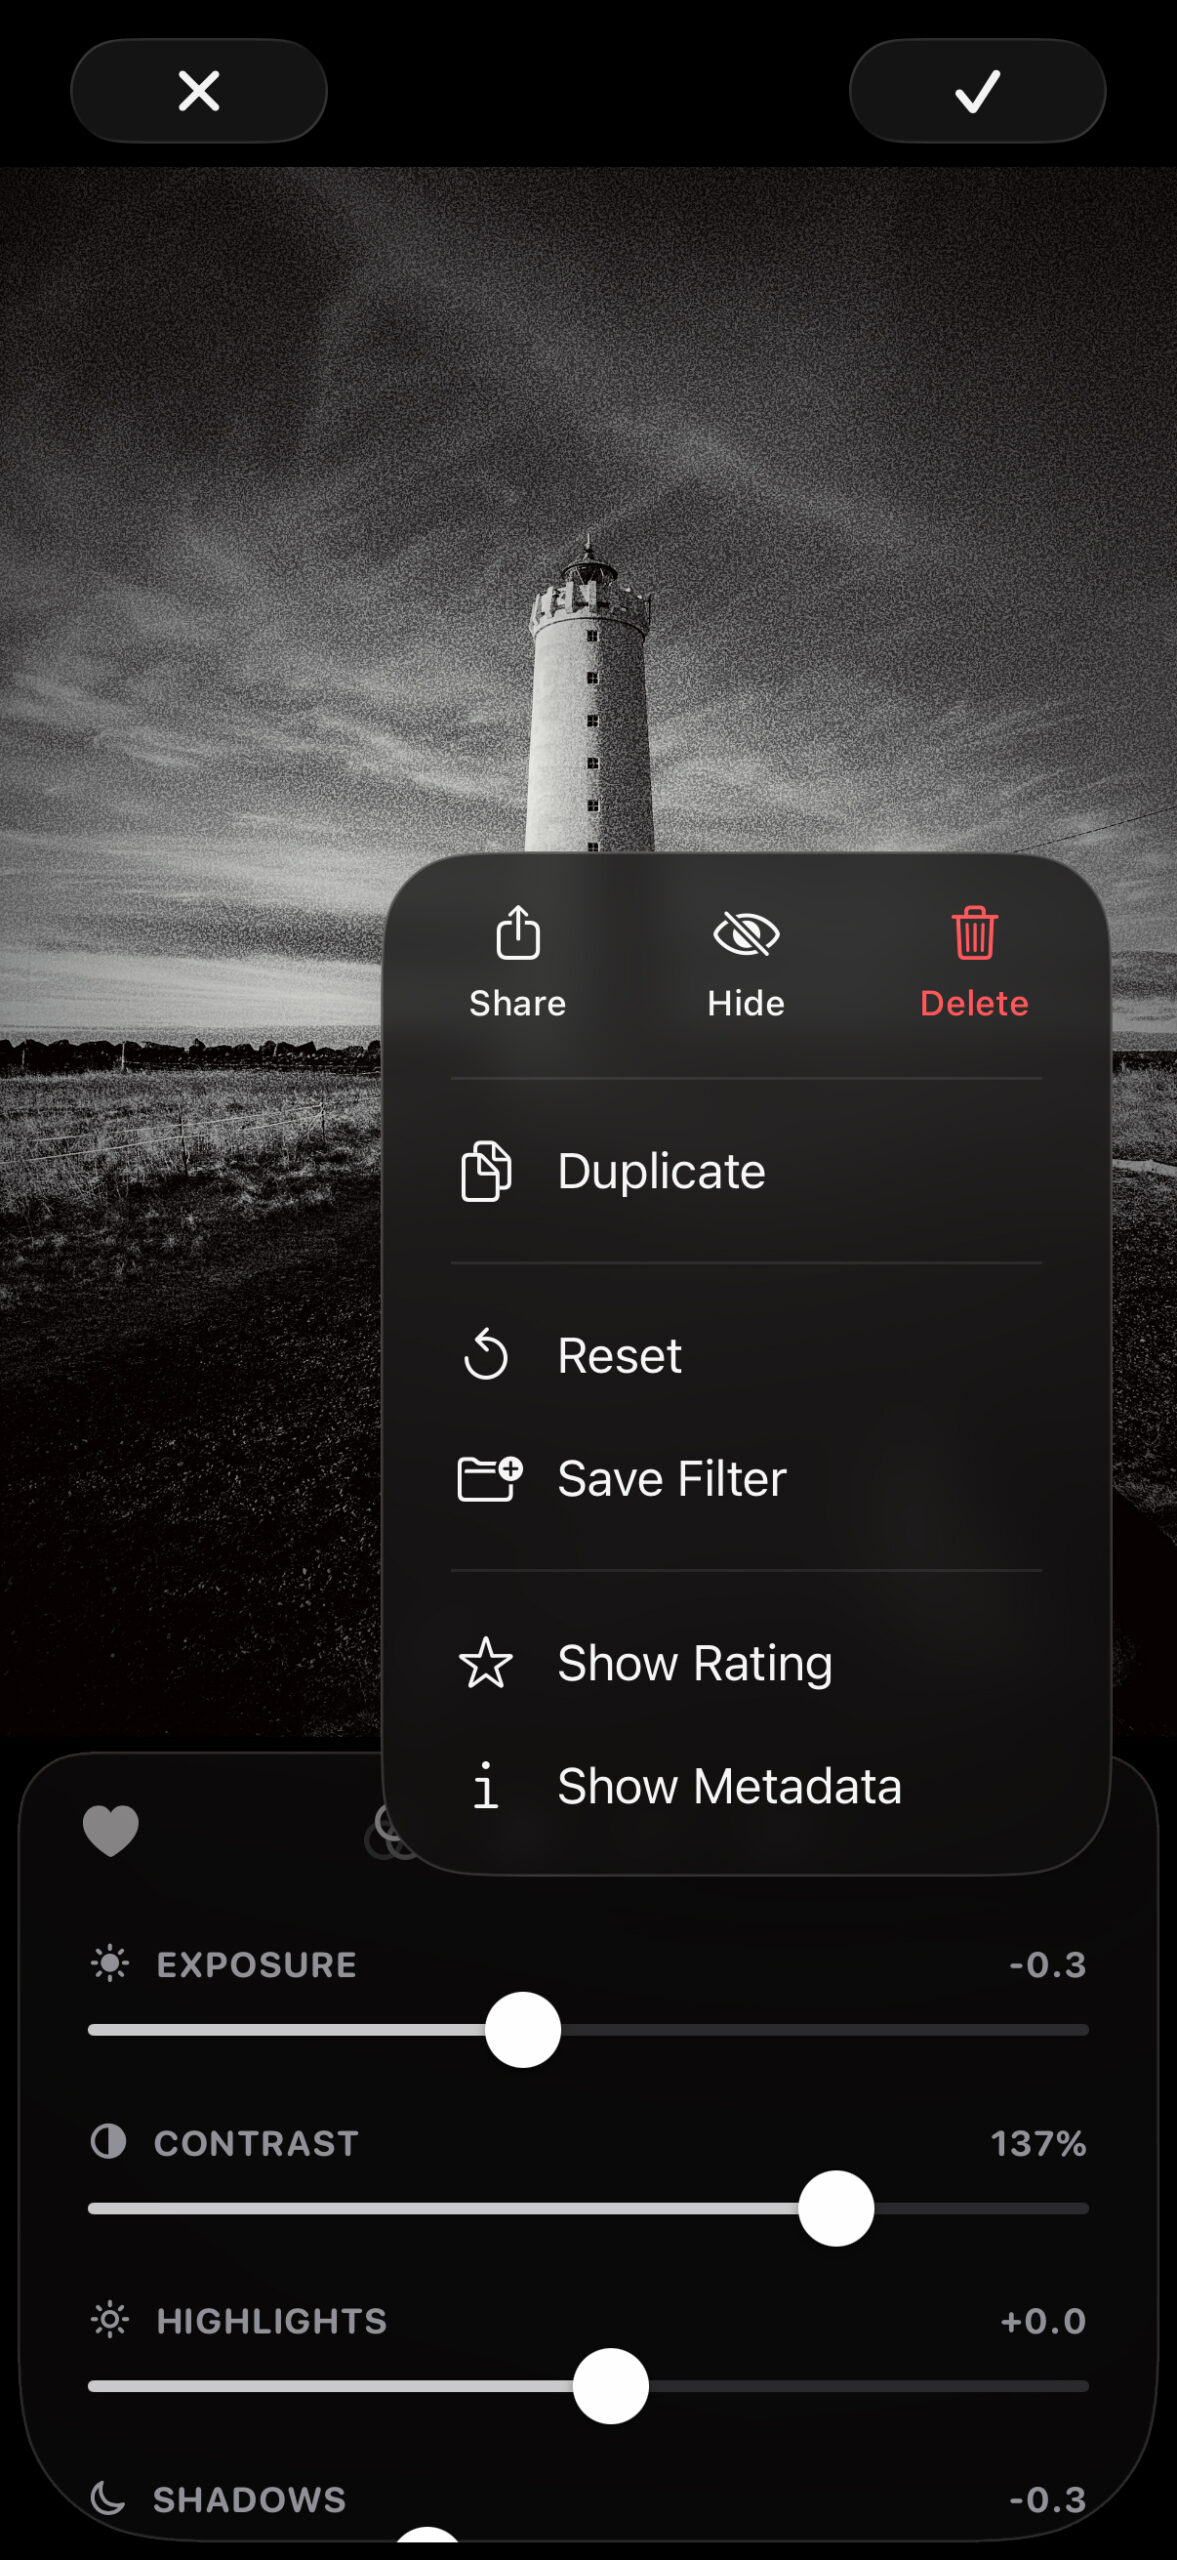
Share a photo: Use … > Share to send either the original or edited version of your image to another app or storage location.
Save a custom filter: Choose … > Save Filter to turn your current setup – curves, grain, color tweaks, and more – into a reusable one-tap filter available from the Filters section.
Get photo info: Finally, use … > Show Metadata to view photo details like resolution and capture hardware. Tap Show Rating to assign ratings and flags, which can be used to filter photos during selection.
Visit the Obscura Studio website or get Obscura Studio from the App Store. After the trial, Obscura Studio costs $2/£2 per month or $12/£12 per year, or you can instead select Obscura Ultra for $3/£3 per month or $25/£25 per year to unlock Obscura Studio and all the extra features in Obscura Camera.