
If you own an iPhone handset, the chances are you’re hooked up to a plan that provides a limited amount of cellular data each month. Of course, the problem with this setup is that it’s all too easy for smartphone owners to consume all of their cellular data before the end of their billing period.
If this is the kind of problem you run into month after month, follow this guide to better manage cellular data usage on Apple’s iPhone.
1. Check your usage
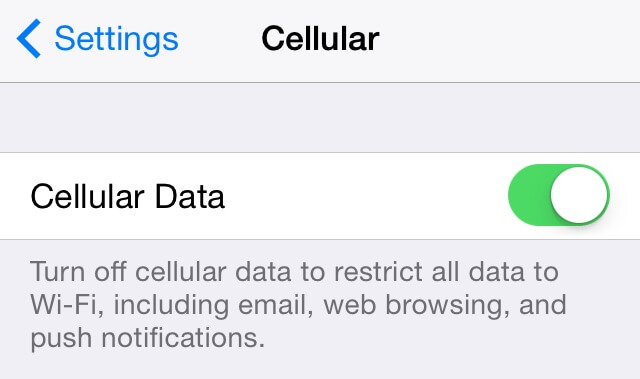
The first step when it comes to managing a limited data plan is to keep an eye on your usage from inside the iOS Settings application. Here, under the section marked “Cellular,” users can examine which applications are consuming the most data; it’s also possible to disable cellular data for particular iOS apps, too. In order to provide more accurate results, it would be a good idea to regularly tap the “Reset Statistics” button in this section of the Settings app. You’ll likely be on a monthly plan, and so resetting this data every 30 days would be a wise move.
2. Identify data hogs
If you often run out of your monthly allowance, identify data-hogs as quickly as possible.
In the same section of the Settings app, users are also usefully able to identify which iOS applications are using up the most cellular data. You can find a note of each app’s cellular consumption for the current period alongside its name and app icon; this data is broken down into kilobytes (KB), megabytes (MB, around 1,000 KB), and gigabytes (GB, around 1,000 MB). Of course, regularly-used Internet-based apps like Safari, Twitter, and your RSS client of choice will have consumed more data in the current period, but a bug or flaw in a less-used application could see the software consuming data unnecessarily and using up most – if not all – of your monthly allowance.
3. Photo Stream
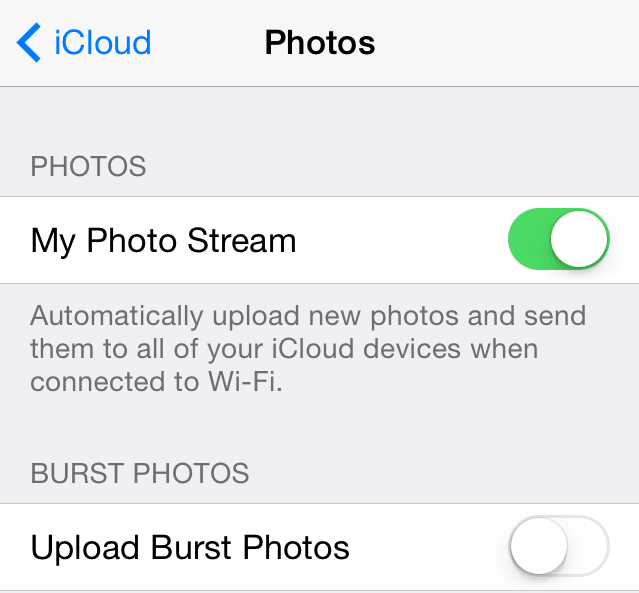
Photo Stream might be convenient, but it’s likely eating into your cellular data quota.
Photo Stream is a useful feature, but it’s also a big-time data-hog. The service works by synchronizing captured images on all your iCloud-enabled devices; however, if your iPhone is syncing photos over cellular, a sizeable chunk of your limited plan could be used. You can disable Photo Stream from inside the Settings app: simply navigate to the “iCloud” pane, and then switch “Photo Stream” from ON to OFF.
4. Documents & Data
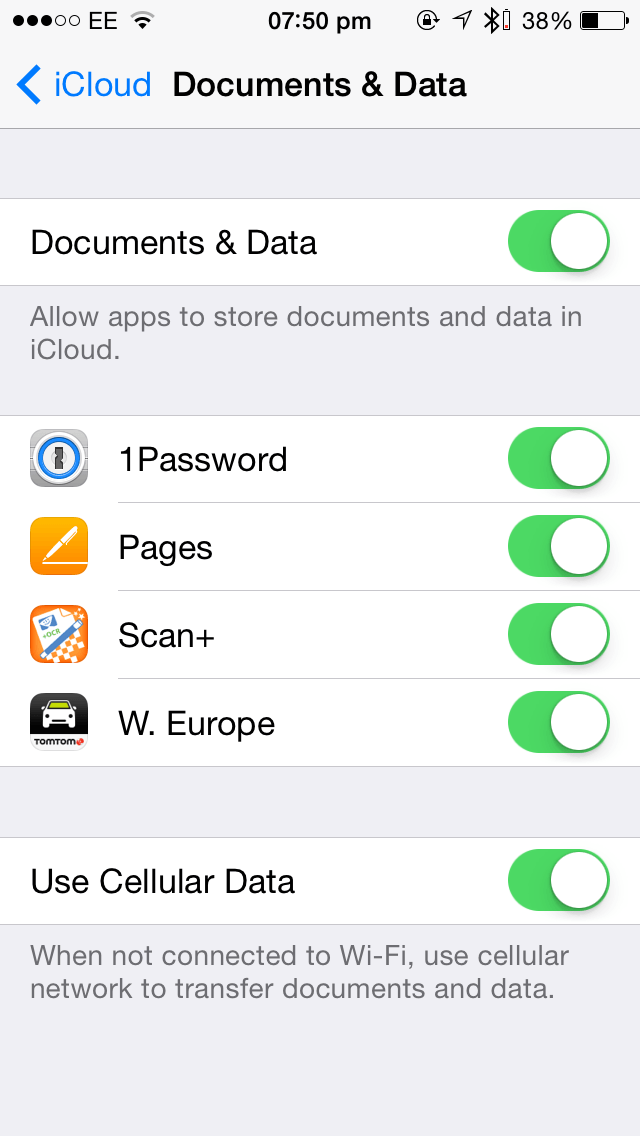
Disabling Documents & Data for individual apps or outright is as simple as switching a virtual button.
Much like Photo Stream, the iCloud-powered Documents & Data option in Apple’s iOS can be a real problem. The feature is designed to make users’ documents available between multiple iCloud-connected devices, and in order to achieve this, content from Pages, Numbers, and Keynote is synced with Apple’s servers. Depending on the size and number of your iWork documents, this could be a lot of data. You can disable this feature, however, from inside the Settings app: simply navigate over to the “Documents & Data” section of the “iCloud” pane and toggle the feature off.
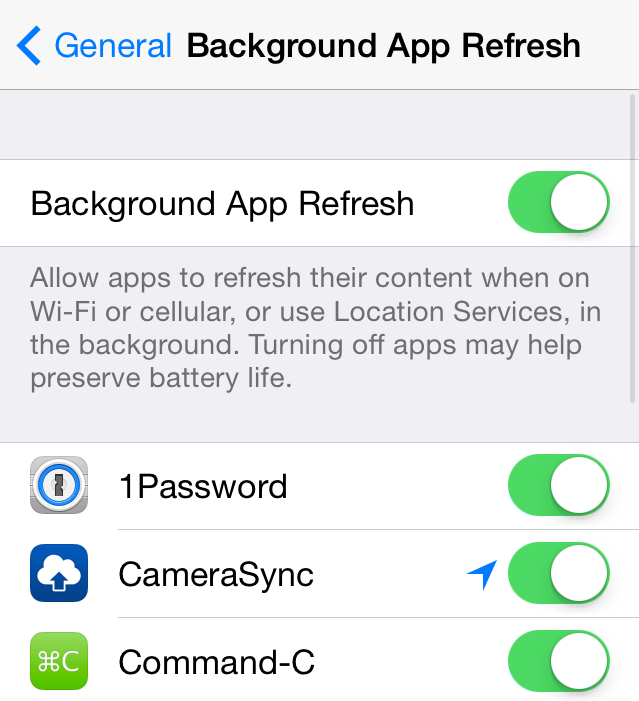
5. Background App Refresh
One of the most useful-but-troublesome additions which appeared in Apple’s iOS 7 is Background App Refresh. When enabled, the feature allows installed iOS applications to fetch for data and update content automatically in the background. While this means your chosen weather application will always be up to date and that your read-it-later app should always remain populated, Background App Refresh will also likely take a large slice out of your cellular data allowance. To conserve as much of your cellular data as possible, disable the feature outright: the option to do so can be found in the Settings app’s “General” pane.
6. Push and Fetch
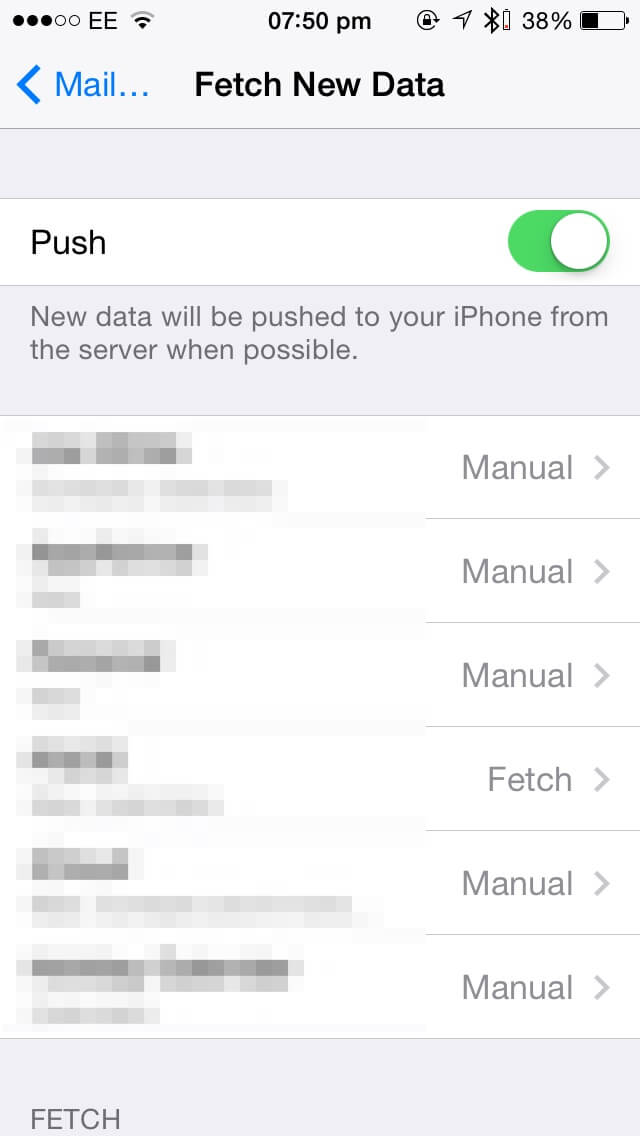
Disabling push on your iPhone can save a lot of cellular data.
One of the iPhone’s best features is its ability to provide users with on-demand access to their mailbox. Apple’s iOS does this using the Mail app: a built-in application that can connect to an iCloud, Microsoft Exchange, Google Mail, Yahoo! Mail, AOL, our Outlook email account in order to deliver messages direct to your smartphone. When it comes to choosing how data is collected, however, iPhone owners have three options: fetch, push, and manual collection.
Both push and fetch are designed to collect email automatically: when either one or other of the options is enabled, users should usually have email messages ready and waiting for them in their Mail application, and both are without doubt ultra-convenient solutions. On the one hand, push indeed “pushes” content over to smartphones and tablets as messages reach the server; conversely, fetch works by checking a configured mailbox at regular intervals. Each one, however, can eat into your data, and if you find that your limited allowance isn’t enough to get you through the month, push and fetch may indeed need to be disabled.
You can configure fetch options per-account from inside the “Mail, Contacts, Calendars” section of the Settings application. Here, individual accounts can be assigned a fetch cycle. Push, on the other hand, can be outright disabled using the toggle button located at the top of this screen. Once both options have been disabled, email will reach your iPhone when “manually” collected – that is, when users launch the Mail application and allow the usual connection process to take place. It might not be the most convenient solution, but this method will nevertheless result in far less data consumption per month than the traditional fetch or push methods.
7. Get smart with Wi-Fi hotspots
Our last quick-tip for limiting data consumption on an iPhone handset is to get smart with Wi-Fi hotspots. BT OpenZone, The Cloud, and more offer access to wireless hotspots, and browsing the Web on a network such as this obviously won’t eat into your data. Wi-Fi is even available on countless public transport options, too – from buses to trains – and a selection of iOS profiles make the sign-in process quick and painless.

A more drastic solution, of course, is to disable cellular data outright!
There you have it: our seven-point guide for limiting cellular data. If you start at the beginning and work your way down, even the most data-hungry iPhone owners out there should be able to cut back on their usage in no time at all.