
iCloud is a really useful service provided by Apple, allowing users to automatically store important data “in the cloud” so it’s easily accessible from all their devices. It’s what keeps your apps in sync from your iPhone to your iPad, and it’s how you can restore all your old documents and data when you get a new device.
But if you run out of space in iCloud, that means your device will stop syncing your stuff and stop making backups. That’s probably not an issue for a few days, but in the long term, it’s a big problem. It means you could lose all kinds of important things if your device is lost or destroyed.
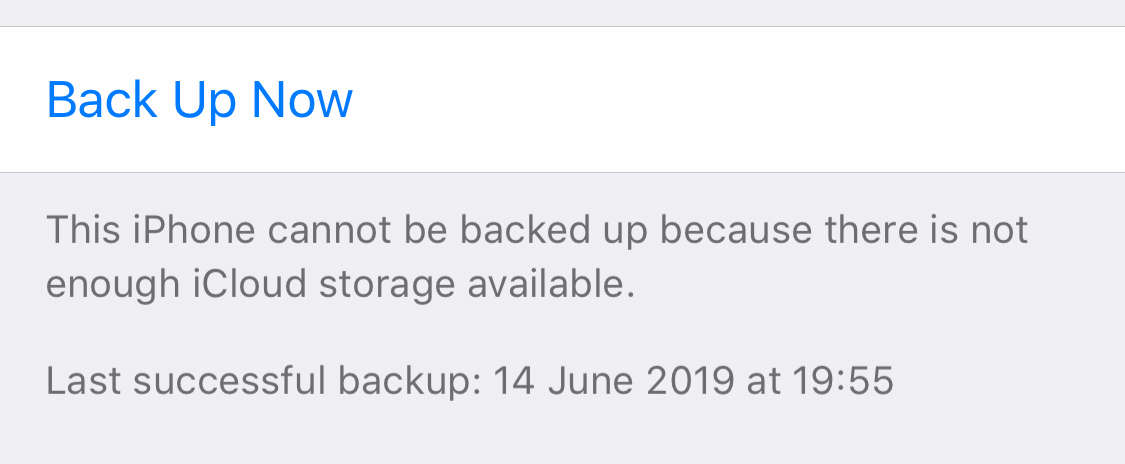
If you run out of space, iOS is not shy about reminding you – you’ll get daily reminders to sort it out. But there are a few ways to do so, and we can talk you through them right here.
Check your usage
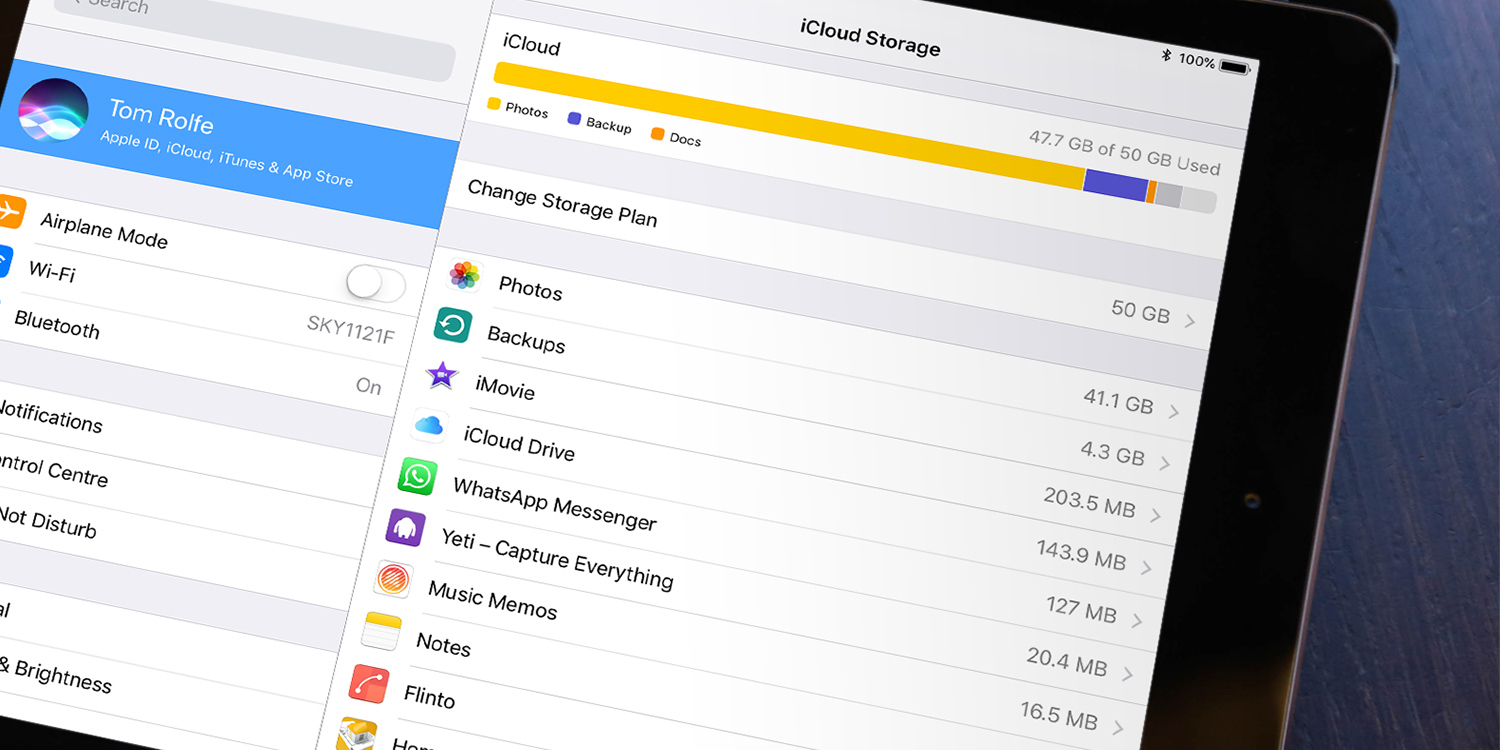
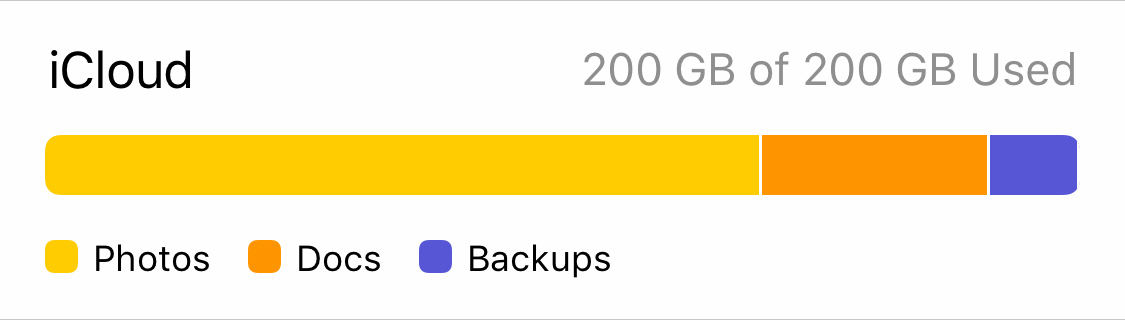
First off, open Settings, tap your name at the top of the menu and then choose iCloud. This will present a graph showing how much of your storage allowance has been used, above a list of toggles for every app and service that’s compatible with iCloud.
Here, you can turn off anything that’s not essential to keep in iCloud. But remember, turning it off means you lose continuity between devices!
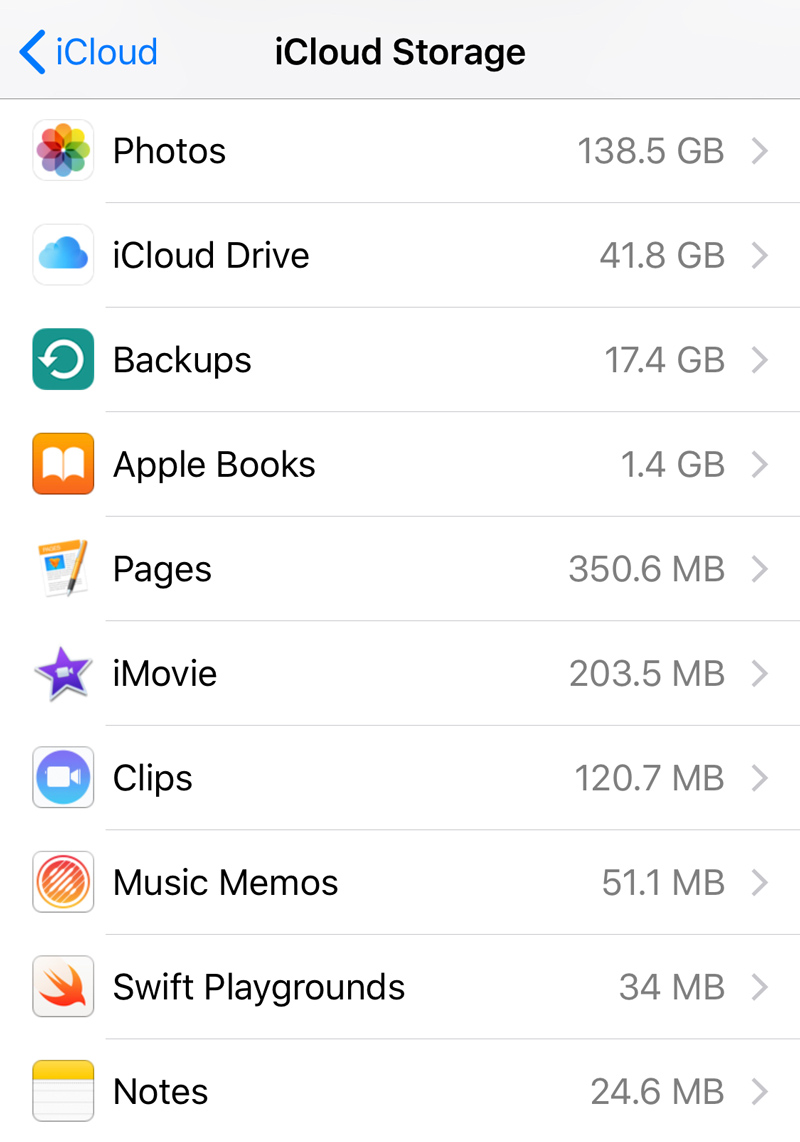
Press Manage Storage for a more detailed breakdown of your usage. You’ll see a list of services, with the most storage-hungry culprits up top. This should give you a clue as to what needs to be trimmed in order to lose a few GB and get back within your storage allowance.
Stick with iCloud Photos
In the vast majority of cases, we’d expect a burgeoning camera roll to be the root of the problem. If you snap a lot of pictures and video clips, Photos can soon take up a huge amount of space. A quick fix would be to disable iCloud Photos and store your snaps offline, but that has three major downsides:
1. No automatic photo sharing between devices. You can only view a photo on the device it was taken on.
2. No backup of your library. That means if your device is lost, stolen, or broken, you can say goodbye to those treasured memories.
3. No option to optimize storage. Full-sized pictures will be kept locally on your device, which can fill up quickly.
For those reasons, we wouldn’t recommend disabling iCloud Photos. Instead, you’ll either need to manually trim down your camera roll, or shell out a few bucks to increase your iCloud storage capacity.
Manually trim your photos
This can be an overwhelming task if you have many thousands of images stored in Photos, but there are a few tips that can make things easier.
From the Albums tab, look for the folders dedicated to specific media types. Screenshots are usually fair game for deletion, while removing lengthy Videos is a quick way to free up a lot of space. Slo-mo videos are incredibly storage-hungry, so make sure to check through that section too. Deleting a few slo-mo videos could equate to hundreds of still photos.

Once you’ve cleaned out your library, make sure to head to the Recently Deleted section of Photos to ditch them for good. By default, items are sent to this graveyard folder for 40 days before permanent deletion, in case you change your mind. But if you’re sure, you can speed up that process. Hit Select followed by Delete All to trash the lot for good and reclaim that space immediately.
Of course, it’s not just photos that can be trimmed. If the storage breakdown shows that another app is taking up too much space in iCloud, you can open the offending app and clear its data.
Increase your iCloud storage
Sometimes getting rid of stuff is just not an option. Or maybe it is, but you don’t have the time or energy to sort it out. Whatever the reason, there’s another way – simply increase your storage limit!
Apple gives everyone 5 GB iCloud storage for free, which these days is not a lot. The good news is you can multiply that tenfold to 50 GB for a less than a dollar a month. ($0.99/£0.79 to be precise). This upgrade is a no-brainer for most users – it’s a lot of extra space at a very low cost.
The higher storage levels aren’t quite so wallet-friendly, but depending on your usage they may be worthwhile for you. 200 GB is a great mid-range plan, and anyone who shoots and edits a lot of 4K video may want to consider the top-tier 2TB plan. (That’s equivalent to a whopping 2048 GB, if you were wondering.)
To do this, navigate back to Settings > iCloud > Manage Storage and press the Upgrade button. You’ll then be given an upsell screen to move up to the next payment tier. Tap your preferred capacity and hit the Buy button to confirm.
There we have it! Hopefully, this guide will help you trim down your documents, beef up your iCloud storage, and be more confident that all your files, photos, and backups are safely stored in that giant server in the sky.