
- Create a digital version of your own voice
- Speak typed text aloud using Live Speech
- Use your virtual voice on calls and FaceTime
Apple includes a pair of powerful accessibility features that work together to turn typed text into natural-sounding speech – using either a system voice or a digital version of your own. By recording a short set of spoken phrases, it’s possible to create a personalized voice that can be used to communicate across calls, FaceTime, and in-person conversations.
For people who are at risk of losing their voice thanks to conditions like ALS, this can be genuinely life-changing. But even beyond accessibility needs, it’s a fascinating glimpse at how far voice synthesis has come – and it only takes around 15 minutes to set up.
Banking your voice
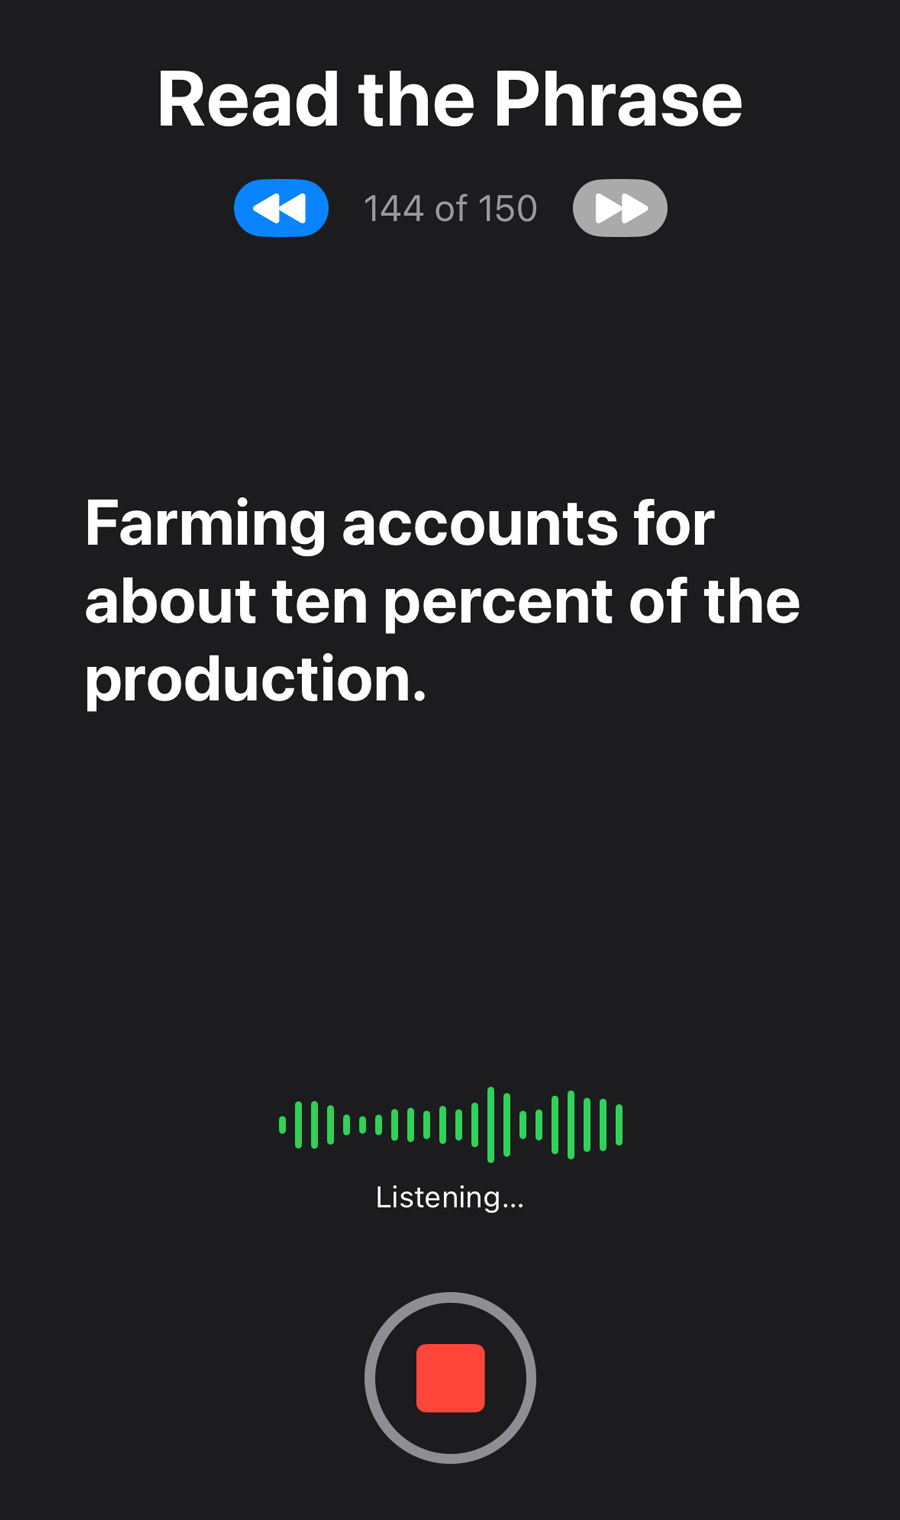
To create a personal voice, you’ll need to read aloud a series of 150 random sentences, which are then synthesized with machine learning smarts into a digital voice.
Open the Settings app and choose Accessibility. Scroll down to Personal Voice and choose Create a Personal Voice. The process takes around 15 minutes, and you’ll need to be in a quiet place. Apple recommends you speak naturally and consistently, with your device 6-12 inches from your mouth.
Follow the prompts to name your voice and work your way through the sentences. You can use the blue arrow buttons to move back or forward through the phrases, if you need to re-record one or skip over one you don’t like. You don’t have to do the whole thing at once, so take your time. Your progress is automatically saved in case you need to exit and return later.
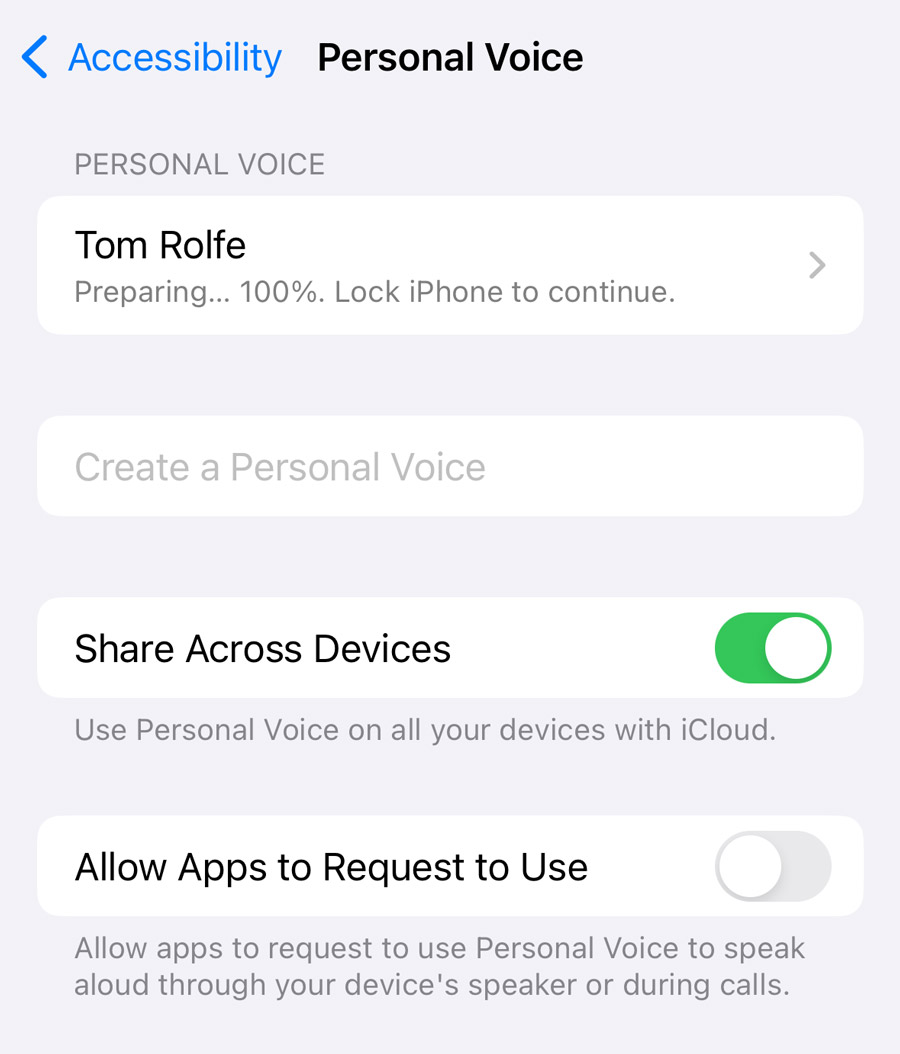
When you’re done, it’s time to play the waiting game. Generating a voice takes a lot of processing, and as such your device can only work on it when charging and locked. The process is paused when you use your device so as not to slow down your apps. You’ll get a notification on your Lock Screen when the personal voice is ready, although be warned it’s not quick. In our testing, it took 48 hours of regular usage before it was complete, but your mileage may vary.
What does it sound like?
The results generally sound like a combination of your real voice and Siri. You get a realistic tone with a slightly robotic cadence. Still, pretty impressive.
Personal Voice can only be used in combination with another new feature called Live Speech. That unfortunately means you can’t replace Siri’s voice with your own or use the Speak function to read entire web pages or documents with your dulcet tones. But there are plenty of places Live Speech can be utilized, and it will work on all your Apple devices running the latest software if you toggle on Share Across Devices.
How to use Live Speech
Live Speech is a type-to-speak feature that allows users to speak with a synthesized voice via FaceTime, Phone, and more. By default, you can use it with any of Apple’s voice presets, but if you have a Personal Voice set up you can use that too. Either way, it works the same.
First, you’ll have to toggle Live Speech on from the Settings app, under Accessibility > Live Speech.
This menu is also where you’ll choose which voice to use. Personal Voices will be at the top if you have any, but there’s a wide range of voices with different accents and tones to choose from. Tap a voice and use the play button to preview it. When you find one you like, tap the cloud button to download it to your device. Note that some voices have Enhanced and Premium options, which sound more realistic but take up more storage space.
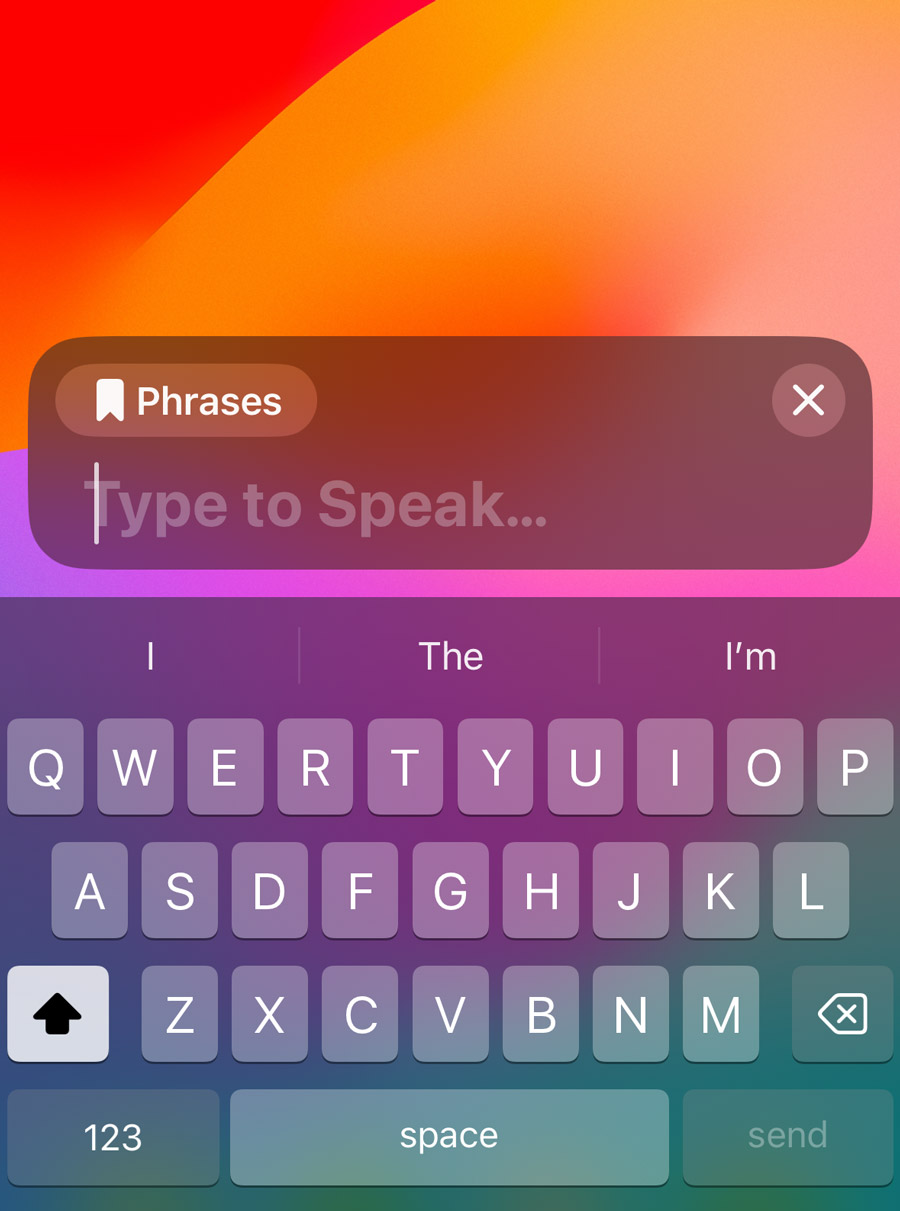
You can also add Favorite Phrases from the same page in Settings, which is extremely handy for quick access to things you’re likely to say often. Use the + button to add a new phrase. There doesn’t seem to be a character limit, meaning you could even use this function to prepare something longer form like a speech.
Testing your new voice
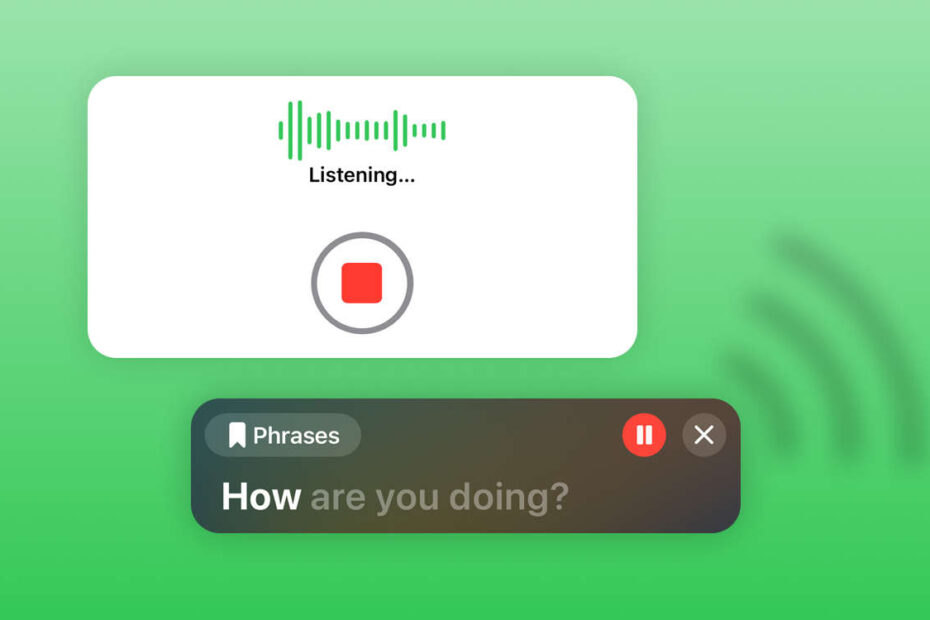
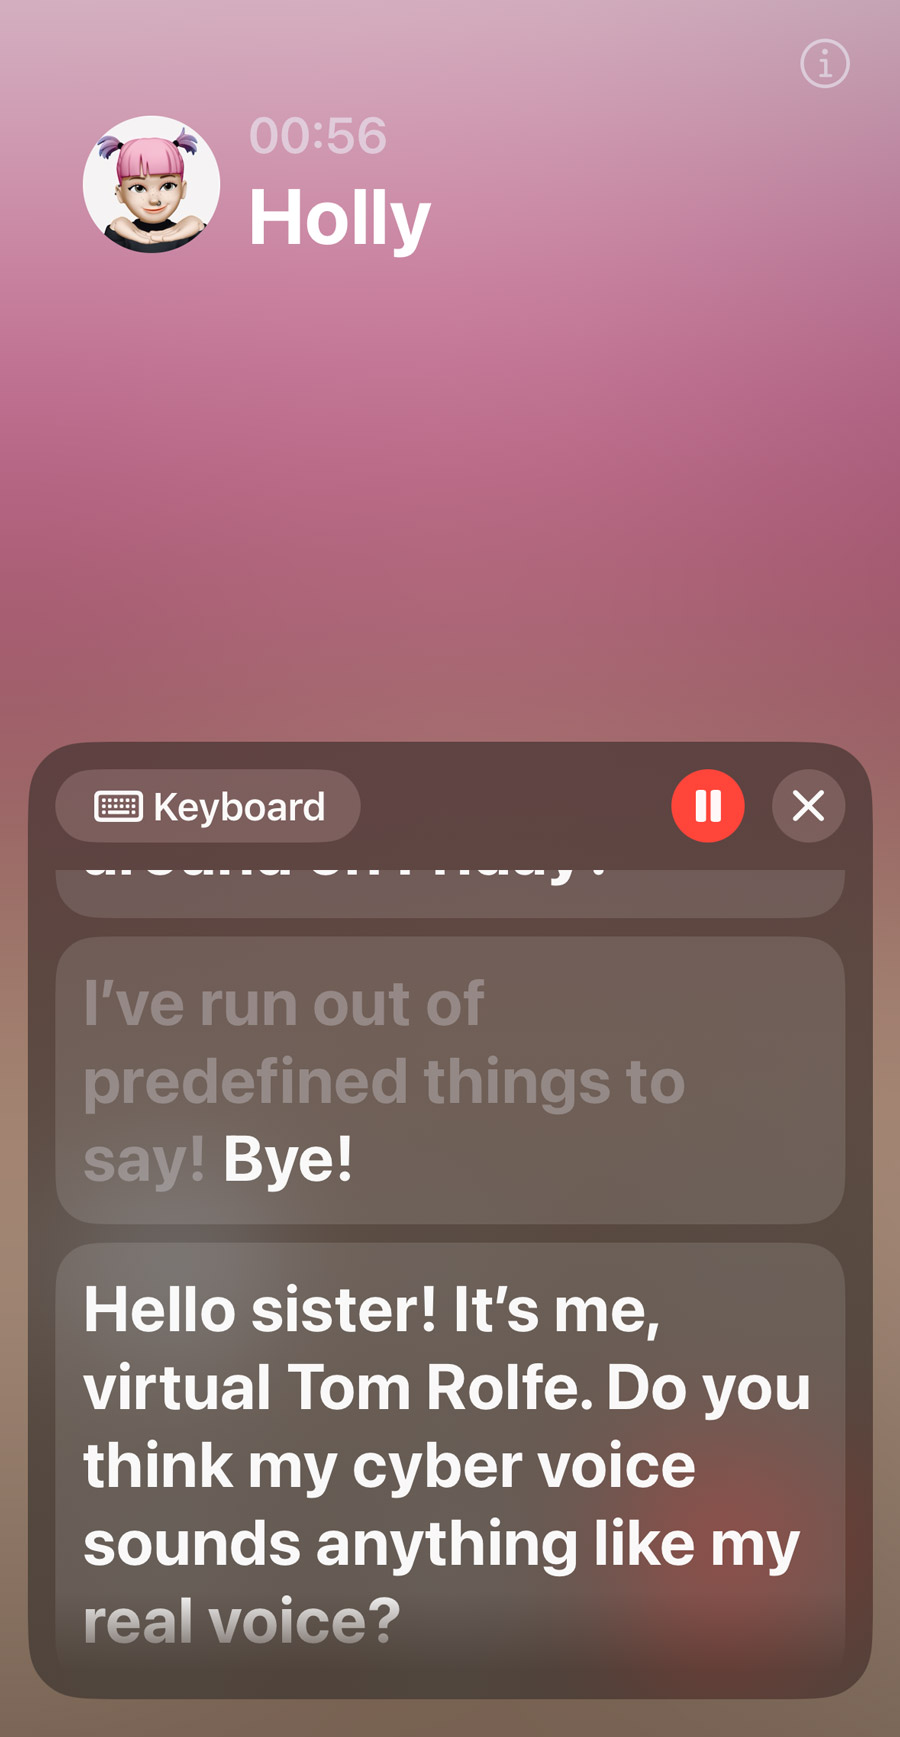
Now all that setup is out of the way, we can finally start a conversation. Triple-click the side button to show the Live Speech view at any time. Here you can type to speak or hit the Phrases button to choose something you wrote earlier.
Generally, your chosen phrase will be spoken aloud, even if your device is muted. But if you’re in a Phone or FaceTime call, your speech will instead be played through the recipient’s speaker, as if you’re really talking to them. There’s no special setup to make this work, simply start a call and then triple-click to launch Live Speech.
What about privacy?
Personal Voice uses on-device machine learning and is not accessible by Apple. Live Speech is accessible from the Lock Screen, but you’ll need to unlock the device before it will speak anything out loud. Third-party app developers can build functions that utilize Personal Voice, but you need to grant explicit permissions.