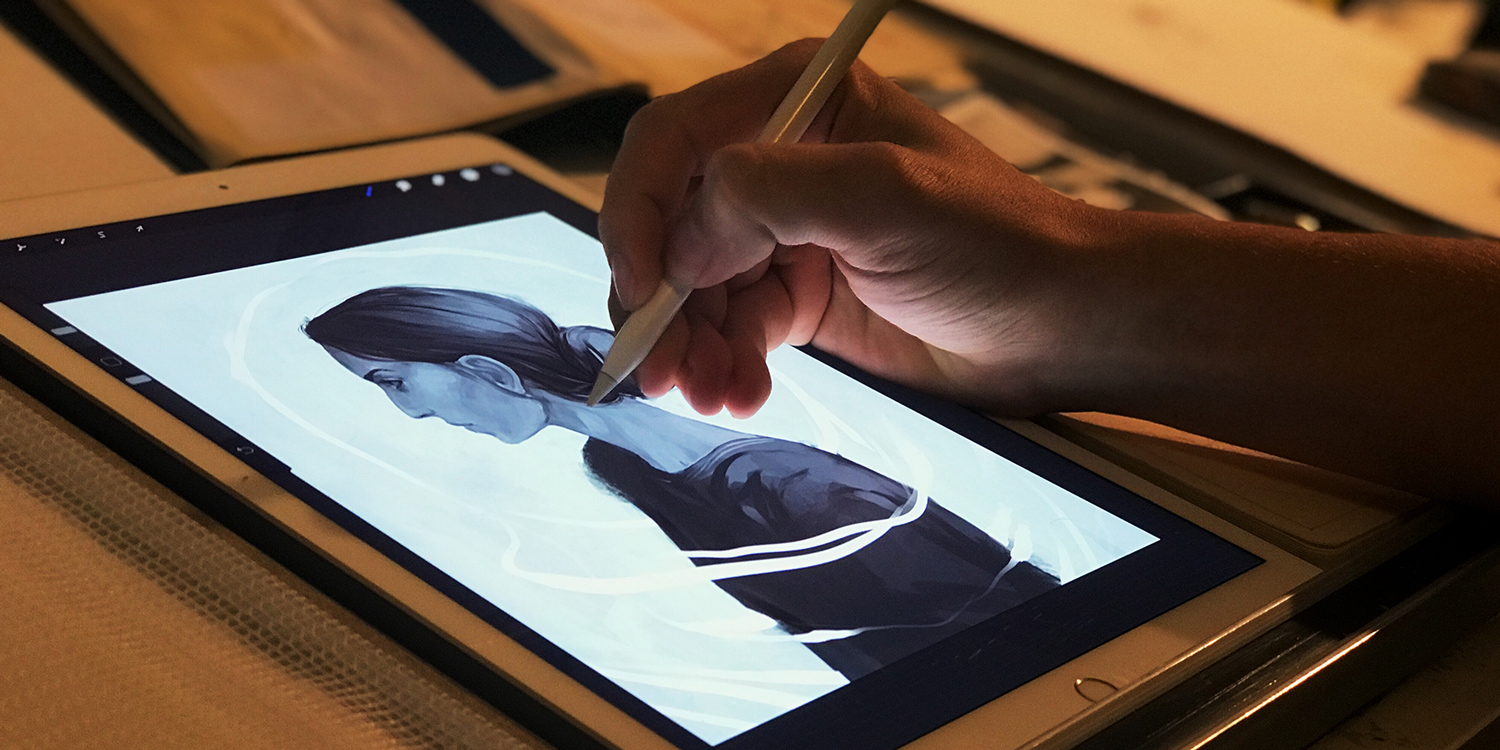

Pro animator Jimmy Makepeace shows us how to get started with the basics of animation using Procreate 5 for iPad
With the release of Procreate 5, hand-drawn animation is smoother and more intuitive than ever – to the point where the app has become an essential part of my workflow as an animator.
Here, I’ll show you how to make a simple animation like the one shown below. It’s a great way to learn the fundamentals of frame-by-frame animation and how to get started in Procreate. Best of all, you don’t need any special drawing talent to give it a go!
Setting things up
To start, set up a new canvas with the + button on the main menu. Procreate limits the number of animation frames based on the resolution, but the default Square canvas (2048 x 2048 pixels) gives us 124 frames to work with, which is more than enough for a short animation. For something longer, you’d have to work at a lower resolution or in batches.
Once you’re set up, head to the Actions menu (the wrench icon in the top left) and select the Canvas tab. Toggle Animation Assist on. This brings up a little bar at the bottom of the display that acts as your timeline for the animation.
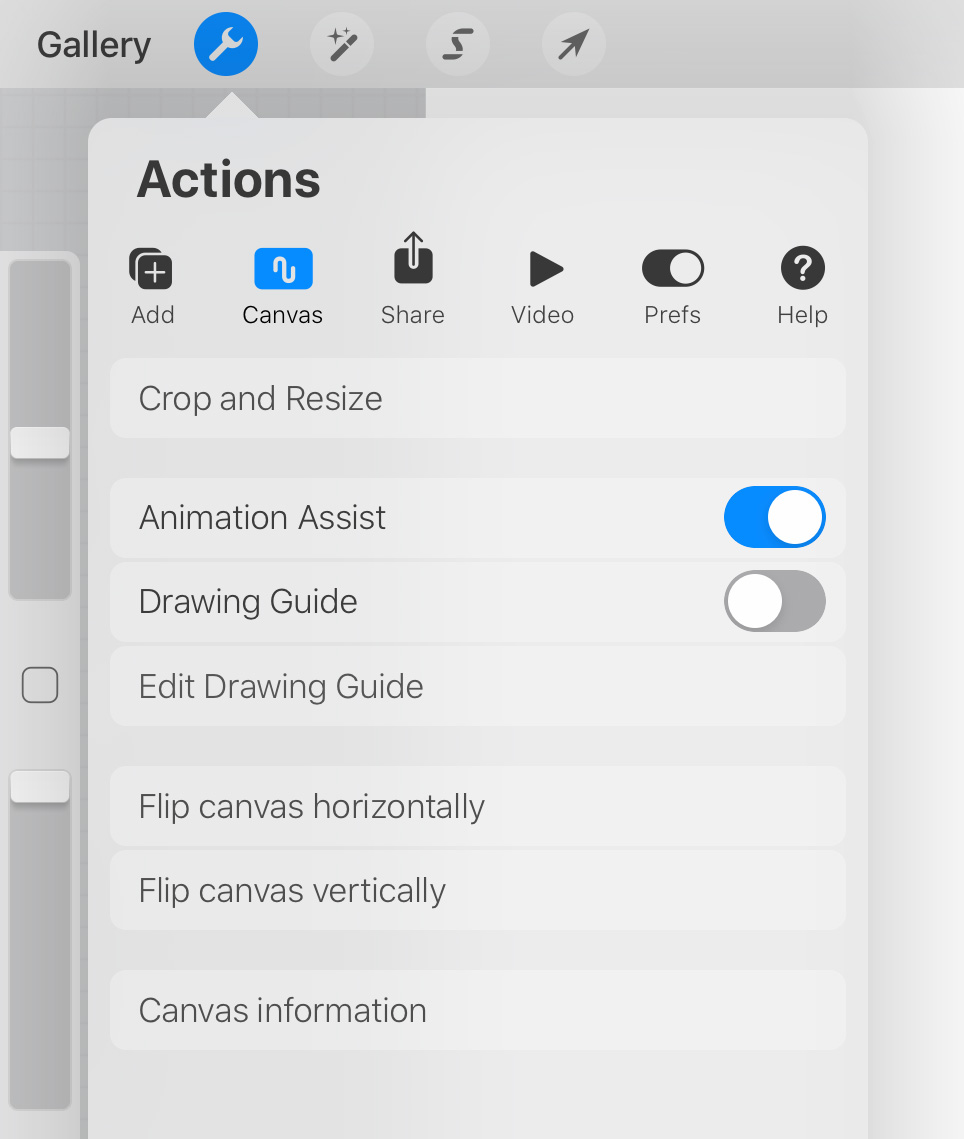
Tap Settings on the Animation Assistant and you’ll be given a set of options. First is frames per second (fps), which is how fast your animation will run. I’d recommend starting with 12 fps – a pretty common industry standard that’s fast enough to give the illusion of movement whilst still retaining a nice crunchy style. Traditional Disney animations use 24 fps, but that would mean drawing twice as many frames!
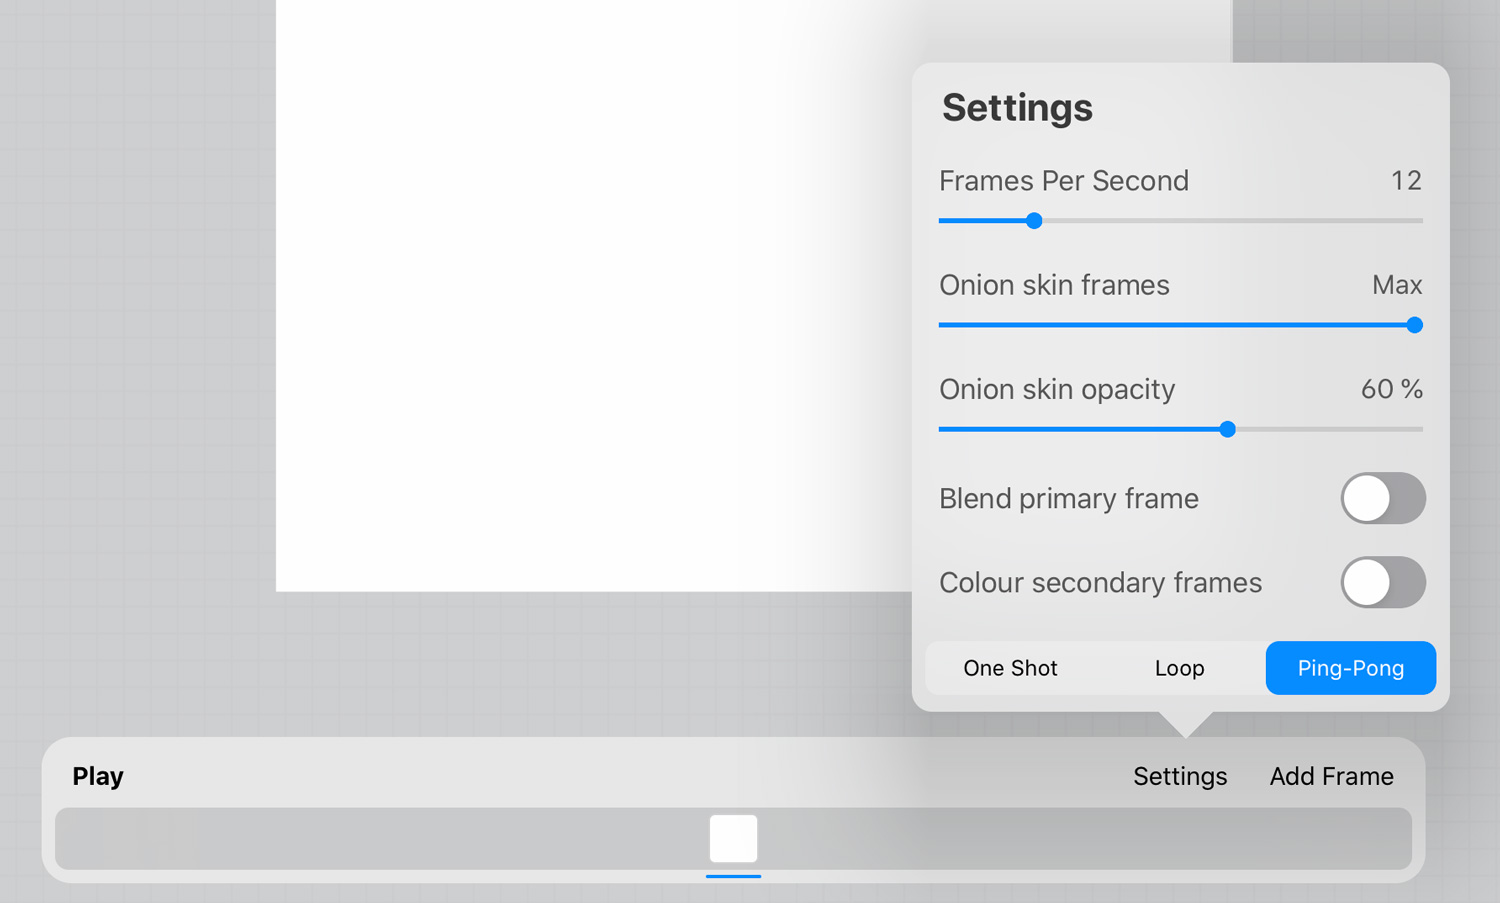
Next is onion skin frames, a feature that overlays a faded view of the frames before and after your current frame to help line things up accurately. This is an incredibly useful fundamental of animation, as it allows you to see where the movement is coming and going from. For now, leave it at max. You can toy with the opacity slider later if you’re finding the overlays difficult to work with.
We can save some time by selecting ping-pong from the playback options at the bottom. This means we don’t have to draw our shape animating twice – it’ll automatically play in reverse when it ends.
Every frame a painting
Procreate treats each layer as a frame, so in order to extend your animation, you need to add a new layer. Luckily, the Animation Assist feature makes this very simple!
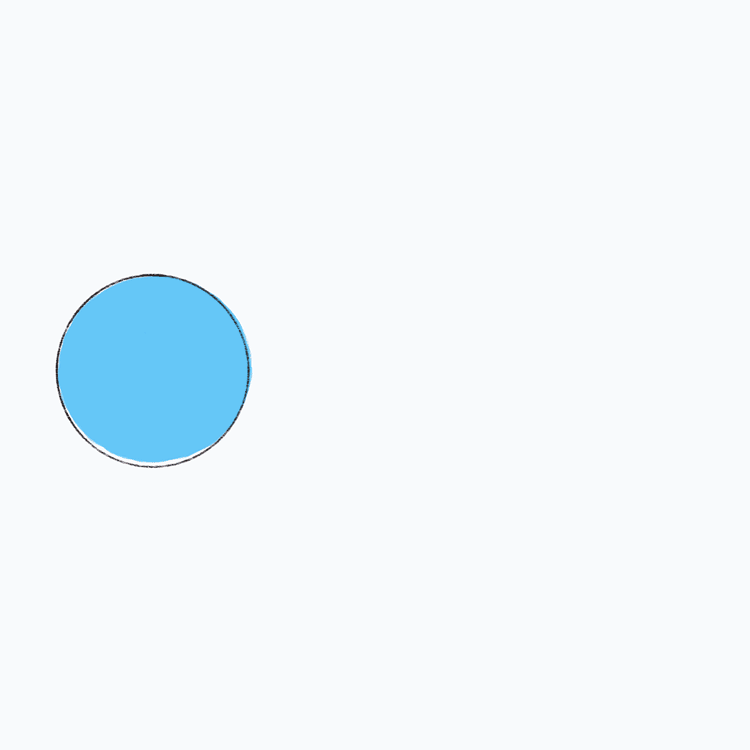
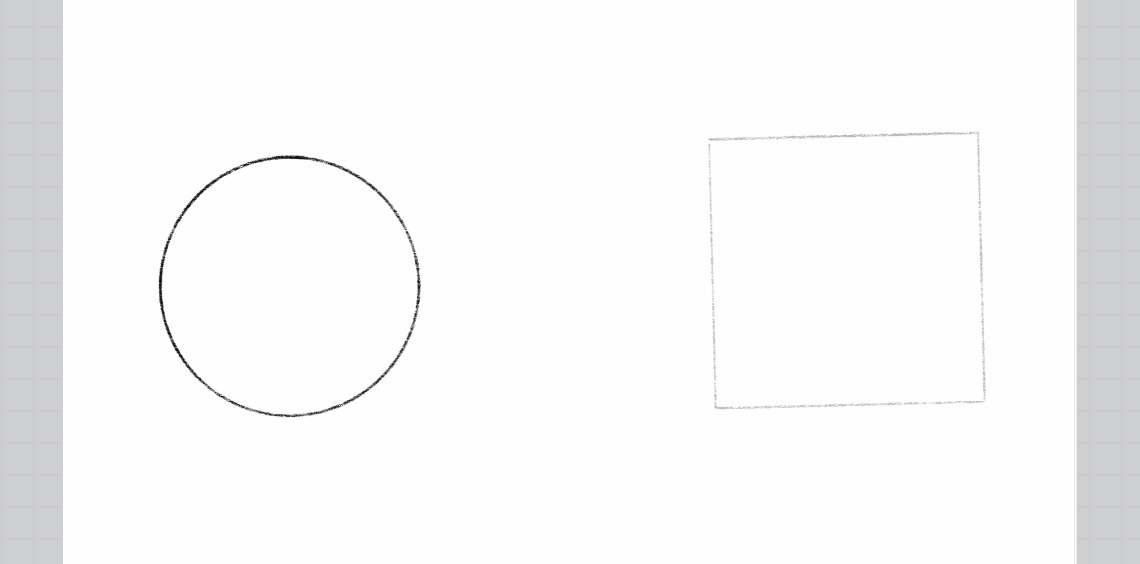
Tap Add Frame to create a second frame; these will be our key frames that bookend the animation, featuring the two shapes we want to animate between. Draw a circle on the left of the first frame and a square on the right of the second frame.
Next, we want to set up a guide to help consistently space out the “in-between” frames. On a new frame, draw a rough guide like the one pictured below.
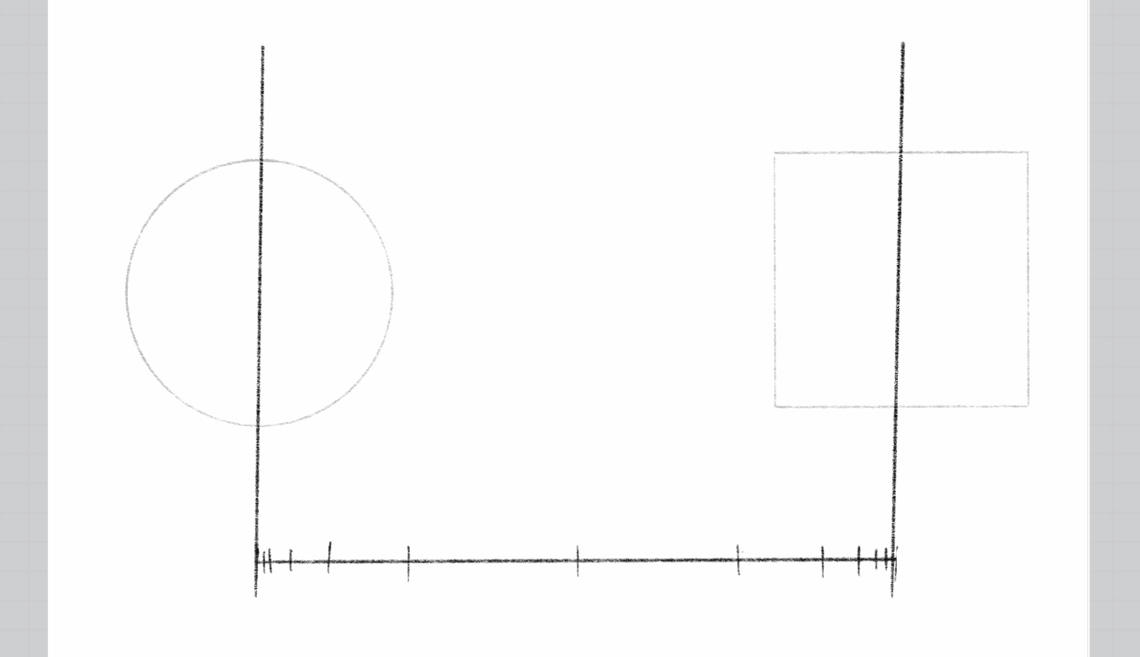
This will map out where each additional drawing needs to be positioned. In animation, it’s very helpful to remember the timeless mantra: “fewer frames, thing goes fast, more frames, thing goes slow.” Thus, by spacing the frames out in this way it’ll give the impression of the object speeding up and slowing down. This technique is called “easing” and can help your animation feel much more alive.
Tap the guide frame and toggle Foreground on. This keeps the frame visible for the whole animation.
Pro tip: this option won’t show up unless it’s the last frame on your timeline, so long-press and drag to rearrange frames if need be. Similarly, there is also the option to make the first frame on your timeline the background of the entire animation.
Inbetweeners
Once you’ve done this you want to add your in-between frames to make the shapes morph, so add another frame between the circle and the square and draw in a transitional shape centered on the middle point of your timeline.
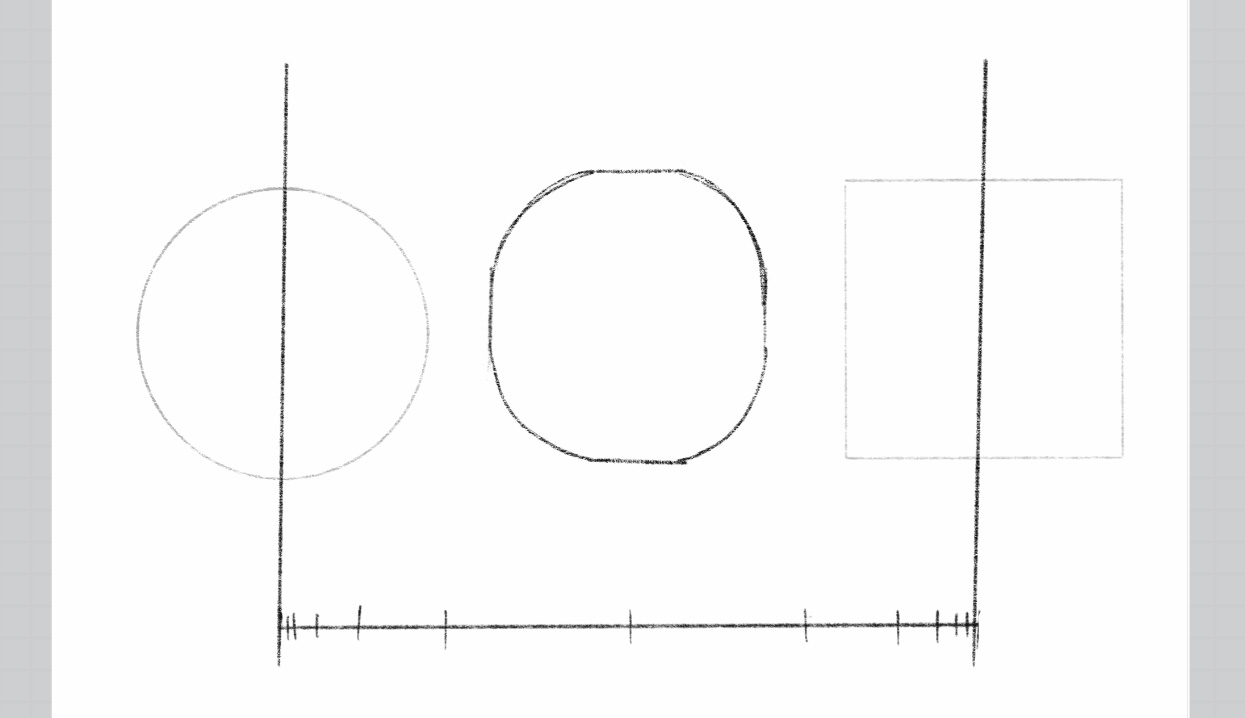
Then it’s just a case of adding more in-between frames and drawing shapes that follow the guides we set up earlier. The shape should get rounder as it approaches the circle, and edges should chisel off toward the square. If you follow this example you should end up with a nine frame animation with drawings that look something like this.
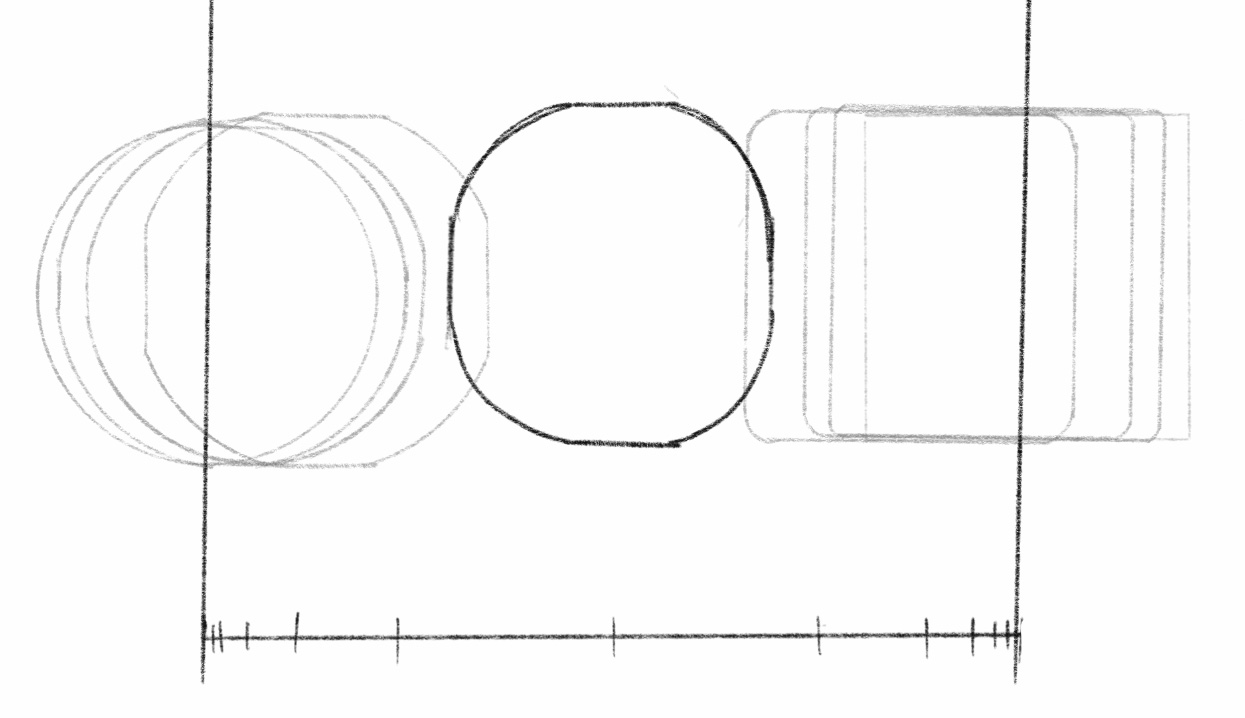
Disable Foreground on the last frame to hide your guide, hit Play, and look on in wonder at your shape-morphing animation!
From here you can export your work by choosing any of the Animated filetypes under the Share tab of the Actions menu. Animated GIF is the most widely used format for sharing short animations.
If you want to push things further, you can always try more complex shapes, adding color to your frames, or even making a bouncing ball that squashes and stretches as it collides with the ground. For a deeper dive into the fundamentals of animation, I’d highly recommend The Animator’s Survival Kit. Have fun experimenting!