
Apple’s mobile devices ship with a range of built-in fonts that you can choose to use in the likes of Pages or Keynote. But did you know that it’s possible to download custom fonts online and install them on your iPhone or iPad? All you need is an idea of the font you’ll like to add to your device, and an iOS app called AnyFont.
Why you’d want to install custom fonts
Custom fonts are a great way to spice up a document or presentation. We get bored of seeing the same old, regular fonts like Helvetica or, dare it be said, Times New Roman. Custom fonts can be attractive and engaging — used right, they make a document or presentation look more unique and appealing. If you’re using your iPhone or iPad on a professional basis, or regularly use it to get serious work done, installing custom fonts could be a real boon for you.
Better still, adding custom fonts to your device using AnyFont couldn’t be easier.
How to do it
First, download the AnyFont app — it’s $2/£2 on the App Store and is compatible with the iPhone and iPad.
Then find the font you’d like to install on your device. There are plenty of font repositories available online where you can download fonts entirely free of charge, but our favorite is probably Font Space (www.fontspace.com). There, you can search for fonts by category or keyword.

FontSpace.com.
When you’ve found the font you want, tap Download.
Most often, fonts are downloaded from the Internet in compressed folders (with the .zip extension). Because of this, once the folder has downloaded you’ll need to choose Open in “Files”. Then in the Files app, tap the compressed folder to decompress it.
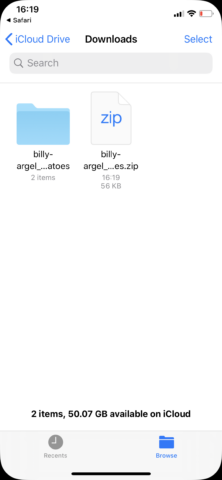
Decompress the zipped font file.
Next, locate the actual font file — this will have the extension .ttf (True Type Font) or .otf (Open Type Font). Since iOS doesn’t natively recognize font files, your device won’t appear to know which app should be used to open the file. What you need to do is tap the file, then tap the iOS share icon in the top-right of the screen, and select Copy to AnyFont.
You’ll now see the font appear in the AnyFont app — the app should even preview what the font looks like, but it won’t yet be installed.
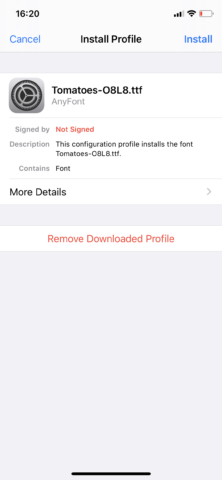
To configure the font for future use, tap it, then choose Install. AnyFont uses a workaround for installing fonts on iOS through configuring profiles — when the pop-up appears asking if you’d like to install a new profile on your device, choose Allow then head to the Settings app.
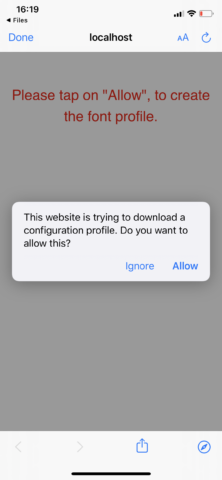
Allow AnyFont to install a profile.
Next, choose General and then Profiles. You should be able to see a profile for the font you have just downloaded. Tap that profile and choose Install. Then sit back and relax: the font should now be available to use throughout iOS.
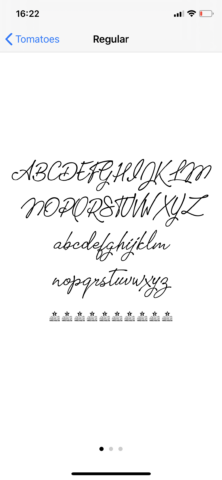
To check that the font has been installed, launch an app like Pages and search through the available fonts. You should be able to find the new font and use it in a document.
A few helpful tips
First, if you can’t find your font, carefully check through the font list to ensure that it hasn’t been installed under a different name — sometimes this happens. It can also help to reset apps before testing to see if they’ve pulled in the new font, or even to restart your device completely.
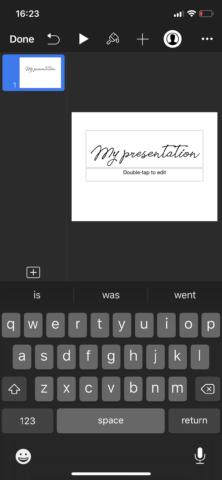
Using a custom font in Keynote.
Also bear in mind that if you’d like to share a document with a custom font, you’ll need to export it as a PDF. This bakes the font into the document, meaning the recipient doesn’t need to have it installed on their device. If you share a document as a .pages or .doc file to a different device or computer, the font won’t appear unless that same font has already been installed. On iOS, you’ll get a message telling you that there are “missing fonts” if this happens.
As such, you’ve used a custom font in a presentation, it might be smart to take your device with you and plug it into whatever screen or projector is available in order to avoid any embarrassing mishaps.
Finally, if you’d like to uninstall a font, simply visit the AnyFont app and choose which font you’d like to remove. Unfortunately, the app does leave the profile behind, so lead to the Settings app and delete the font profile from there, too.
Uninstalling a font.
Looking ahead to iOS 13
In iOS 13, installing custom fonts is going to be a little easier — albeit in a limited form.
Apple is adding fonts to the App Store. There, curators will be able to provide fonts for users to download to their device. It won’t be possible to natively install fonts found online — for that, you’ll still need AnyFont. But the method will be a lot simpler.
Managing fonts in iOS 13.
Also in iOS 13, Apple is adding a Fonts sub-menu to the Settings app. There, you’ll be able to check on what additional fonts you have installed on your device — the list will include both “official” App Store downloads, and fonts which have been added using the above method.
For now, you can pick up AnyFont for $1.99 (£1.99) on the App Store. It’s a great piece of software that won’t let you down.