
What you’ll learn…
🔒 Lock your device to a single app with Guided Access
⏲️ Set restrictions and time limits with Screen Time
👉 Essential settings to change to stop accidental access
If you have young kids, you know the story: leaving your iPhone unattended is a risky business. At best, you’ll return to a dozen blurry selfies. At worst, they’ll FaceTime your ex-boss and factory reset your device. Letting your little one actually use the thing is even scarier.
While we can’t prevent your toddler from smearing peanut butter over the screen or dropping your iPhone down the toilet, changing a few simple settings can certainly grant you peace of mind next time you allow them a little screen time. (Which, by the way, is way more enriching if you grab any of our favorite educational apps and games.)
Here are the iOS tricks every modern parent should know like the back of their hand.
Set up guided access mode
Guided Access allows you to lock the device to a single app, preventing anyone from switching apps or returning to the Home Screen. Perfect for ensuring little fingers don’t start messing around in your important apps or changing your settings.
Open the Settings app and head to Accessibility > Guided Access. Toggle Guided Access on and choose a passcode that you won’t forget.

Once enabled, you can activate Guided Access with a quick triple-press of the Power button. Whichever app is currently open will stay that way until you triple-click again and enter your passcode to end the session.
Turn off auto wipe
Auto-wipe sounds like something a futuristic smart potty might do. In reality, this anti-theft feature of iOS automatically deletes everything on your device if a thief tries to brute force their way in. It’s a good barrier against data theft.
The problem is that the trigger for erasing everything is ten unsuccessful password attempts. That makes you extremely vulnerable to small children randomly bashing buttons on the Lock Screen. Ten wrong passwords can fly by in a matter of seconds, and if that happens you can say goodbye to everything stored on your device.

The solution? Go to Settings, then Touch ID & Passcode or Face ID & Passcode. Scroll to the bottom to check whether Erase Data is turned on. Turning it off might make it easier for a hacker to unlock your device, but it removes the risk of kids deleting everything. Either way is a compromise; it’s your call.
Change Lock Screen access levels
While we’re in the Passcode settings, there are more things we should probably change. In particular, look for the Allow Access When Locked section. This controls which features of iOS require authentication to use, and which don’t.
By default, you can speak to Siri, read notifications, and even reply to incoming messages – all without confirming who you are via password or Touch/Face ID. Take a view on which of these you’d like to be more secure and switch those toggles off.
Set Screen Time restrictions
Screen Time is a great way to keep tabs on your device usage, but unfortunately, there’s no way to split the data into “me time” and “kids time”. So be wary that any settings you change will affect your own usage too.
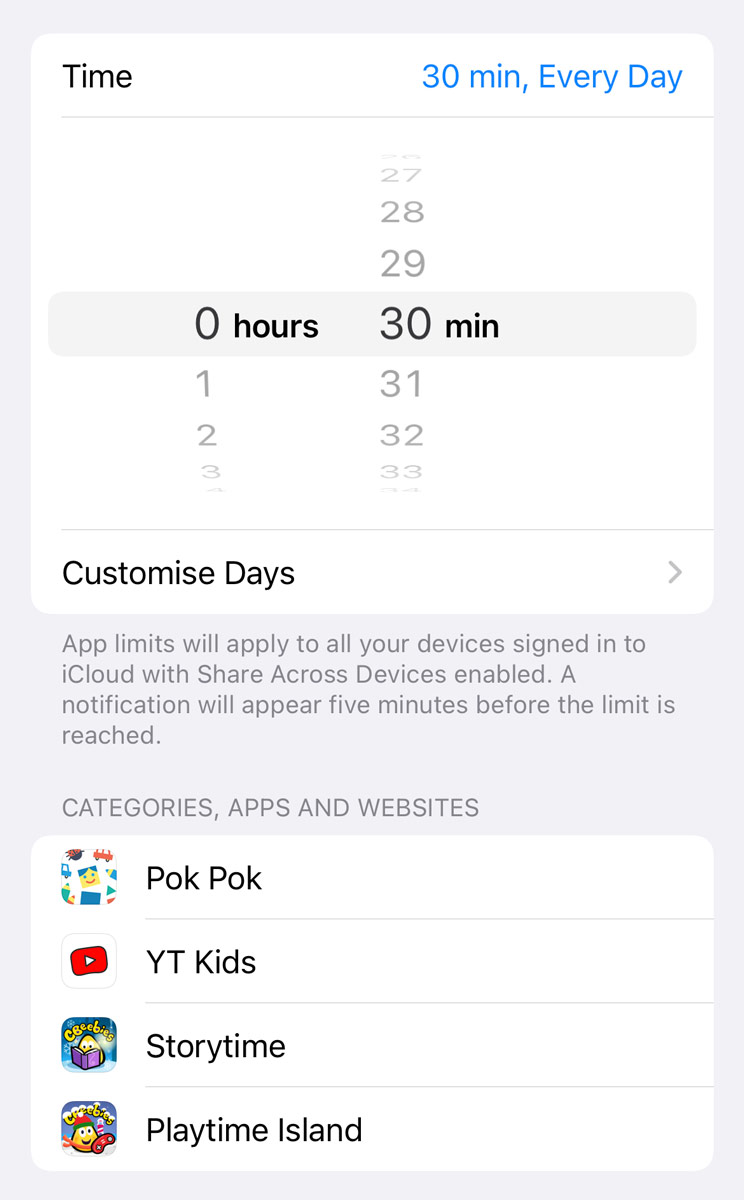
That said, there are some clever things we can do here. Head to Settings > Screen Time and press App Limits. Here, you can create a custom group of all the apps your kids use and time limit their usage, which is useful for enforcing and tracking their screen time and will automatically lock all chosen apps when the limit is hit.
You can also block unsavory content if your kids are at an age where they use Safari to access the internet. From the Screen Time menu, choose Content & Privacy Restrictions > Content Restrictions > Web Content. Here you can choose to Limit Adult Websites or even create your own whitelist with Allowed Websites Only and block everything else.