
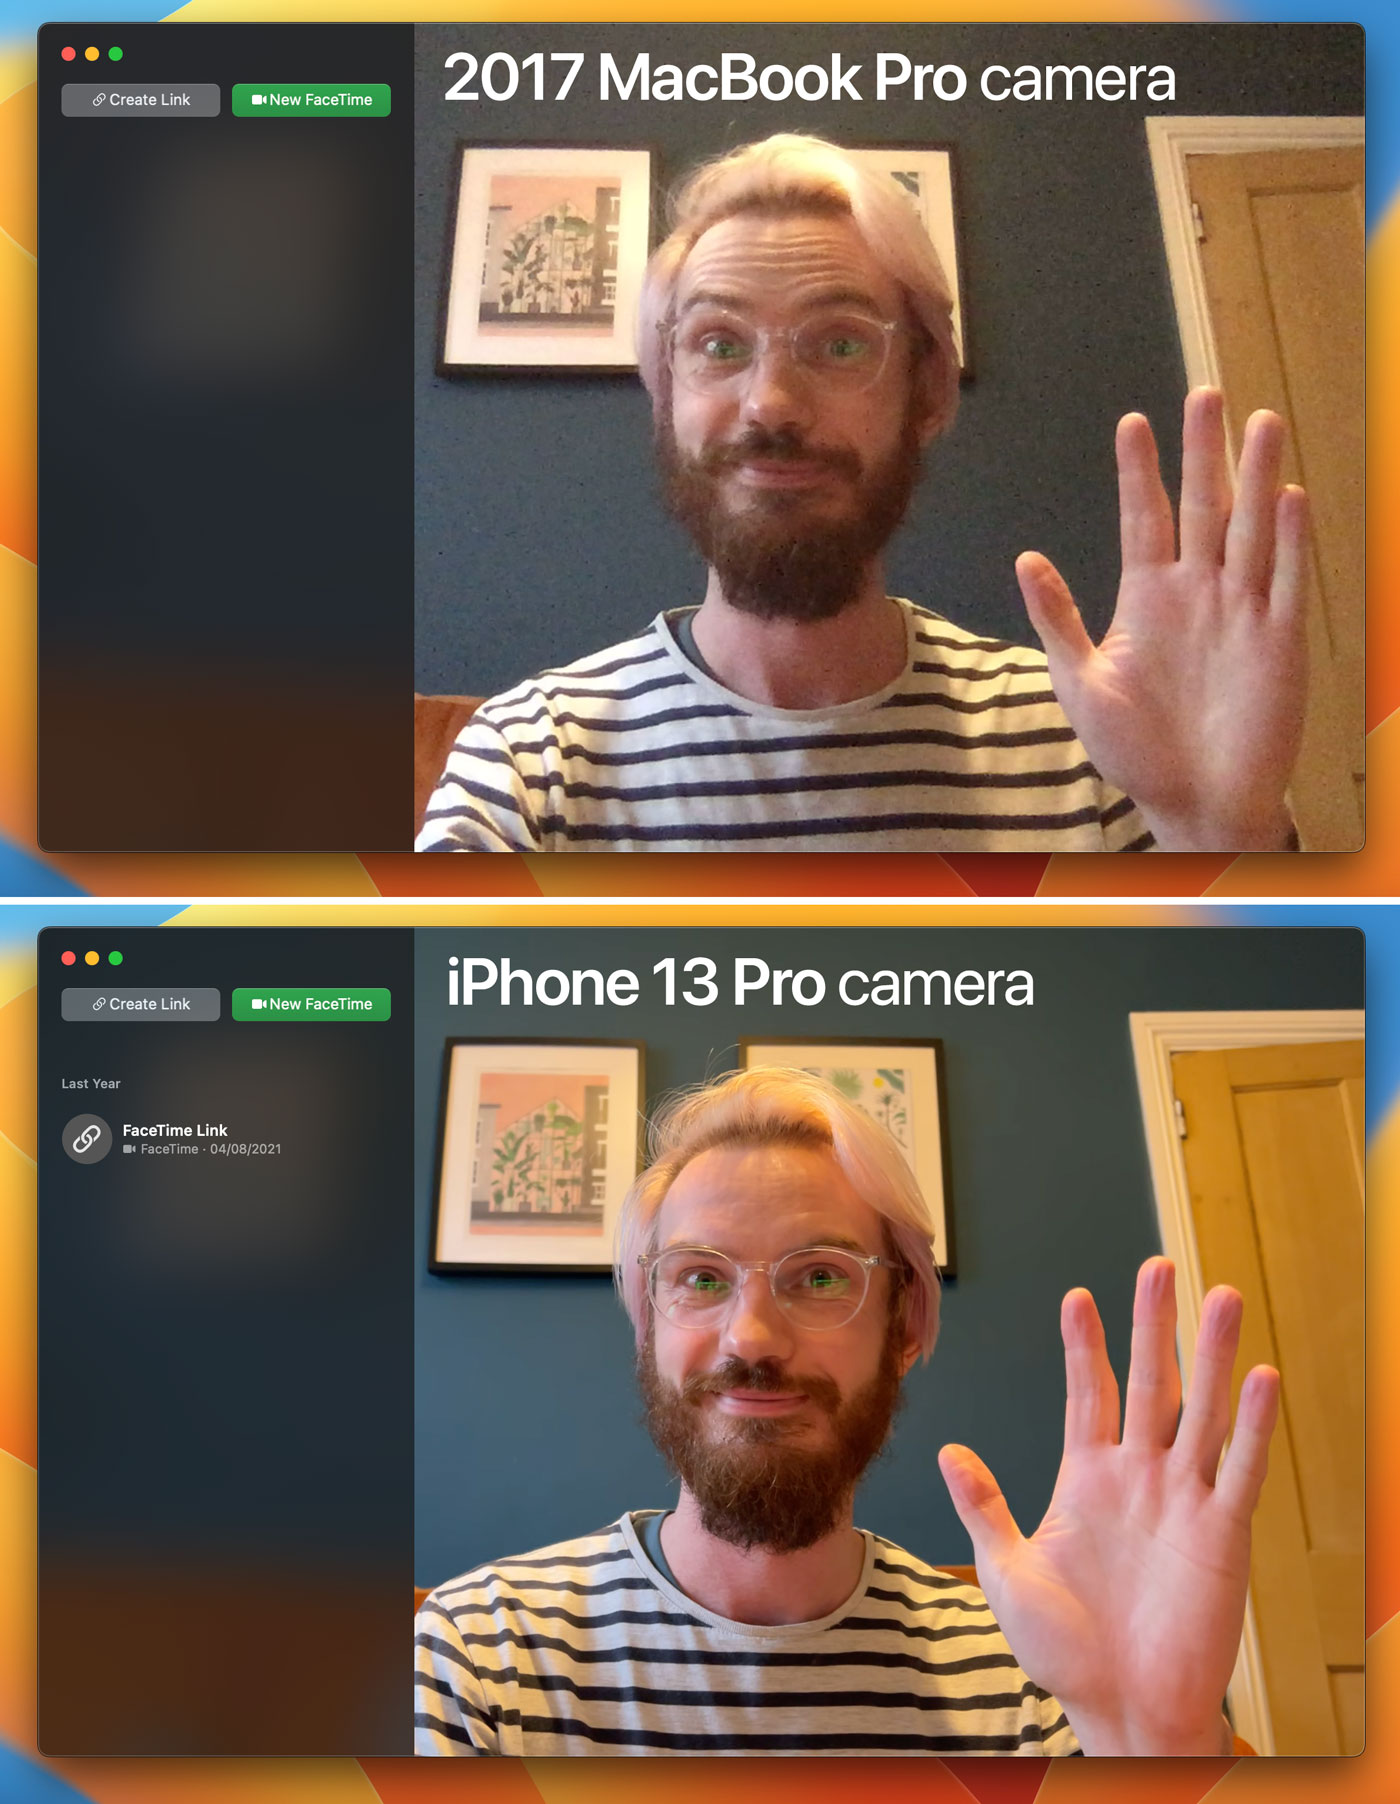
Apple allows users to use their iPhone’s high-quality camera as a stand-in for the not-so-high-quality webcam built into their iMac or MacBook. Unless you have a brand-spanking new Mac, all compatible iPhones (XR and later) should provide noticeably sharper visuals than the default camera.
Here’s an example using both a Mac and iPhone that are a few years old – there’s a massive improvement in resolution, definition, and color.
It’s a nifty upgrade using something you probably already own, although for best results you will need to buy something like this MagSafe mount from Belkin to hold the iPhone in place. It works in most software that takes a video feed, and you can even show a top-down view of your desk at the same time as a shot of your face. Let’s take a look at how it all works.
iPhone Webcam
First, ensure both your iPhone and Mac are on the same Wi-Fi network, have Bluetooth enabled, and are logged into the same Apple ID.
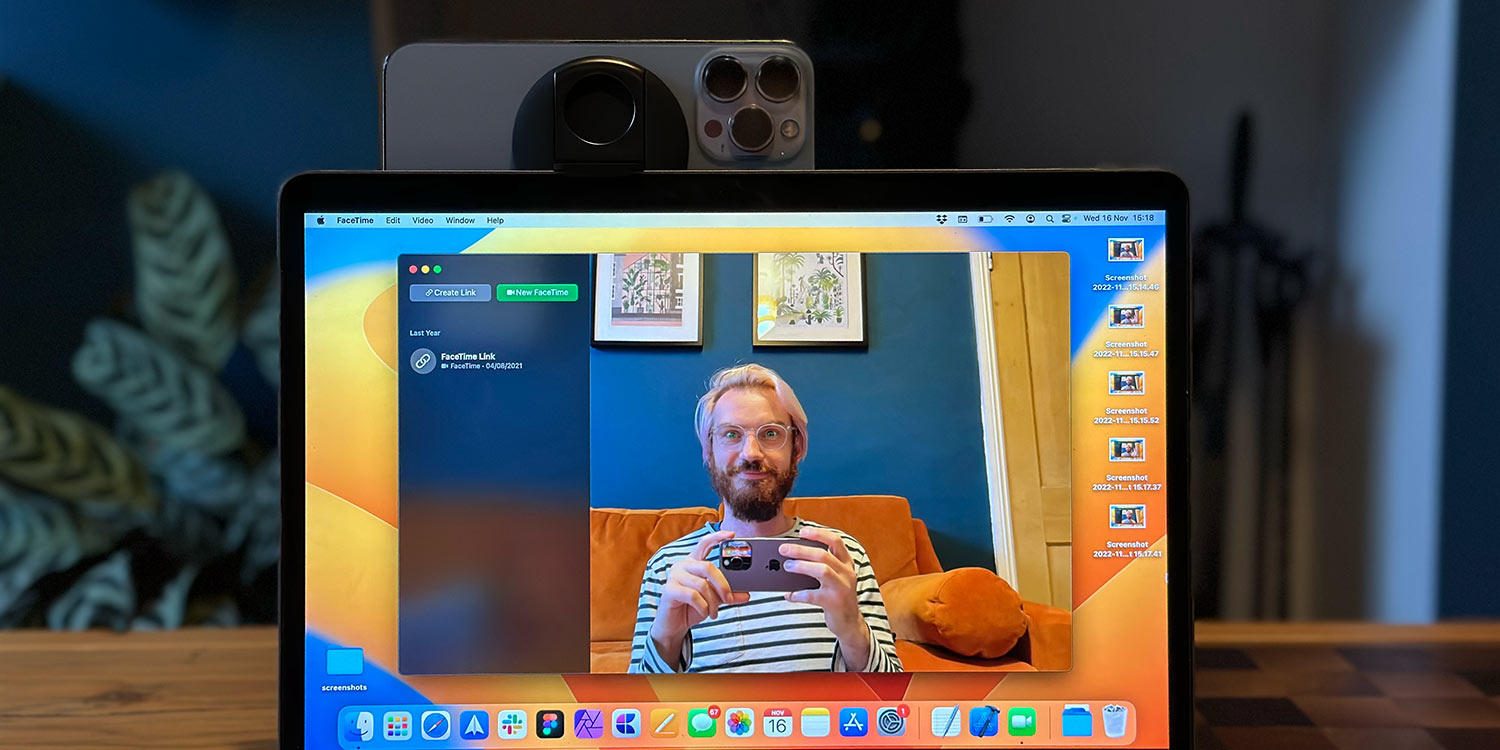
Next, mount your iPhone in a sensible spot on your computer, with the rear camera facing you. Set it up so the camera lens is aligned centrally with your display. There’s no need to plug anything in or press anything on the iPhone – close proximity is all the devices need to automatically connect to one another!
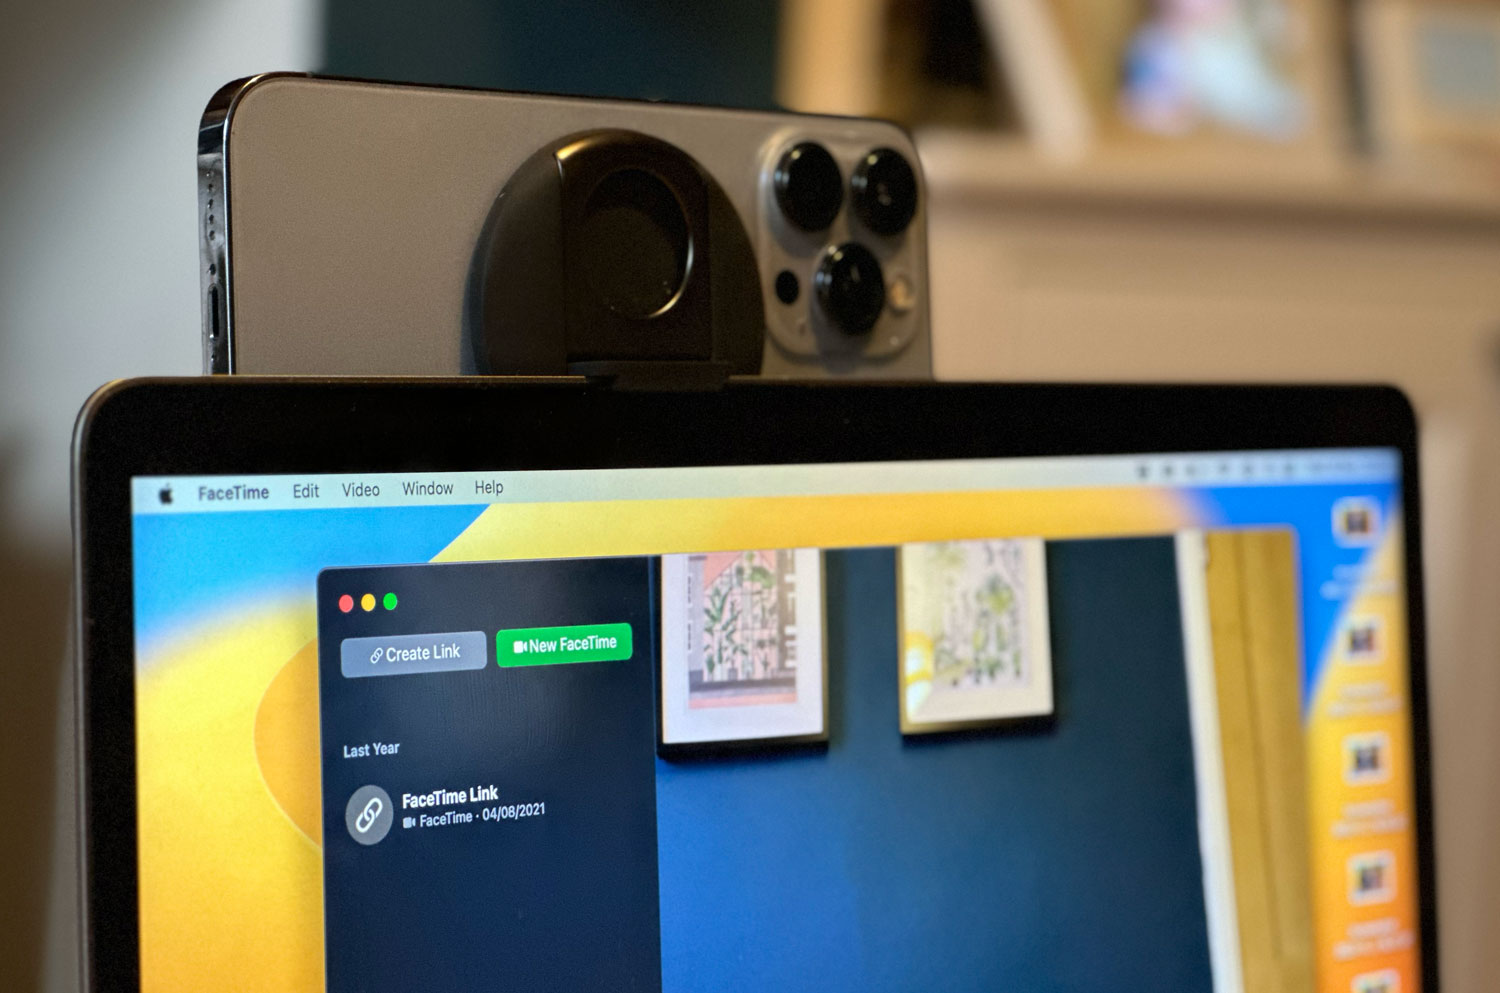
Then it’s just a case of selecting iPhone as the active camera in any app that you’ve granted permission to access your camera feed.
In FaceTime, you’ll find this setting under the Video menu on the menu bar. Other video apps like Zoom and Skype can tap into the iPhone camera just as easily, although the settings menus vary between apps.
(Troubleshooting tip: if you don’t see iPhone listed as an option, try plugging it into your Mac via USB. Once found, you can try again wirelessly.)
You can also use the iPhone’s microphone instead of the built-in mic if you wish, but by default only the video is used.
Desk View
Improving the quality of your webcam feed is all well and good, but Apple also offers Desk View, a technically impressive feature that uses the iPhone’s wide angle camera (plus a sprinkle of neural engine magic) to show what’s on your desk without requiring a top-down camera setup.

This view works best with flat objects – the perspective shift required to simulate a top-down view can make anything with depth look a little strange. But it’s a great feature for teachers, game masters, musicians, or anyone who needs to show what they’re doing while talking.
To set this up, click the Control Center icon on your Mac’s menu bar and choose Video Effects. It’s worth noting that with an iPhone connected, you can use Center Stage, Portrait, and Studio Light for improved video calls. But for now, ignore those options and press Desk View. (You can also open the Desk View app directly.)
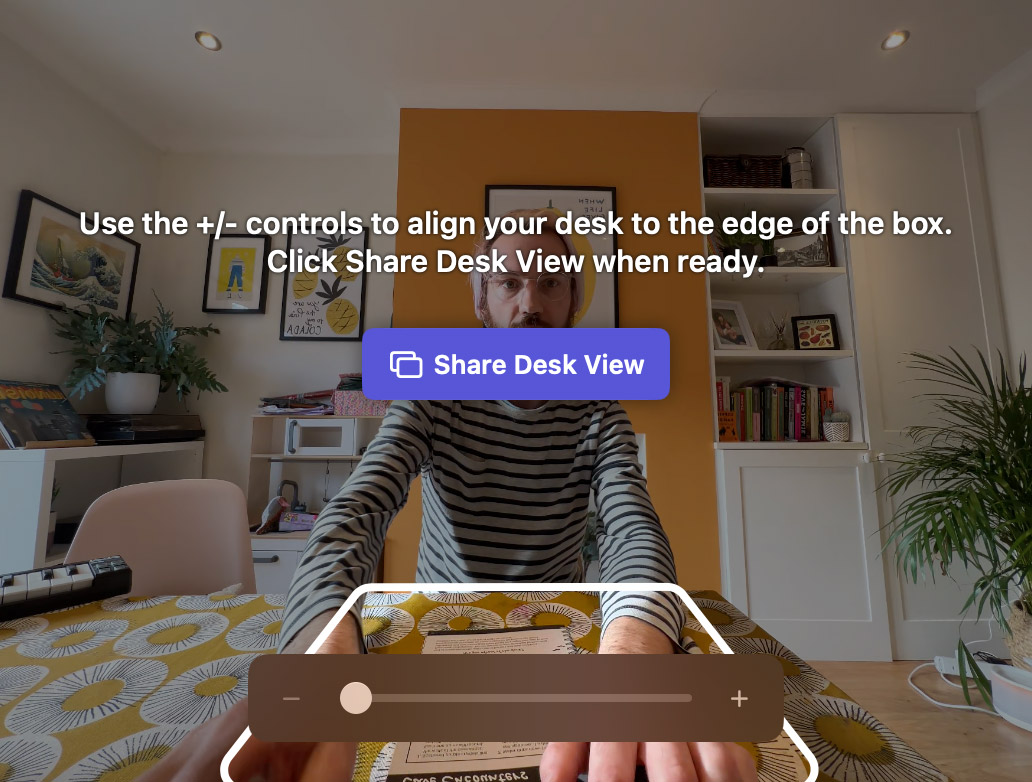
This will prompt you to choose the zoom level that fits your desk. Configure it to your liking and tap Share Desk View. This essentially works as a screen share, so in most video apps it appears in addition to the view of your face rather than replacing it.
In FaceTime, everyone on the call (including you) will see both feeds and be able to rearrange them. In other apps, you can usually choose a specific screen or window to share in addition to your main video feed; simply choose the Desk View window.
Note that you can use the menu bar icons to access further screen sharing settings.