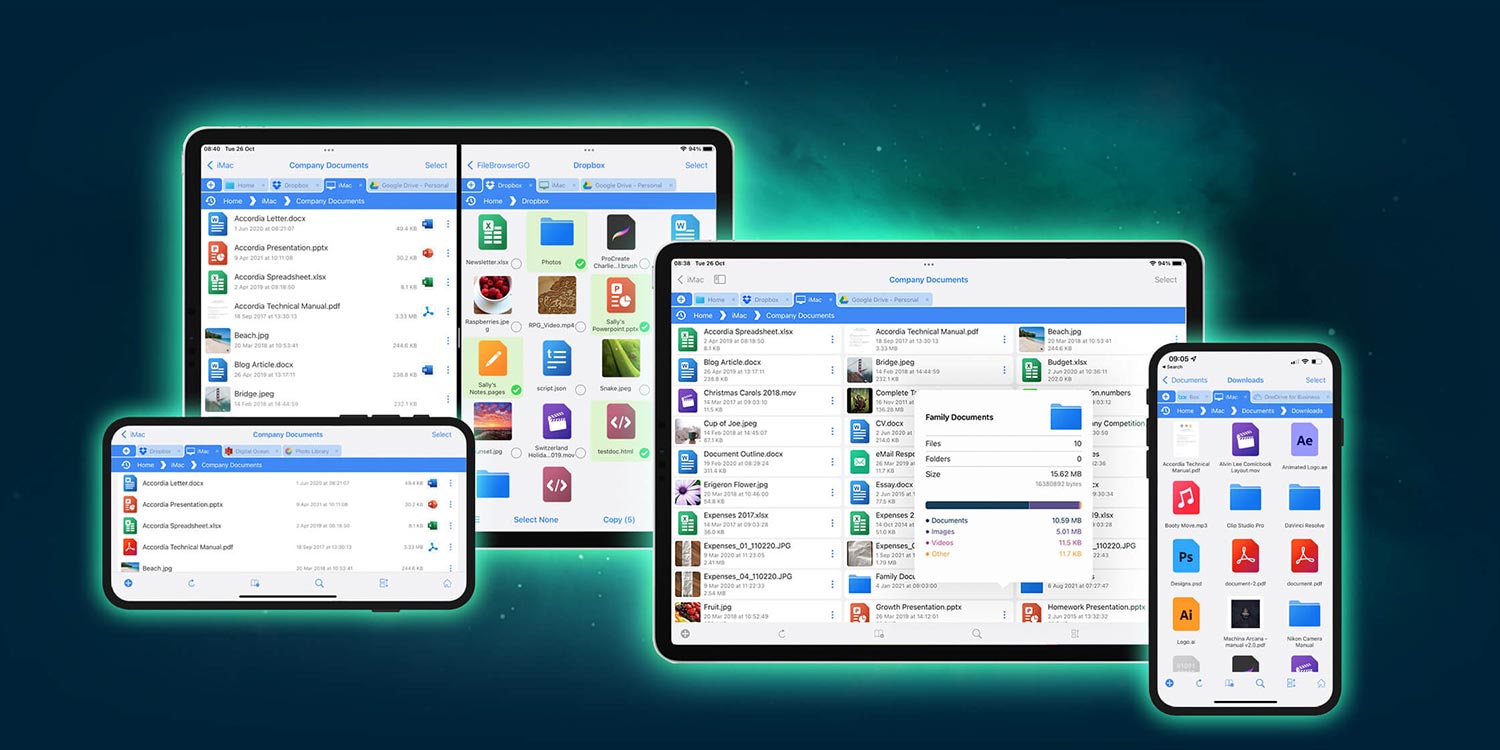

Apple’s built-in Files app is great for managing documents stored on your iPhone or iPad, and for syncing files kept in iCloud Drive across your various Apple devices. But if you want to go further, Filebrowser is a great all-purpose document manager that can connect up to even more locations, so you can access everything, everywhere from a single iOS app.
We’ll show you the basics of how to view and manage two common setups – files in the cloud, and files on a local Mac Once you’ve got to grips with those, you can experiment with other connections like external drives and SFTP servers.
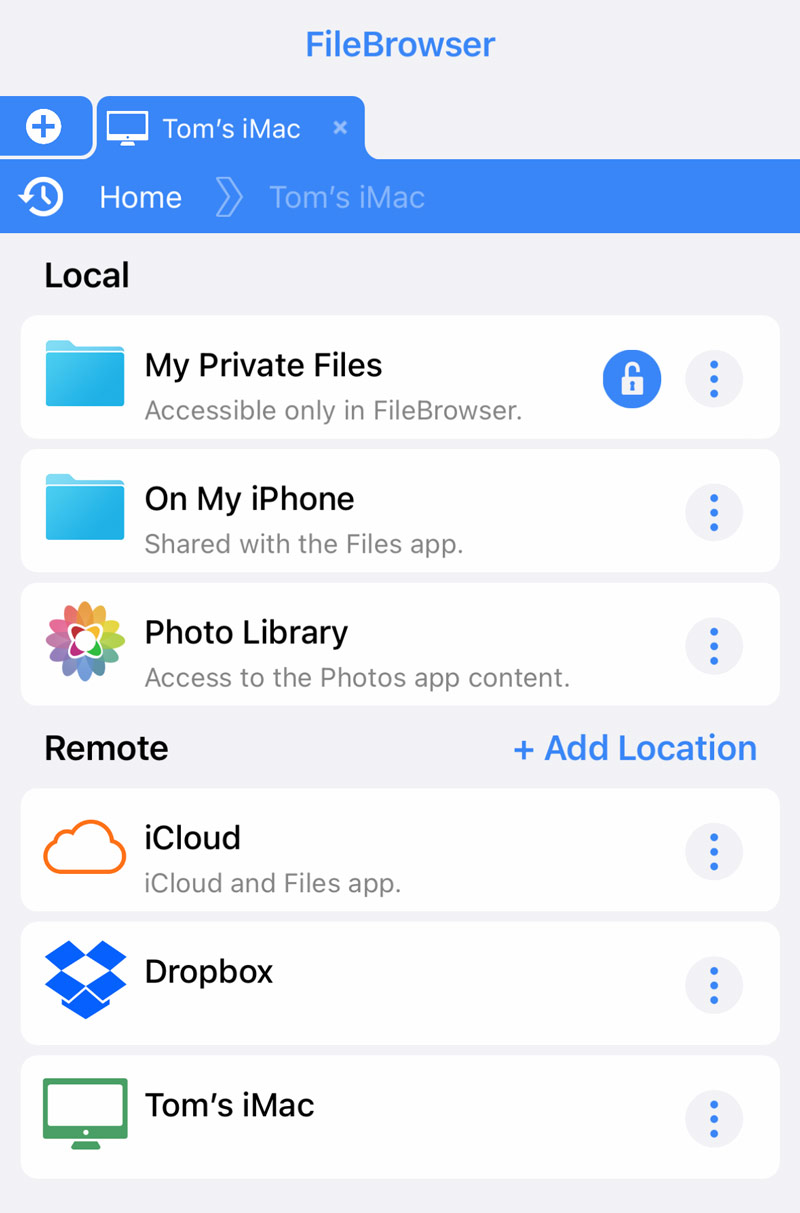
By default, the app has access to the local contents of the device you’re using in the On My iPhone folder, plus anything stored in iCloud Drive in the iCloud folder. You can also view your Photo Library’s contents, which in some cases might be an easier way to manage and transfer albums than the Photos app itself.
Cloud storage
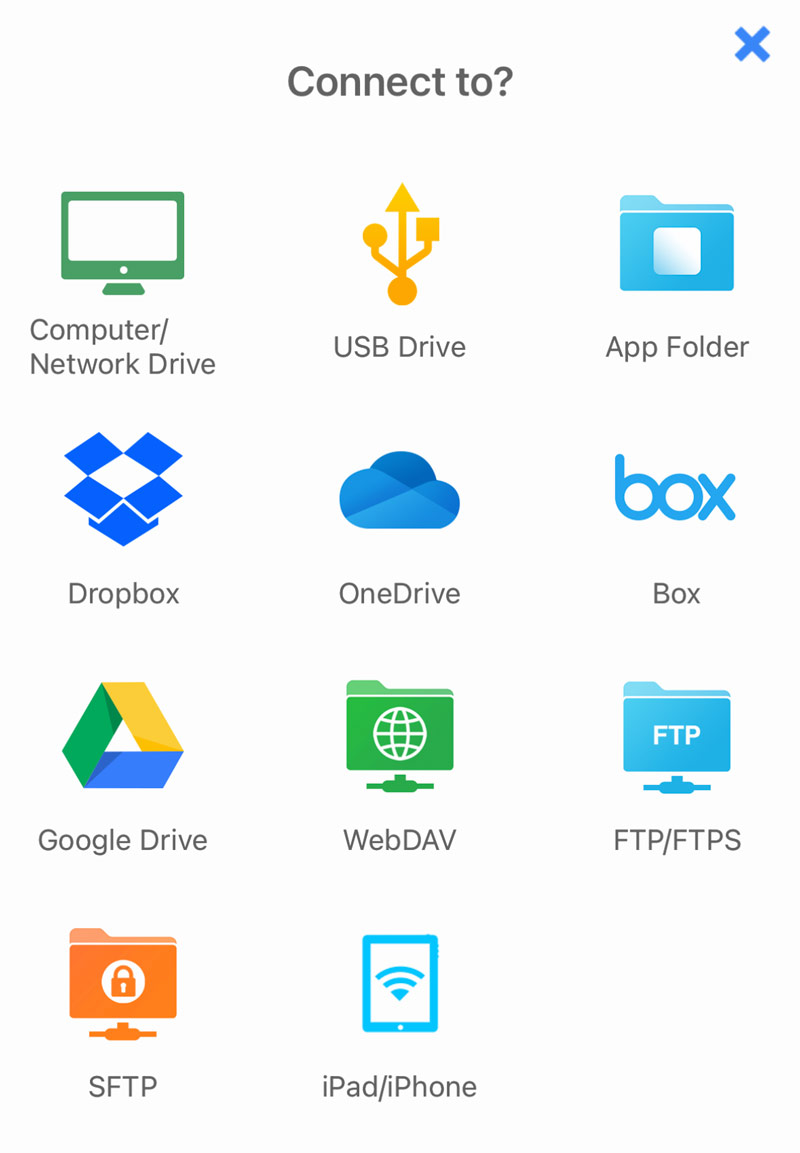
FileBrowser can hook up to most of the popular cloud storage services: Google Drive, Dropbox, Box, and OneDrive. If you need access to even more connection types (including OneDrive for Business, Amazon Azure, and Amazon S3) you’ll need to shell out for FileBrowser Professional ($12.99/£10.99) or pay a subscription fee for FileBrowser Go. But for most users, the standard version of FileBrowser ($6.99/£5.99) offers more than enough connectivity.
Open the app and hit +Add Location to get started. Choose whichever service you use (we’re using Dropbox for this example) and change the default Display Name if you want something more personal. Hit Save. This will add a Dropbox folder to FileBrowser’s main view, but there’s another step to get everything connected.
Tap the Dropbox folder and then Open to switch over to the Dropbox app for authentication. If you don’t have the Dropbox app, you’ll have to install it now. Log into you account and choose Allow to grant the necessary permissions. That’s it! Return to FileBrowser for full access to everything stored in your Dropbox account.
Desktop computer
This time, tap +Add Location and choose Computer/Network Drive. You’ll need to Allow permission to connect to local network devices when prompted. FileBrowser will scan for any shared drives or folders on your network, and if you have one set up already it will appear here. If not, there’s a bit more work to do.
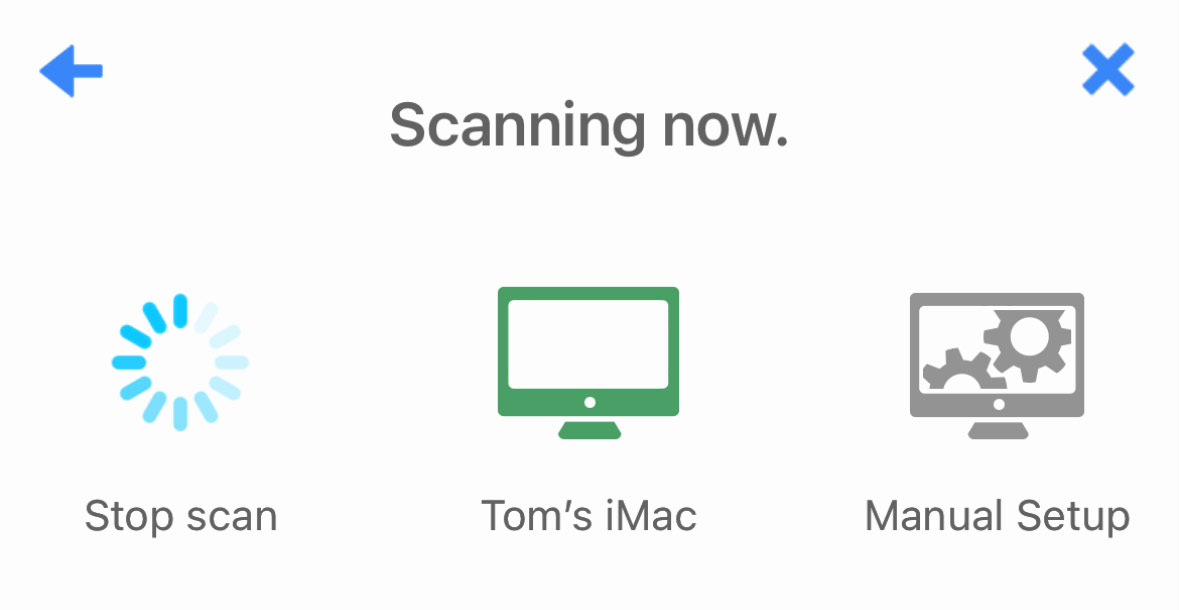
You’ll need to set up a shared folder on your computer. On a Mac, open System Preferences > Sharing and ensure File Sharing is ticked. Hit the + button under Shared Folders to choose a specific folder to share. Then tap Options, ensure Share files and folders using SMB is on, and then tick the box next to your account name. If you’re using a PC, follow these instructions instead.
Head back to FileBrowser, scan the network again and the Mac should show up. Tap it, then press Edit and enter the username and password you use to log into the computer. Note that even the username is case sensitive, so type it exactly as it appears in the Options menu from earlier. Hit save and you should now have access from the FileBrowser home screen!
If it doesn’t work, try this connection issues FAQ.