

Let’s talk about a surprisingly common situation: you’re an iPhone owner embroiled in the Apple ecosystem, but also use Google Nest smart products (thermostats, doorbells, cameras, etc) in your home. Is it possible to control them via Apple HomeKit?
The answer is… complicated. But it’s also yes.
We’re using a Nest Learning Thermostat in our example here, but in theory any Nest product can be connected with the same steps.
Benefits of proper integration
First, it’s worth noting why you might want to cross the streams of Apple and Google. Can’t you simply use the official Nest app (below) or the physical Nest Thermostat itself to control the temperature?

Well, sure, that works just fine. But you’d be missing out on a lot of stuff.
For a start, there’s no Nest widget in iOS, meaning you can’t track and change the thermostat from your Home Screen. You can’t control the temp via Siri, so HomePod users are out of luck. You can’t add Nest to scenes or automations in the Home app, or use it in custom Shortcuts.
The following options solve (most) of these problems, opening up many more ways to control your Nest products from an iPhone or other Apple gadget. Convenient, eh?
Option 1: Matter Support
If you have the budget-level Nest Thermostat 2020, you’re in luck. For some reason, it’s the only model that supports the “Matter” standard designed to help smart devices from different manufacturers play nicely together.
That means you can connect it directly to HomeKit in the Home app. Simple.
Option 2: Google Assistant
If you have the higher-end Nest Learning Thermostat or Nest E Thermostat, unfortunately it’s not quite so simple. You won’t be able to control your device from the Home app, no matter what you do.
But there’s a clever workaround you can use to hook Nest up to Shortcuts, which means you can control it with Siri, widgets, and automations.
First, you’ll need to download two apps: Google Home and Google Assistant.
Google owns Nest, so sign into both apps using the same account you use with your Nest device. You should automatically see the device appear in the Google Home app, but you can add it manually if not. Once there, you can control it with voice or text commands from the Google Assistant app.
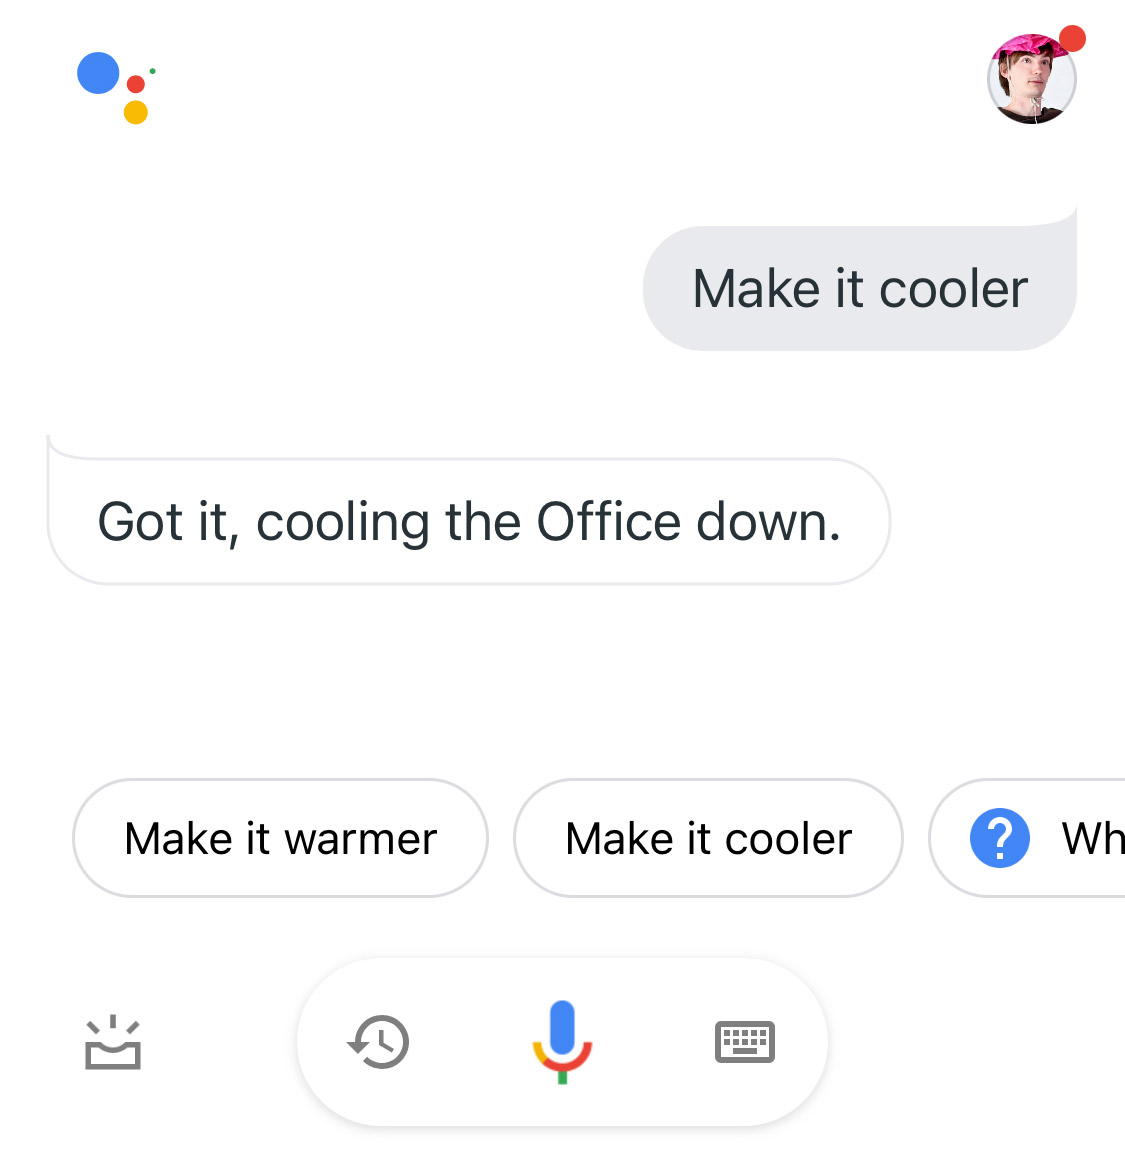
Try using phrases like “make it warmer,” “set the thermostat to X degrees,” or “turn on eco mode.” You should see the physical Nest device update within a few seconds.
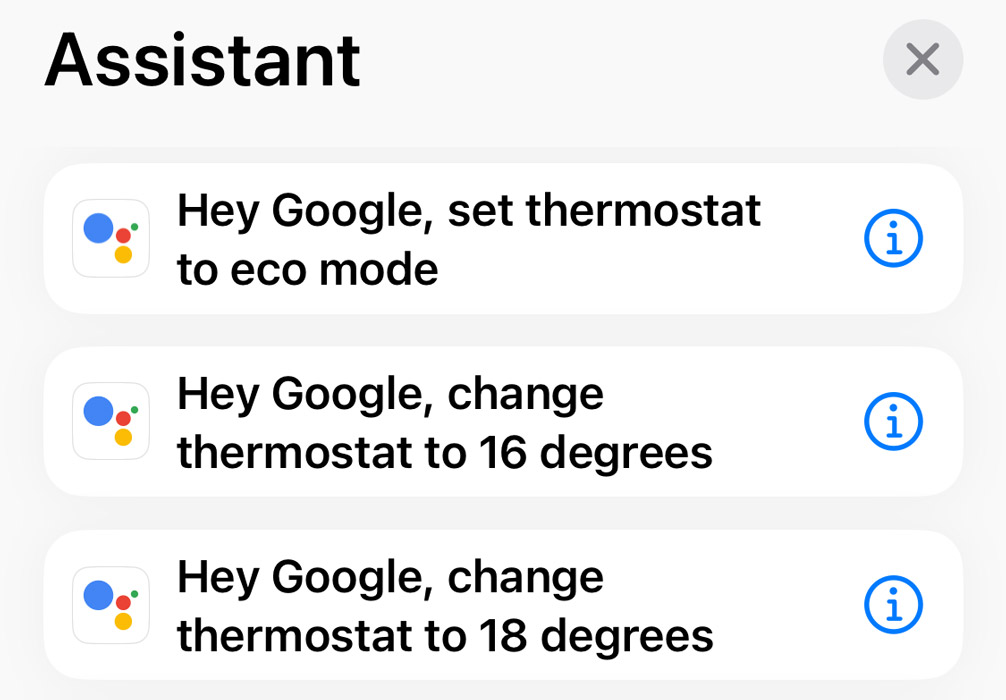
Here’s the clever part: any command you give Google Assistant will appear as an action in Apple’s Shortcuts app. Create a new shortcut, search for Assistant, and define the prompt you want to use. Give the shortcut a name and save it.
You can then trigger your custom shortcut using Siri, although note that your device needs to be unlocked to actually run.
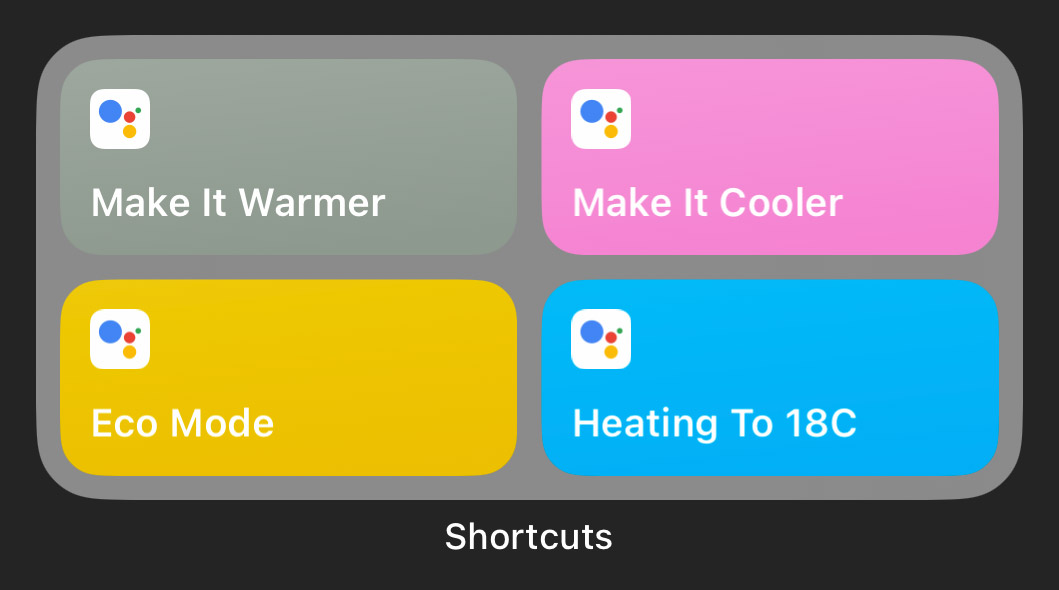
You can also make an interactive Shortcuts widget featuring your most-used thermostat commands. Add all your Nest-related actions into a folder in Shortcuts, then add a Shortcuts widgets of any size to your Home Screen. Long press it to Edit, and choose the Nest folder to turn those commands into easy-access buttons.
Option 3: Home Hub
If the above options seem too fiddly, or you can’t get them to work, there’s an easier method: buying a dedicated hub to link everything together. We’d advise the Starling Home Hub, though others are available.
This solution is particularly helpful if you have several Nest products, like the doorbell or smart locks. It gives you full plug-and-play compatibility between Nest products, HomeKit, and Siri. The only real downside is the cost.
(If you don’t want to spend much, and you’re quite techy, you can try installing your own home hub on a local machine using Homebridge).
Phew! That’s all. Quite a few variables at play here, but once you get it set up the flexibility is really worth it.