

With the launch of iOS 10 earlier this year came an awesome new feature for the stock Photos app. A new tab called Memories automatically bundles together pictures and videos it thinks will make for good viewing, and auto-generates a cool animated slideshow for your viewing pleasure.
It’s a great feature, but the moments chosen as memories aren’t always spot-on. For some reason, there’s no option to manually choose a photo album for the slideshow treatment – or is there?
Viewing Memories
First, a quick recap. Open the Photos app and tap the Memories tab. This will show a selection of various memories the app has compiled. It’s pretty good at highlighting when you go on a trip, with some of the memories focusing on a particular location you’ve visited. Others will use facial recognition to pool together shots of a particular person, or simply focus on a time period when you took a lot of photos, like ‘last weekend’ or ‘Christmas 2015.’

Tap any of the thumbnails and then hit play to see the automatically generated video slideshow. Cool stuff!
Editing Memories
Beyond that, you can customize some aspects of the video if you don’t like the tone or think it’s just a bit too long. Once you’ve started the video playing, tap again to show some simple options. You can swipe to alter the length and style of the slideshow, or press the edit button in the bottom right for more detailed adjustments.

Here you can give the project a name, custom music, and manually adjust which photos and videos are used in the final cut. However, you can only choose to add or delete media that is already part of this memory, as chosen by an algorithm. So what do you do if you want to be in charge of what is and isn’t a memory?
Making Memories
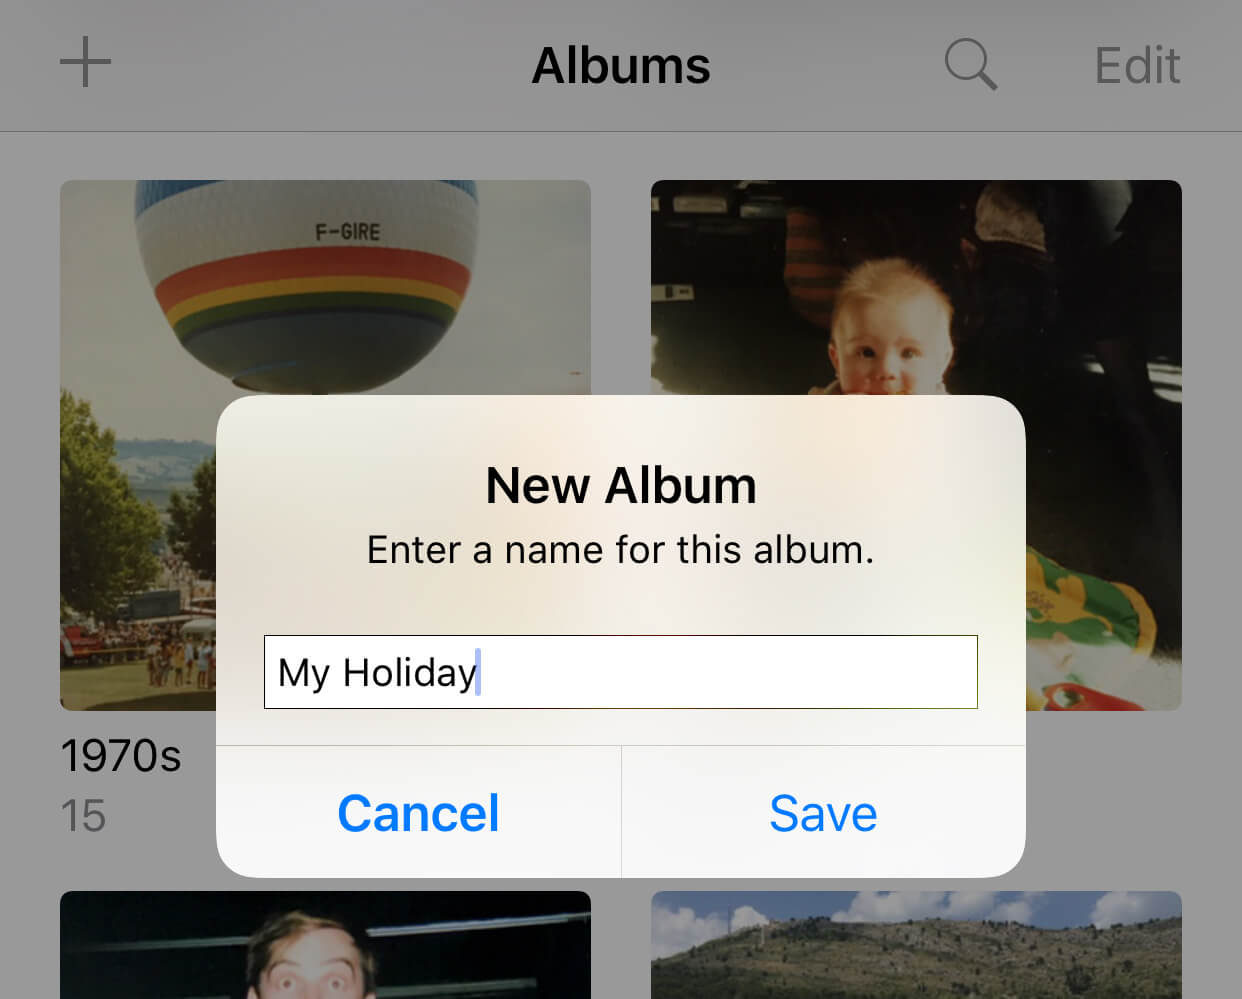
Though it’s not on option from the Memories tab itself, it is possible to manually choose the photos and videos used in these automated slideshows. It’s as simple as creating an album in the usual way. In Photos, tap the Albums tab and press the + button in the top left. Give your album a name – this will be used to title your video. From the next screen, scroll through your photos and tap to select any that you wish to include. Press Done when you’re finished.
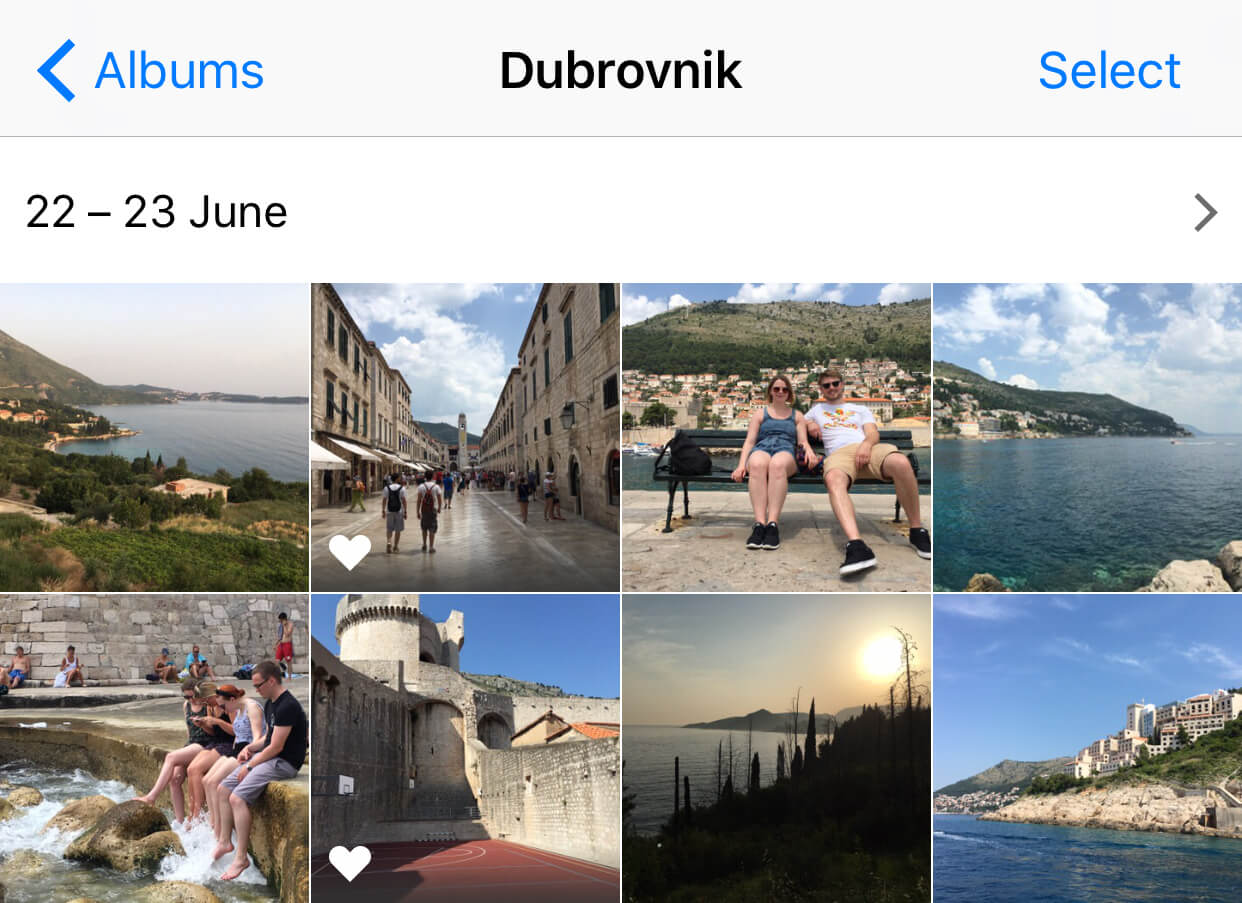
Open the album, and between the title and the photos you should see the dates the shots were taken. It doesn’t look especially like a button, and there’s no particular indication of its purpose – but tapping the dates will take you to a memory page for your new album. As before, you can hit play to see a slickly edited movie showing off all the pictures from your album.
The key step is to now press the edit button in the bottom left – it looks like a series of sliders. This will prompt you to Add to Memories, which is necessary to make any further adjustments to to length and style of the video. Hit ok to confirm and you’ll be able to make all the changes you wish. You’ll also find that your album now appears in the Memories tab, alongside the automatically picked moments!

Bonus tip: scrolling to the bottom of the page reveals a series of four related memories. Often these focus on times and places that don’t appear in the main Memories tab, and is a quick way to get new memories without making an album yourself!
That’s it – now you have full control over what constitutes a good memory! Don’t forget you can swipe to change between styles (gentle, uplifting, extreme, etc.) and lengths (short, medium, long) just below the video. If you particularly like any of the slideshows, hit the Share button and show your friends. Enjoy!