
Your iPhone or iPad is a true jack of all trades, capable of acting as a communication device, music player, web browser, calculator, gaming machine, and plenty more besides.
However, some people like to take an iOS device and turn it into a single-use tool, whether temporarily or permanently. You might wish to limit a child’s use of your phone to a single game, or turn an old device into a payment system for your business. You could even use an old iPod touch as a fancy remote control for your smart lights!
There’s a single built-in iOS facility for achieving such things. It’s called Guided Access, and it locks your iPhone or iPad to a single app, preventing it from being used for anything else unless you know the bespoke passcode.
Here’s how to access and make use of Guided Access on your iOS device.
How to activate Guided Access
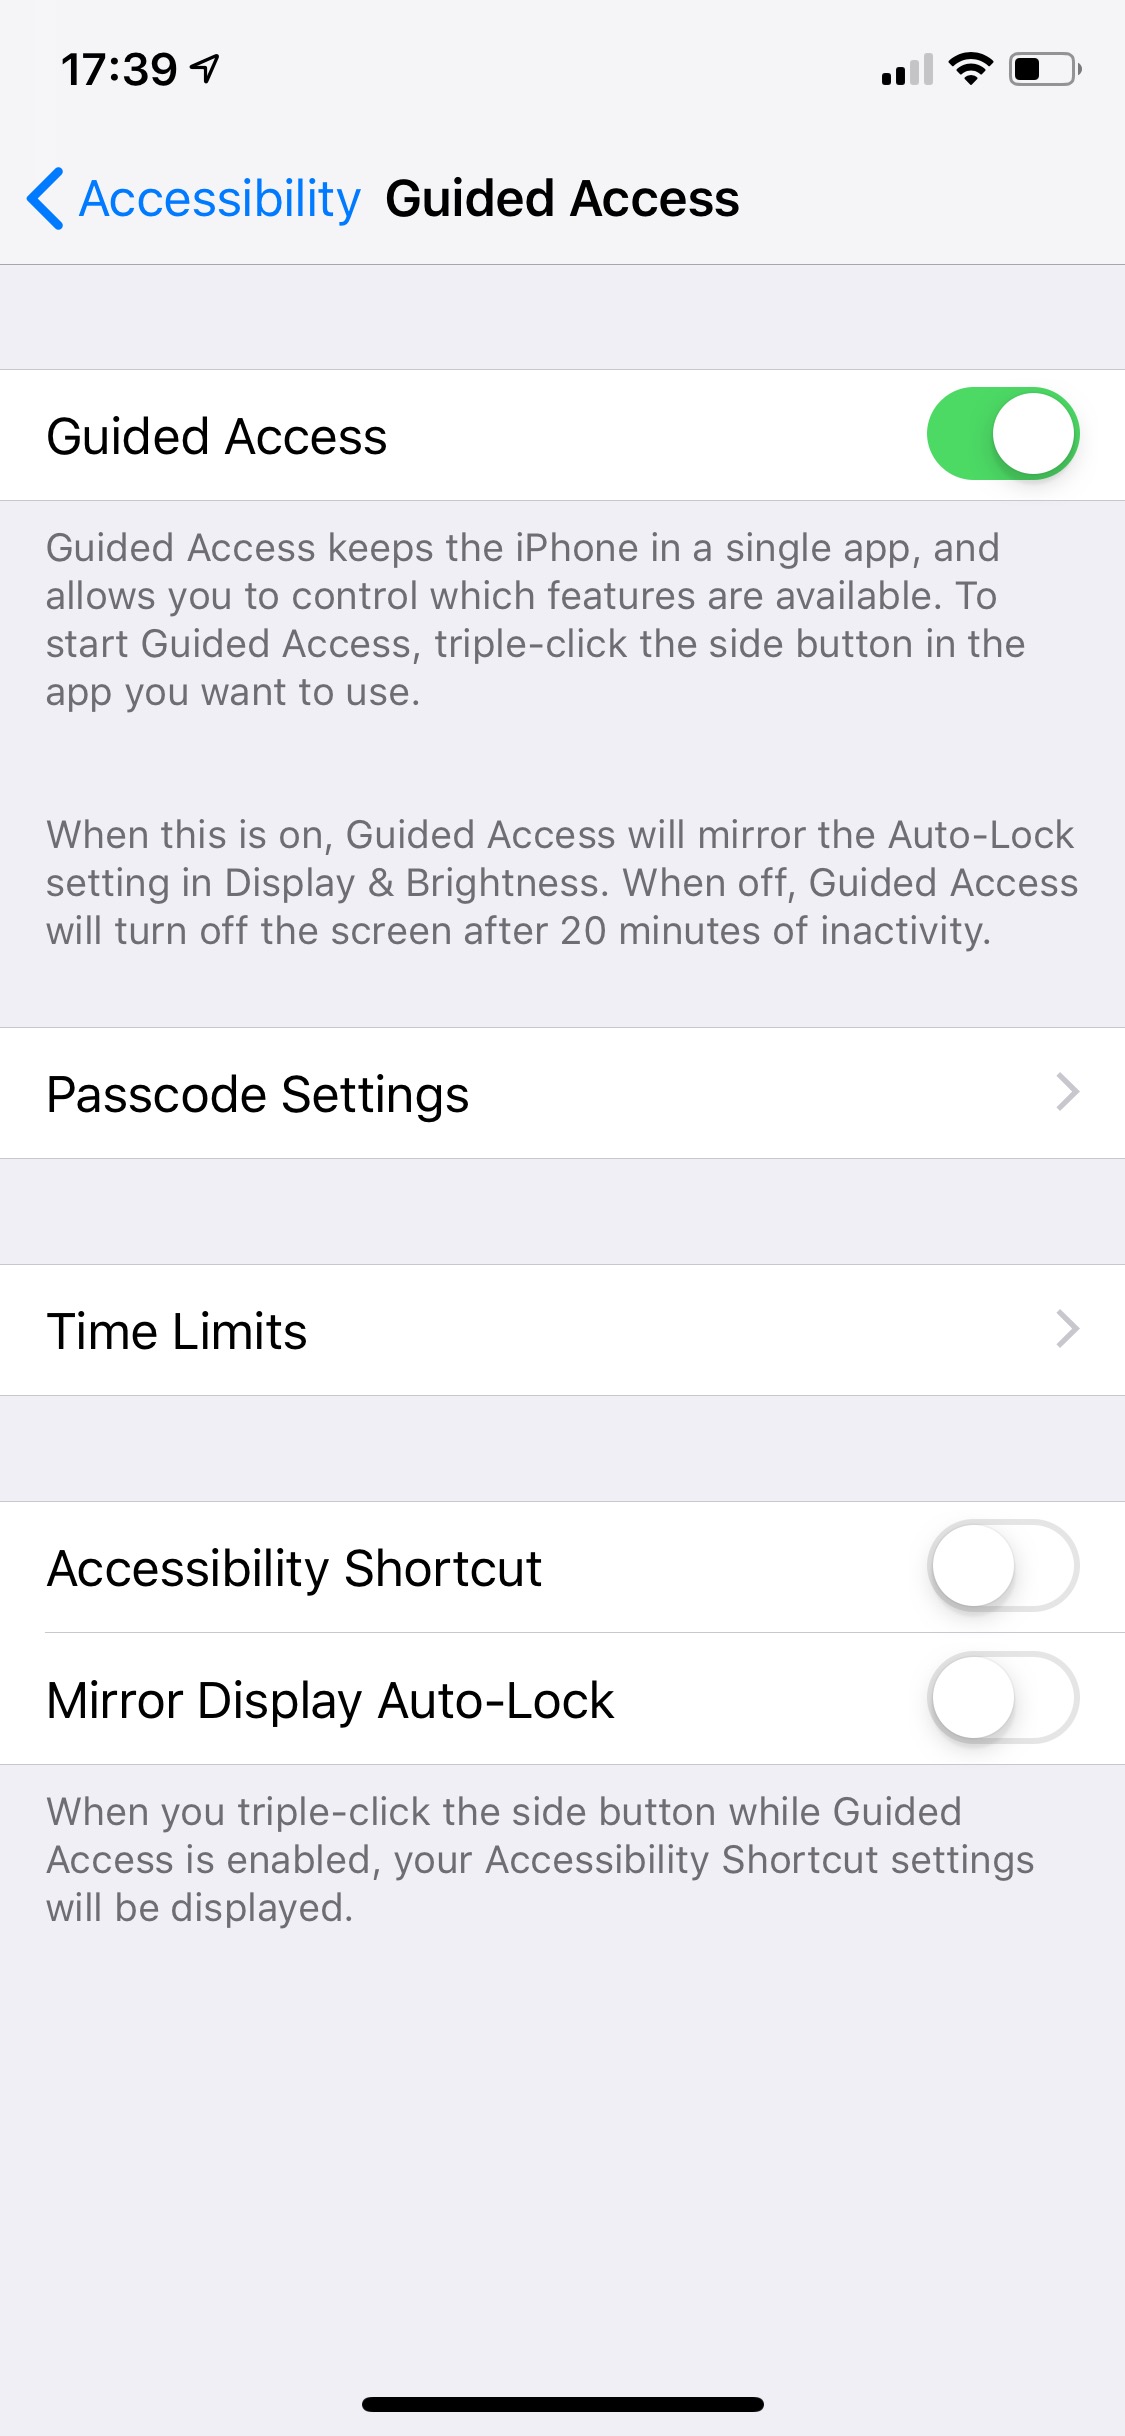
Navigate to Settings > General > Accessibility, scroll down to Learning, and then flick the Guided Access toggle to the on position.
Start (and stop) a Guided Access session
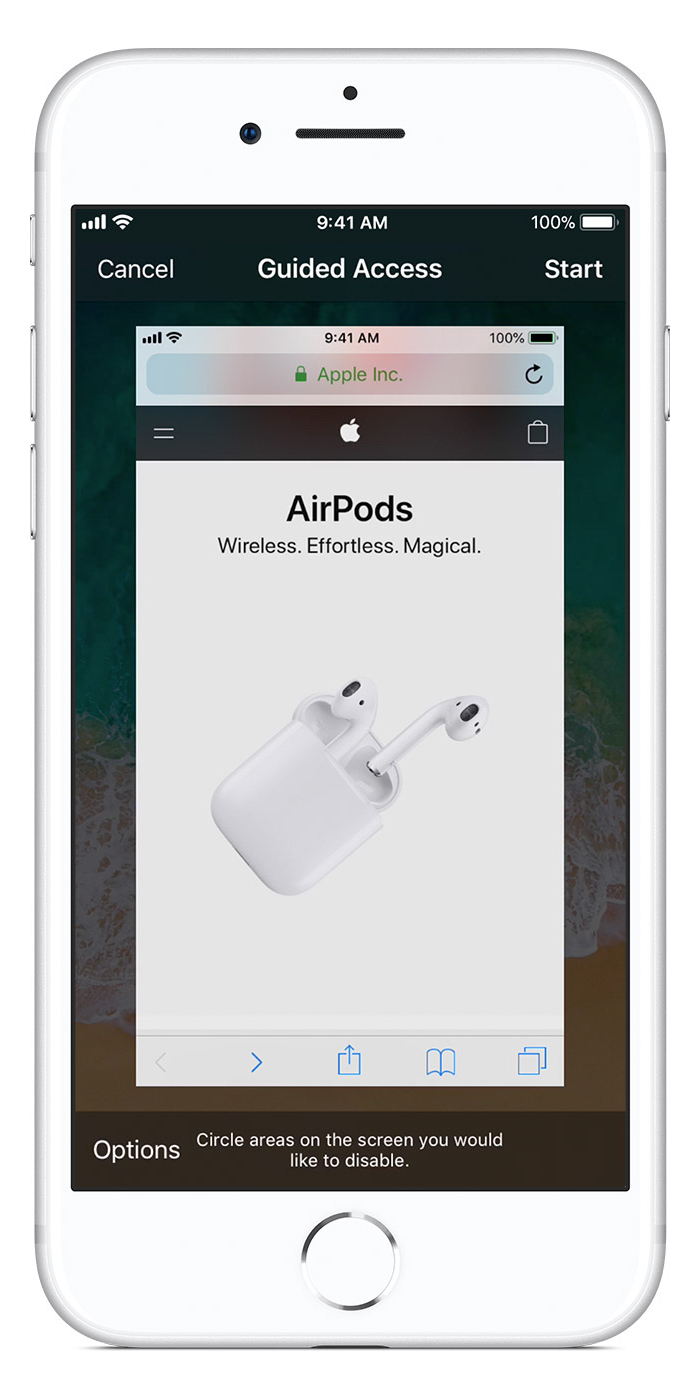
To turn Guided Access on, head into the app you wish to lock in place. Now triple-press the Home button if your device has one, or the side button on an iPhone X-class device.
Hit Start in the top right corner, then input a passcode to lock the app in place as the only usable function.
Triple-click the button again and input the same passcode to stop your Guided Access session.
Lock out app functions
You can also limit exactly which part of this app the user can access when in Guided Access mode. Simply enter the triple-click screen and draw a circle around the buttons or screen elements you wish to render inert, then hit Start as above.
Keep the screen on
By default, Guided Access will keep your screen on, but it will enter sleep mode after 20 minutes of inactivity. You can keep the screen on permanently by heading back into the Guided Access section of the Settings menu and turning Mirror Display Auto-Lock on. This is especially useful if you wish for an old device to become a permanent wall-mounted fixture in your home – say, for controlling the lights and other smart gadgets.
Now back out to the main Settings menu and enter Display & Brightness > Auto-Lock, then adjust the setting to Never.
Apply a time limit
If you want to limit the amount of time a Guided Access session can go on for (to curtail a child’s gaming time, for example), enter the triple-click Guided Access screen in the app and hit the Options button in the bottom left.
Now flick the Time Limit toggle to the on position and adjust the timer accordingly. When the timer expires, a black overlay will appear, and you’ll need to use the triple-click and passcode combination to regain access.