

There are a few routes to take here, but below we’ve included two of the most effective
Apple’s Mail app has become a pretty robust app in recent years, and the chances are that you use it to send a decent amount of email. Have you ever considered using an actual handwritten signature as your email sign-off? It’s easy to do in the Mail app and it adds a personal touch to your outgoing messages.
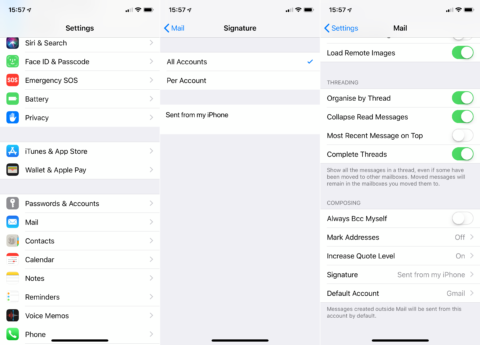
Of course, regular text-based signatures can be added to the Mail app easily enough. To do so, head to the Mail section of the Settings app, choose Signature, and then type in the text you’d like to appear at the bottom of your email messages (the default is “Sent from my iPhone”).
Who would want a text-based signature?
You can also set specific signatures for individual accounts, which may be useful if you have personal and work email accounts connected to the same iPhone or iPad. But text-based signatures are boring, right? To add a handwritten sign-off to your messages, there are one of two routes you can take.
Route 1: scan your handwriting
This route involves adding a picture of your real signature to outgoing messages.
Create a new note in the Notes app, and tap the + button above the keyboard. Choose Scan Documents. When the camera opens, take a snap of your handwritten signoff and adjust the corners to crop it down. Tap Keep Scan when you’re done, and then Save. Tap the image you just scanned to bring it fullscreen, then press and hold it and choose Share, then Save Image. This will add it to the Photos app for easy access later.
To add this signature to outgoing email, you’ll then need to tap the screen at the end of your message in the Mail app, choose “Insert Photo or Video,” and add the picture into the email.
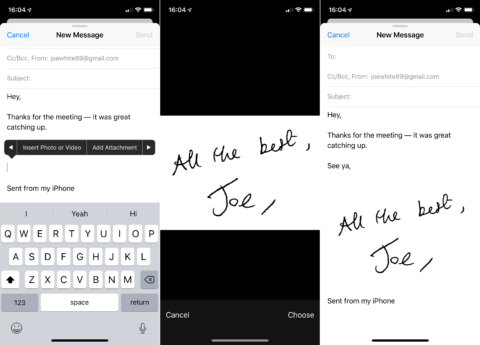
We used Scanbot to create this scan of my handwritten sign-off.
There are a couple of problems with this route. Mainly, you’ll find that your handwritten sign-off looks disproportionally big in comparison with the rest of the message. It’s also harder to customize your handwritten sign-off (you need to make a new one each time a change is required).
Route 2: draw with your finger
This second technique involves adding a digital drawing into your outgoing email. It’s a little quicker and easier than the previous tip, though lacks a little authenticity.
After you’ve finished writing up a message in the Mail app, find the annotation button in the row of icons which sits just above the keyboard. This looks like a pencil, and will let you write out a signature or sign-off using your finger and your device’s screen.
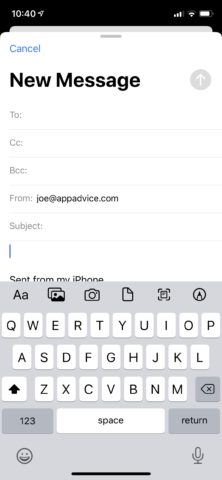
Look for the pencil icon.
The downside of this process is that the white drawing canvas is pretty big, and you can’t crop it down. Our advice: try to write as small as is comfortable, and use the top-left corner of the screen. If you do, your sign-off will fit better in the body of the email, and won’t look quite so big and out of place.
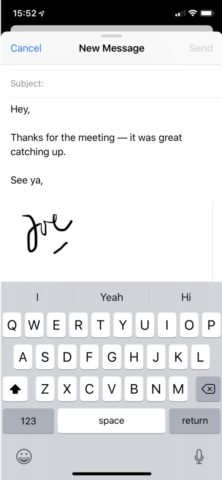
A personal sign-off.
Both routes result in a handwritten signature being added to your email; give each one a try and see which you prefer. Either option will result in a more personalized touch being added to your outgoing messages.