
Following Pages, and Keynote, the last member of the iWork suite is Numbers, which lets you create spreadsheets. With options to add tables, graphs, and formulas, we take you through the basic steps to create a working spreadsheet.
Use iCloud
When you open Numbers for the first time, it will ask if you want to use iCloud. We recommend doing so, as then you can share documents with your other Apple devices or online through www.icloud.com.

iCloud will allow you to store your spreadsheets securely online
Create New
Once the setup process has finished you can begin creating a new spreadsheet. You can start with a blank sheet or pick from the default options. There are several layouts included, such as Personal Budget, Meal Planner, Invoice, and so on. We’re going to start with a Blank sheet to show the simple basics but feel free to use any of the included templates.

There are plenty of Templates to choose from to start your spreadsheet.
Entering data
At first the sheet will be clear and you’ll want to enter data. Double-tap any cell to bring up the data entry box across the top. You can enter numbers, dates, text, or formulas using the four icons next to the entry box. We’ll cover formulas in more details later.
If you tap the Number option (grey 42) then a number pad appears with other options. If you tap the Clock icon (green clock) then you can quickly enter dates or times using the default options, or select the Type option (grey T) to bring up the keyboard and type. To enter more data simply tap any cell once. When you’ve finished tap the green tick icon.
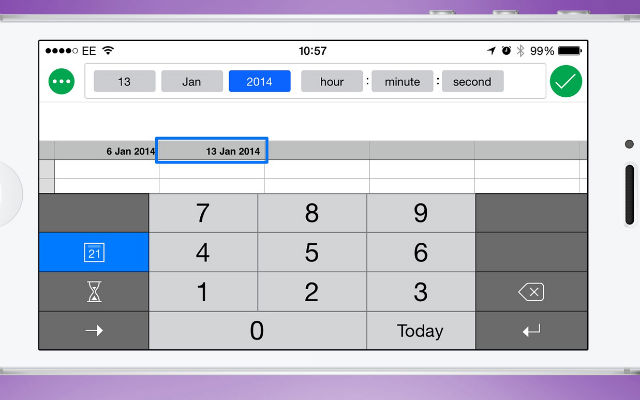
Use the clock option to quickly enter
dates or times.
Simple formulas
One of the best features of a spreadsheet is the ability to add simple or complex formulas, and Numbers makes it easy to do so. When the entry box is visible, tap the Equals symbol to access the formula keyboard.
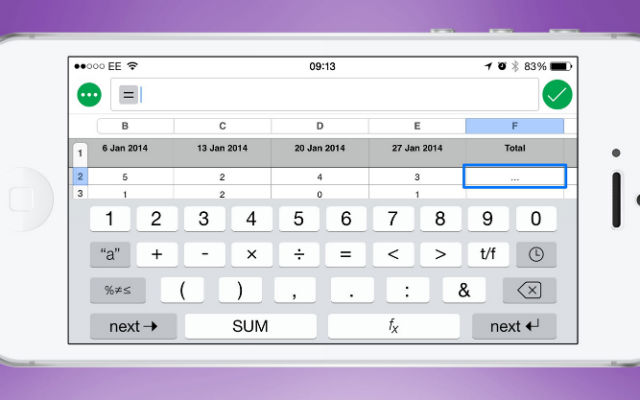
The formula keyboard holds all the necessary options for calculations.
On this keyboard you have access to all the mathematical symbols, such as + or – as well as the SUM button. The SUM function is one of the most commonly used and allows you to find the total for a range of numbers when added together.
In our example we want to find the total number of goals scored over four games of football. Simply tap the SUM button then any of the cells in the range. Now drag the dots on the orange box to encompass the whole range and tap the tick. You’ll see that the total now appears.
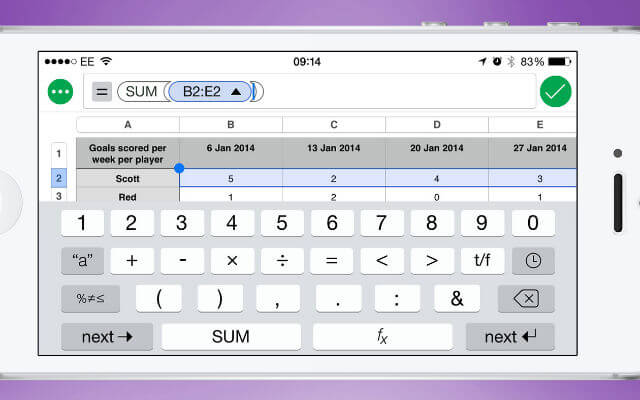
Select the cells you want to add together with the SUM function.
Copy formulas
Of course you could repeat the above steps for each row but it’s also possible to copy and paste formulas. Tap the first row once, and select Copy. In our example we have seven rows, so tap on the second entry to select the empty box. Now drag the blue dots to cover the other five rows also, so that a total of six are selected. Now you’ll want to tap Paste followed by the Paste Formulas option. This then adds together the numbers for all rows and fills in the total.
Format the cells
Apart from entering the data and calculating totals, you may also wish to format the table to make it easier to read. To edit the whole table tap the Edit option (green paintbrush) from the top toolbar followed by the table header. Here you’ll find a few default choices to change the header and row styles. For more choices, select Table Options and edit from here.
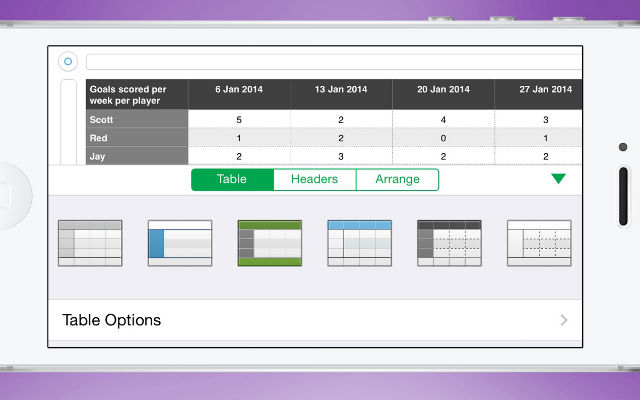
There aren’t many styles but you should be able to pick one to suit.
If you wish to edit cells, select the relevant ones and tap the ‘brush’ icon followed by the Cell header. Here you’ll be able to change the text style and alignment, and position within the cell. If you select the Format header then you’ll find options to change the cell, for example to a percentage or currency.
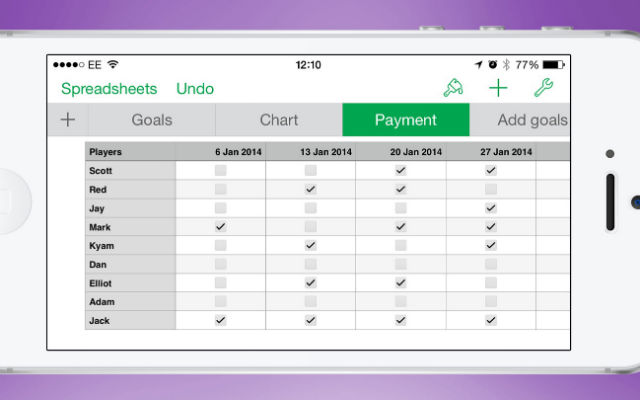
There are options farther down to turn into a pop-up box, checkbox, or star rating. These could be used to enter different values into your table quickly and easily if they are receptive. For example you may want to know if each player has paid for each week, so a simple check box will cut down on how long it takes to enter your data.
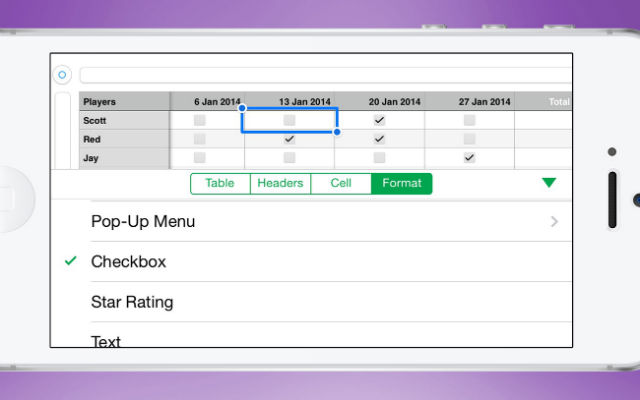
Simply tap the checkbox to enable or disable when not editing the cell.
Add new sheets
While it can be handy to have all your information on one sheet, you may need to separate your data to make each table easier to read or for different purposes. To add a new sheet, tap the plus icon with a gray background and choose New Sheet. This will then present you with a blank table that you can enter data into.

Add a new sheet to your document to
add more data.
To edit the name of any sheets, simply double-tap on the name in the gray bar across the top.
Copy data
If you’d like to use the same data from previous sheets then you can do so. Double-tap a cell, then tap the equals symbol. Now select the More option (green circle with three dots) next to the text entry box and tap the Down button (V symbol) . This reveals the names of the other available sheets and you can tap on any to switch to it. Now select the cell, row, or column that you wish to use and tap the ‘tick’ icon. The same information is then copied across. If you change any of the original cells, then they will also change here.
Reuse data from one table to another,
such as player names in our example.
Use a form
Another option for entering data is to create a form. To do so, tap the gray + again and select New Form. You will then need to select from the available tables. This automatically adds the data from the table to the form.
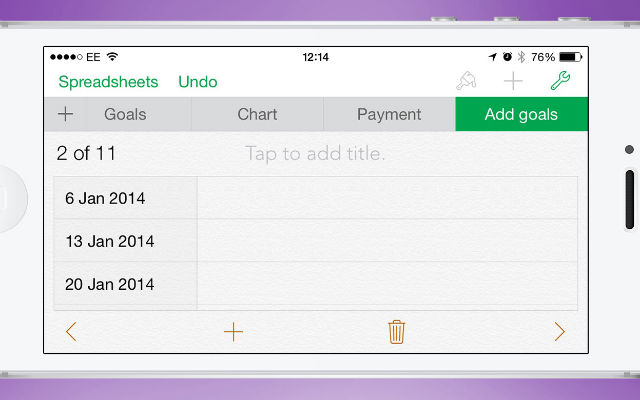
Use the form to quickly add new entries to your main table.
While looking at the form, tap the + button to create a new entry. In our example, we can add new players to our main table. Each text box will be empty and you can enter the data. If you return to the original table, you’ll see that the new entry has been added automatically.
If you add new columns to the original table, then they are also added to the forms and you can enter the data in the form.
Make a graph
After you have a table with several entries you can then create a graph to show off the data visually. To create a graph, tap the + icon followed by the ‘graph’ option. Select 2D, 3D, or Interactive and swipe across the screen to access the different color schemes. Tap on one to add it to the current sheet.
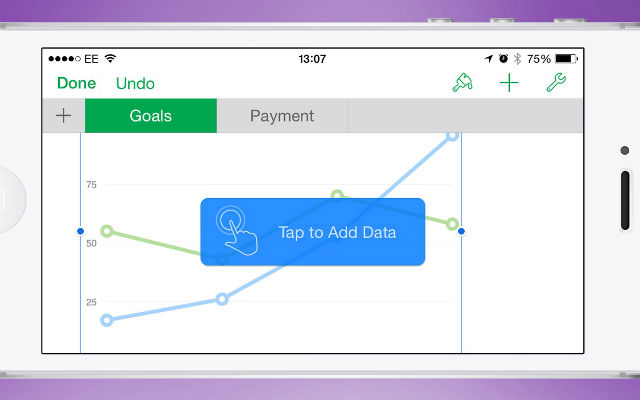
After you’ve chosen your graph style you need to add the data.
At first the graph will be empty. Simply tap on it to choose the range of cells to draw the data from. Tap a cell and then drag the blue dot to select the required range of cells and tap Done. The data will then be displayed visually in graph form. If you update the table, the graph will also change to match.

The 3D graph can look more interesting than a 2D option.
If you decided on using a 3D graph, then you can change the angle of its display. Tap on the transparent overlay and drag your finger around on screen to do so. To edit the size of your graph, tap on it once, and drag the blue dots on any side.
Share your spreadsheet
Once you’re finished with your spreadsheet you may want to share it. To do so, tap the ‘wrench’ icon and select Share and Print. From here you can share a link on iCloud, send a copy via email (which also allows you to export to Excel), open in another app, or print it out.
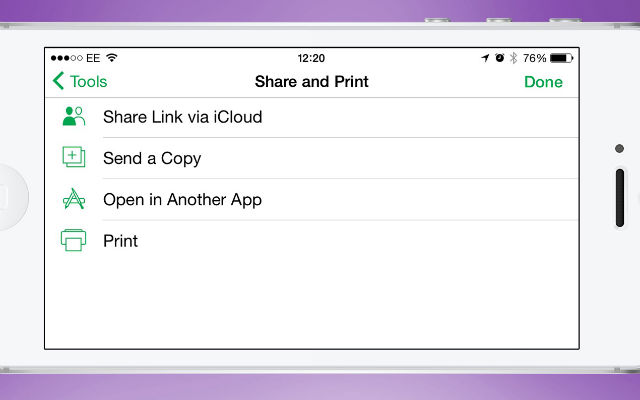
Share or print your spreadsheet from within the Numbers app.
A Numbers expert
Now you should feel comfortable in creating a whole spreadsheet using the Numbers app on your iPhone.
Price: Free
Version: 2.1
Size: 234 MB
Developer: Apple
![]()