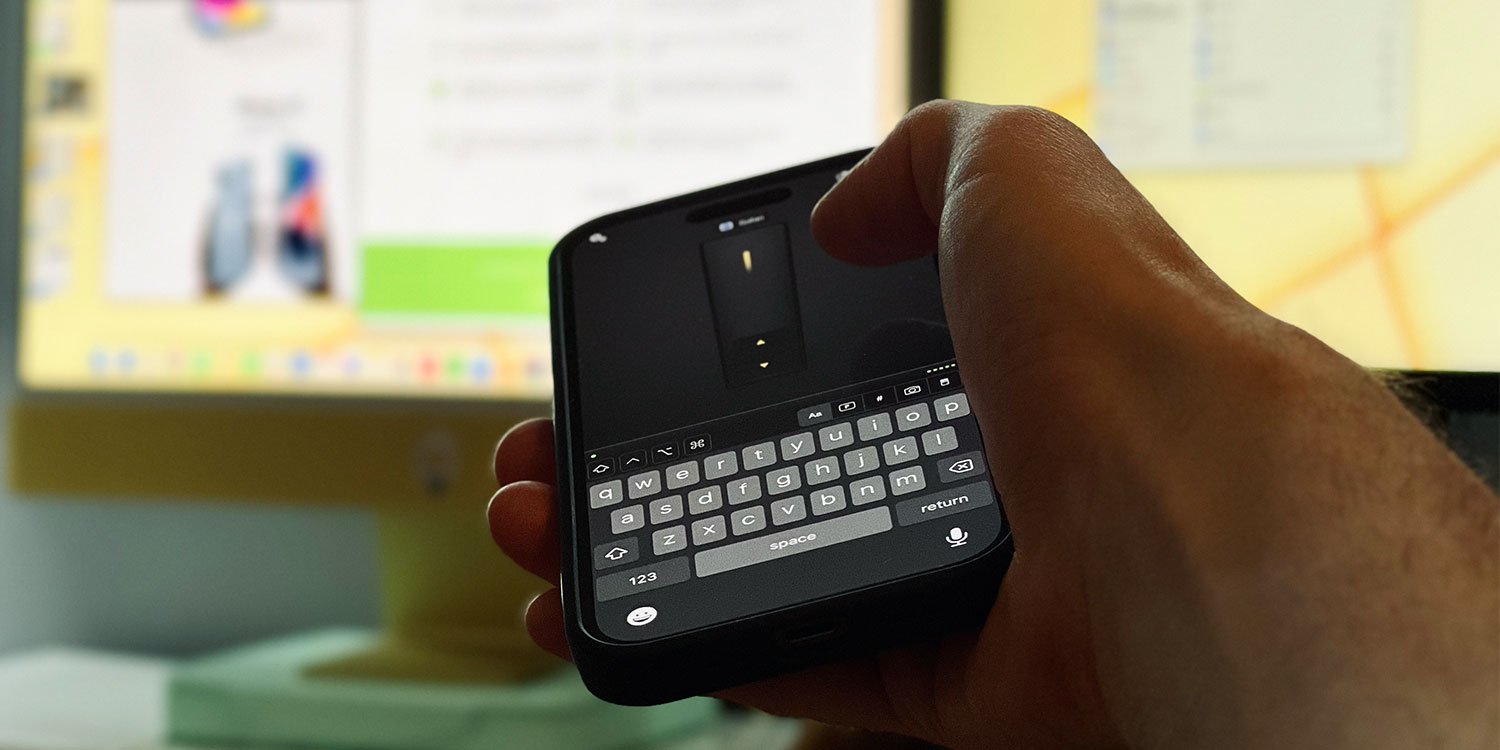

Forget conventional keyboard and mouse. Did you know you can control your Mac with your iPhone?
There are plenty of reasons you might want to do so, especially if you have a computer set up as a media center. Many people keep a Mac mini in a cupboard as a network drive, watch TV on an iMac from the sofa, or blast tunes from a MacBook while doing chores.
Setting up an iPhone as a glorified remote control means you can easily access playback controls or switch apps without getting up and clacking away at a desk.
If you think that sounds useful, here’s how to do it.
Getting set up
For this trick, you’ll need to install Mobile Mouse Remote on your iPhone and Mobile Mouse Server on the Mac you wish to control.
Open the Mac app first to prepare your computer for remote control. You’ll need to grant it some permissions – open System Preferences > Privacy & Security > Accessibility and toggle Mobile Mouse Server on. If you have any other firewall or antivirus software active, make sure to allow the connection there too.
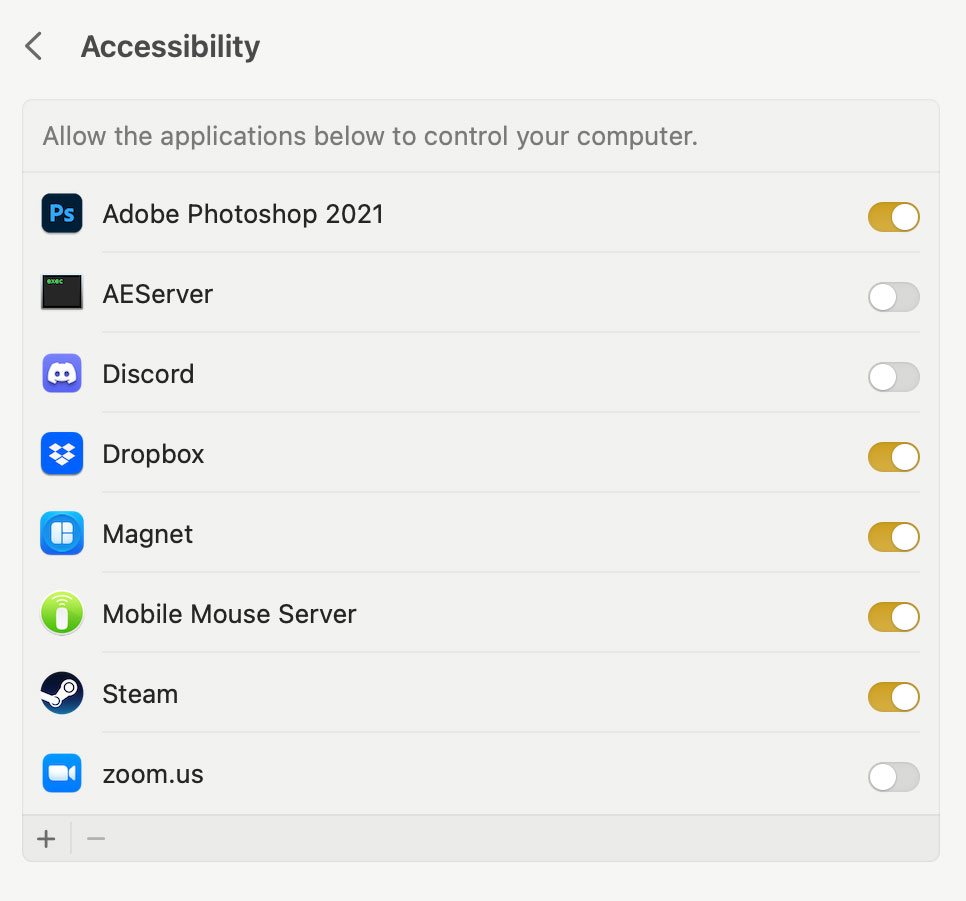
Note that the app lives as an icon in the Mac’s top menu bar if you ever need to close it or adjust the settings.
Next, ensure both devices are connected to the same Wi-Fi network and fire up the iOS app. Press to Allow it to connect to devices on your local network and it will automatically search for your computer. In our testing, it connected within a few seconds. You’re now in control of your Mac!
Using the remote
Once you’re connected, you’ll probably want to know what Mobile Mouse Remote can do.
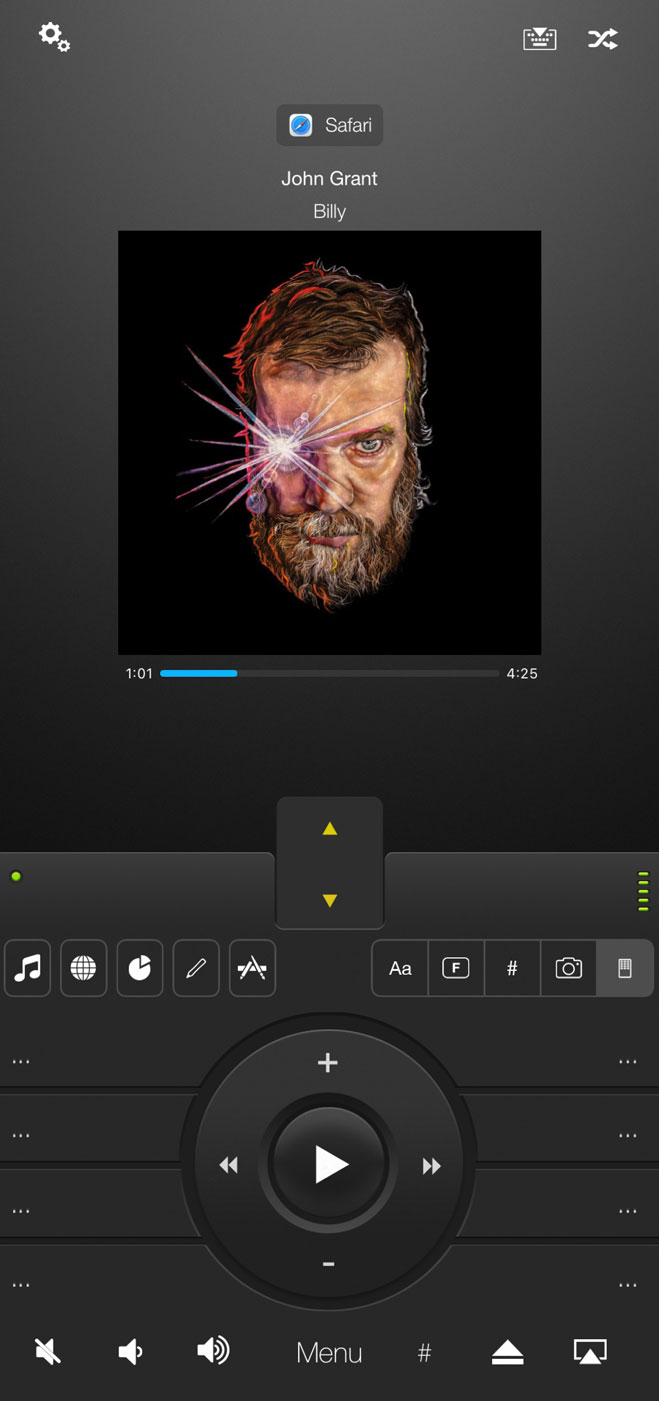
For starters, you can swipe anywhere across the top half of the screen to move the mouse cursor, much like using a trackpad. If you’re playing music, it’ll give you a preview – but you can swipe right over it, no bother.
Tap anywhere to click, or use the bar just above the keyboard as designated left- and right-click buttons. The yellow arrows in the middle act as a virtual scroll wheel – swipe across it to scroll vertically or horizontally around a page. If you’d rather use the entire screen, there’s a button to hide the keyboard.
Speaking of which, the keyboard mode is really clever. Obviously you can type as normal, but the row of buttons above the keyboard gives you a ton of other options. Tapping any of the icons to the left will hold down the shift, control, option, and command buttons respectively – handy for keyboard shortcuts.
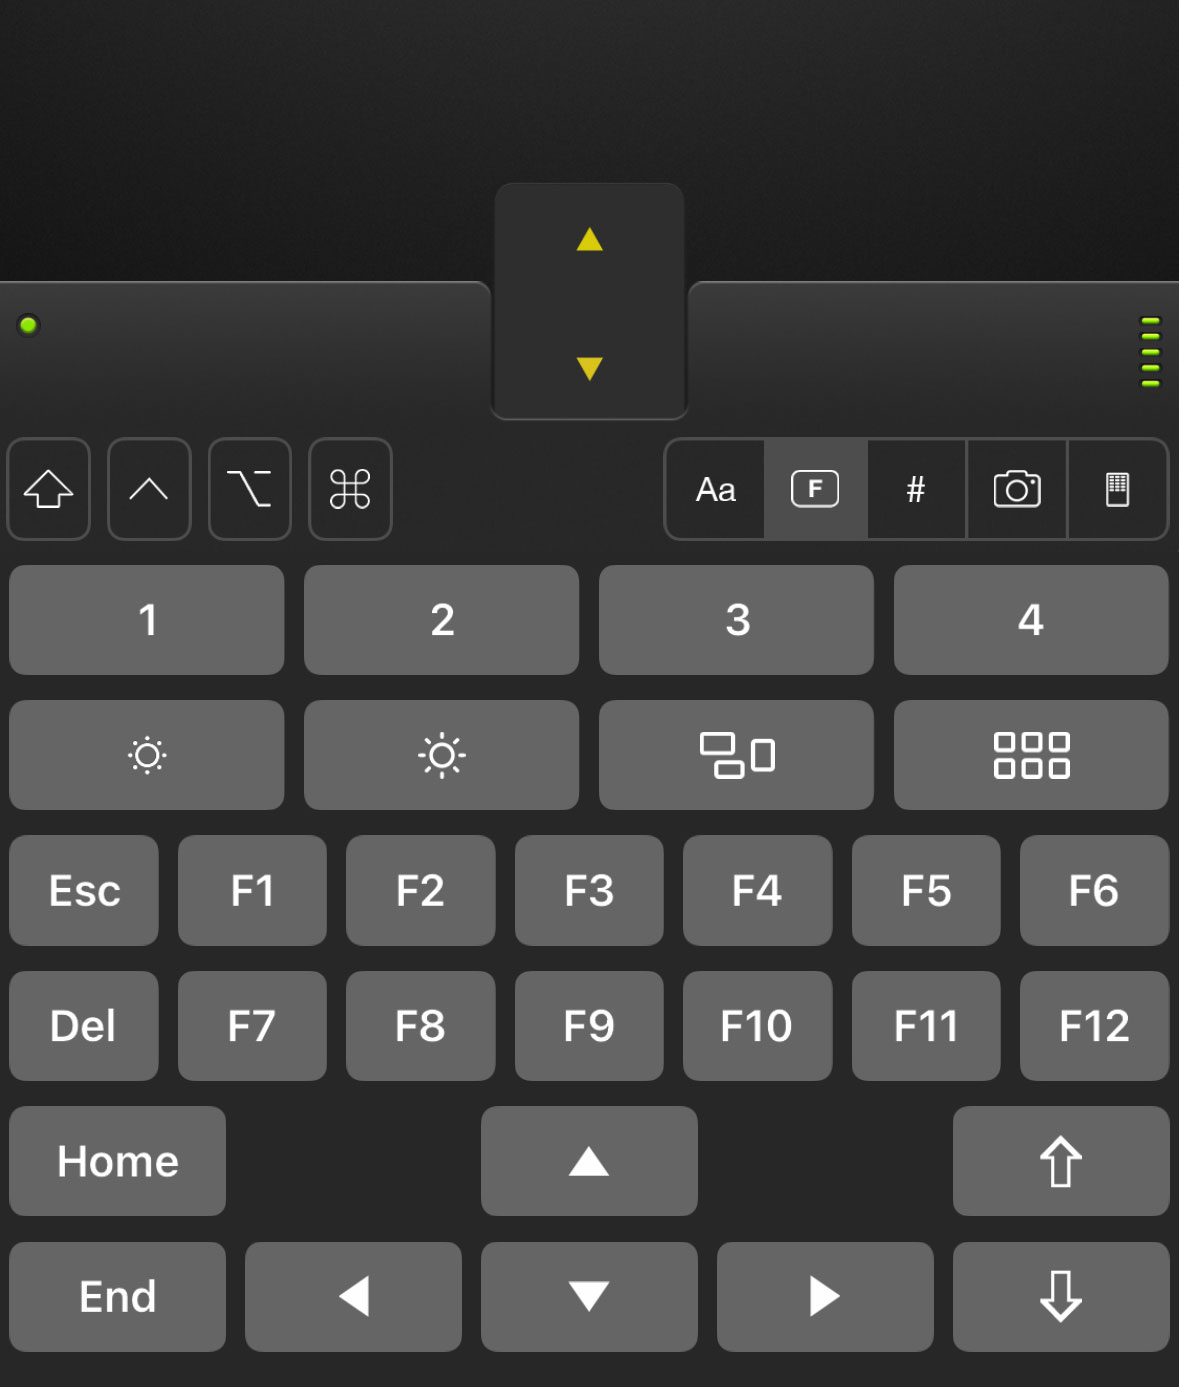
The toggles to the right switch the keyboard to display function keys or a full number pad. There’s a camera icon that allows you to snap photos or scan documents, but it’s the final button that we found the most interesting.
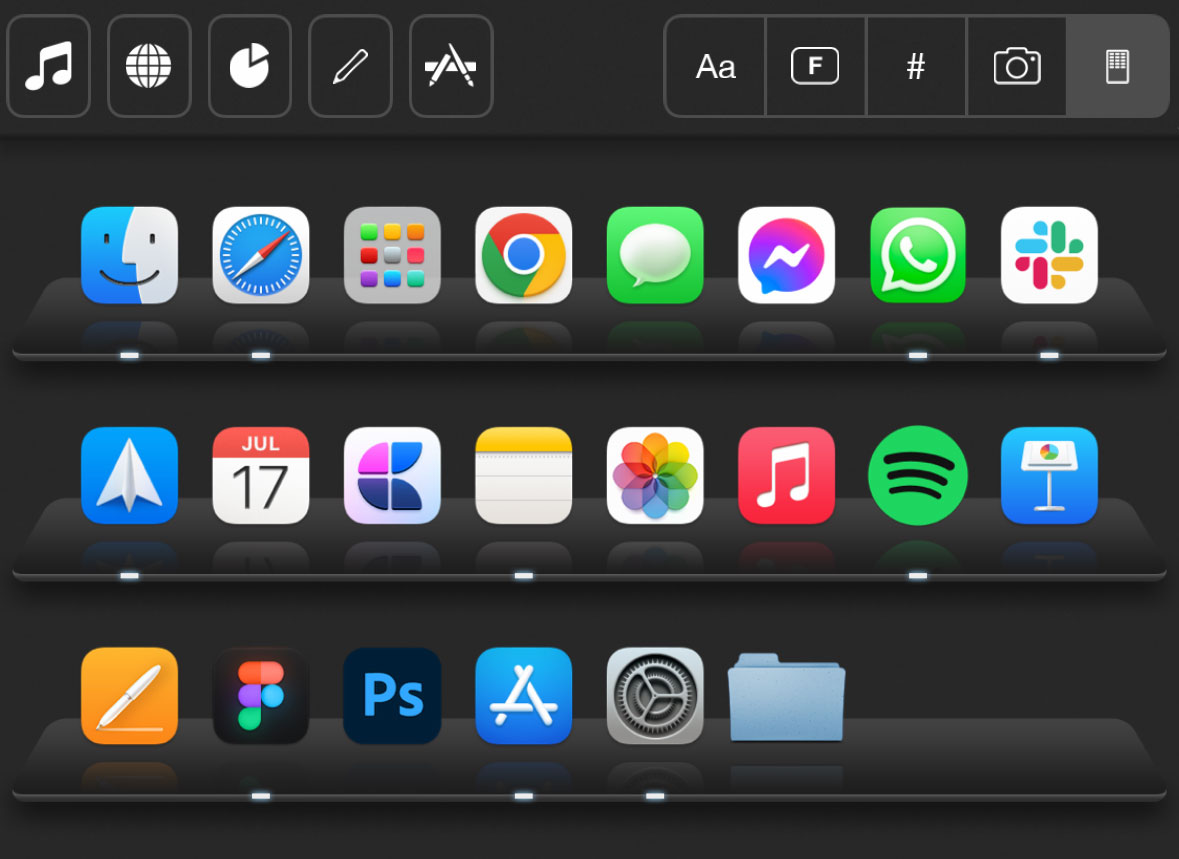
Tap the rightmost icon to bring up a series of bespoke modules for various uses. The icons to the left allow you to switch between five different setups: music playback controls, web browsing shortcuts, a presentation remote, a drawing pad, and app dock. That final one replicates the dock on your Mac, giving quick access to open any of your favorite apps.
Magic mode
Finally, there’s something called the “in-air” mouse mode, and it might just blow your mind. Tap the button in the top right to switch modes and you’ll be presented with a minimal view that looks a bit like a regular mouse: left and right clicks, a scroll wheel, and a mysterious trigger top and center.
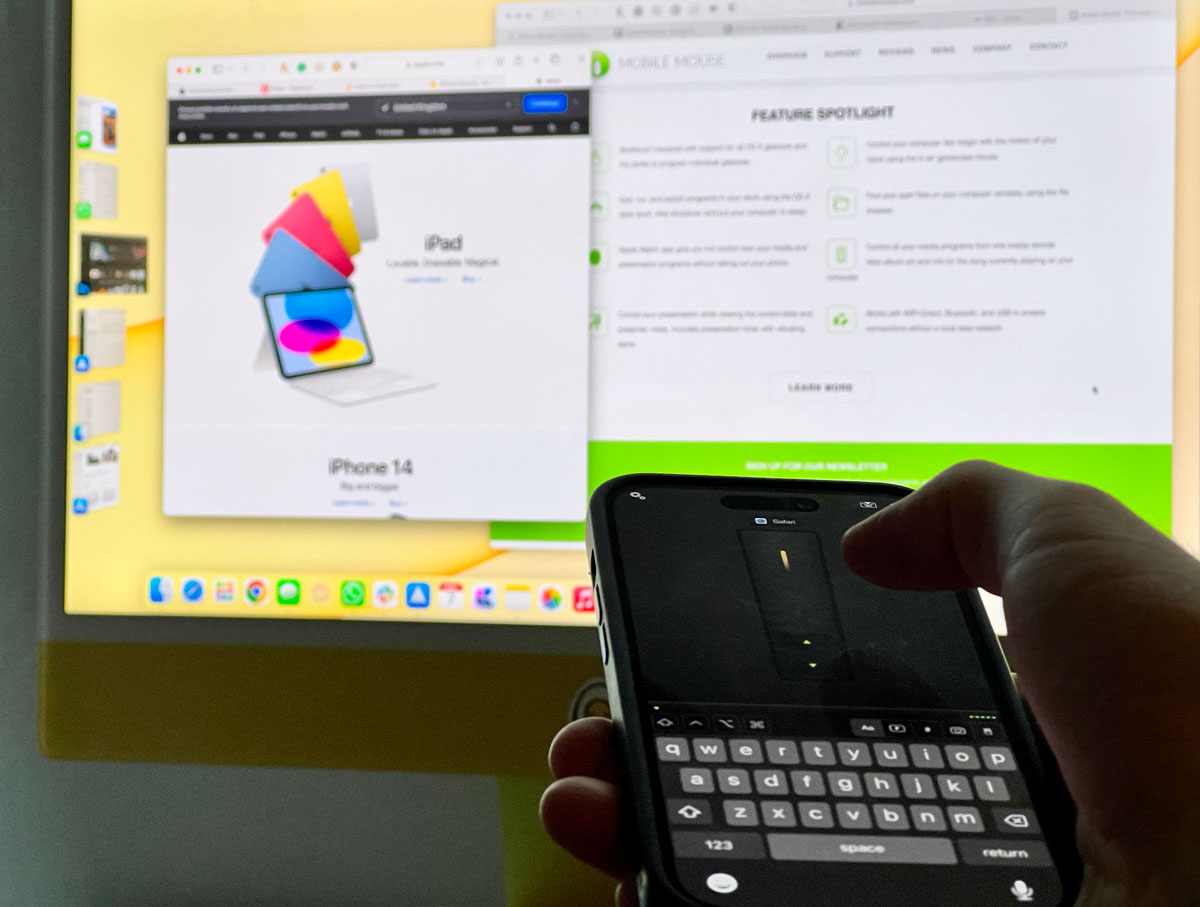
Press and hold this trigger and you can move the cursor by waving your hand around. Aim at the screen like you’re using a laser pointer, and as if by magic, the mouse will follow. Pretty neat, and super useful for live presentations. (By the way, if presentations are what you’ll be using this for, we’d recommend the $2 IAP to unlock the “pro presentation module” too.)