

If you’re someone who likes to take a little extra care over the framing of your photos, then you’ll know all about that sense of frustration when your best shot isn’t quite aligned just right.
When you’re using your iPhone camera in a ‘fire and forget’ manner to capture the moment, it’s rarely practical to get all of your ducks in a row before pressing that shutter button, and the perspective can suffer as a result. Thankfully, there are some powerful yet simple tools available to correct for a wonky snap within the stock Photos app.
You can also take things a little further with third party image editing app Ultralight. Here’s how to utilise both apps to straighten (or tilt) your snaps.
Perspective correction in Photos
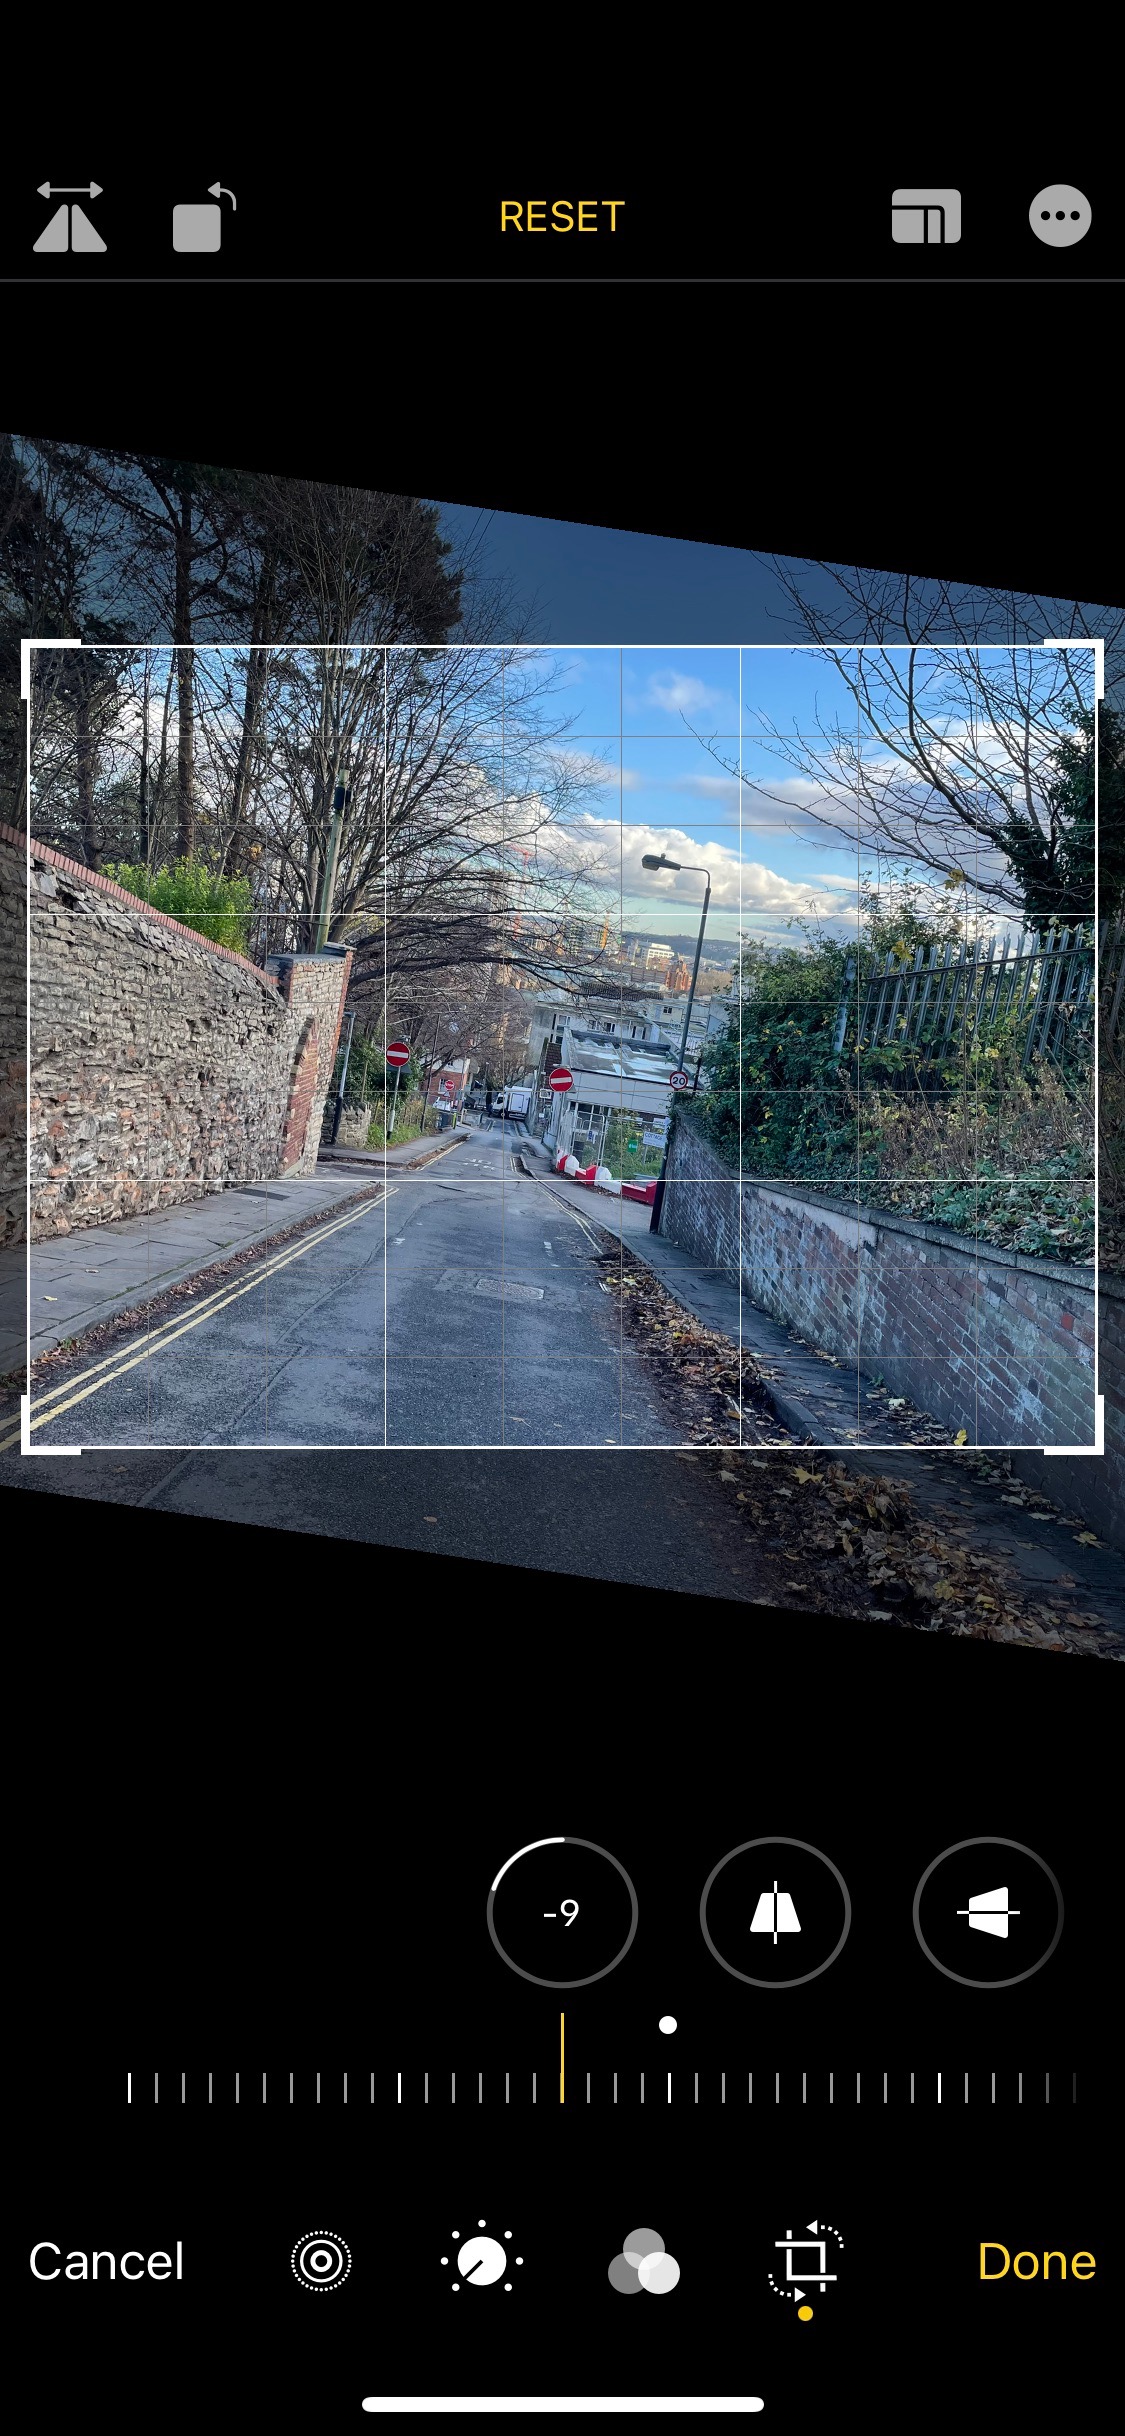
Open Photos and navigate to the shot you wish to correct. Hit Edit in the top right corner, then select the Straighten tool to the bottom right.
Now drag left and right on the horizontal gauge along the bottom of the screen to rotate the image in either direction. You’ll note that the original framing ratio will remain, showing which sections will be trimmed. You can select a different ratio (16:9, square etc.) by hitting the box icon in the top right.
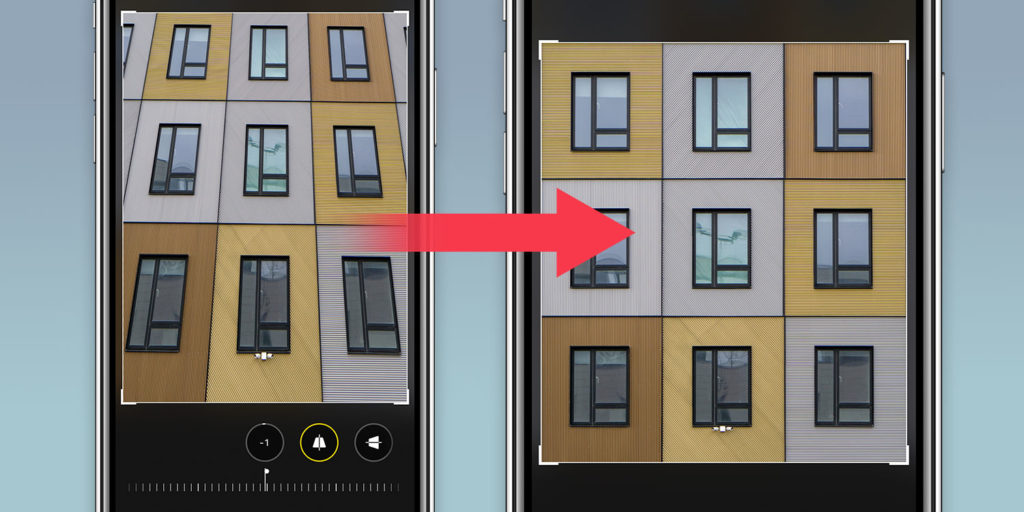
The buttons to the left of the rotation control allow you to shift the perspective along a vertical and horizontal axis. This is particularly helpful if you’ve photographed something square – like a building facade – and your positioning has thrown the angles off. Realigning these kind of shots to perfection can be a really powerful effect.
Hit Done when finished to apply your changes.
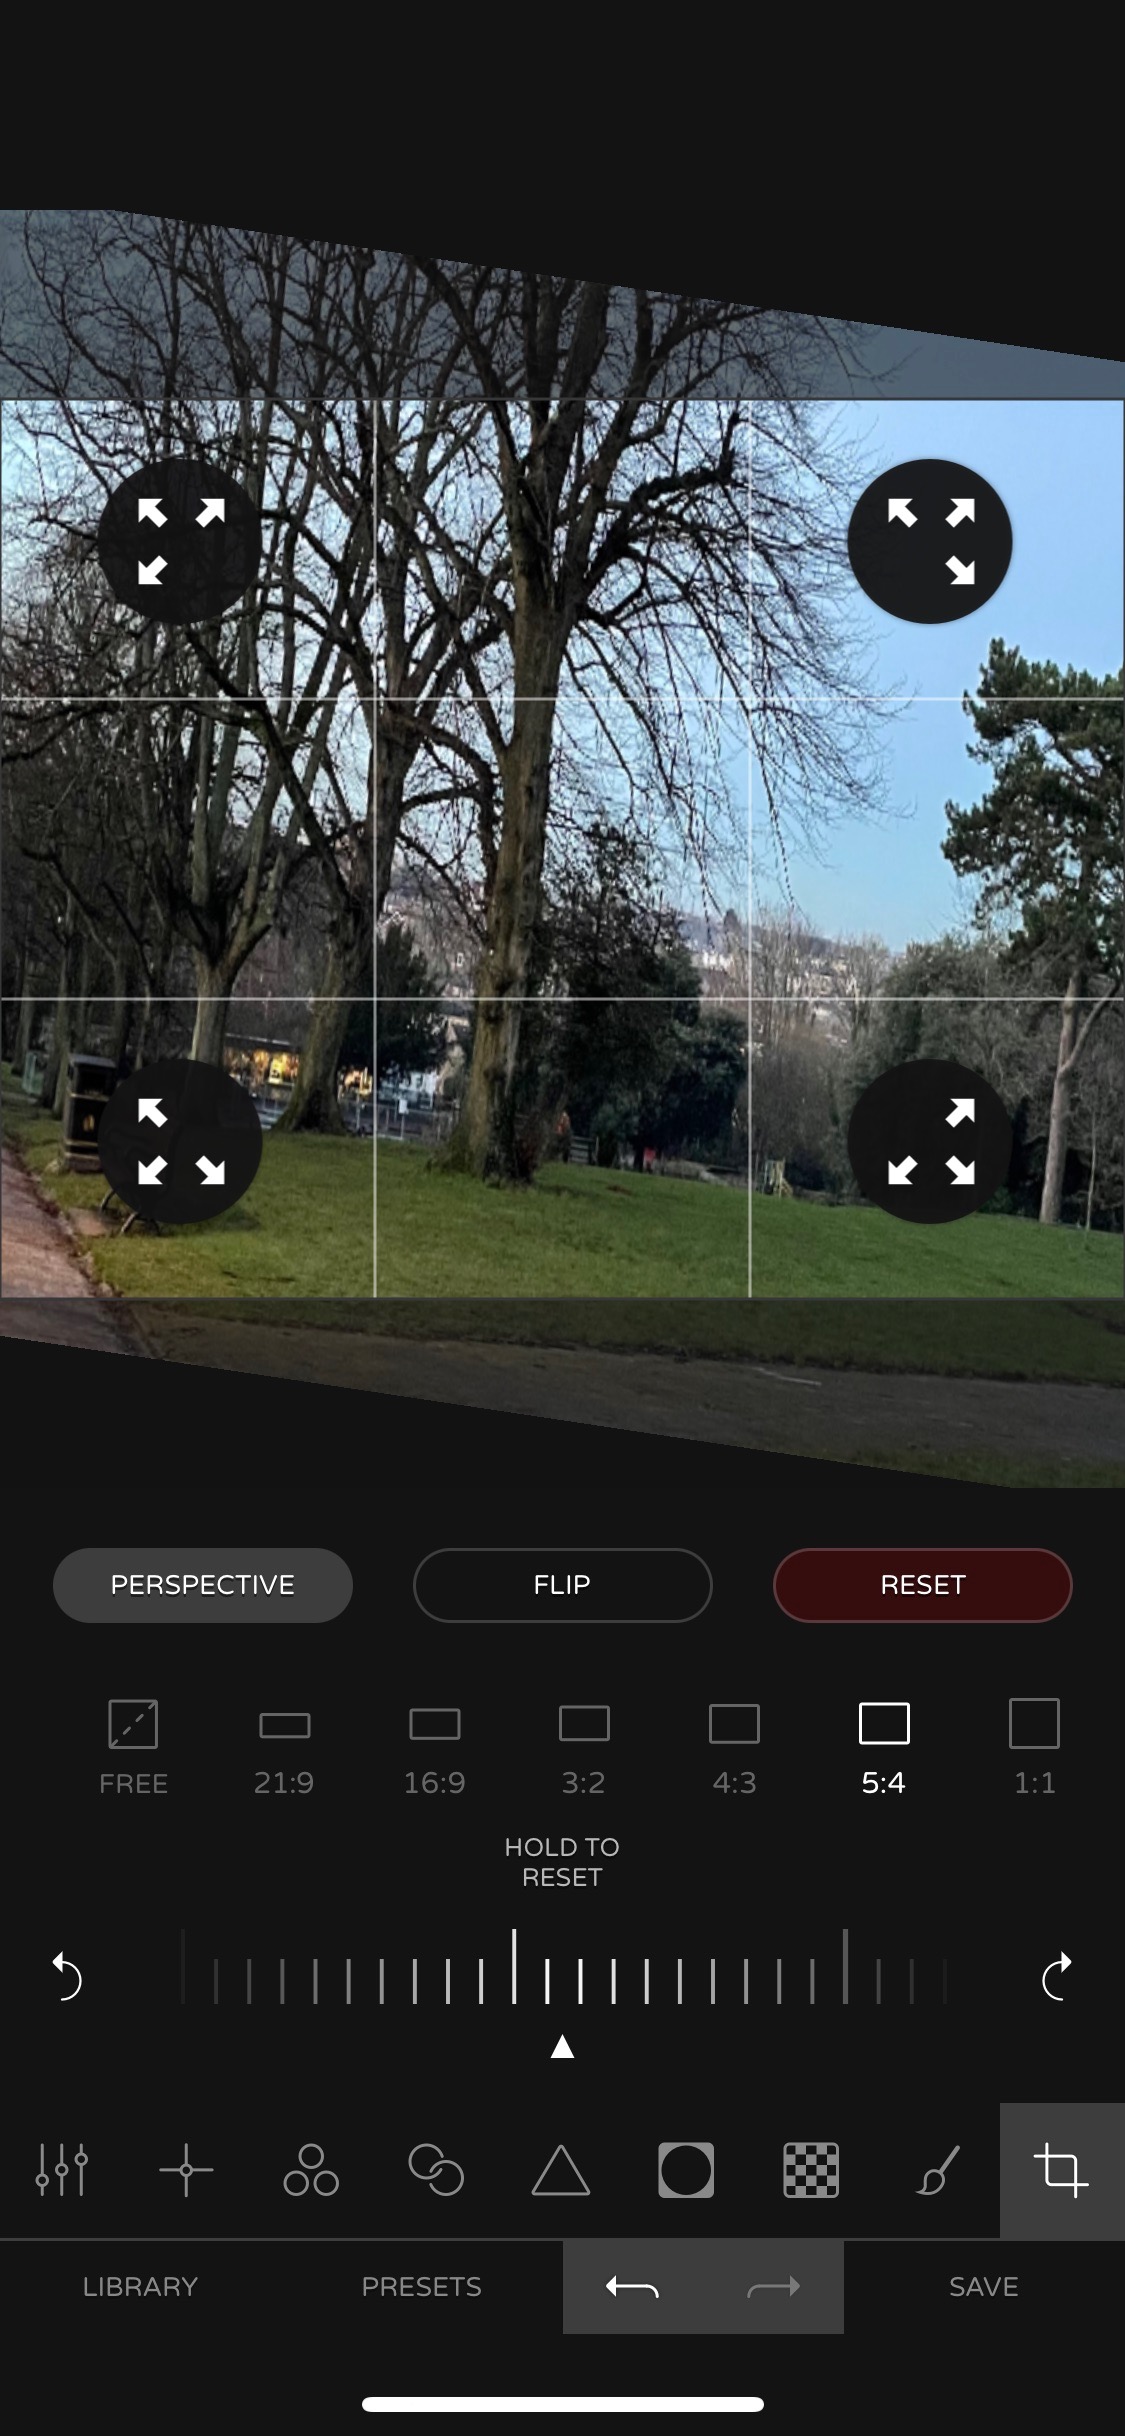
Using Ultralight to go further
Having downloaded the free Ultralight app from the App Store and granted the necessary image permission, select the photo you’d like to edit from the grid at the bottom of the screen. Now hit the Edit tab, followed by the resizing option on the far right.
You can rotate shots in a similar manner to the above Photos method, by scrubbing left and right on the horizontal gauge, and you can also reframe using the templates provided immediately above. It’s also possible to fine tune the perspective using any sector of the image as an anchor point. Just hit the Perspective button on the left and drag from any point on the image in any direction. This offers even finer control than the stock app allows, making it easier to create the perfect shot.
Hit the backwards arrow at the bottom to undo your last edit, or hit Save to finalise your edit, either as a fresh copy or as an overwrite of the original snap.