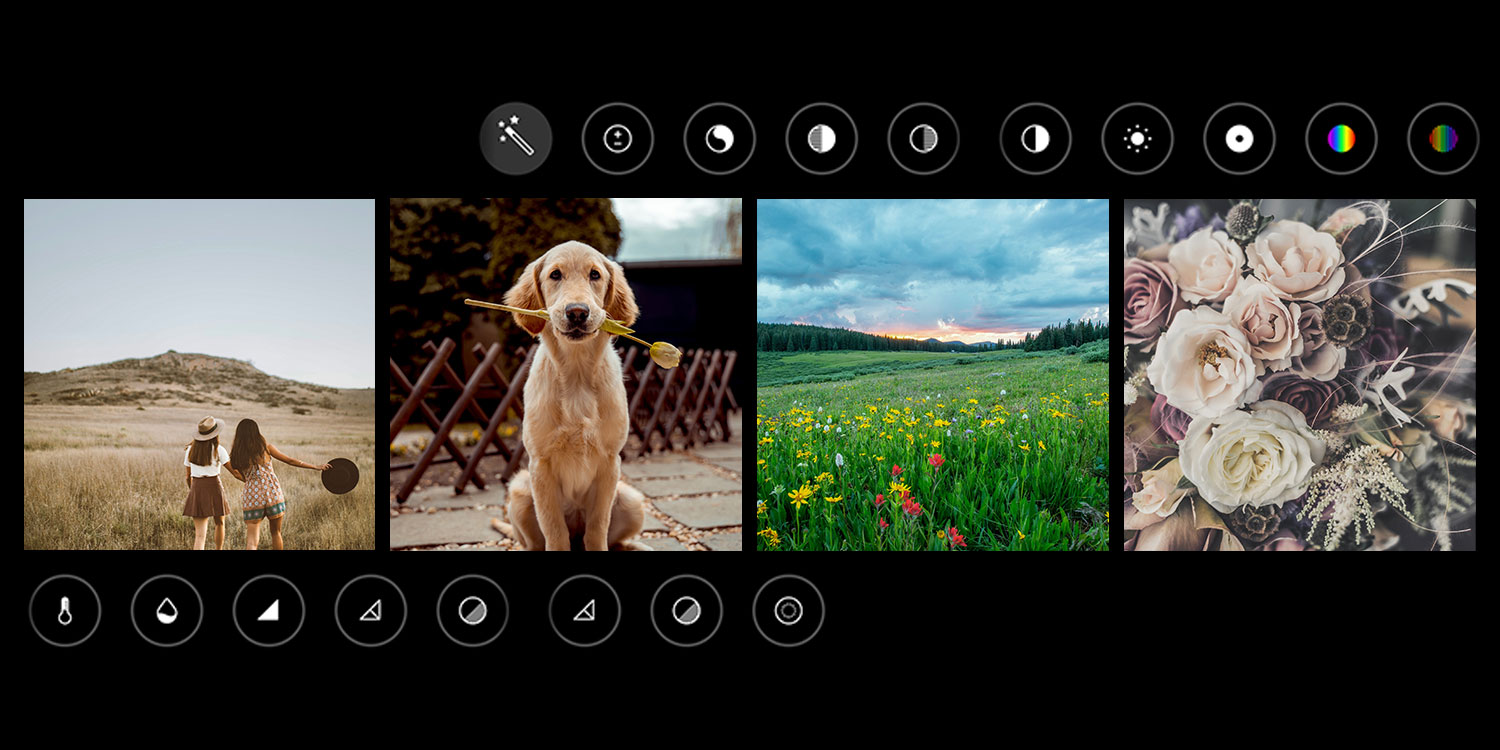

The photo editing interface built into iOS is a pretty powerful tool – and all the edits you can apply to photos work with video clips too. But with so many adjustments available, it can be a little overwhelming if you don’t know the terminology.
Understanding these tools will massively level up your photo editing game. It gives you far more control than simply tapping a pre-built filter, allowing you to hone in on the perfect look every time.
So if you’re unfamiliar with photo editing tools, here’s a quick guide to every single adjustment available to improve your shots.
Finding the adjustments
To get started, open the Photos app and tap on an image. Next, tap the Edit button (top right) to reveal Photos’ range of editing tools. Lastly, tap the Adjust button on the left (it looks like a dial).
If you’re in a rush, the Auto option lets you magically improve an image with a single tap. Photos will sharpen the image, boost color, and make other intelligent changes to give your photo some je ne sais quoi. You can always use this as a way to get started, and then tweak the automated settings to your liking.
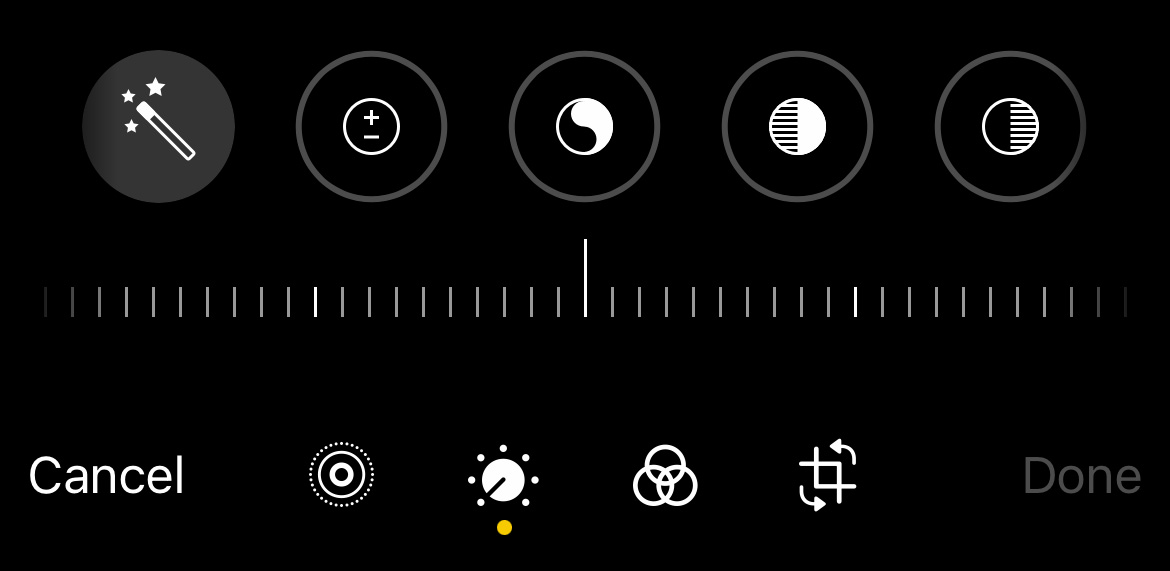
Slide past the Auto tool to get stuck into the manual adjustments Photos has to offer. If you want to see how your picture looks without specific changes, instead of moving the control slider to zero, simply tap on the tool icon to toggle your changes on/off.
You can also tap the image itself to toggle all changes on or off, giving you a chance to compare your handiwork with the original photo.
Now, let’s take a look at all 17 of those adjustment sliders and how they can be used. We’ve included visual examples of some common use cases, but nothing beats hands-on experimentation as a way to make this knowledge stick once you’ve read the basic theory.
Change the lighting
There are several ways to improve the lighting of an image – whether too light, too dark, or too foggy these tools will help you out.
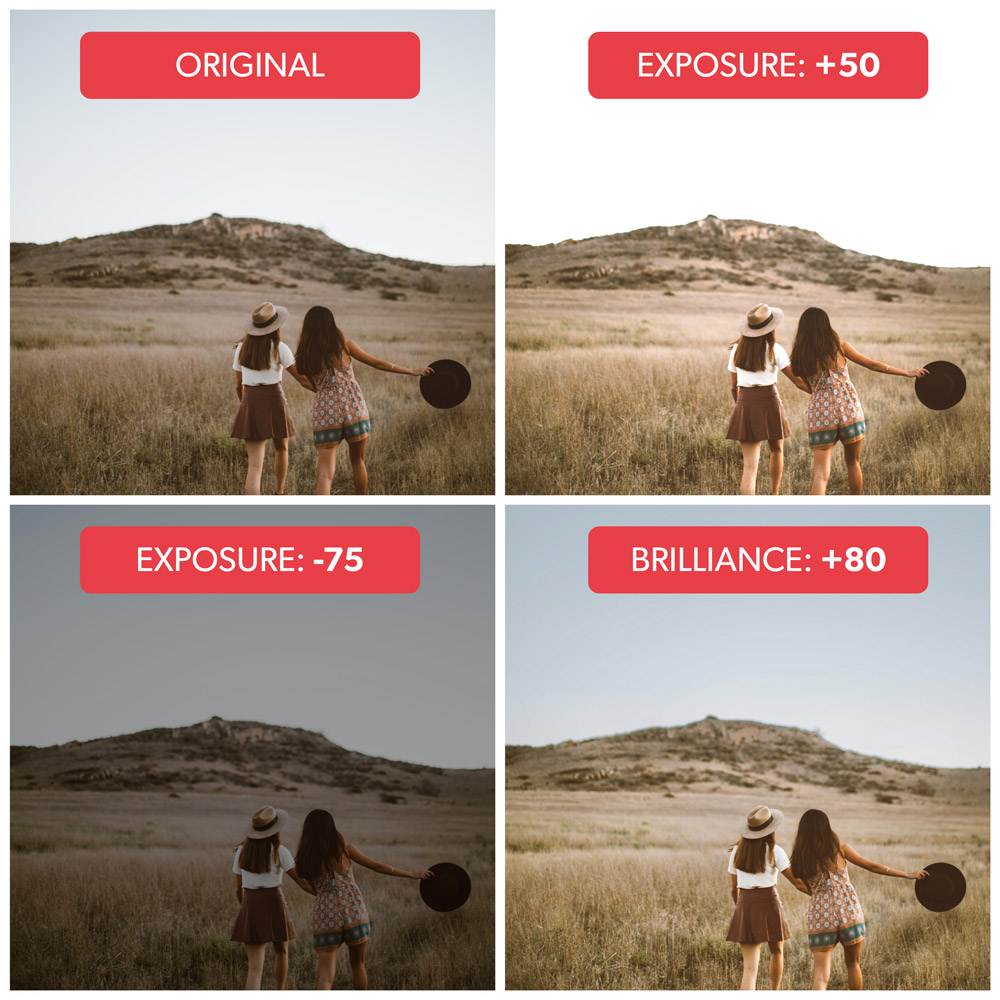
Exposure allows you to adjust the amount of light in your photo, making it lighter or darker. Be wary with this tool – it’s easy to bleach out whites in your images, which can look okay on screen but won’t fare well for printing.
Brilliance alters the brightness of an image a little more dynamically than Exposure. It brightens up the image whilst adding subtle contrast to refine the subject.
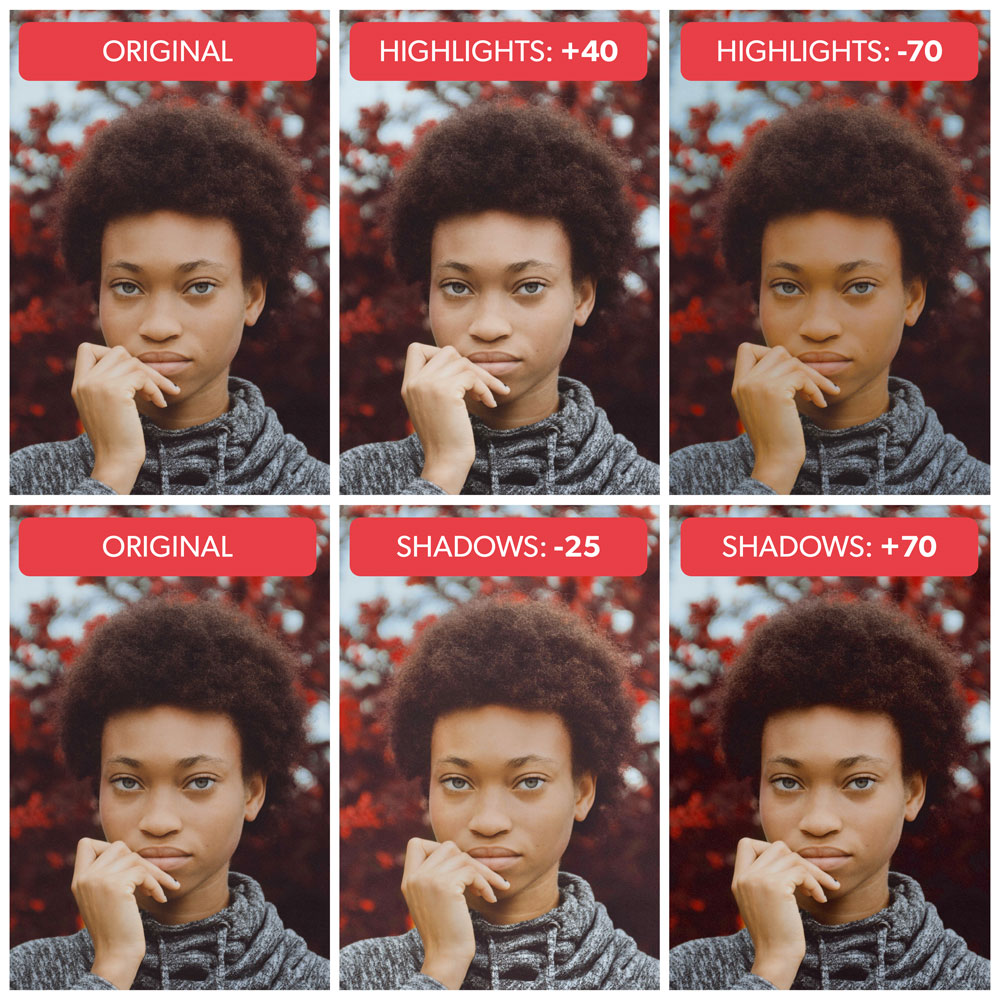
Highlights allows you to increase or decrease the brightness of only the lightest parts of the image, without affecting the darker tones.
Shadows works in a similar way, and will adjust the brightness of the darkest parts of the image, without affecting the highlights or mid-tones.
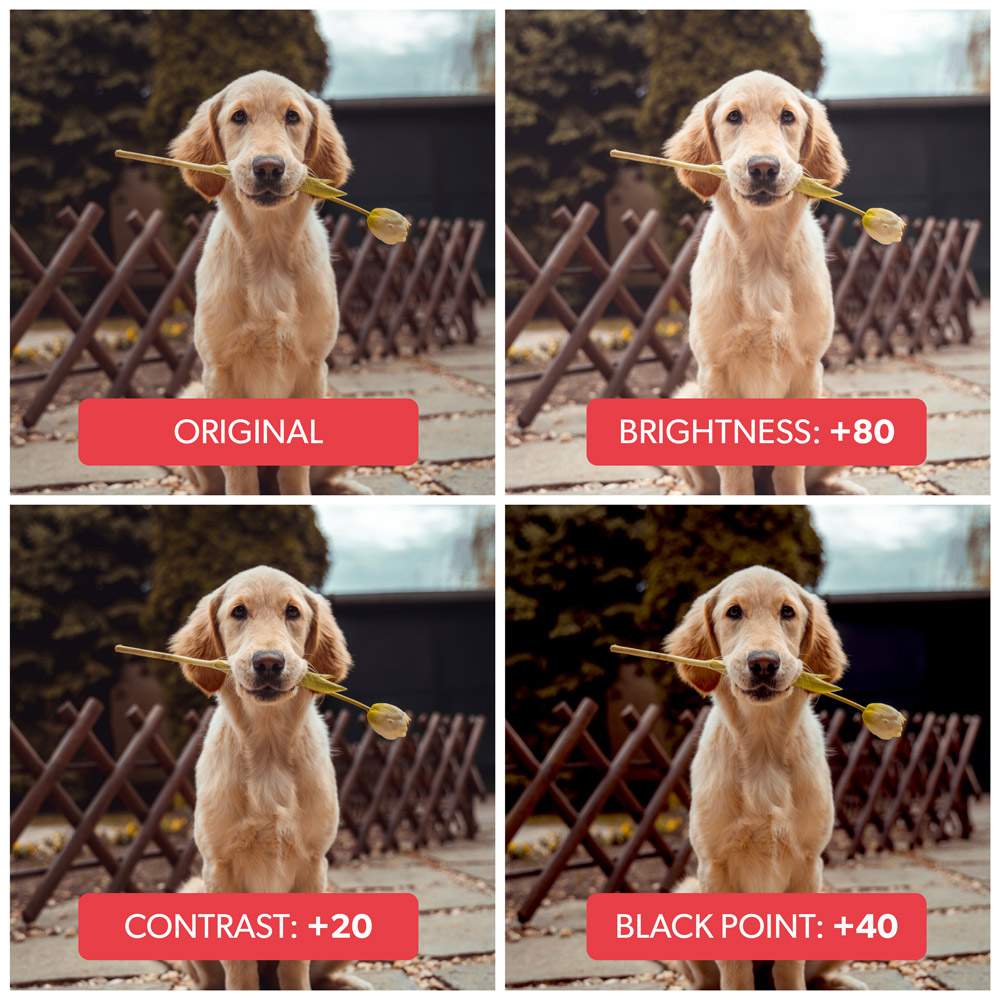
Brightness adjusts how light or dark an image is, and is similar to Exposure. However, making an image darker using the Brightness tool, will produce a more saturated dark image with higher contrast than using the Exposure tool.
Contrast will increase or decrease the difference in tone of the highlights and shadows. Turn it up, and the highlights will become brighter and shadows darker. Turn it down, and the highlights and shadows will get closer to the mid-tones in the image.
Black Point determines the darkest shade in the image – increase to make all the deep shadows in the image completely black, or decrease to soften them to a more charcoal shade.
Tweak the colors
Sometimes a photo just doesn’t seem as vibrant as it looks in real life, or cloudy weather has resulted in muted, cool-toned images. Photos offers some detailed editing tools to adjust the color of an image.
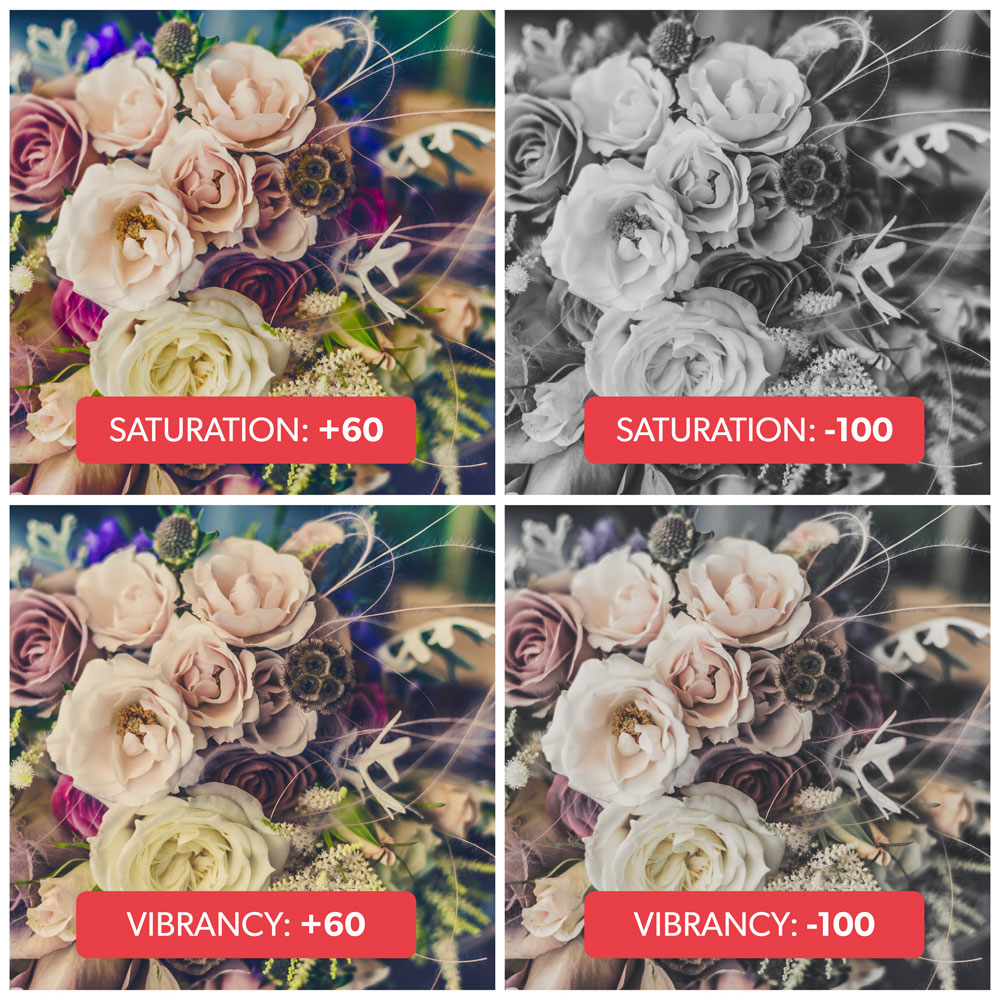
Saturation allows you to increase or decrease color intensity. Subtle changes work best here – using the extremes can spoil your image. That said, you can make any photo black and white by setting Saturation to -100.
Vibrance is very similar, but tends to brighten the colors more realistically and less intensely than Saturation. Turning Vibrance right down to -100 won’t make your image black and white, but can offer some beautiful muted tones that give a vintage feel to your photos.
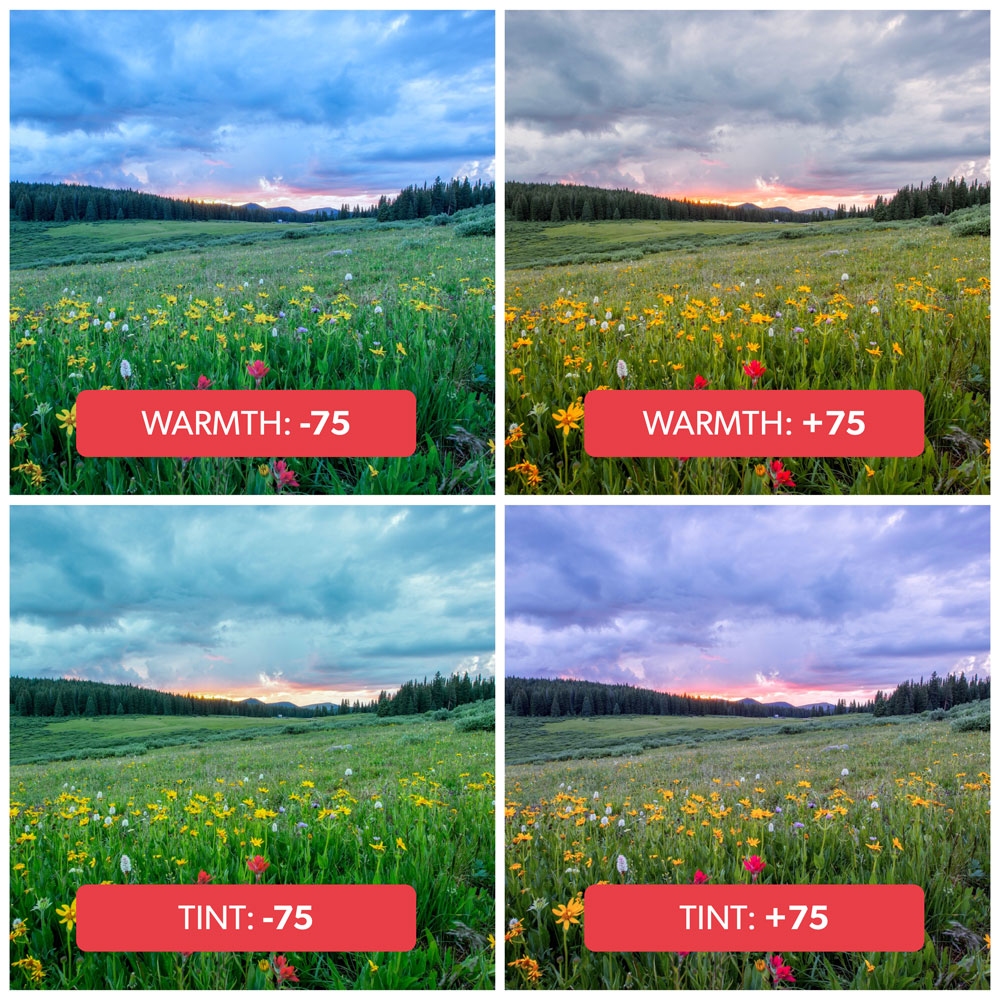
Warmth lets you push the colors in an image towards the warmer end of the spectrum (yellows and oranges), or the colder end (blues). This is also a great tool for neutralizing colors that appear too warm or cool in the first place.
Tint lets you shift the color balance in your image towards a purple or green hue, which is often best used to correct skin tone in a portrait.
Refine your image
Cropping an image can leave it a little blurry, and photos taken in low light or scanned from film cameras can often appear quite grainy. There are a few tools to help combat this.
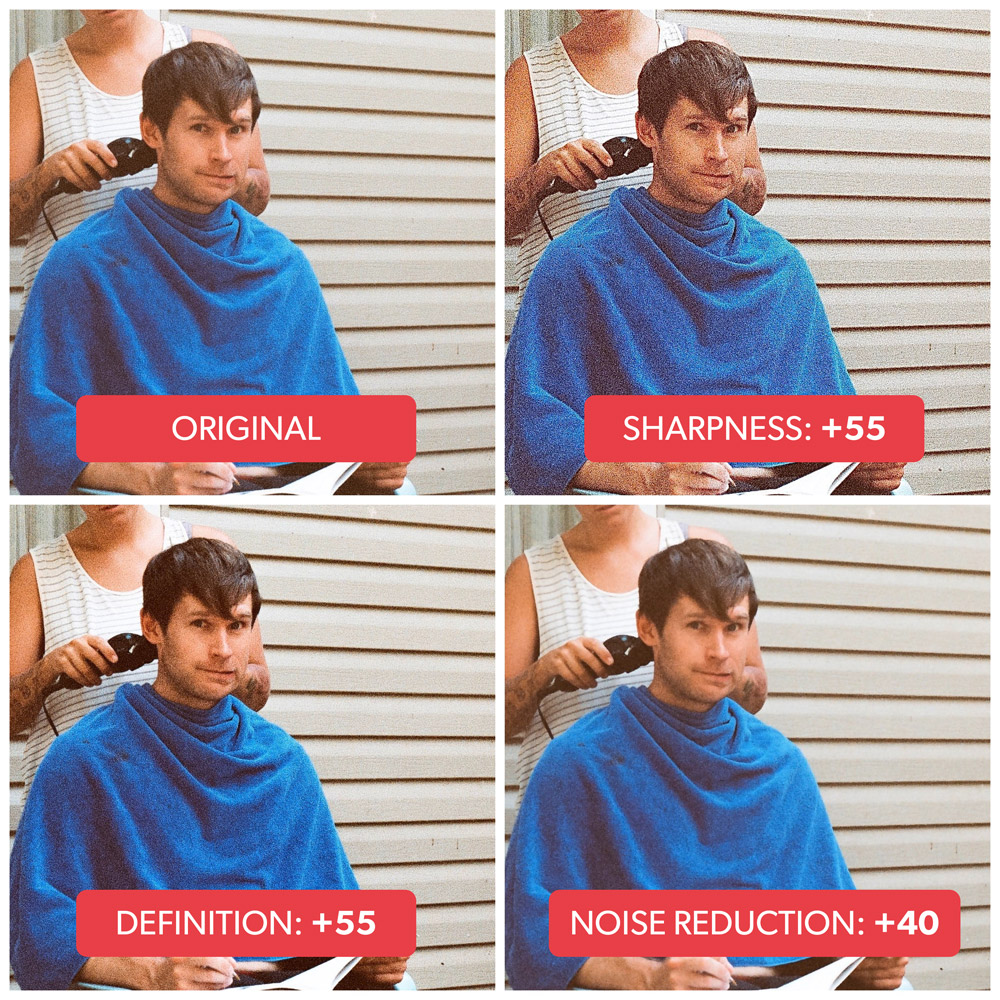
Sharpness helps when you have a blurry image — it can bring your photo into focus, but over-tweaking can result in a grainy image.
Definition sharpens the edges in an image, whilst adding contrast to create depth. This doesn’t tend to make your image as grainy as Sharpness can.
Noise Reduction takes away the fuzzy, grainy texture that you see in old photos, from shooting in low light, or heavily cropping an image. This tool often makes the image more blurry as you increase, so is best used in conjunction with Definition or Contrast to add some clarity back.
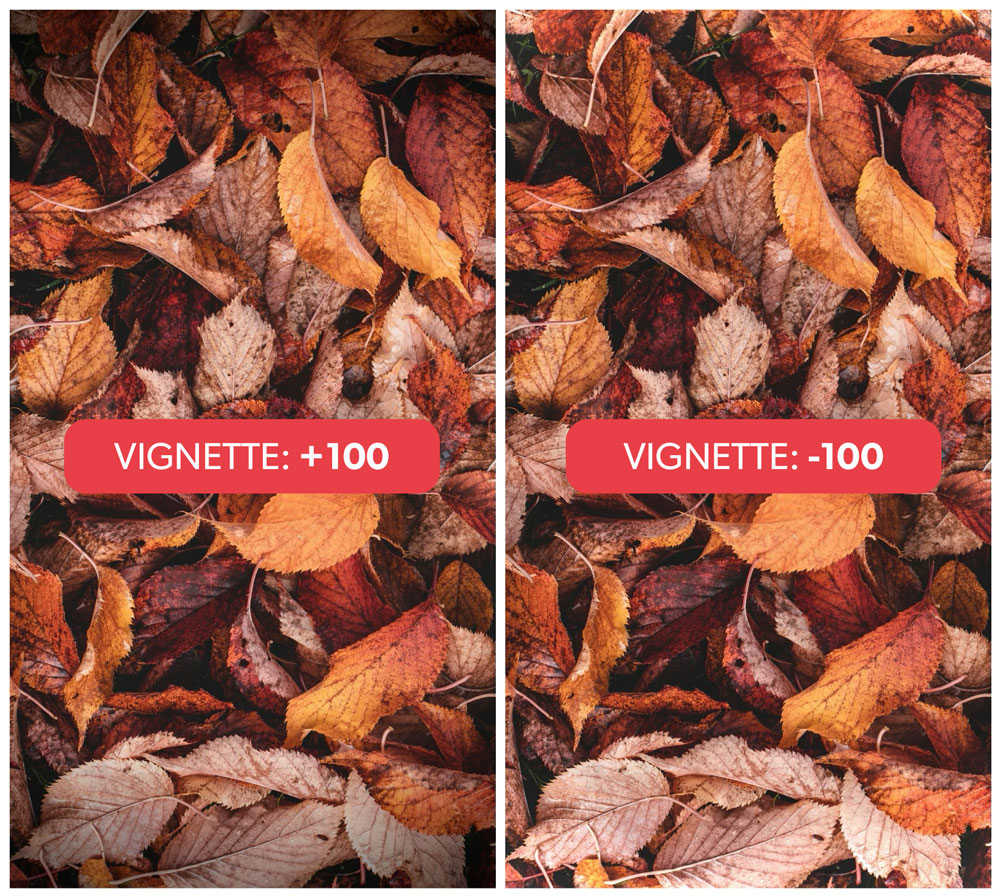
Vignette lets you darken or lighten the frame surrounding your picture. Darkening the frame can add quite an antique feel to an iPhone-shot photograph.
When you’ve finished tap Done. Once edited, the image will retain your changes – unless you Revert the image back to its original.
Phew. That’s all 17 sliders explained. We recommend experimenting with your photos until you’re super familiar with all of them. Happy editing!