
Photoshop for iPad doesn’t yet have all the same tools as its desktop cousin, but its feature set does include an incredibly useful feature for anyone wanting to try their hand at simple photo editing. Subject Select allows users to isolate the subject of a photo in seconds without painstakingly drawing the selection by hand. In turn, this makes it super easy to delete the background from your shot, and even swap in a new one.
Now you can make people jealous of your vacations on social media without even leaving your own home! Here’s how it works.
Note: Photoshop is a free download, but you’ll need an Adobe subscription (starting from $10/£10 monthly) to actually use it.
Automatic selection
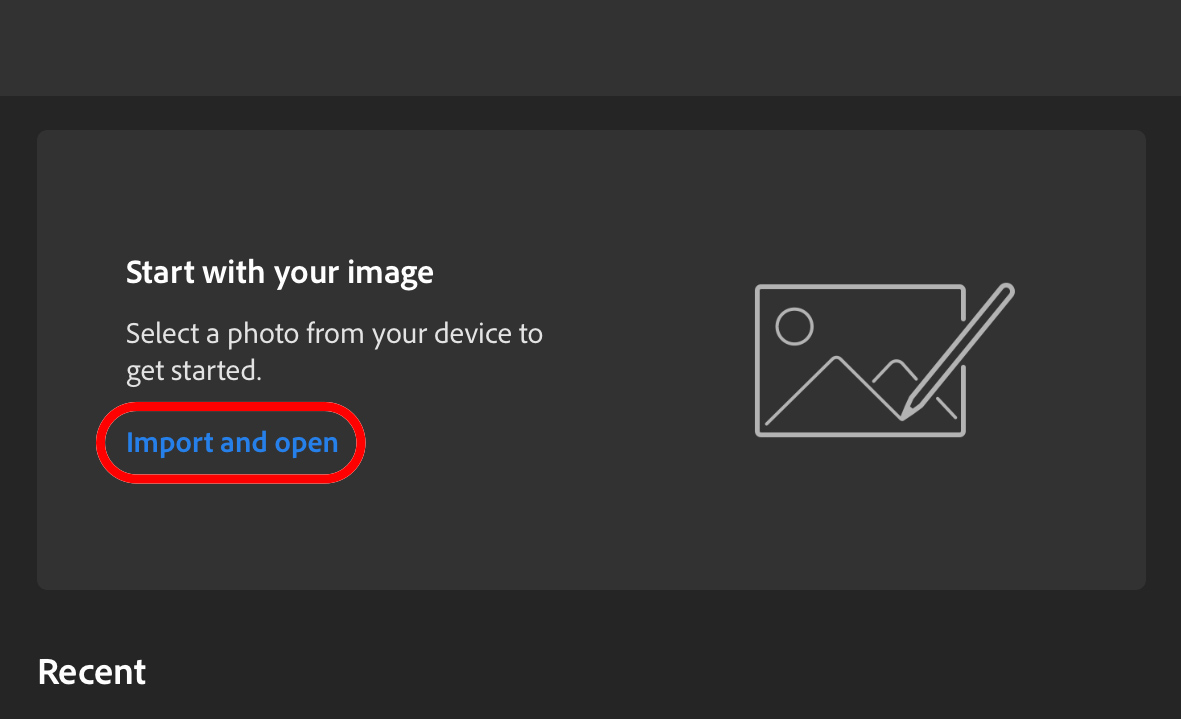
Start by importing a photo from your camera roll. The easiest way to do this is to press Import and open from Photoshop‘s main screen. The clearer the image, the better results you’ll get from this technique – Portrait mode shots taken in good light are particularly effective.
Long-press the Lasso from the menu on the left-hand side of the screen to bring up the full selection toolset.

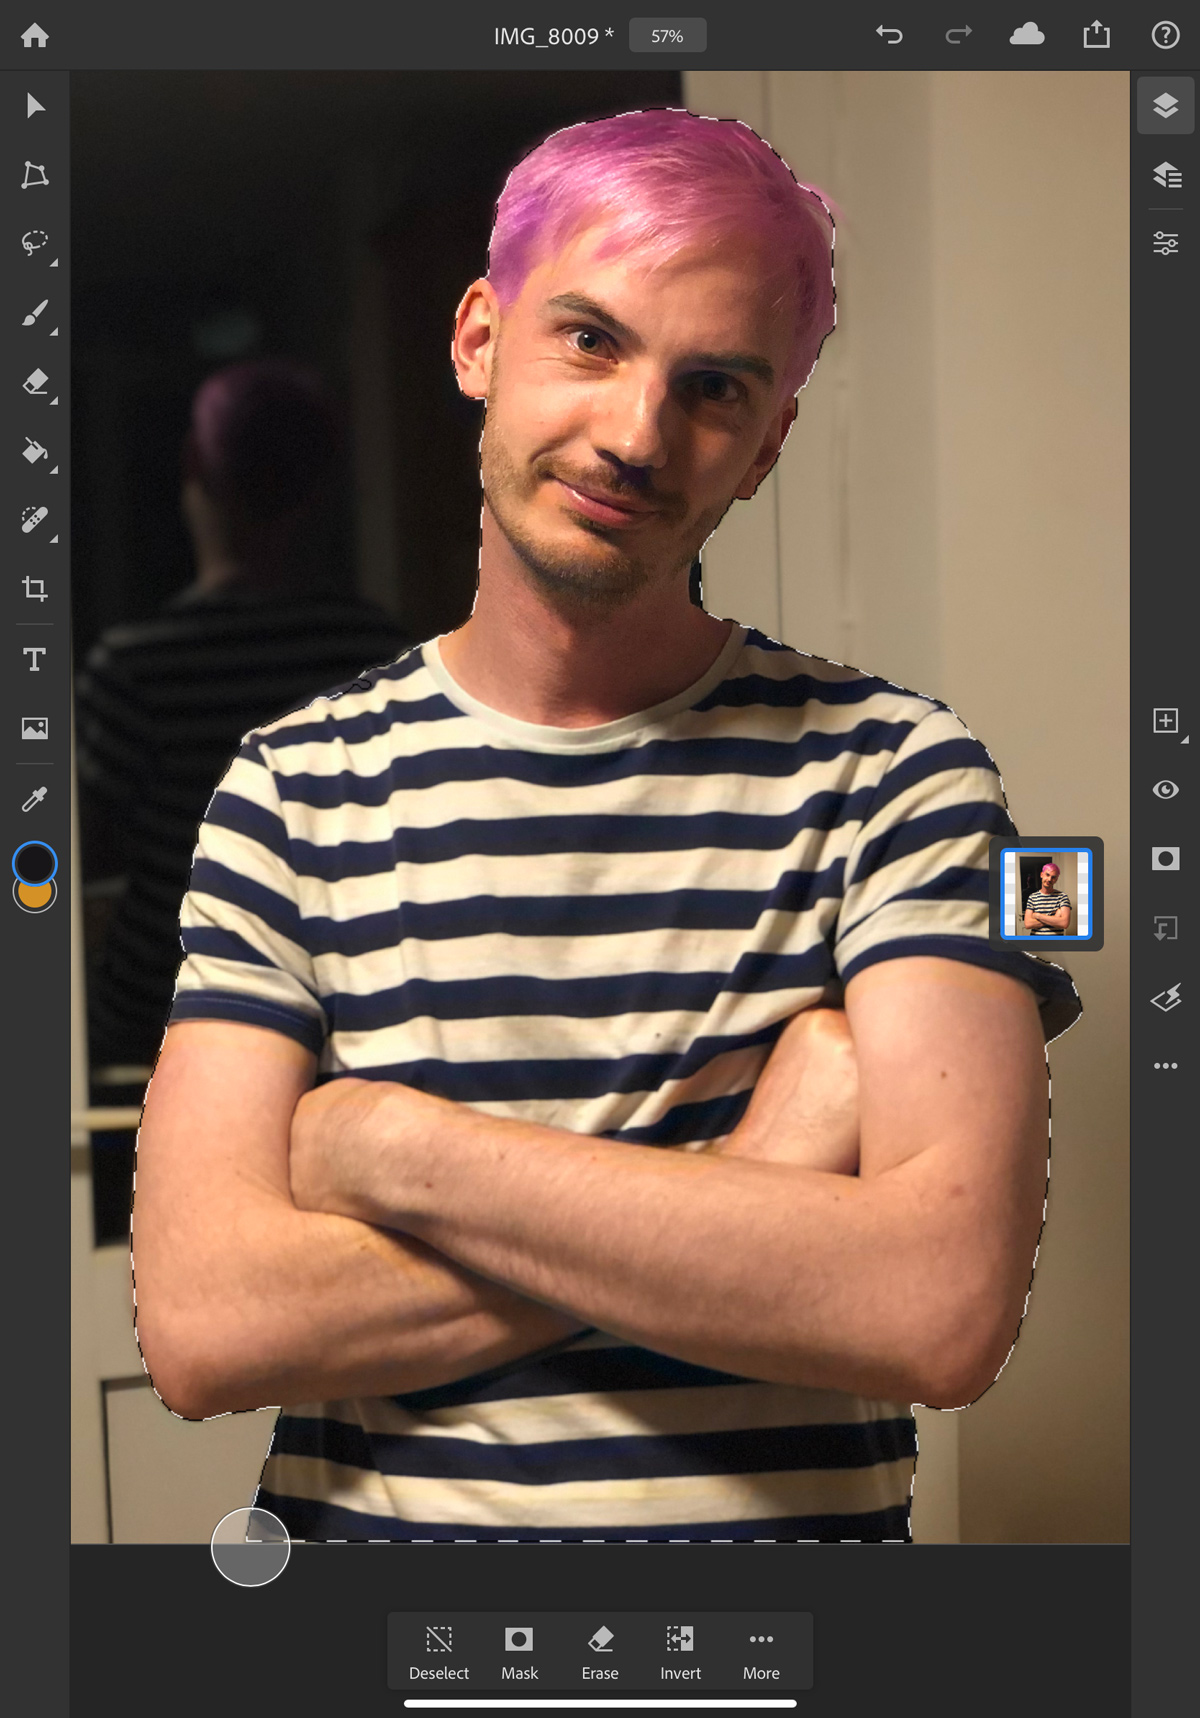
Tap the Select Subjust button and the subject of your photo will be automatically outlined with a moving black and white line.
Tweaking the selection
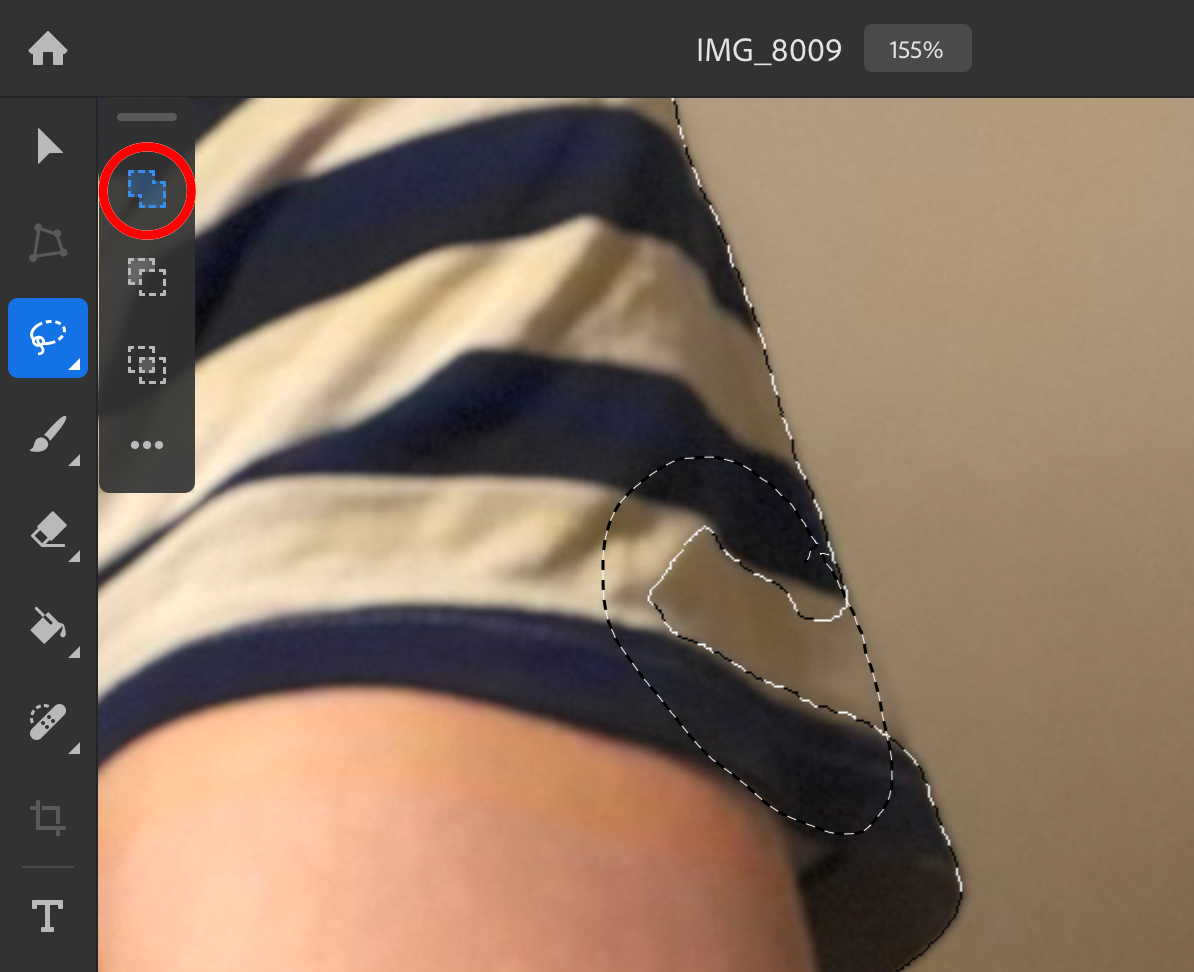
With any luck, you’ll have perfect results right off the bat – but it’s not unusual to need to manually tweak the selection to get it just right. To do this, long-press the Lasso button again and this time, instead of Subject Select choose the first tool from the submenu – the basic Lasso shape. A second submenu will appear with some overlapping squares. You’ll use these tools to fine-tune the outline of your subject.
If there’s a part of the subject missing – a segment of shirt, for example – select the first of these options and then simply draw around the area you want to add to the selection. It’s ok to overlap the existing outline.
If something has been accidentally selected that’s not part of the subject – a rogue shape in the background, for example – instead select the second option and draw around the shape you wish to remove from the selection.
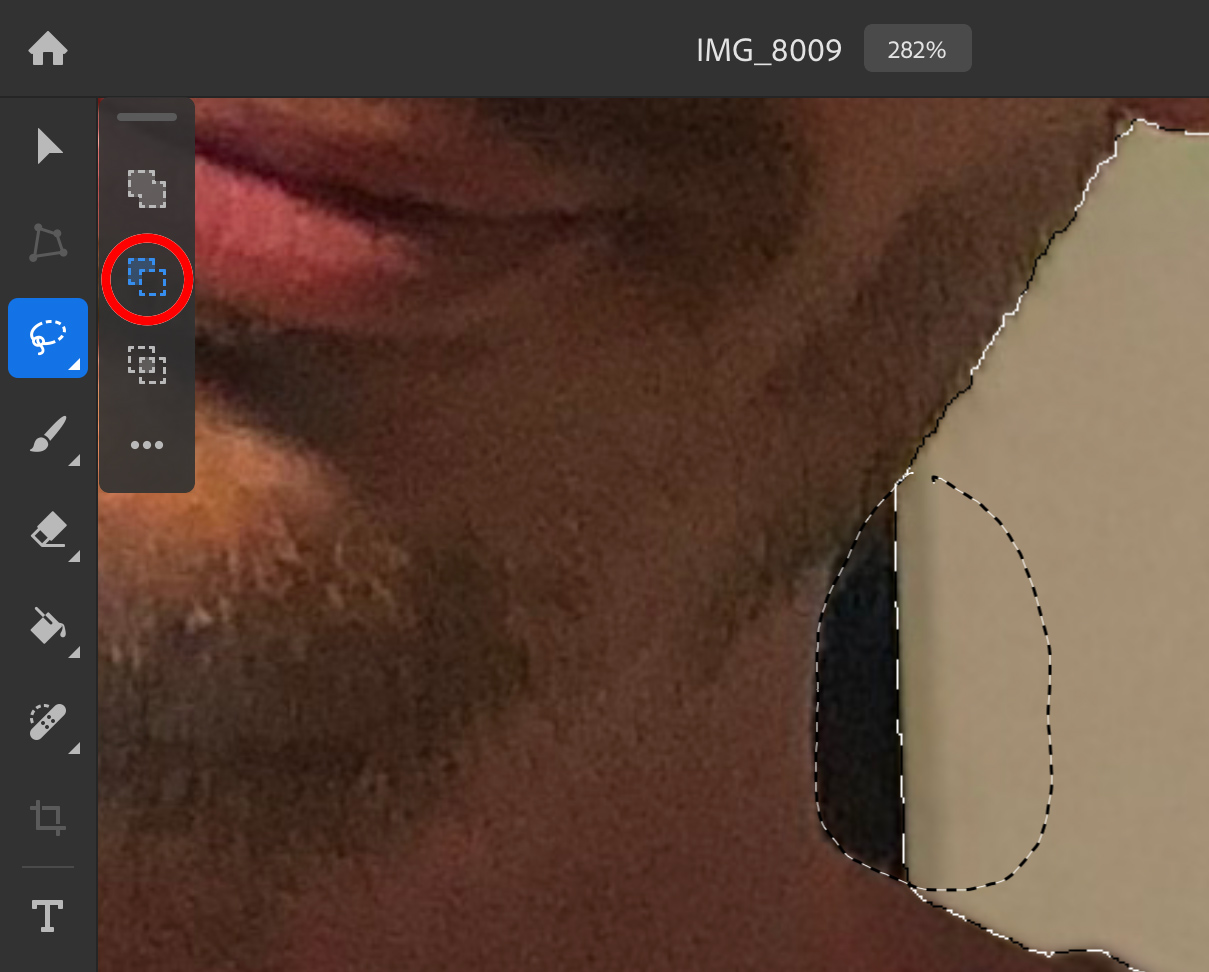
These two tools – the addition lasso and subtraction lasso – are invaluable to making accurate subject selections in Photoshop. Use them well.
Remove the background…
Here’s the fun part. When you’re happy with the selection, tap the Mask button on the submenu floating at the bottom of the screen.
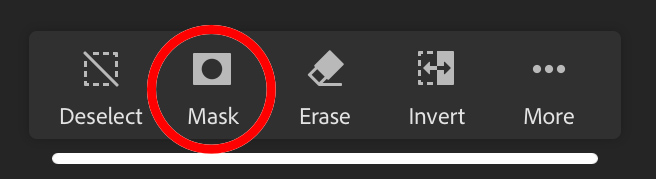
This will instantly remove the background, leaving nothing but your selection. (If you notice any obvious errors at this stage, simply press Undo and fix them before tapping Mask again.)

Now, you should have a nice clean cut-out over a checkered backdrop. In Photoshop, this texture represents transparency – or rather, the lack of a background. Let’s add one, shall we?
…and add a new one!
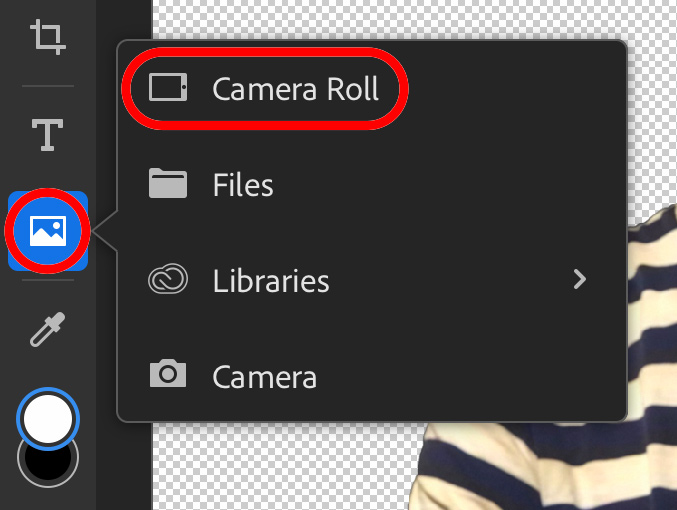
Press the Insert Image button from the left menu and choose Camera Roll. Here, you can choose another photo to become the background for your subject. (If you haven’t picked a background yet, head to Safari and download one to Photos.)
Tap your desired background image and it will be added to the frame – though by default, it’ll be on top of your subject, and too small. First, use the nodes at the corners of the image to scale it up to fill the entire canvas, and hit Done.
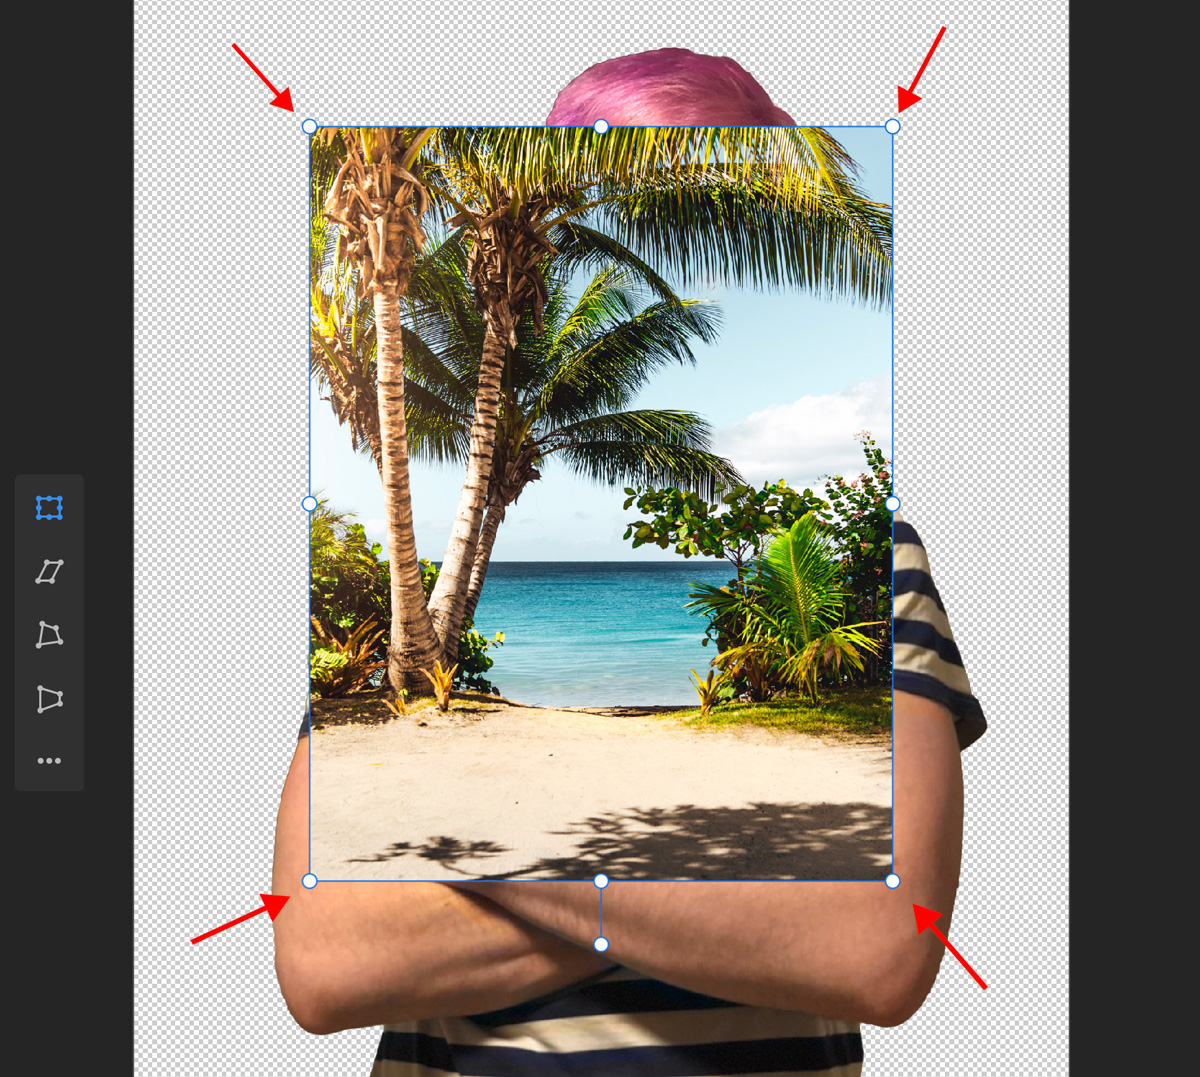
Then, take a look at the Layers shown on the right-hand side of the screen. (Press the Layers button in the top-right if what you see doesn’t match the screenshot.) These layers represent each aspect of your composition, and the order they’re sat in. Press and hold the background layer and drag it below the subject layer. That’s more like it!

There are many more tips to get a really realistic composition, but these basics should get you started on the road to Photoshop brilliance. With a bit of practice, you’ll be able to swap out backgrounds in less than a minute. Happy photo manipulating!