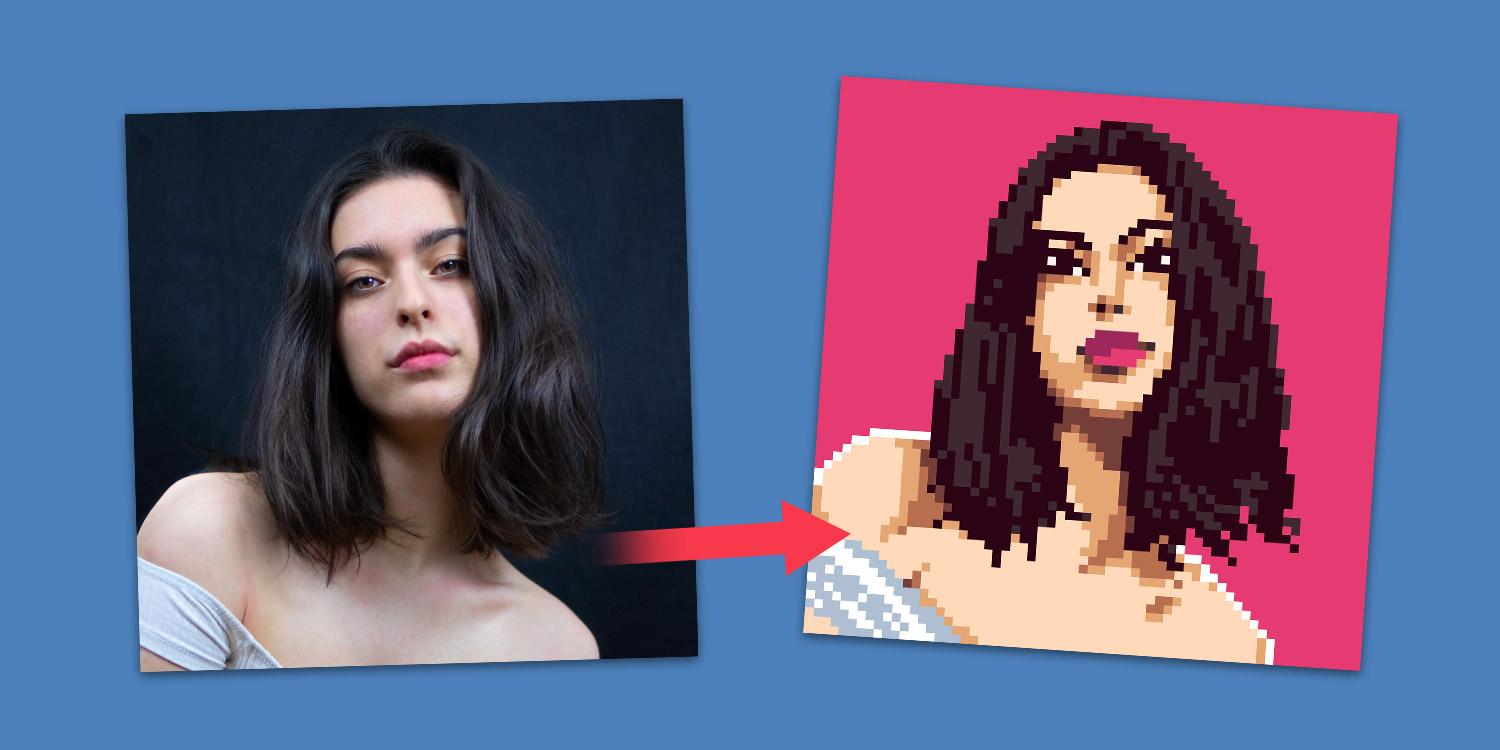

Pixaki is an excellent app for creating retro-styled pixel artwork. Here’s our beginner’s guide to using the app to draw a stylized pixel portrait using a photo reference – perfect for a profile picture or even a novel gift print.
No need to follow this guide rigidly – feel free to play around with it. The aim here is to create a likeness, not a carbon copy. There’s a detailed user guide on Pixaki’s website if you feel like delving deeper into the app.
If you’re not ready to commit and purchase the latest pro version of Pixaki for $26.99/£23.99, or you’d just like to give it a go, you can download their free app: Pixaki Intro to get a feel for it. Everything in this tutorial can be done with the free version.
Please note that this app is for iPad only – unfortunately, there’s currently no iPhone version. It’s not necessary to use an Apple Pencil, but it would certainly make things easier if you have one.
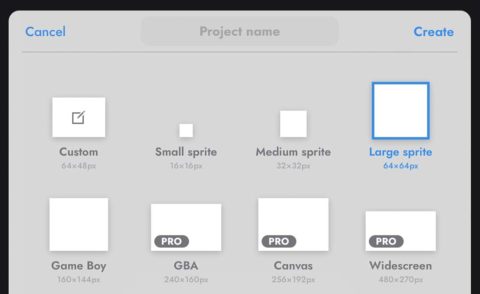
Setting up your canvas
In Pixaki Intro, you get a maximum of 3 layers – so it’s important to make good use of them. Start by deleting the background layer, and creating one layer each for the body/face/hair. You’ll then be able to edit the contents of a single layer without disrupting the rest of the drawing.
To get started, open a new canvas in the app by tapping on the plus sign in the corner. Here, we’re using the 64x64px Large Sprite canvas.
Blocking basic shapes
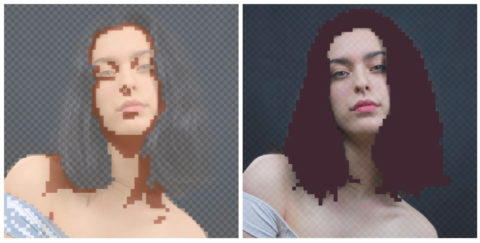
Tap on the 3 dots in the layers panel on the right hand side and choose Import Reference Photo. This will add an uneditable fourth layer, used to reference a high-resolution image whilst drawing pixels at your chosen scale.
Long press on a layer to move its position and pop the reference image at the bottom of the stack so you can trace over it. Tracing might feel like cheating at first, but it’s a legitimate way to get a feel for the app and create something great without much practice!
Next, select a base tone for the skin color and trace the outline of the body. There’s no need to be perfect at this point, we can refine things later. Fill in this shape using the paint bucket tool.
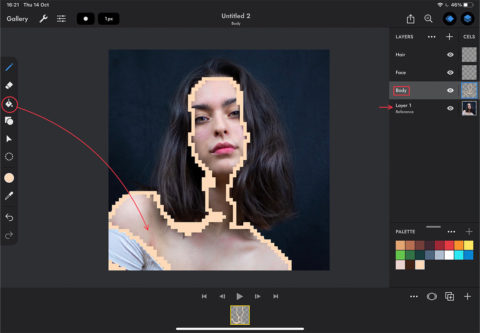
Do the same for the face and hair.
Pro Tip: trust the process!
It can be helpful to hide layers whilst you trace the other elements – just tap the eye icon on each layer to toggle visibility on/off.
Adding shadows and detail
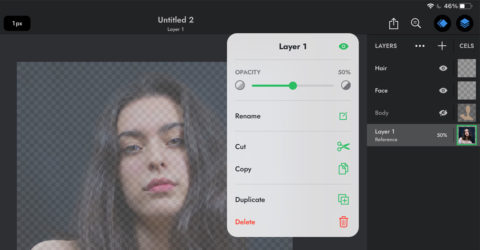
Next we want to move the reference layer above the others. Double-tap the reference layer and drag the slider to turn down the opacity – this allows you to see what you’re drawing through the image.
Using darker colors, trace the shadows in the body and hair, try to use as few pixels as you can to convey the shapes. Repeat this with darker shades as many times as you like.
It can be helpful to turn the opacity back up to 100 on your reference image once, and toggle visibility on/off over your drawing – this will give you an idea of any little areas that need altering.

Pro Tip: add single pixels to the ends of hair to make them appear more tapered.
Once happy with it, you can merge the layers together, and add in a background using the paint bucket tool. Et voila! Your pixel portrait is complete.
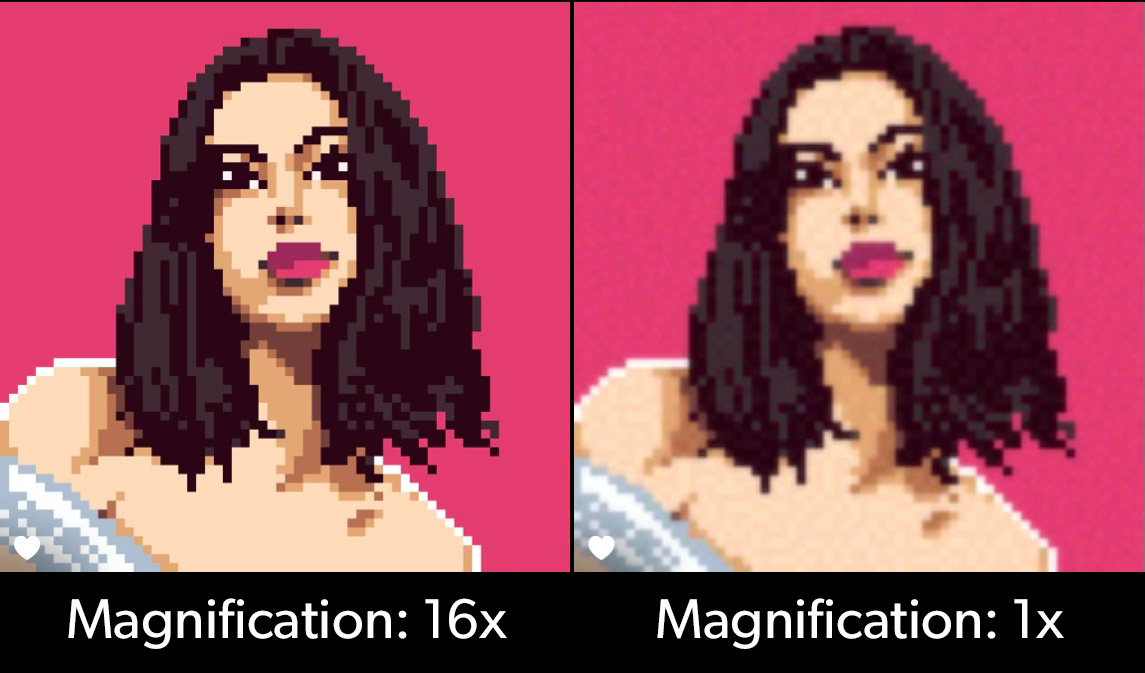
To export your image, tap the share icon in the top right-hand corner, then images. At the bottom of the pop-up, tap the + next to Magnification until the warning message disappears. This will preserve the pixels of your work without losing image quality.
That’s it – enjoy your newfound skill!