
This accessibility feature is great for proofing and weeding out errors
Spellcheckers are great but don’t weed out correctly spelled words used in the wrong place. And although you may proof-read your writing before sending someone an essay, business plan, article or email, it’s easy to miss errors.
This is why it’s worth enabling your iPhone or iPad to read text back to you. Here’s how.
Activate speech options
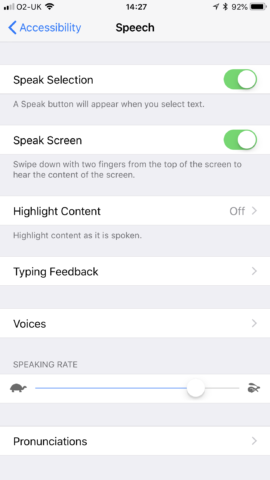
In Settings, go to General > Accessibility. Under Vision, tap Speech, and turn on Speech Selection and Speak Screen.
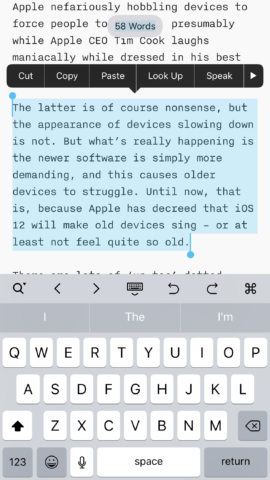
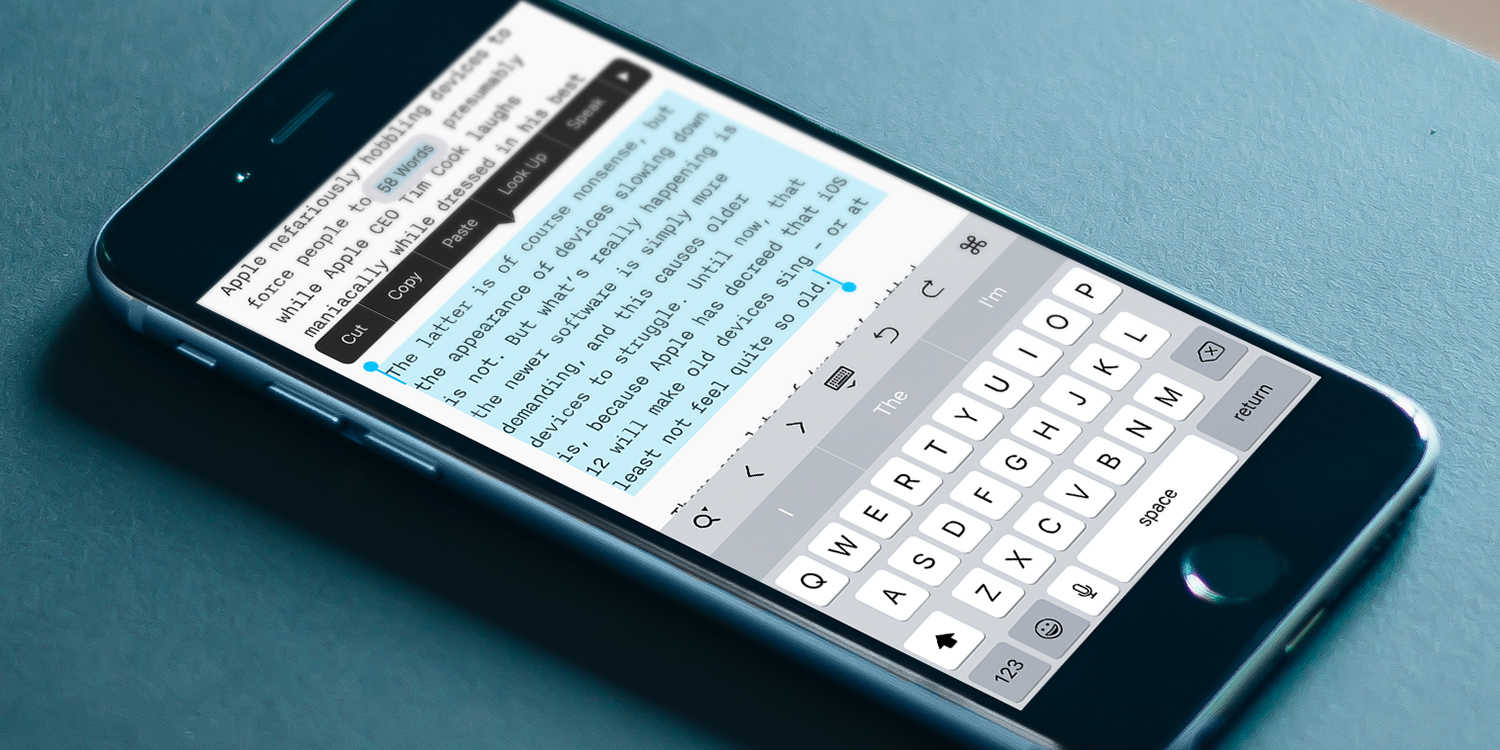
Speech Selection adds a Speak item to the menu that appears when you select text. Tap that button and the selection is read. Be mindful you may first need to tap that menu’s right-facing arrow to see the Speak option.
Speak an entire document
With Speak Screen active, a two-finger swipe from the top of the screen has your device start reading the entire document.
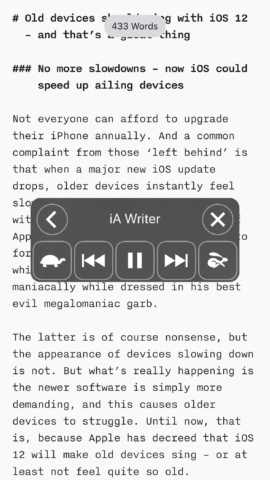
After performing that gesture, you’ll see a controls panel. The tortoise/hare buttons, respectively, decrease and increase playback speed. Previous/next jump to the previous/next sentence accordingly. Play/pause does what you’d expect.
When not interacted with for a while, the panel minimizes to the side of the display. You can expand it again with a tap.
Customize device speech
Back in the Speech section of Settings, you can make further adjustments. Under the Voices option is a slider to adjust the default speech playback speed. But the Voices section itself is also worth exploring.
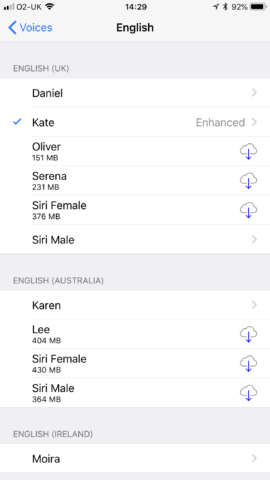
Tap it to see alternate voices available for download. Some languages offer genders and accents (such as British English or Canadian French).
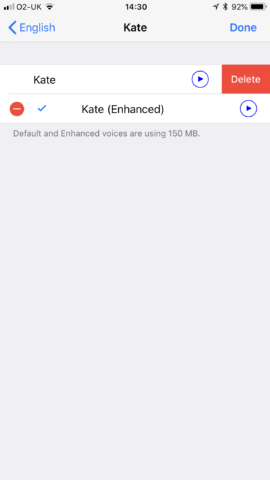
Each voice has a storage requirement in the hundreds of MB, so only download those you need. If you later want to free up space, tap a voice. In the voice’s own page, tap Edit, and use the Delete buttons to remove unwanted downloads.