Microsoft Office is a suite of productivity apps that forms the backbone of most office work around the world.
Apps like Word, Excel and PowerPoint are familiar names to most office workers, and the good news is that Microsoft has brought full versions of these key Office apps to the iPhone and iPad. The Office for iOS apps are free to use, fully-functional and integrate with a range of online services. With Office on your iPhone you can save documents to a cloud service, and open and edit them on the move, then return to them on a desktop. Here’s how.
Installing Office for iOS
It’s absolutely free to sign up, download and start using Office on the iPhone. Microsoft charges extra for premium features, which vary from app to app, but in our experience most users will happily get by with the features found in the free apps.
You will need a Microsoft Account to use the Office apps, but there’s a good probability that you already have a Microsoft account, this is an email typically ending in live.com or outlook.com and is used to sign in to other Microsoft services, such as Xbox Live, Skype, or Bing.
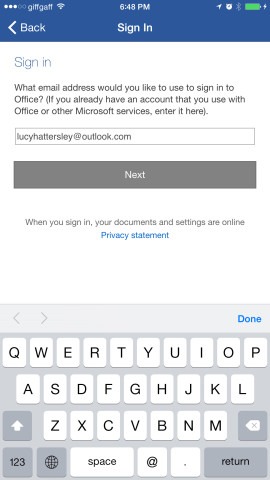
Download and open one of the Microsoft Office apps on your iPhone and click Sign In. Enter the email address associated with your Microsoft Account and tap Next. Fill out the Password field and tap Sign In > Create and Edit. If you don’t already have a Microsoft Office account, click Create An Account, fill out all the fields and tap Create Account.
Once you’ve signed in to one Office app, the other apps will activate automatically (so you don’t need to re-enter the password in each app).
Using Office for iPhone
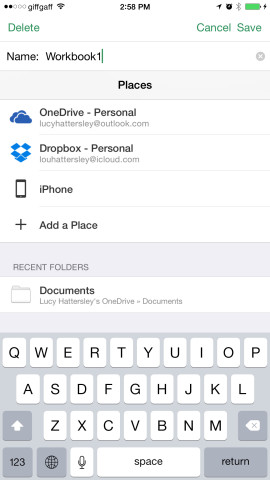
By default, you can choose to save files onto your iPhone internal storage or to OneDrive (you get 30GB free cloud storage with your Microsoft Account).
Upgrading from the free account to Office 365 Personal unlocks additional features in each app. To see what features it unlocks for each app tap Account > Upgrade > Extra Features.
Upgrading also expands OneDrive to a healthy 1TB of storage space, and you get to install the latest edition of Office for Mac (or PC) on one computer. It costs $6.99 a month (or $69 per year).
One limitation you may encounter, regardless of whether you pay to upgrade or not, is font support. The iPhone and iPad have 63 fonts available by default, and although Microsoft has provided support for an additional 54 additional fonts. If a font in a document isn’t in the list Office attempts to replace it with a close match. If you run into documents with esoteric fonts you can use an App called AnyFont to install TrueType and OpenType fonts in iOS and use them in Microsoft Office apps.
Set up Dropbox and iCloud
Once you have Office set up you will need to add any other storage services you want to use. Dropbox is supported in Office for iOS, alongside OneDrive, but it needs to be set up manually.
You need to have the Dropbox app installed and have signed in. So check Dropbox first. Now, in one of the Office apps, tap Account > Add a Service > Dropbox. Tap Allow and Dropbox will be authorized, allowing you to open and save files to your Dropbox storage space.
Apple’s iCloud Drive works a little differently in the Office apps. You can’t save new files to iCloud Drive, but you can open, edit and then save files from your iCloud Drive, although the feature is slightly hidden. Tap Open > More to open the iCloud Drive folders.
Office supports other cloud storage providers, such as Box, Creative Cloud, and Google Drive. These have the same restrictions as iCloud Drive (you can open, edit and save files but not create new files and save them to these services).
Create and edit Office docs
Tap New inside each app to create a new document. Each app features a list of templates to choose from and a Blank template for creating a document from scratch.
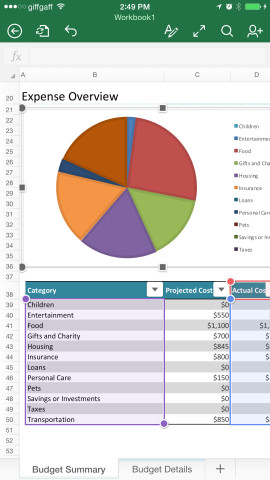
Office apps cleverly tucks away most of the options from the Desktop apps into the small icons in the top-right. The Ribbon icon is where you make most edits to a document. Tap this to replace the keyboard with commands replicating the Ribbon menu in Office desktop apps. Tap Home to switch between different menu options. These vary by each app; Word for iOS has Home, Insert, Layout, Review and View; PowerPoint has Design, Transitions and Animations.
You insert images to documents by tapping the Ribbon icon, then Home > Insert > Pictures. It is possible to insert Table, Shapes and Text Box elements using the same Ribbon > Insert menu. Tap the down arrow to remove the Ribbon menu and return to the keyboard.
Saving Office documents
One quirk of Office documents is that you don’t save them manually (like in Office for OS X). And you are not prompted for a name for the document until you tap the Done button. Until then changes are saved automatically to the iPhone. To save a document tap Done > Back and chose a location for the file and tap Save. The document is placed in that location, and any changes from then on are saved automatically as you make edits. You can’t move files in the traditional manner, instead tap File icon and choose Duplicate to create a copy of the file in another position.
Getting Help inside the Office apps
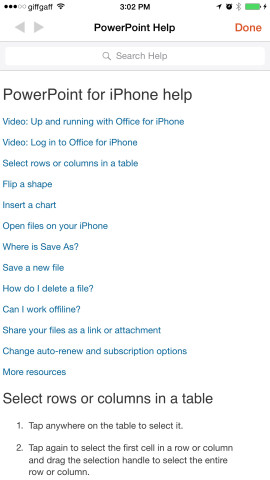
Those used to working with Office for Mac or PC will find all the menus and features comfortably familiar, but each app contains a comprehensive Help guide to help you get started. Open a document (or tap New > Blank Document) and tap File > Help and Support for more information on how to use each app.
