
Found yourself stuck at home with a lot of time on your hands? If you feel like stretching those creative muscles, you might want to have a crack at creating a stop-motion film.
Anyone who’s seen one of Aardman’s Wallace & Gromit productions, or even The Lego Movie, will know all about stop-motion animation. It typically involves taking little figurines (though anything would work) and painstakingly moving them one frame at a time to create an animation. Here’s how to shoot your own herky-jerky homespun masterpiece.
Assemble the pieces
You might think it requires a costly set-up to pull off such a specialised form of animation. But really, all you need is an app, a little patience, some toys or Play-doh, and some steady hands.
First, download Stop Motion Studio. It’s free, with a $4.99/£4.99 IAP for the full experience, which includes features like adding titles and erasing elements in post-production.
Next, cast your actors. Articulated toys work well, though you might want to grab some poster putty to keep them upright when moving their legs. Another great option is to build figures out of Play-doh.
Set the scene
Position your figures for the first shot. We’d recommend using a clear, flat, hard, well-lit surface. Apply Blu Tack to the feet of any articulated figures.
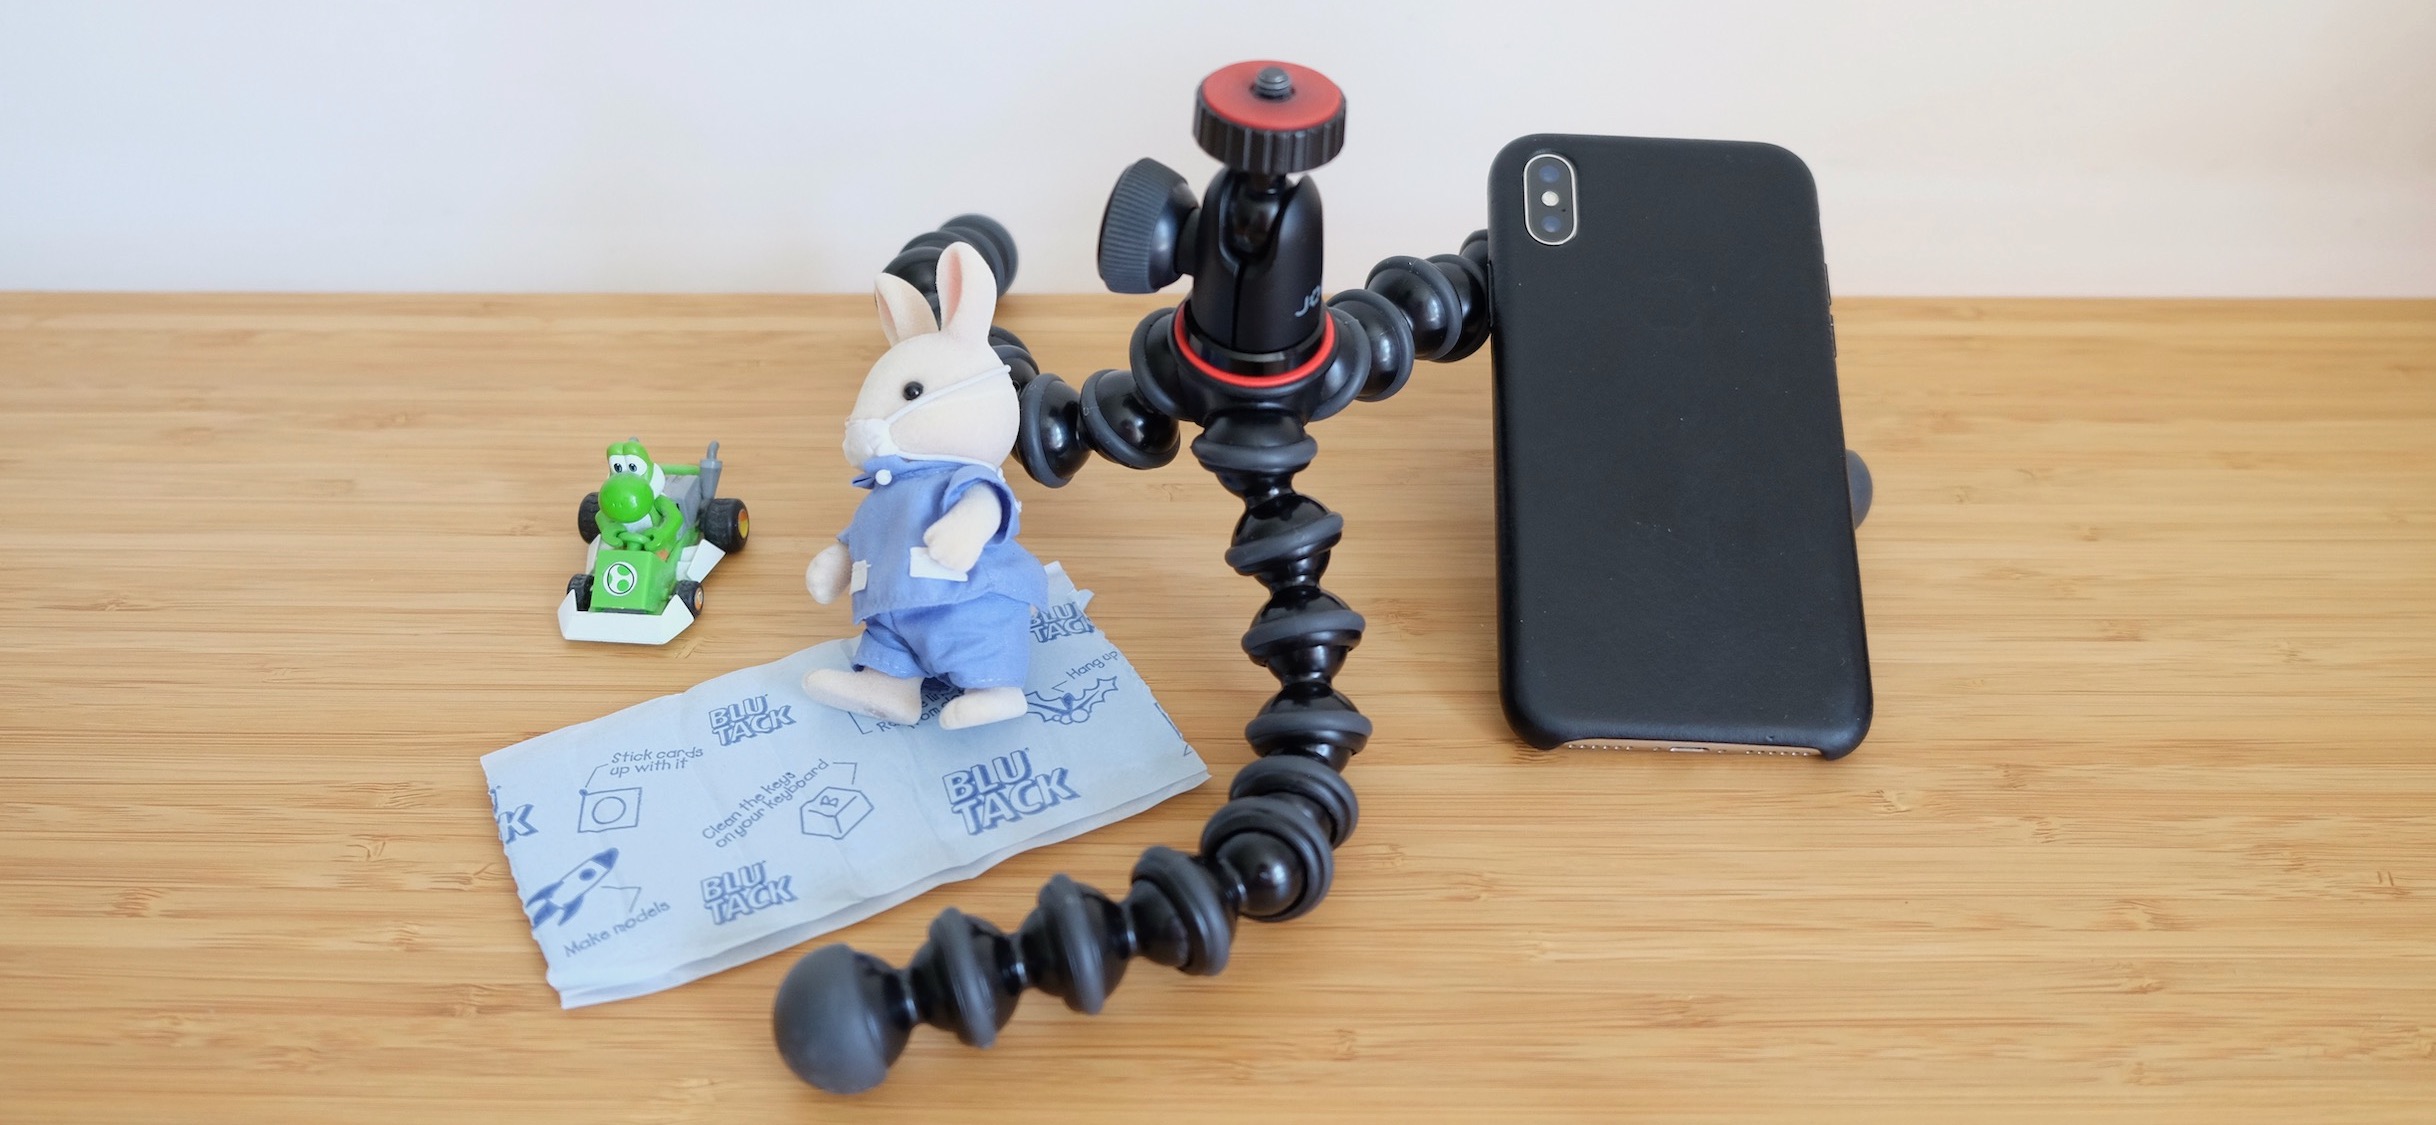
Now set up your iPhone. This is the tricky bit, because you’ll need to keep your device completely still throughout the process.
If you have a stand or tripod, that would be ideal. Otherwise, build something to prop your iPhone in position, using the camera app to frame the shot if necessary.
Pro tip: you can click the button on Apple’s wired headphones to snap a photo without jostling your device!
Shoot away
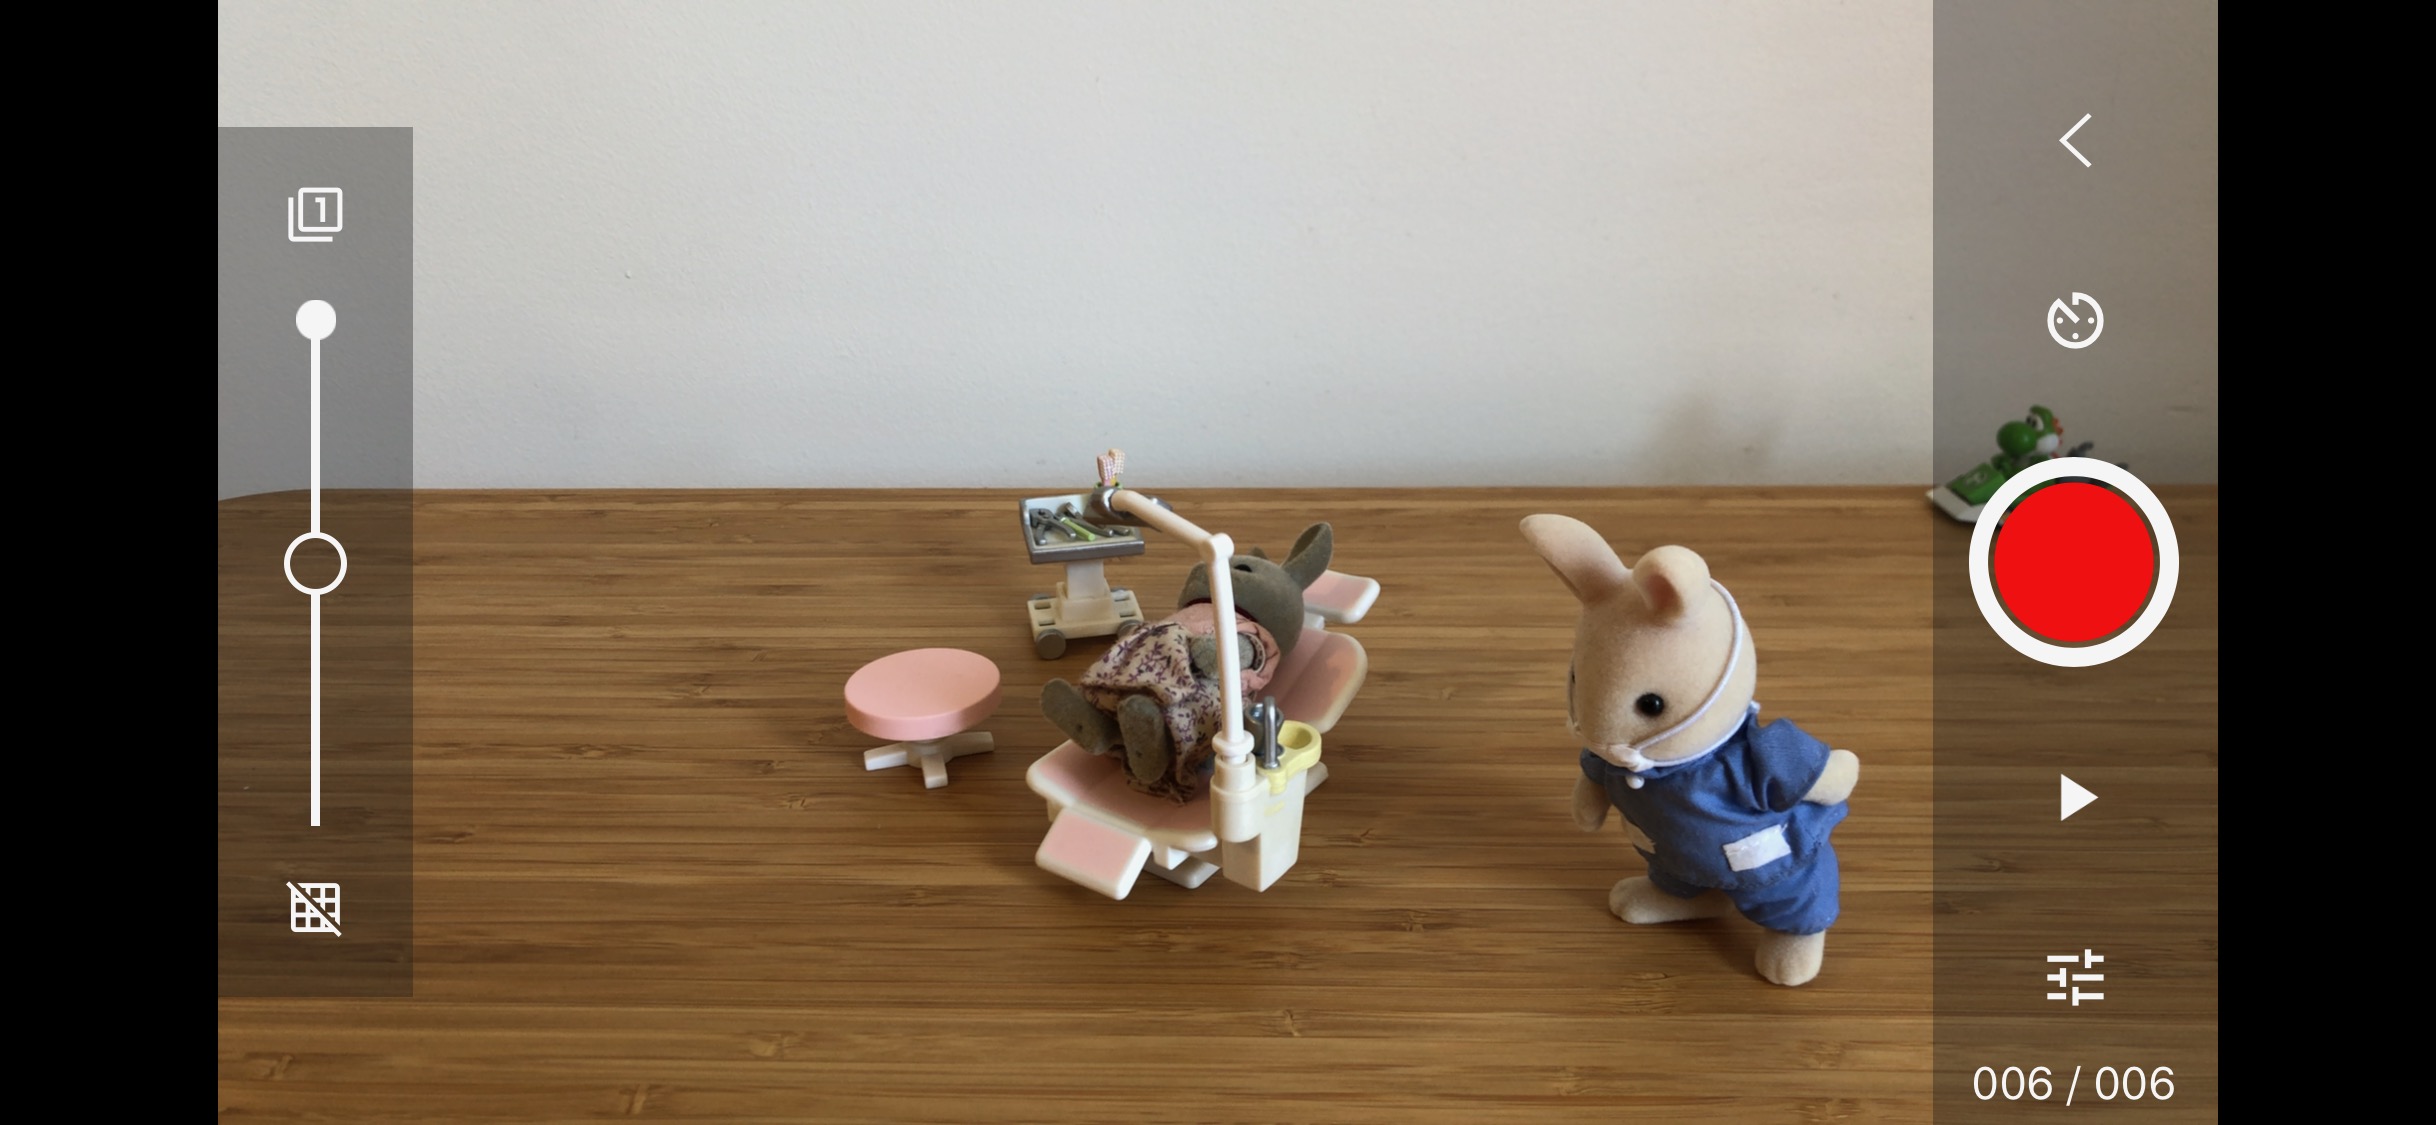
Now open the app and hit + New Movie. Make sure the shot is framed properly and hit the camera icon in the top right corner.
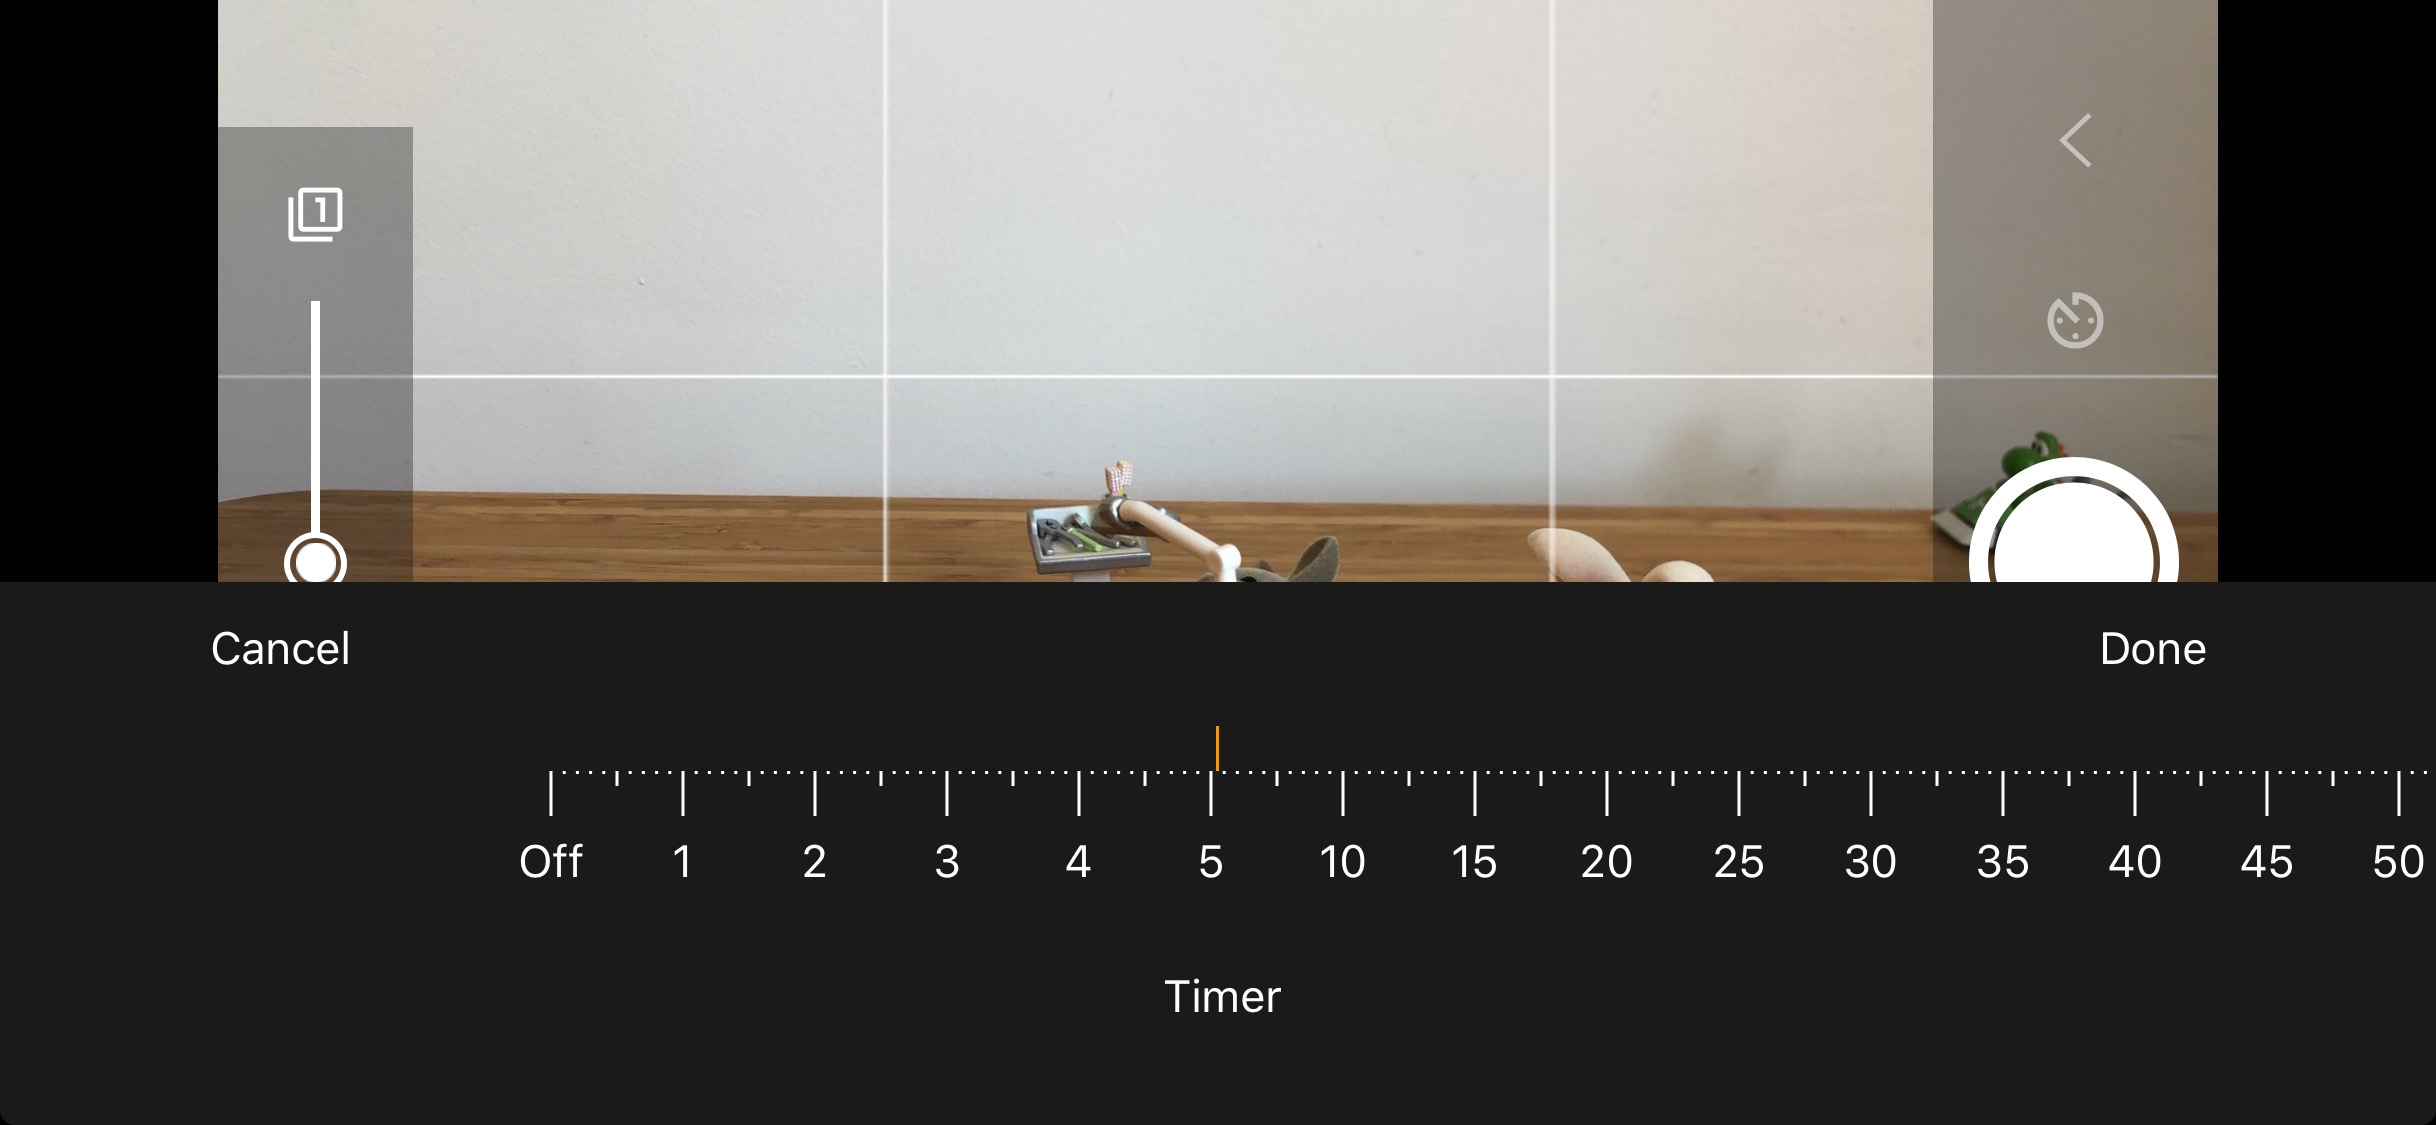
Hit the record button to take each shot, moving your scene along in between. The smaller the movements, the smoother the animation will be. Use the timer button above the record button if you want to automatically take shots at a regular interval.
Hit the Play button below the shutter button to instantly preview your animation.
Extra tools
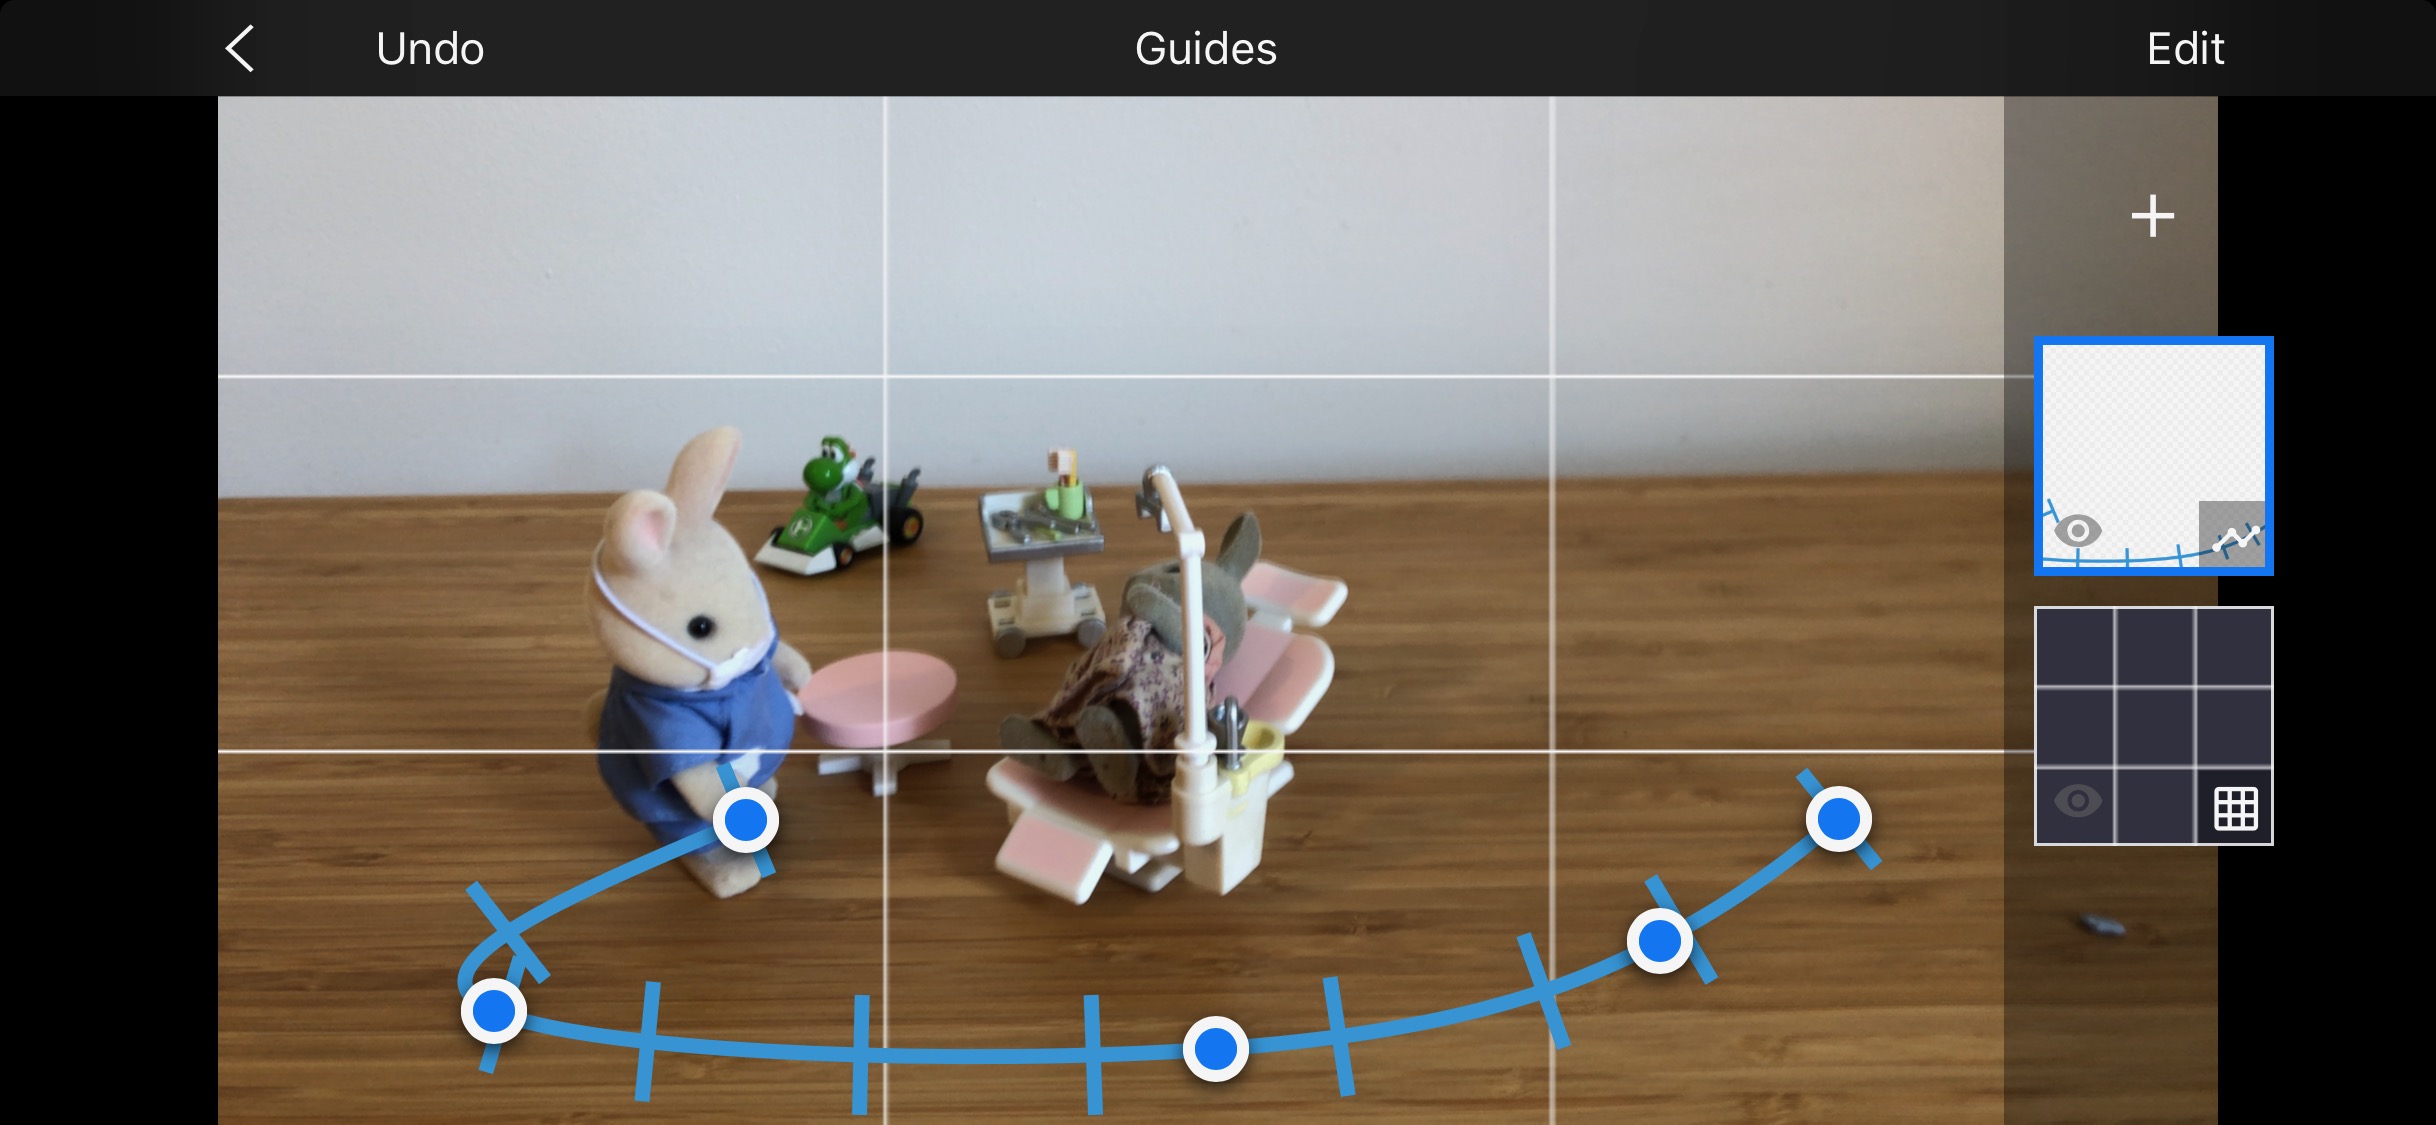
The tool button to the bottom left lets you apply a shooting grid. Press and hold it, then tap + to add safe areas, paths for your figures to follow, drawings and more (some of which are premium features).
The button to the top left of the viewfinder enables the ‘onion skin’ effect, which overlays previous frames to help you with proper alignment.
Tweak your film
The app automatically saves your progress. Hit the back-up button in the top right to go to a timeline view and review each shot.
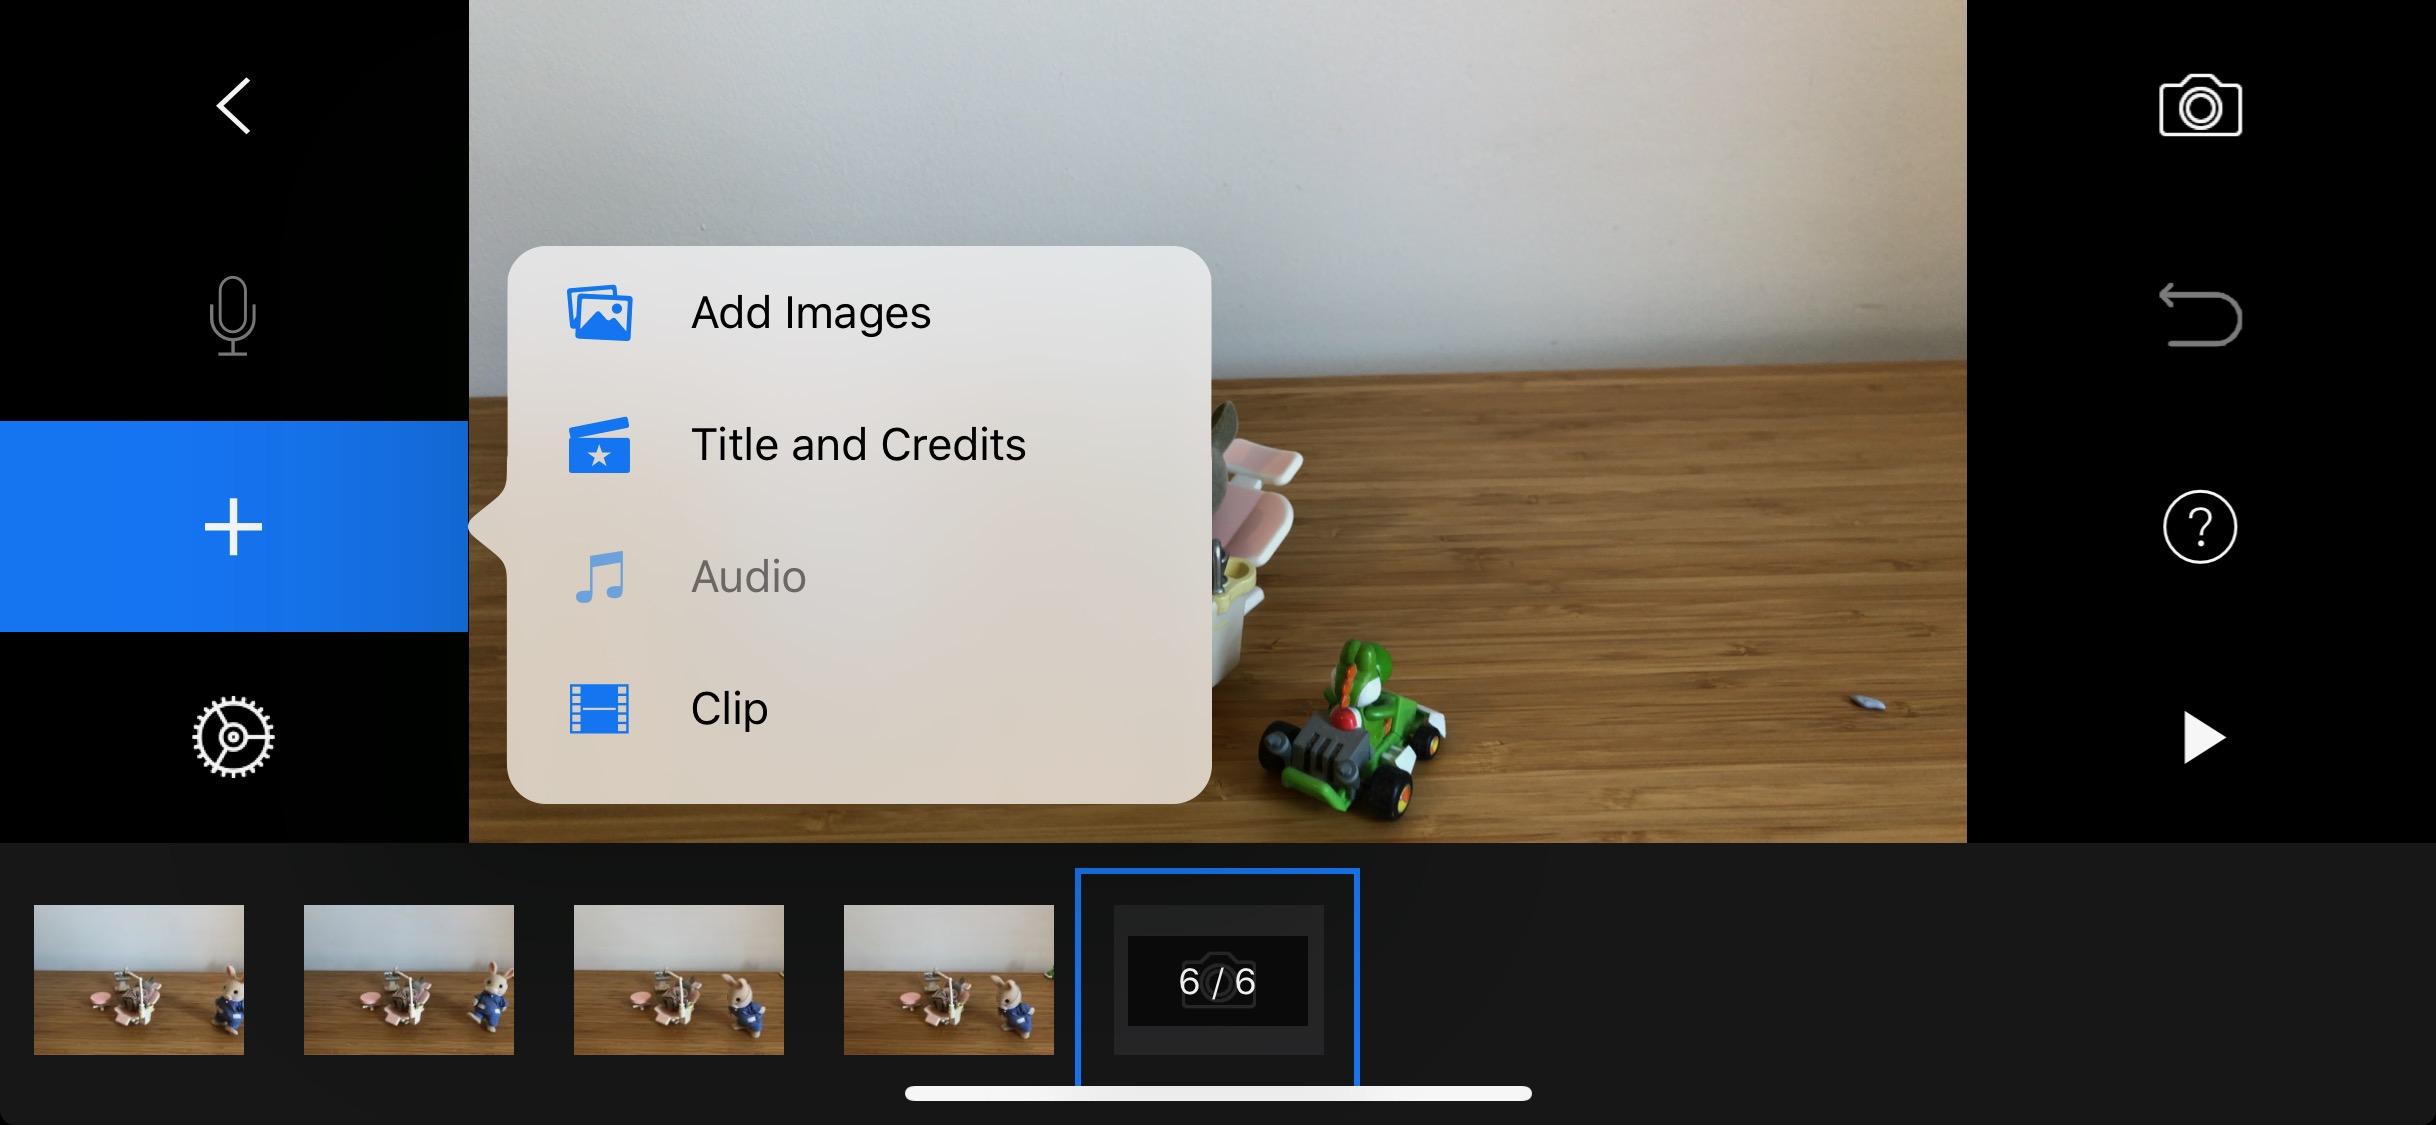
Hit the + button on the left if you want to add images, title and credits, audio or video clips to your production. Hit the Settings cog below to change the nature of the recording itself (filters, speed, resolution, aspect ratio etc).
Note that you’ll need the full app unlocked to access all of these more advanced functions. Head back to the app’s title screen, then press and hold on your video to open up the sharing options.