
Following the release of iOS 10.1 lucky users with an iPhone 7 Plus device are now able to take photos using Portrait Mode. This means the device’s telephoto lens is put into action, taking a photo that automatically creates a blur, or bokeh effect. The result sees the background of a photo softening leaving the individual as the main focus of a photo.
The effect works impressively well, especially for an automatic tool, but what if you don’t have the Plus model from the very latest iPhone range? Don’t worry, you still have options to wow friends and family with some professional-looking photos. Our tutorial even works for photos on your iPad.
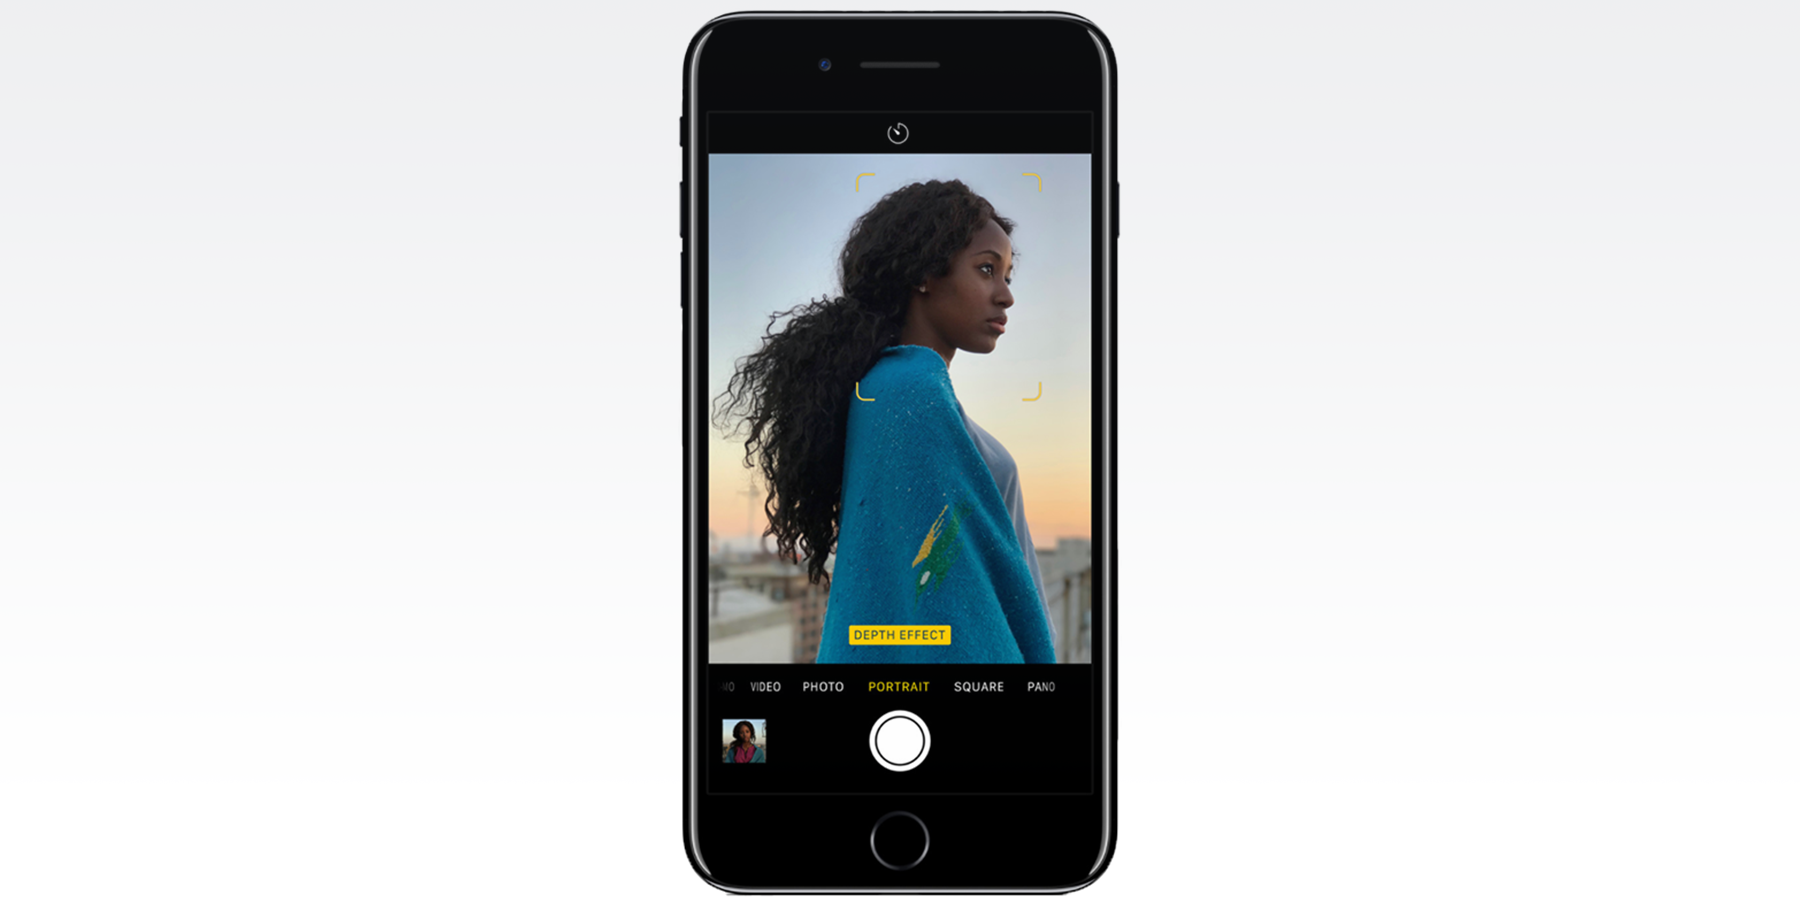
First, let’s take a quick look at how to take a portrait image on the iPhone 7 Plus. The beauty of Apple’s own solution is it’s really simple.
- Open the Camera app.
- Swipe left to select Portrait.
- Ensure you’re stood around 2.5 feet from your subject and that the light is adequate – don’t worry, instructions on the screen will guide you.
- Take a photo!
That’s really it – the device will then save the Portrait image, and the original to the Camera Roll.
A promo pic from Apple after the launch of iOS 10.1
However, for those that love the cool blurring affect of high-end DSLRs but don’t have the iPhone 7 Plus, it’s still possible to create this affect on other devices using third-party apps. In fact, one app we’ve used before is Tadaa SLR [$3.99/£2.99]. This app allows you to shoot photos, or select existing ones and then manually select the subject and produce a blurring of the background.
It works well enough but the results are often slightly surreal and fake looking due to its manual selection – but if that’s the effect you’re going for it’s great.
On the other hand, the key sell for the iPhone 7 Plus’ Portrait Mode is that it’s all automatic, and since its launch more third-party developers have created tools that mimic this approach. One of the best we’ve found is an app called FabFocus [$1.99/£1.49]. This works in a similar way to Portrait Mode, allowing you to take photos before producing its own auto-bokeh effect. It works fairly well, but, and here’s why it’s a worthwhile app for both iPhone 7 Plus users, and everyone else: you can edit the effect.
Apple’s built-in functionality cannot be altered at all, meaning you can’t tweak the subtlety or intensity of the effect, but with FabFocus you can. Other benefits to using an app like this is that because it doesn’t use the Telephoto lens, you don’t have to stand so far away, it works far better in low light, and you can apply it (including automatically) to older photos.
How does it work? The app uses auto-facial recognition to automatically blur the image. Simply take a photo, or select an existing one and the app will start processing the image. The auto-blurring isn’t as good as Apple’s, but it makes a decent attempt, and it makes the editing afterwards easier.
First, let’s use the same subject and start by taking a shot with Apple’s Portrait Mode so we can compare it later.
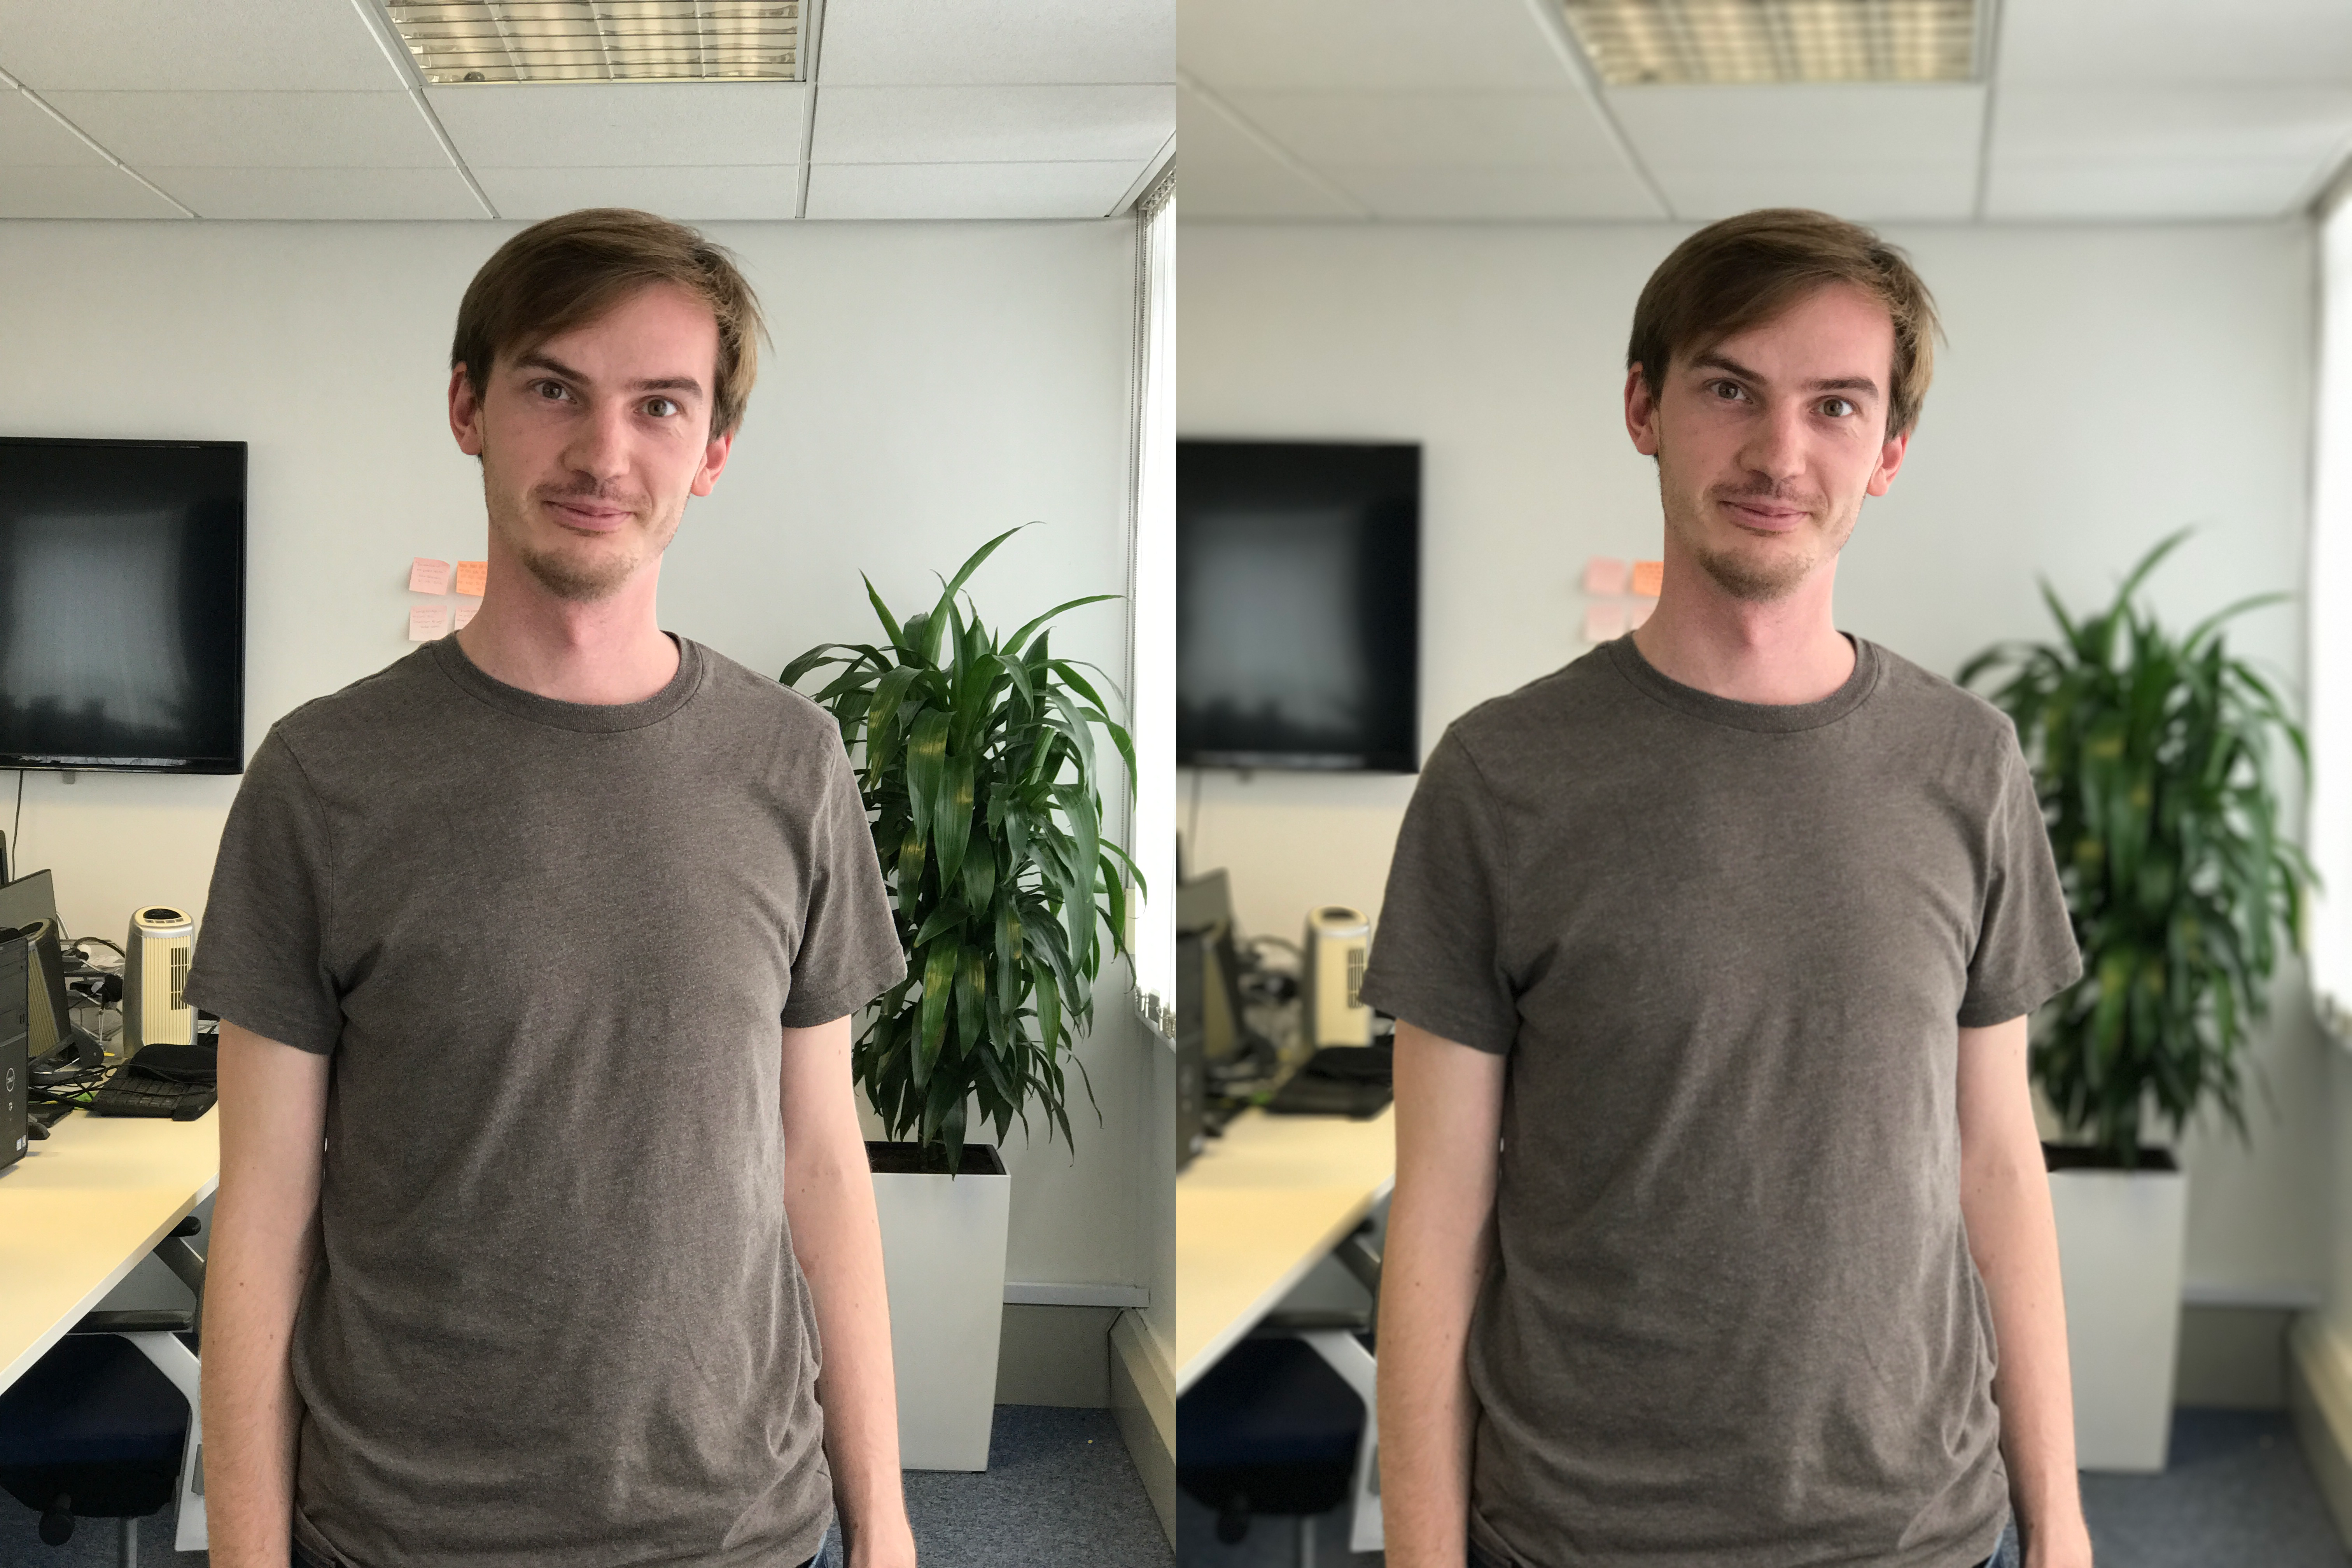
Apple’s Portrait Mode has been automatically applied to the shot on the right with the original on the left
Now, let’s take a look at how FabFocus works:
1. After opening the app you’re given the option for either selecting a photo already on the device, or using the camera to capture a new one. Let’s start by capturing one using the camera.
2. Once you have your subject in place, simply snap the photo as usual using the app’s built in camera. Unlike Apple’s portrait mode you can also use the front-facing camera to take a selfie (top left-hand corner).
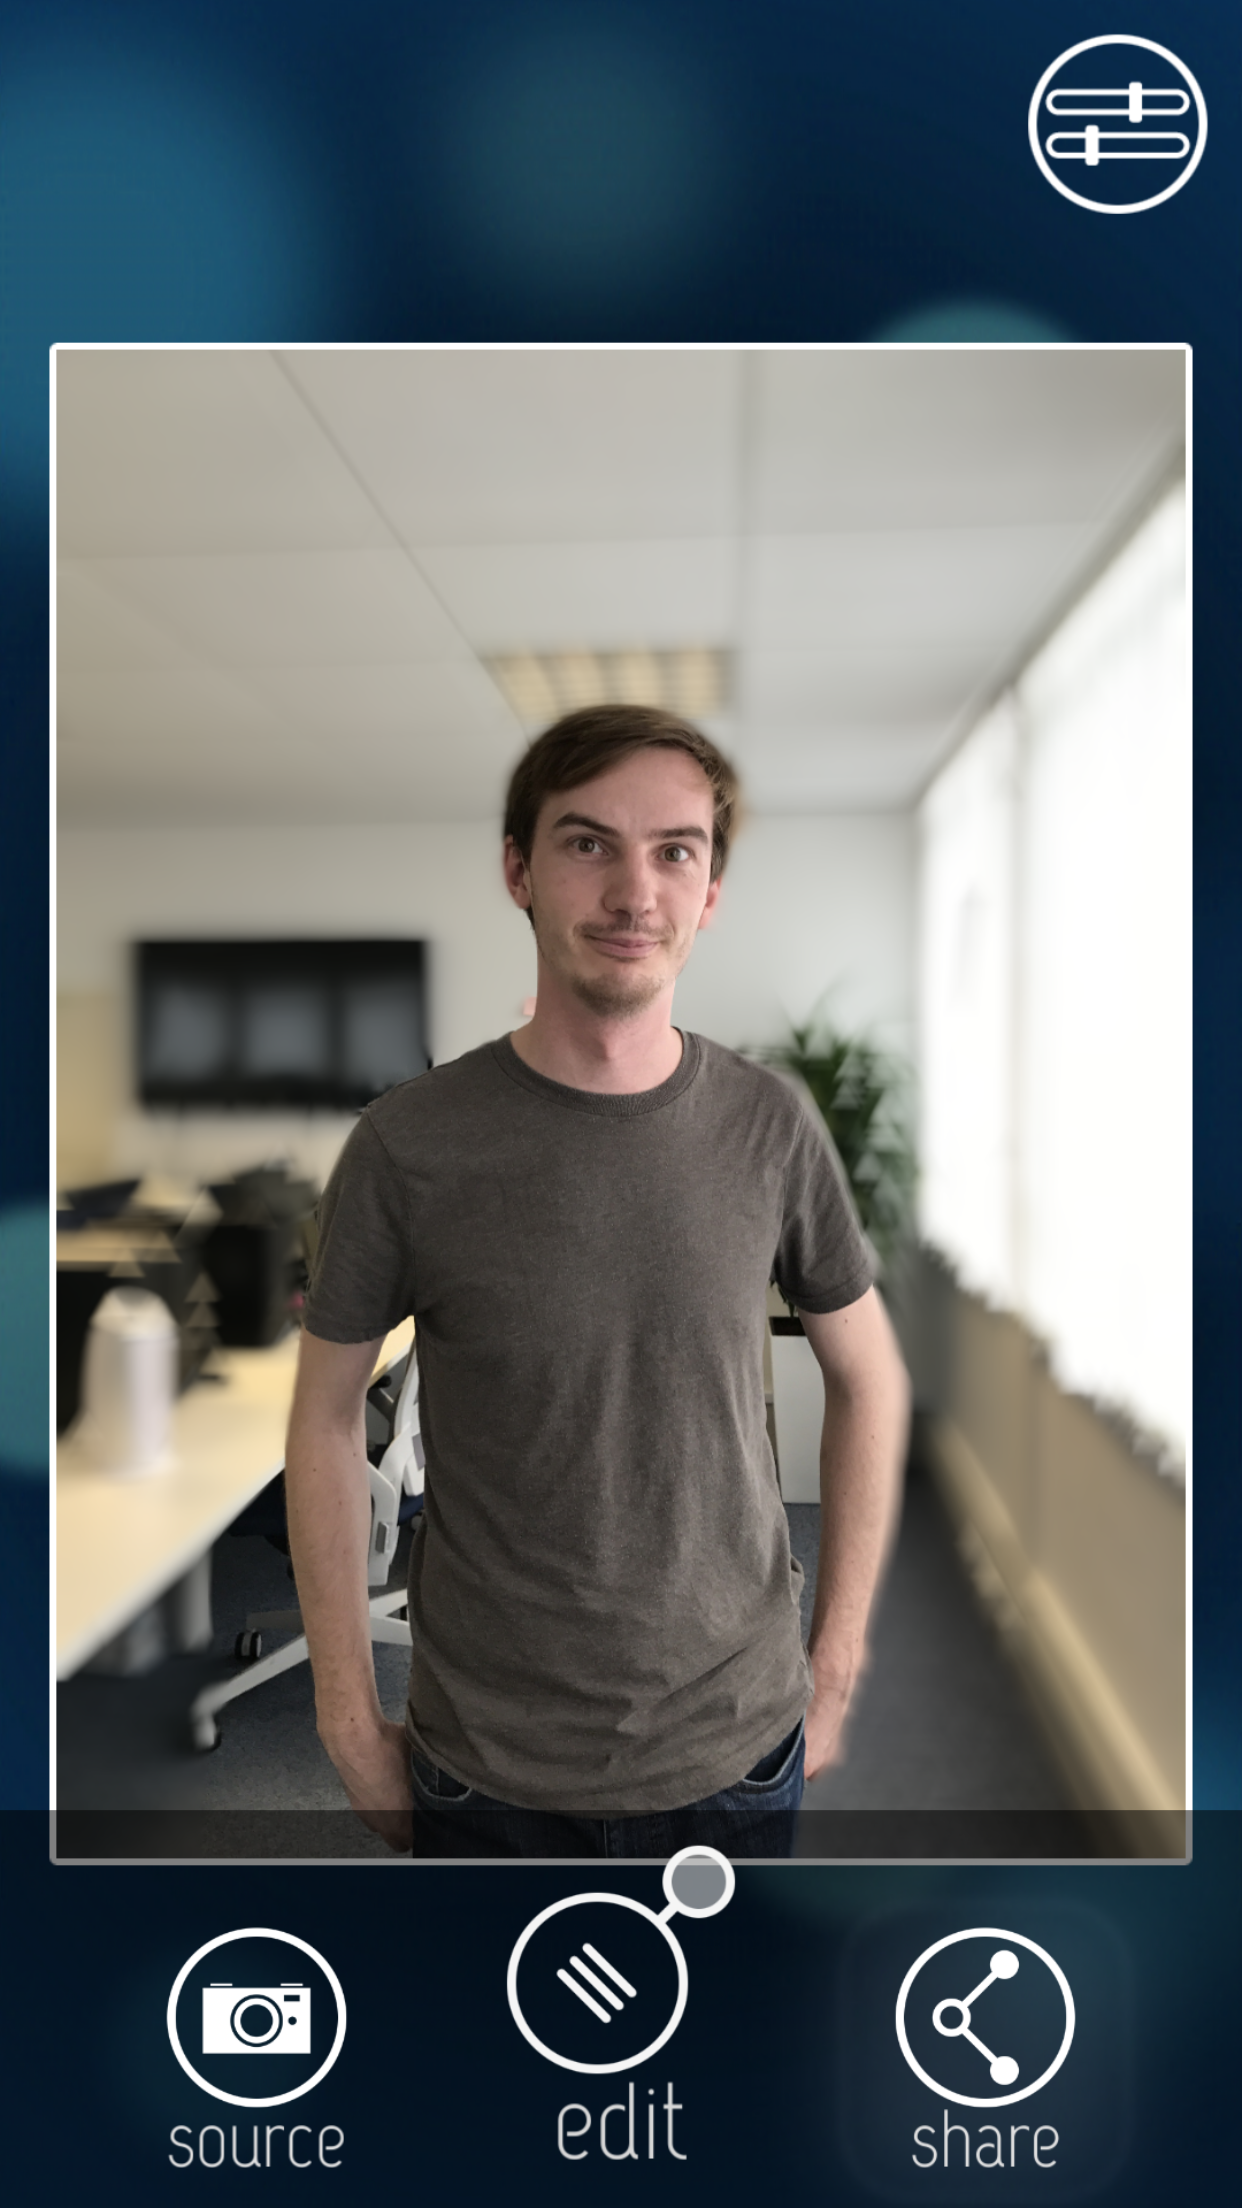
3. Now you’ve captured the photo, you’re taken to a new menu. In the centre is the photo you’ve captured. If you’re not happy with it, tap on ‘Source’ and you can start again. Use the icon in the top right-hand corner to tweak the settings for the blurring effect. You can select a bokeh shape to apply to the photo, and you can also tweak the ‘blur amount,’ giving you plenty of control over the intensity of the effect.

Once you hit ‘Start’ the app starts to process the image, identifying faces and analyzing the background
4. Now here’s where the fun starts! Tap ‘Start’ and the app begins to process the image using facial recognition to automatically detect backgrounds and the subject matter, before presenting the image with the blurred effect added.
And here’s the result. As you can see, between the arms, the background remains in focus, and the intensity of the blur is quite high
5. Generally, the auto-effect is pretty good, but will frequently miss areas, such as the gaps between arms. However, it’s easy to edit the image and paint these back in – simply tap ‘Edit’ and you’ll see the subject of the image has already been shaded in green. Here, you can see it’s been over-applied or missed sections.
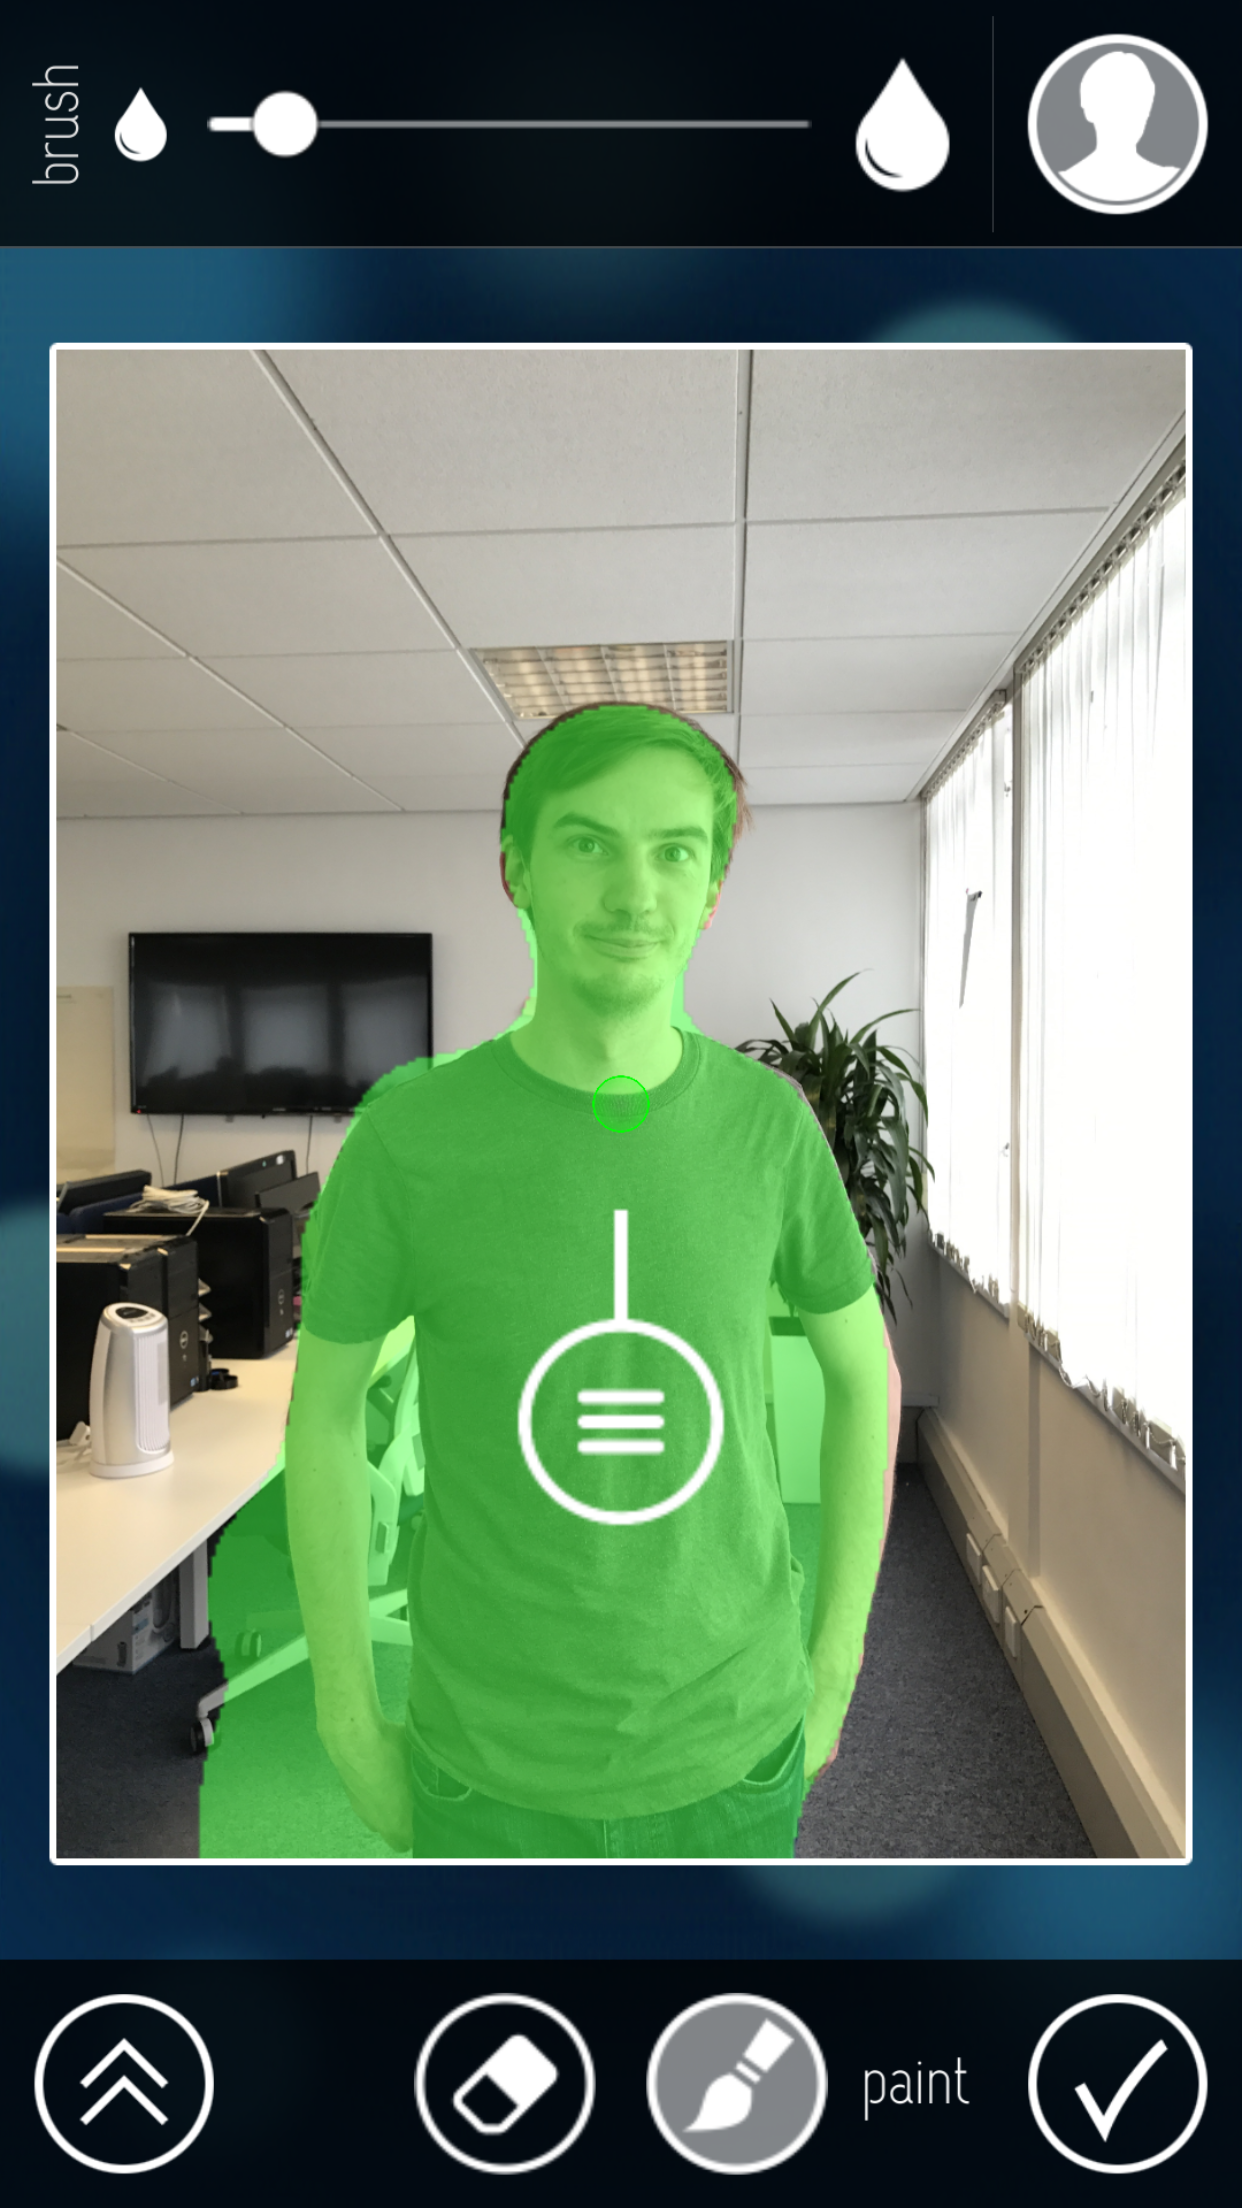
This is the automatically generated mask. It’s over shot in the bottom left. To edit, we erased this, as well as between the arms, and painted a little more of the hair
Use the brush tool to paint these back in with your finger, and the eraser icon to remove any incorrect areas. The arrow on the left-hand side allows you to tweak the shape and intensity again, while the slider at the top lets you increase and decrease the size of the brush depending on how much granular detail you wish to apply.

Editing the mask improves the accuracy of the effect
6. Tap the tick icon and the image will process again where you can either continue to edit, choose a new photo or share. Share options brings up the share sheets where you can save the image, assign it to a contact, send via Messages, Twitter, Facebook, email etc.
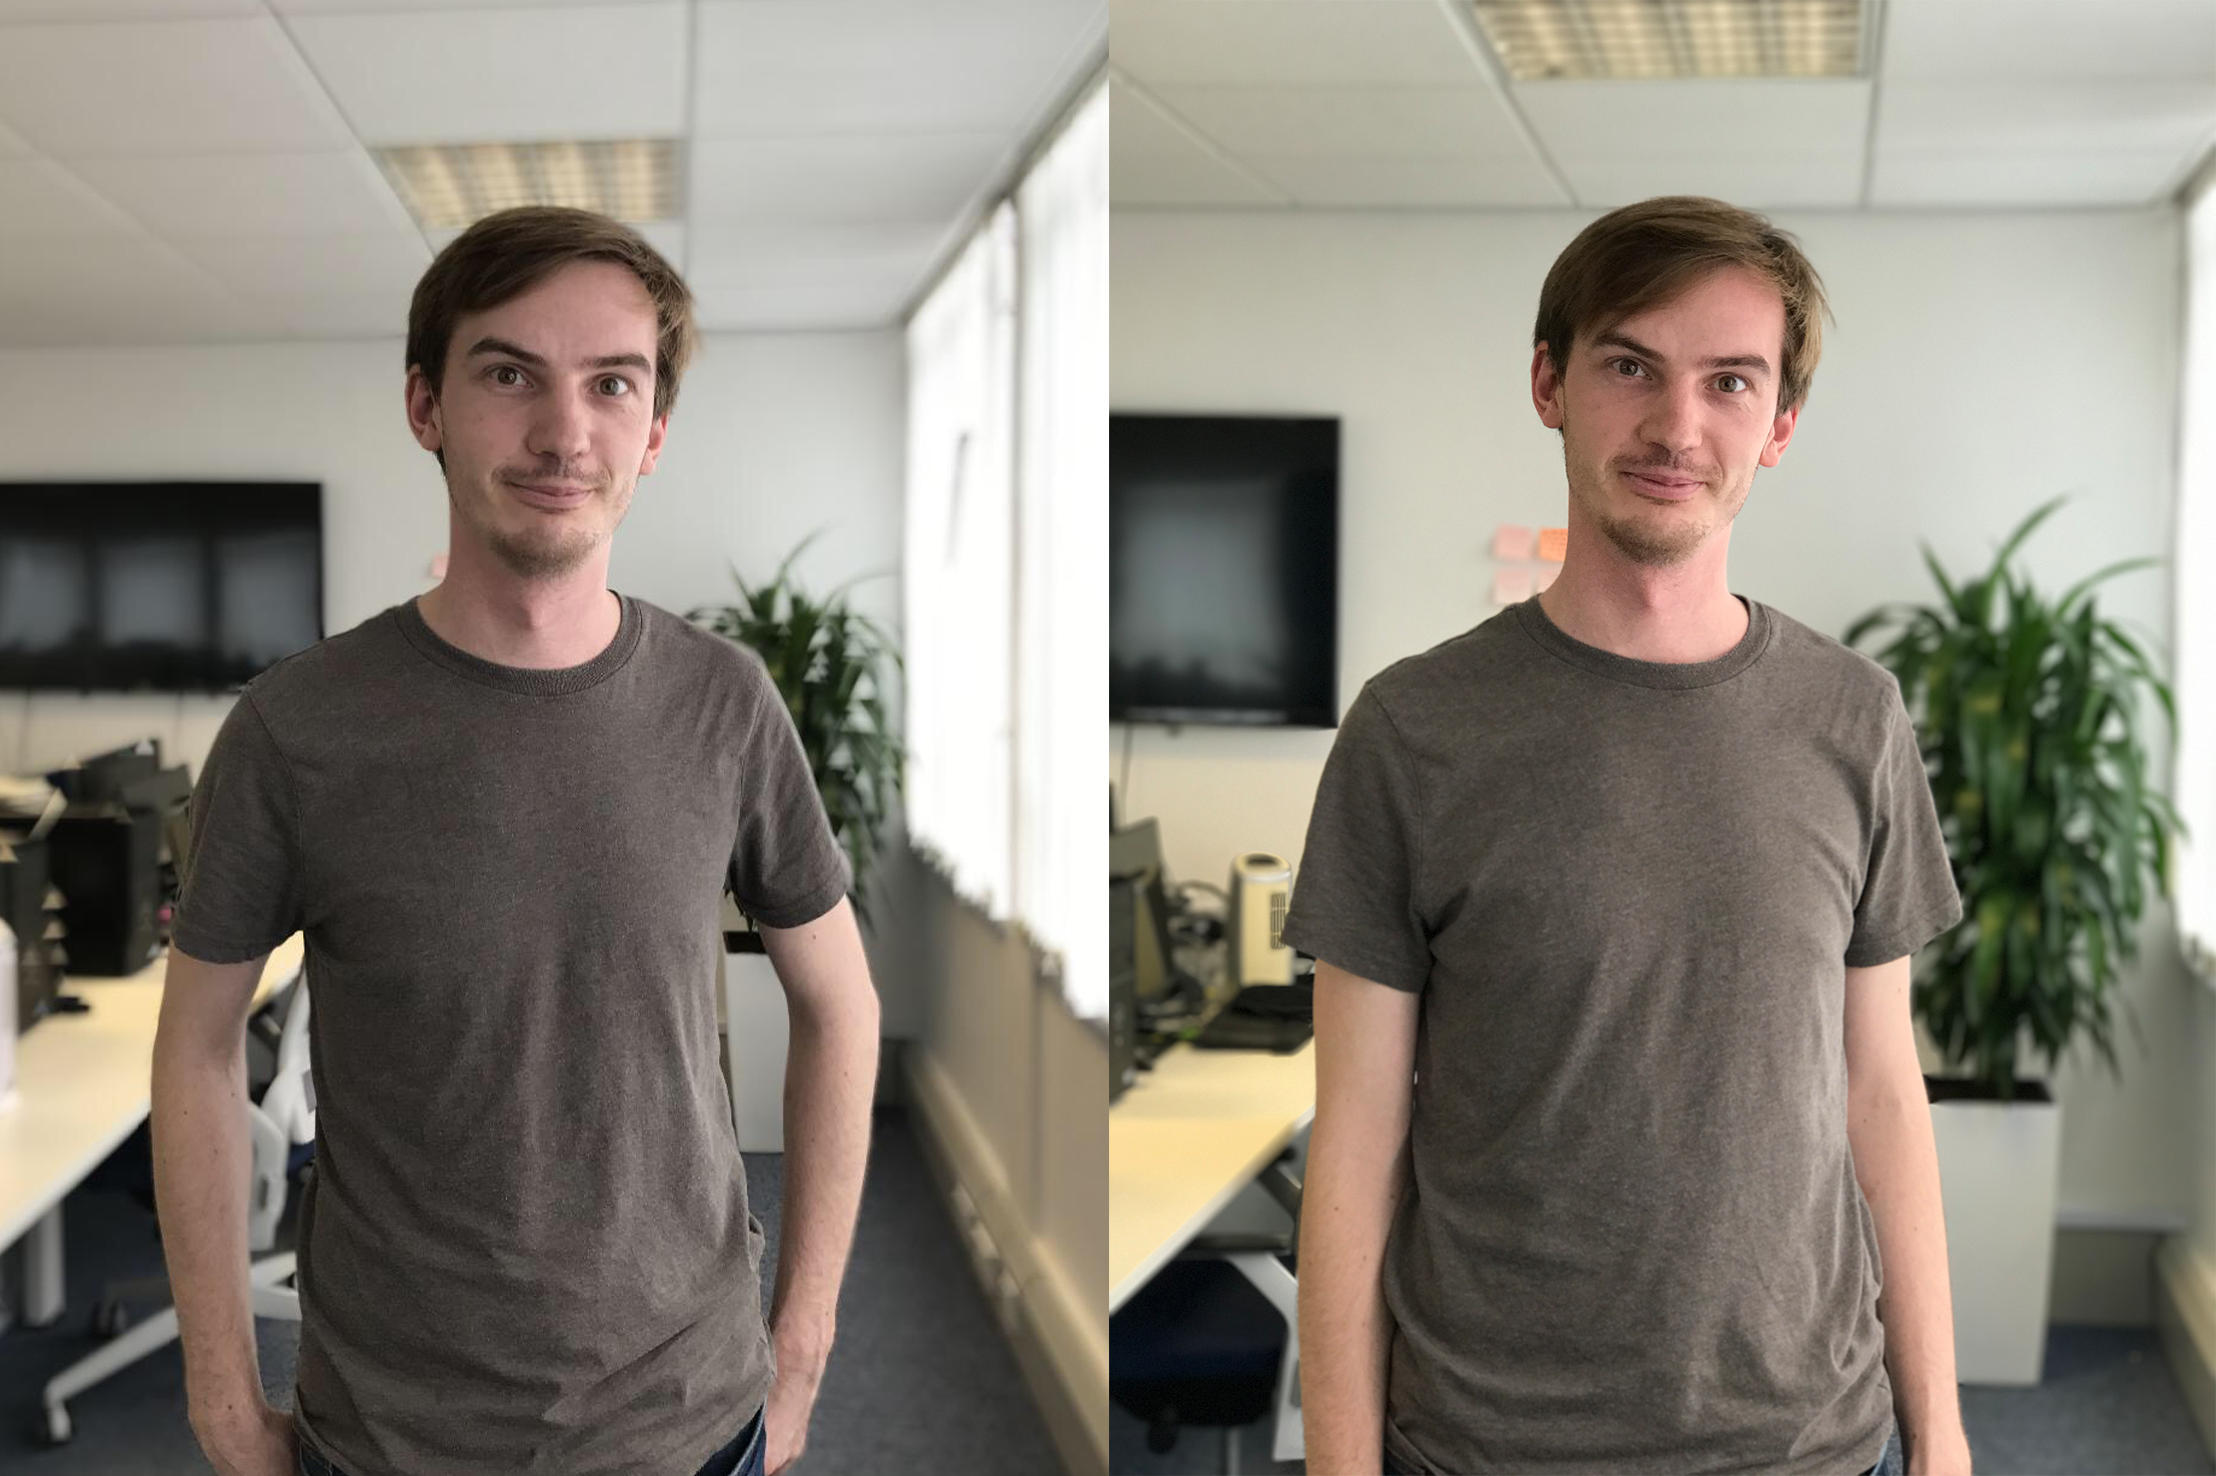
Here’s the final side-by-side. Not too bad. FabFocus is on the left and Apple’s Portrait Mode is on the right. (Note: perspective is different because Portrait Mode uses the Telephoto zoom lens)
And there we go! Achieve DSLR-style blurring effects without having the latest device. If you don’t have an iPhone 7 Plus, or wish to edit the Portrait Mode effect, we’d say for only $1.99, this is a cheaper way to better photos.