
Since the arrival of the iPhone 7 Plus way back in 2016, Apple users have been able to take DSLR-style photos via the Camera app’s Portrait Mode function.
In framing a close-up photo of an individual, Portrait Mode cleverly isolates the subject matter, automatically applying a blurry background effect known as ‘bokeh’. This defines a stark contrast between detailed foreground and out-of-focus background, helping the subject to stand out. Shot correctly, it’s quite a powerful look, as you can see.

Without getting too technical, this photo trickery is based on a conventional camera’s aperture setting – measured by f-stop numbers. Put simply: the lower the number, the wider the aperture, the shallower the depth of field. But how does this photography lesson help you on iPhone?
In terms of Portrait Mode, changing a virtual f-stop means you can control the blurriness of the background. Until recently, a generic setting was applied automatically, but with the power of modern processing chips (as seen in iPhone XR/XS and iPhone 11/11 Pro) you can now edit the strength of this bokeh effect after the fact. Here’s how.
First, ensure you have iOS 13 installed on one of the devices mentioned above. Then start by snapping a photo with Portrait selected in the Camera app. A yellow text box at the bottom of the screen will help you find the right angle and lighting to successfully capture a bokeh portrait.
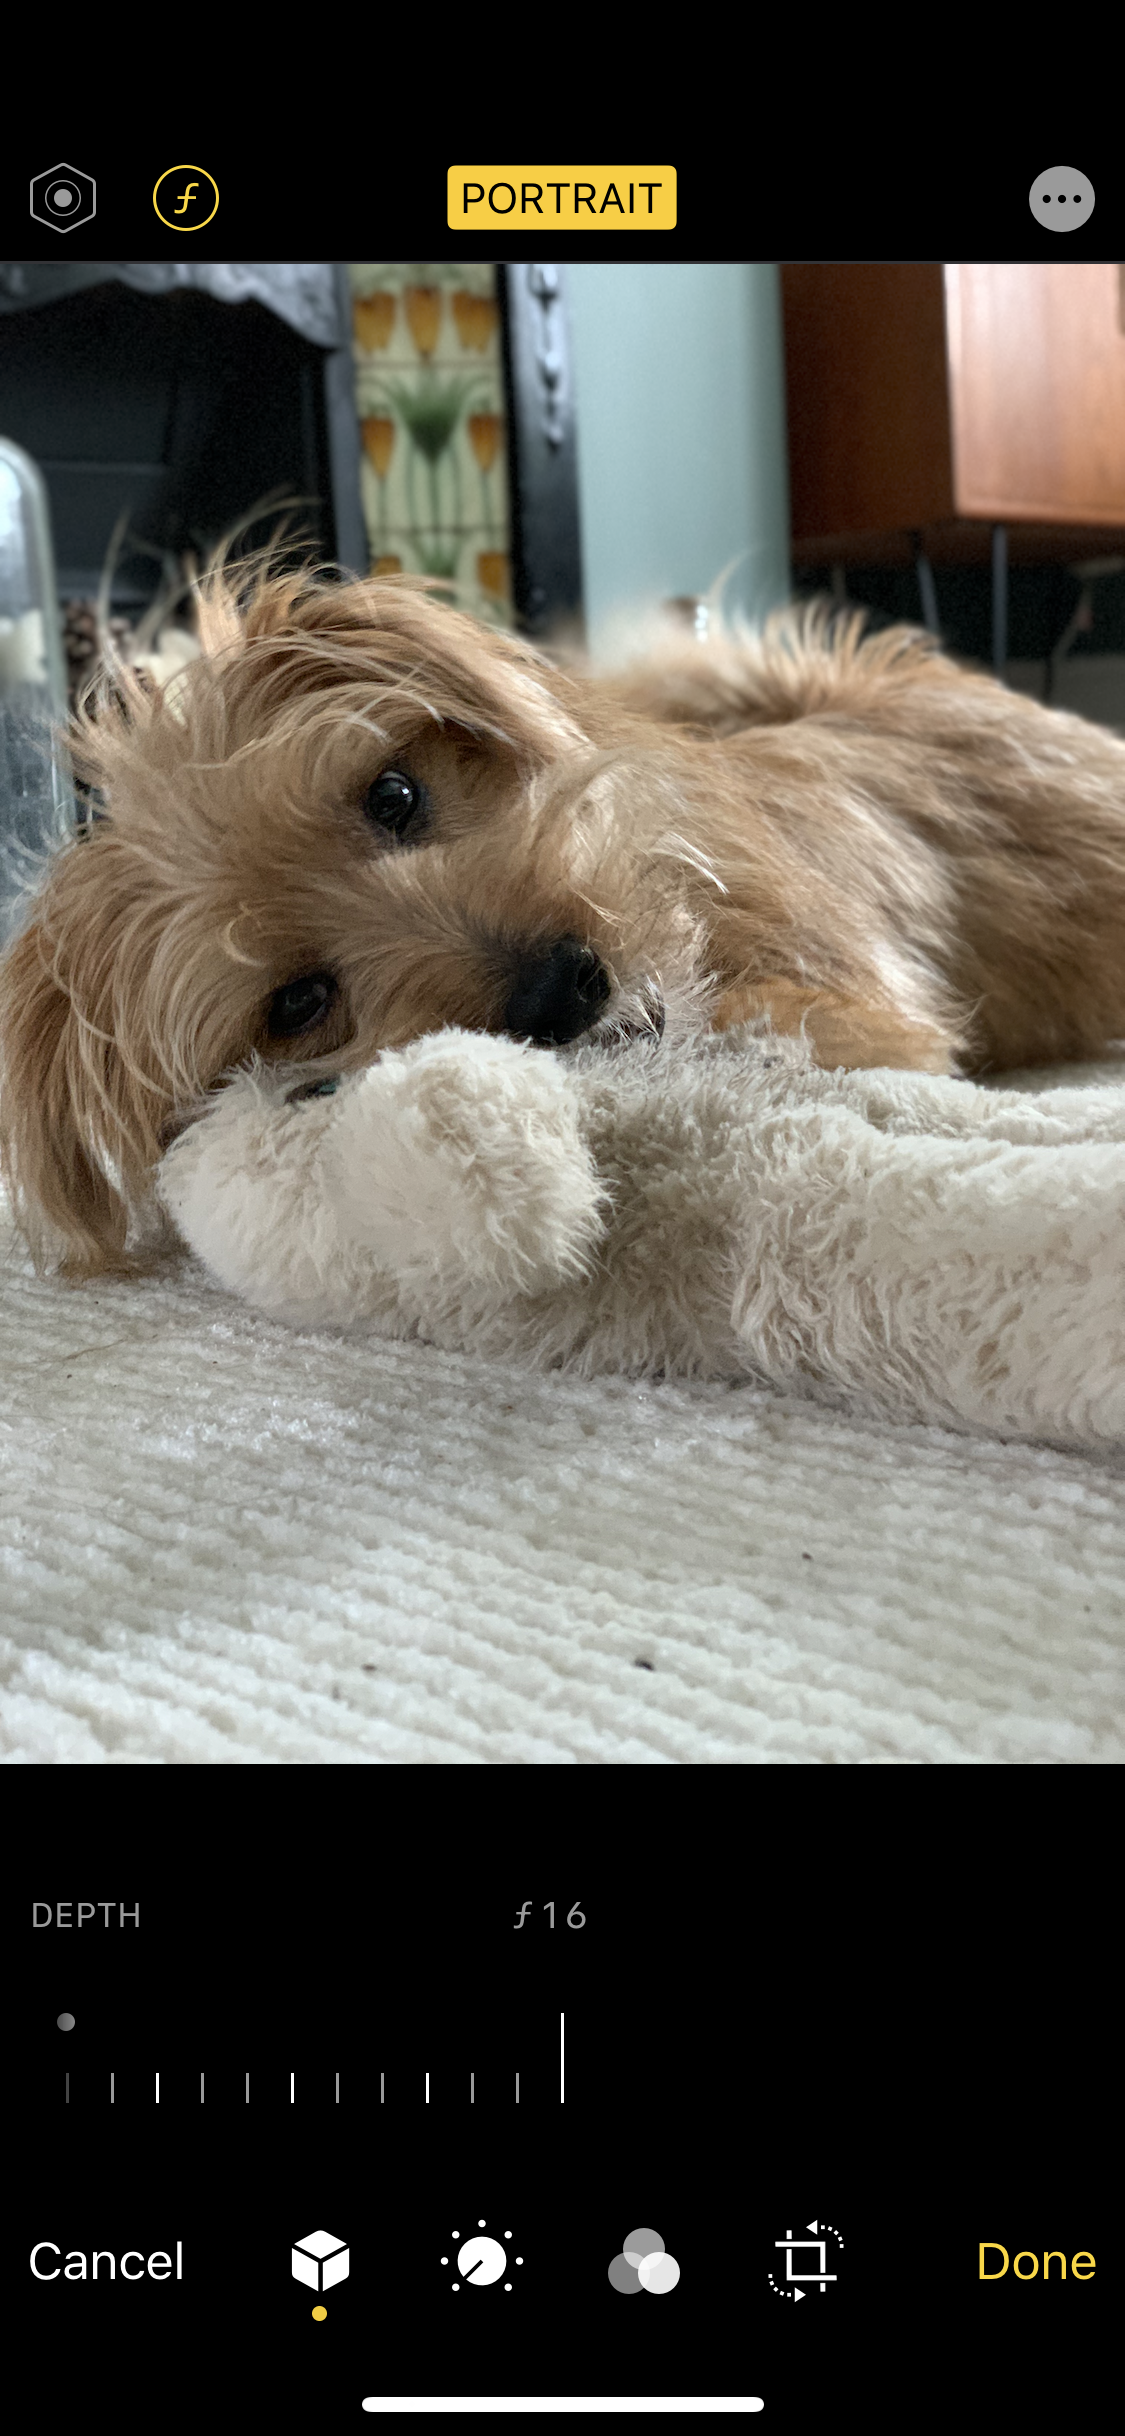
Go to Photos and select the image you just took. (This also works with existing photos, so long as they were captured in Portrait Mode.) Tap Edit in the right-hand corner and look for the ‘f‘ button along the top menu. The button will have a number next to it – that’s the f-stop number we were talking about earlier!

A slider will appear below the photo. Slide this left to right to increase and decrease the f-stop number, altering the amount of background blur. You’ll see the changes previewed live as you make adjustments. Once you’re happy with the amount of bokeh, tap Done!
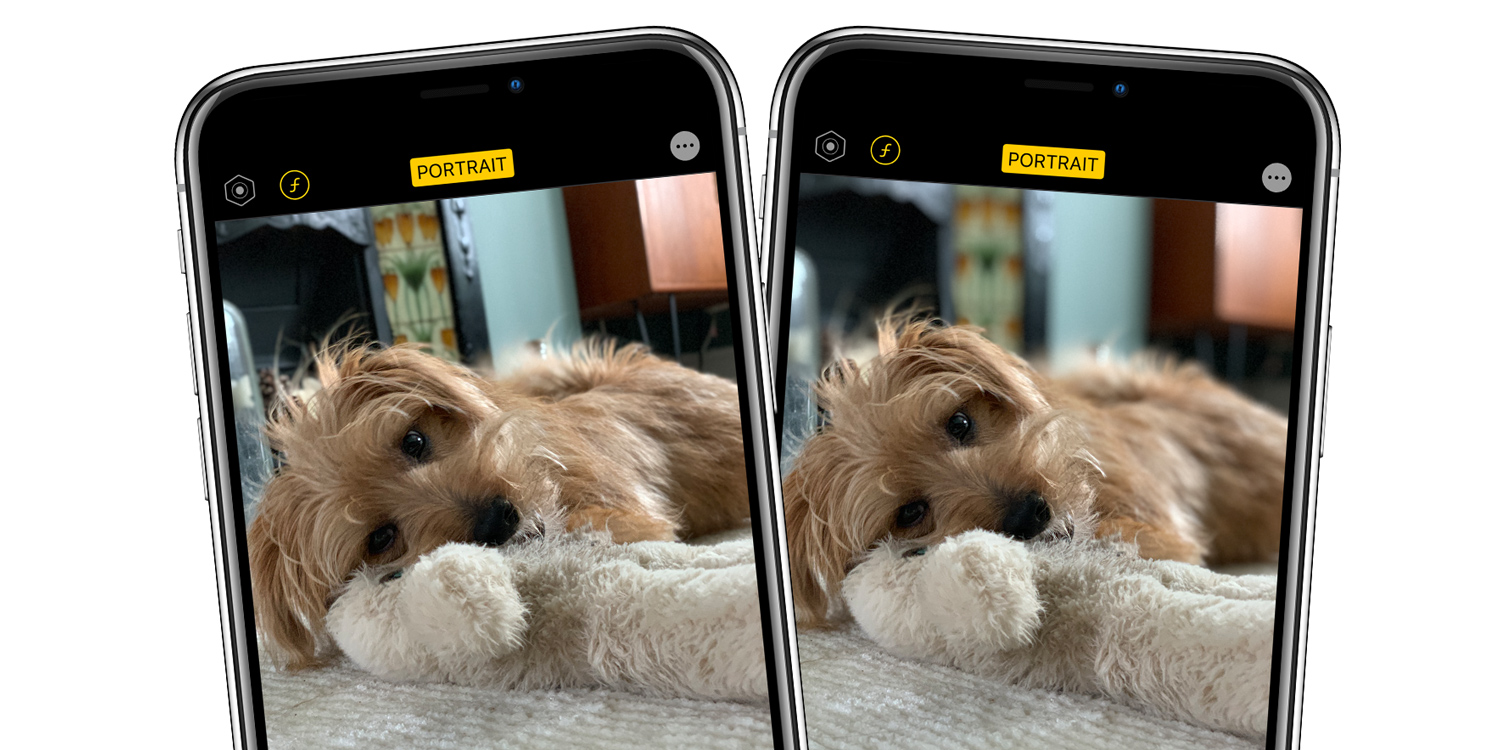
Here’s an example. The first image is set to a high f-stop number (16), which means the background is largely in focus, just like the main subject.
For comparison, this second image has a lower f-stop number (4.5) meaning the background features a satisfying blur. This is a good illustration of ‘depth of field’ at play. Notice how it’s not just that the background has a more intense blur, but also the distance at which the effect begins is much closer to the camera in this shot. The bokeh effect now covers most of the dog’s body, leaving just the head in focus!

We could also take this number down further creating an even more blurred effect. Give it a go yourself, and have fun experimenting with f-stop!