
Do Not Disturb is a great feature on the iPhone (and the iPad,) but its level of complexity is underrated. It might be easy to assume that enabling Do Not Disturb simply blocks everything until you turn it back on again, while many simply will instead turn on Airplane mode when they want some quiet time, completing blocking any cellular activity.
However, Do Not Disturb can be far more interesting. Understanding the feature properly will open up your world to ensuring that you only get notifications or calls when you want. Let’s take a quick look at how to set it up, and if you’re already a Do Not Disturb power user, what’s new in iOS 10.
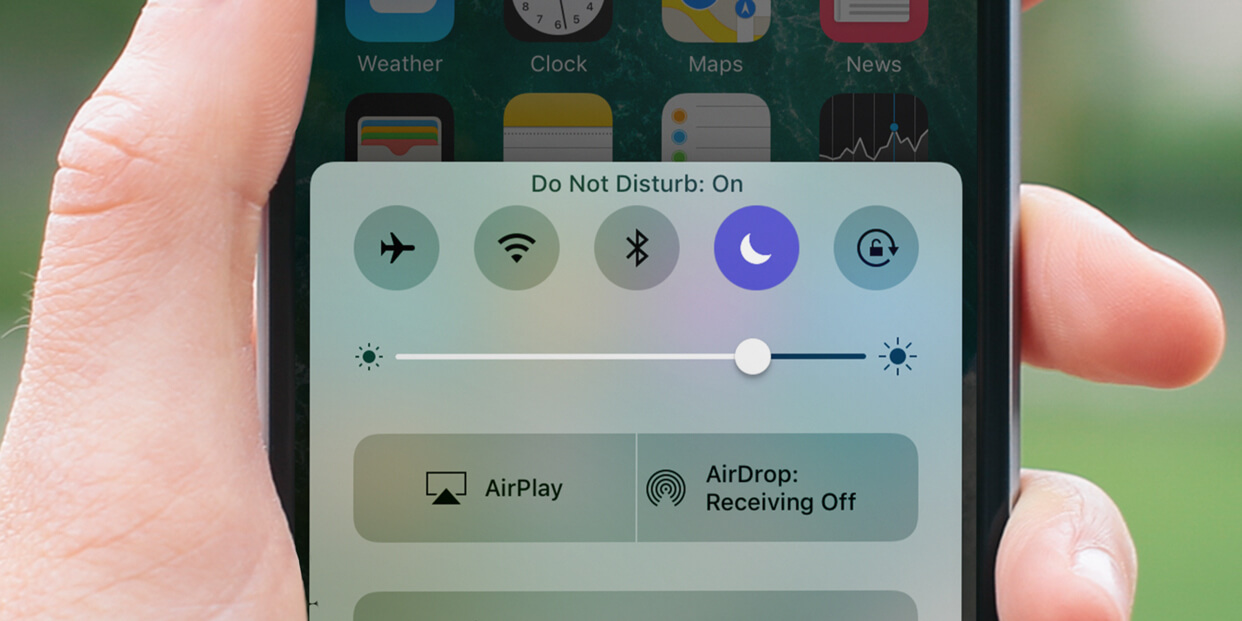
Enabling the feature manually is easy as it’s baked into the Control Center. All you have to do is swipe up from the Home screen and then tap on the Crescent Moon icon, which will enable the feature. So, what does it actually block? One of the key things Do Not Disturb does is stop notifications and any sounds associated with them from reaching your device, while allowing you to continue using the device’s cellular signal or Wi-Fi, unlike Airplane mode.
Importantly, this includes call notifications from the Phone app, which is good for when you’re at work, or overnight, where errant Facebook notifications or emails might be undesirable.
One thing to note is that unlike Airplane mode, Do Not Disturb does not block the notifications from coming in, rather it keeps them hidden until you unlock your device, so you won’t miss anything at all.
However, Do Not Disturb becomes truly useful in its customization.

Scheduling
It’s possible to schedule Do Not Disturb so it turns on and off automatically at certain times of day. This is the crux of the feature’s usability, as it allows you to set these up in advance, rather than having to play about with your settings before an important meeting, or before bed or the start of a work day.
To schedule, first open Settings, select Do Not Disturb, and turn on Scheduled, then choose the times you would like Do Not Disturb to be enabled.
While ideally, if you have multiple times of the day that you wish to enable Do Not Disturb, you’d be able to set up a series of times, this feature isn’t currently available. As a result the most logical time to set here would be overnight, and any other time can be enabled manually.

Allowing some calls
Though the feature blocks all call notifications, it’s possible to keep some phone calls enabled via various options.
To set this up, select from the options under Settings, Do Not Disturb, Allow Calls From. Then select Favorites, Everyone, or No One to decide which calls are allowed. Favorites can be set via the Phone app.

Allowing repeated calls
If you don’t wish to go through the hassle of adding favorites or want calls to get through if they’re important enough that the individual has tried calling you again, then enabling Repeated Calls is a good idea.
This means that if the same number calls a second time, it will override the Do Not Disturb setting and the phone will ring as normal. This will make sure those really important calls get through even when Do Not Disturb is turned on.

Always silent
The idea with Do Not Disturb is that it silences incoming calls and notifications only if your phone is locked. This is the default setting because if you’re using your device, you’re not asleep or otherwise indisposed. However, considering so many of us now use our devices to work or are just taking a quick glance, we may still want the phone to block notifications while we use it.
This is how use Do Not Disturb even when the phone is unlocked: Open Settings, select Do Not Disturb, and scroll down to the Silence section. From here choose the Always option. Now your iPhone will mute all sounds when Do Not Disturb is enabled even if your iPhone is not locked first.
Emergency Calls in iOS 10
In iOS 10, Apple added even more customization for Do Not Disturb. This includes enabling Emergency Calls to bypass Do Not Disturb on a person-by-person basis. Previously, you could only select via Favorites, but to keep these separate you can now manually tag a contact as one whose call can get through.
For example, understandably, you may not consider your boss a ‘favorite’ contact, but it’s important that if he calls you, it gets through. You may also rarely have a need to call your kids’ school, but if they call you, you’re going to want to receive it. However, this is not done via Do Not Disturb’s settings.
Here’s how to select a contact as an Emergency Call in iOS 10:
1. Launch the Contacts app.
2. Select a contact, then tap Edit
3. Then tap Ringtone or Text Tone (do both in turn if you wish to allow both calls and texts through)
4. Toggle Emergency Bypass to the on position.
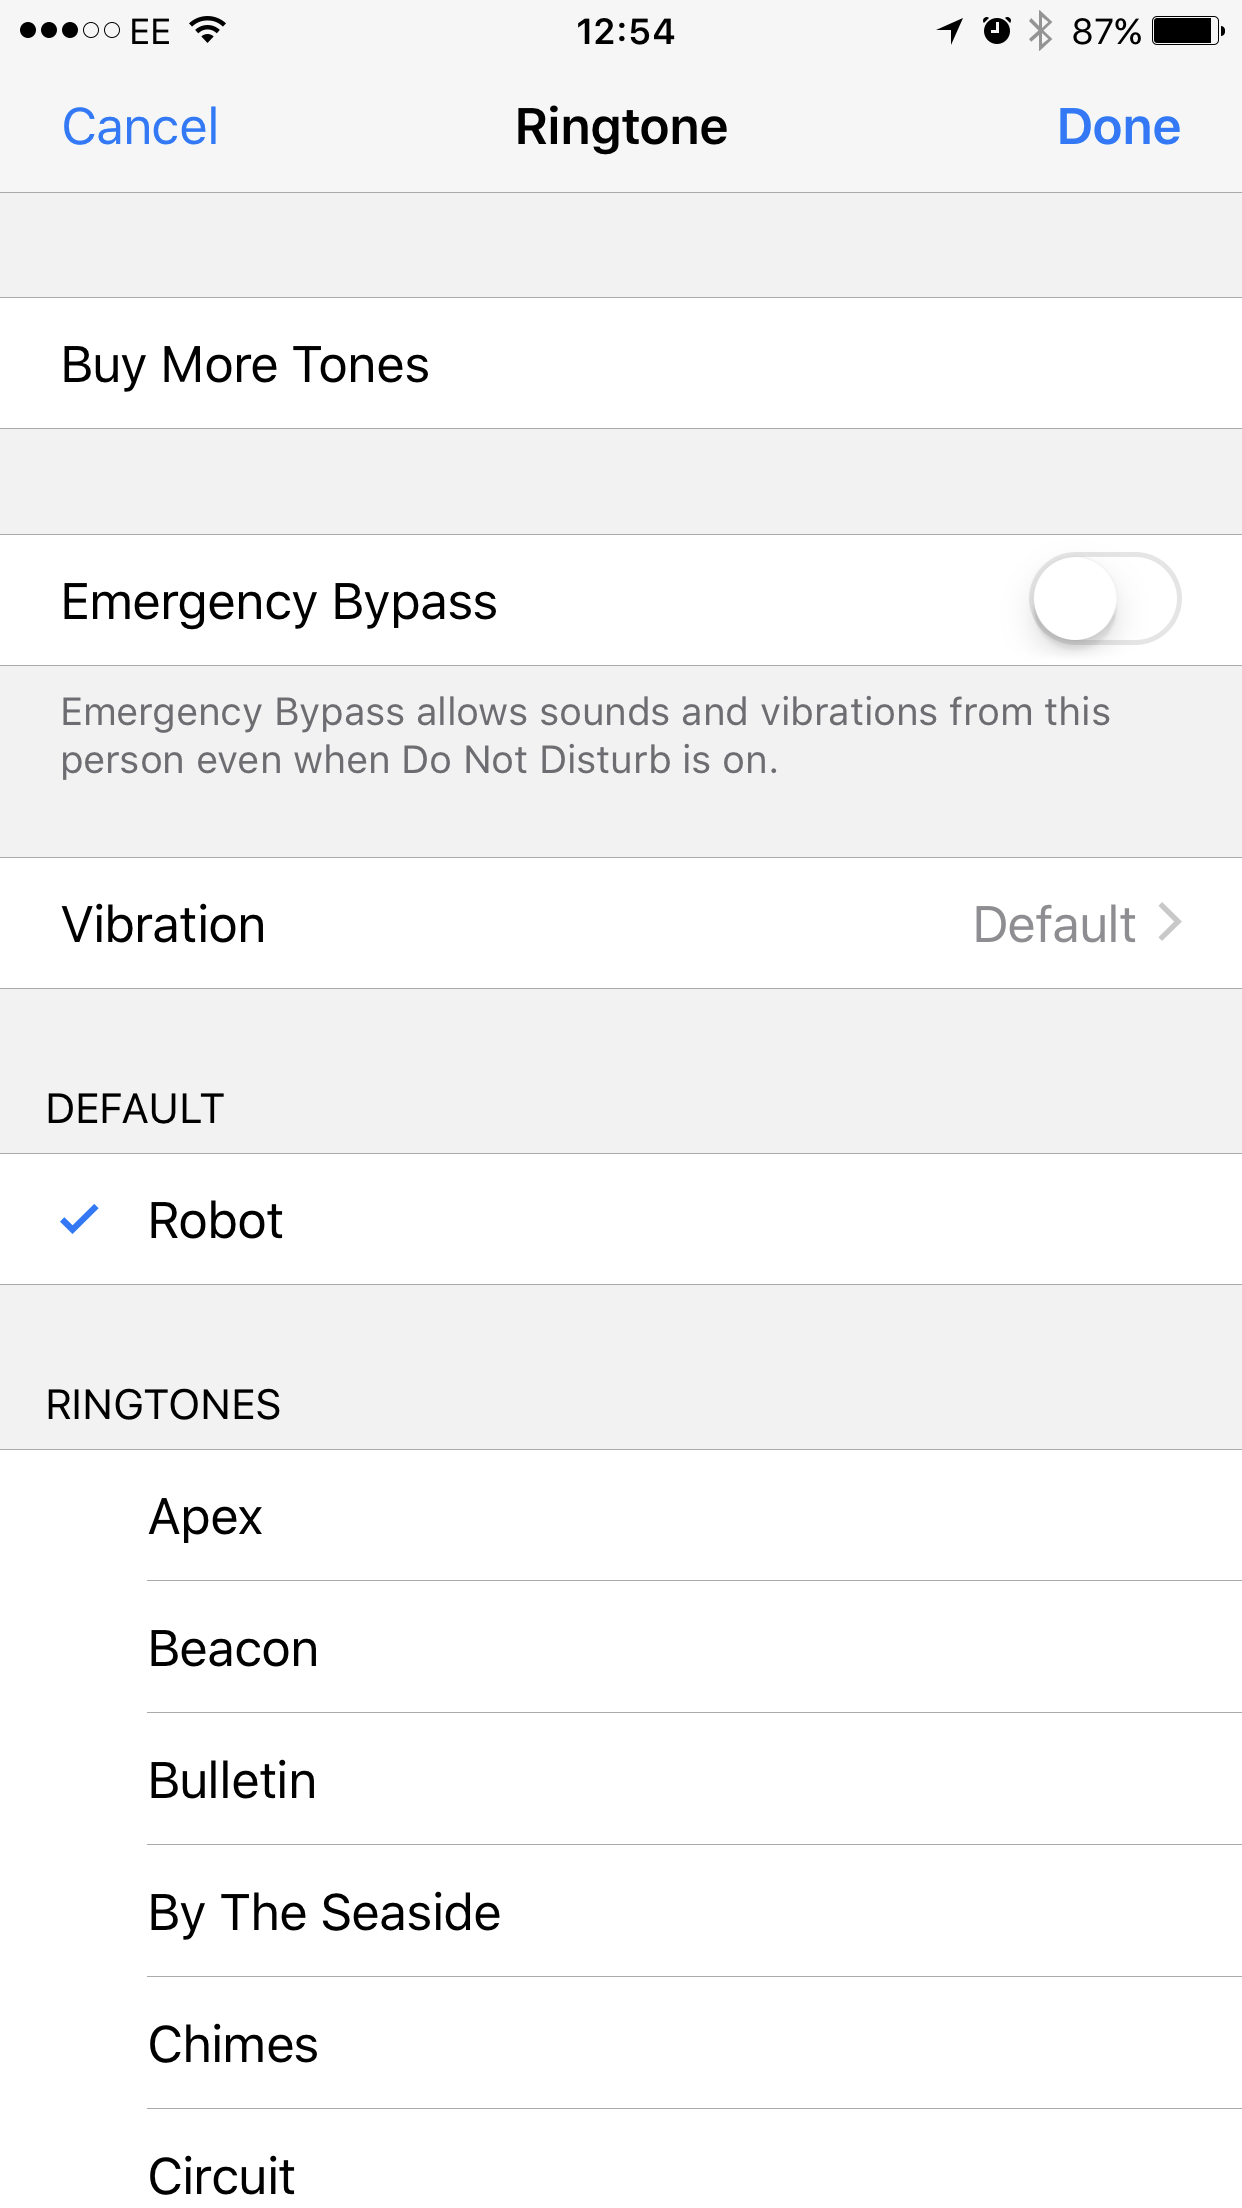
By doing this, each contact you choose will bypass Do Not Disturb if they call or text. While you can make allowances for Favorites, this gives you further control by also giving you the ability to select based on both texts and calls.