
The days of Apple’s “our way or the highway” are gone – there’s loads you can customize on the iPhone these days. Here’s how to use ScreenKit to customize your app icons and widgets.
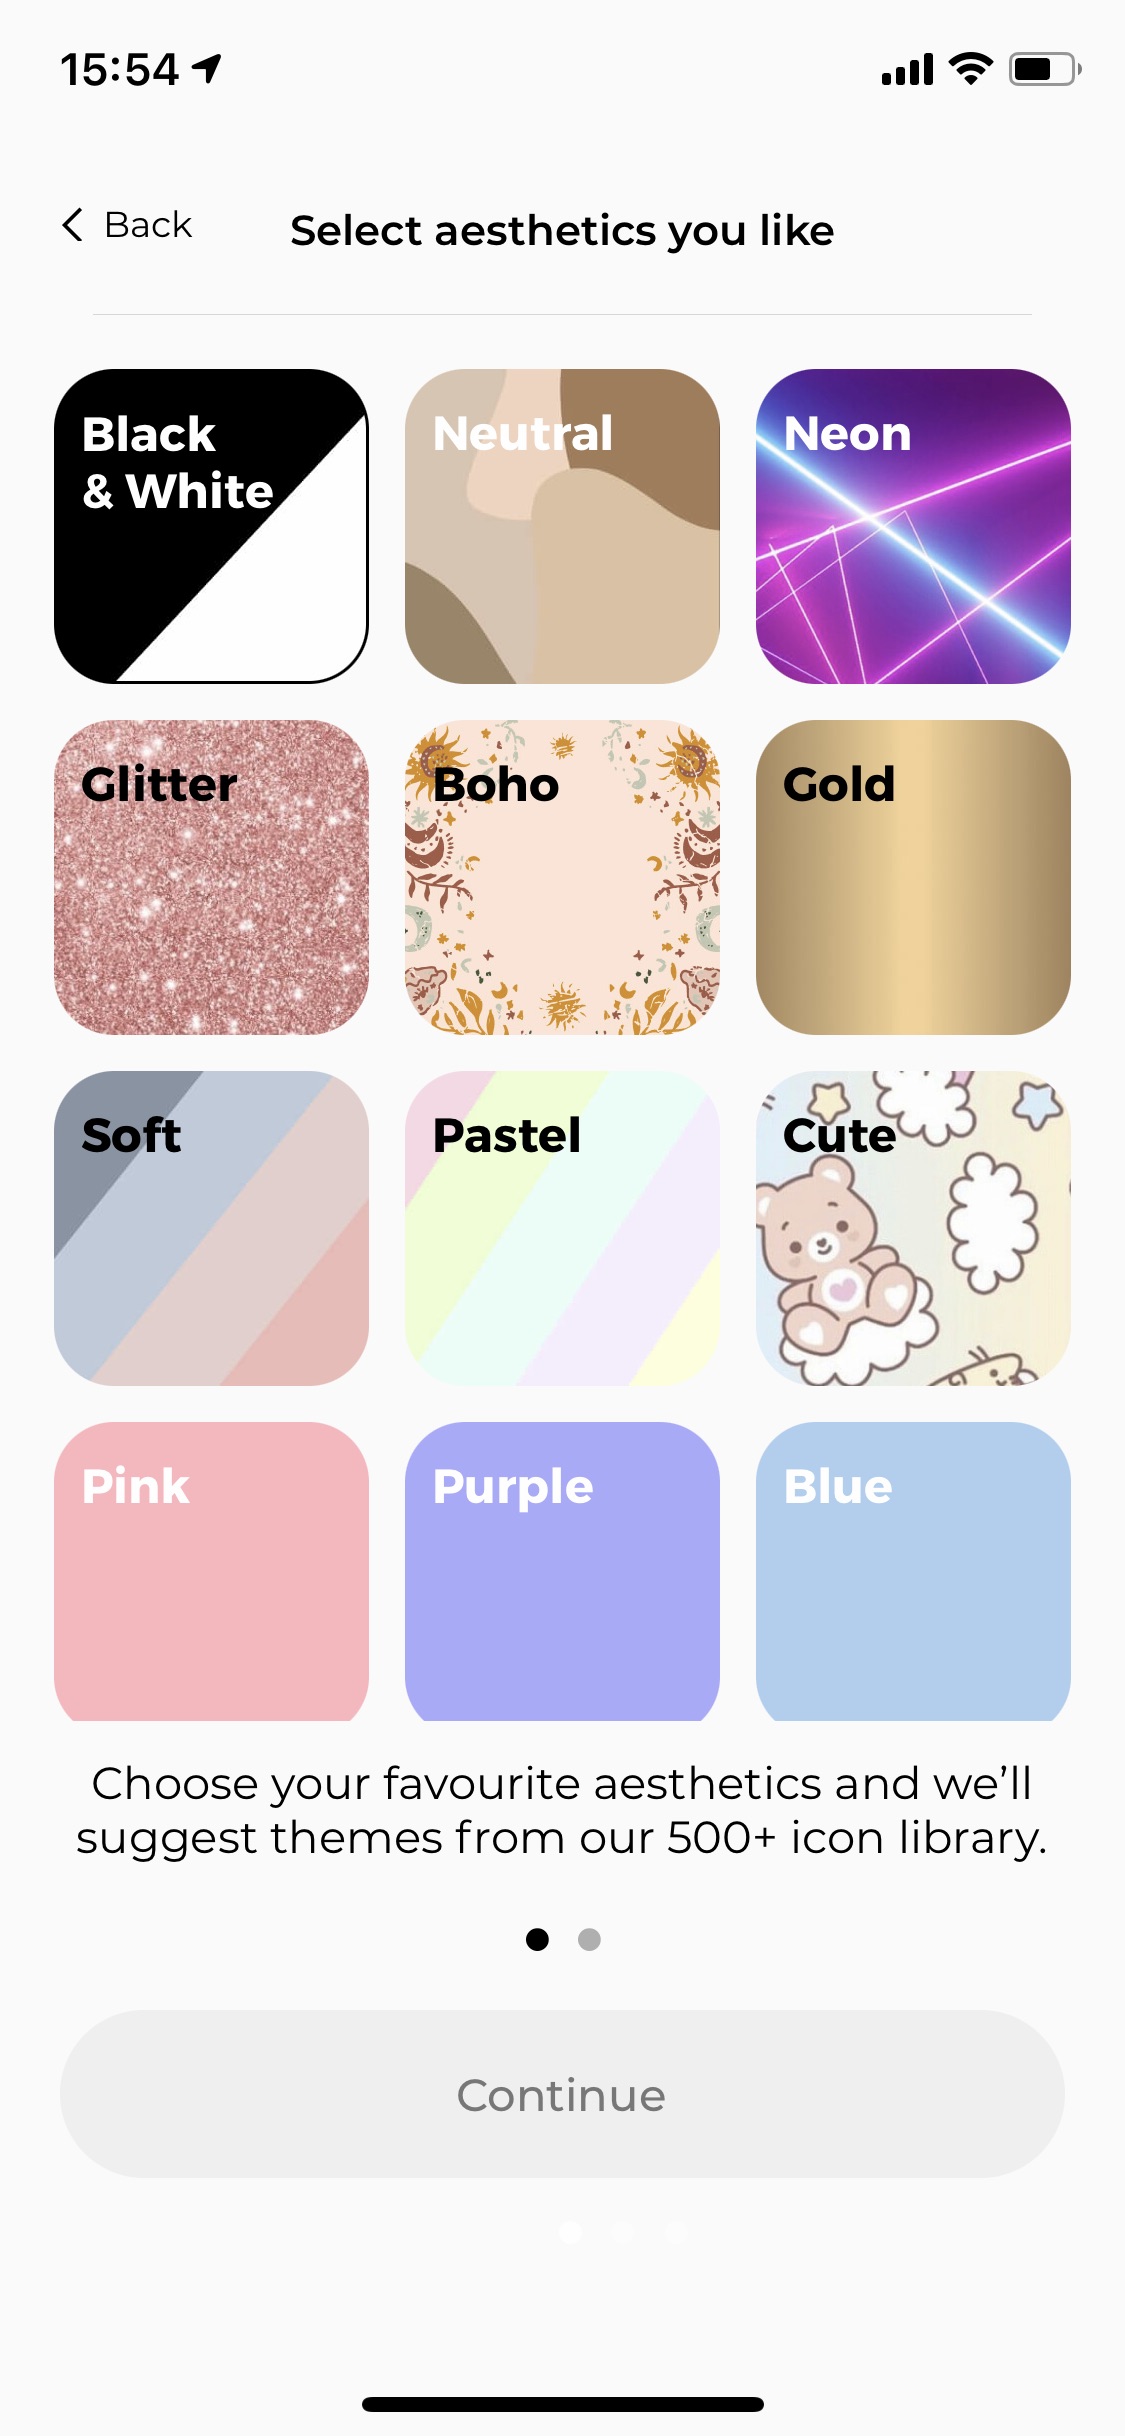
Getting started is simple – but you’ll need to make some design choices as the app is massive. First, download ScreenKit and go through the startup, which will include selecting the kind of color schemes you like and your interests.
There is also a one-off $10 payment to get full use of the app, and though we think it’s a decent deal, watch out as the app is very quick to push the upgrade on you if you try the free version!
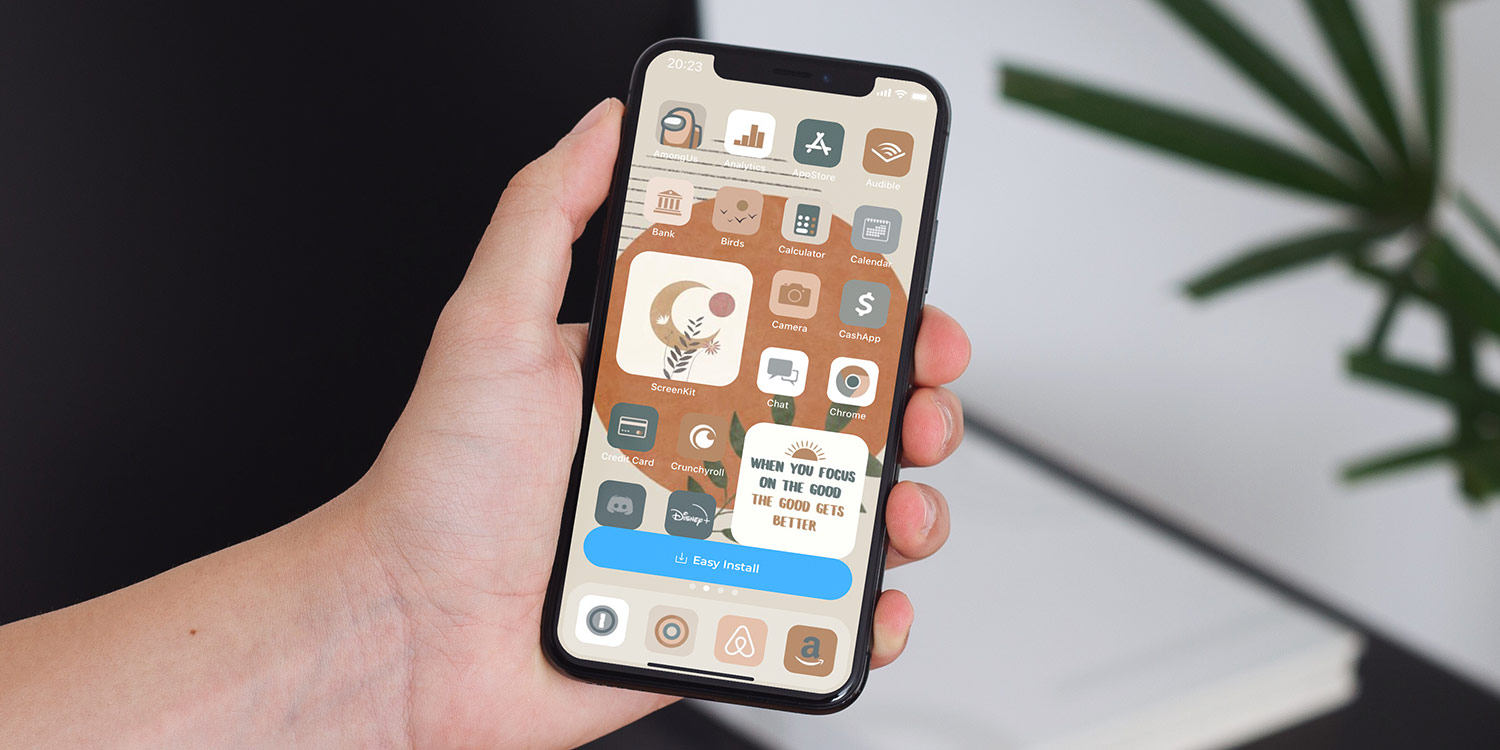
Once you reach the main home screen, you’re all set to give your app icons a new lick of paint.
How to change your app icons
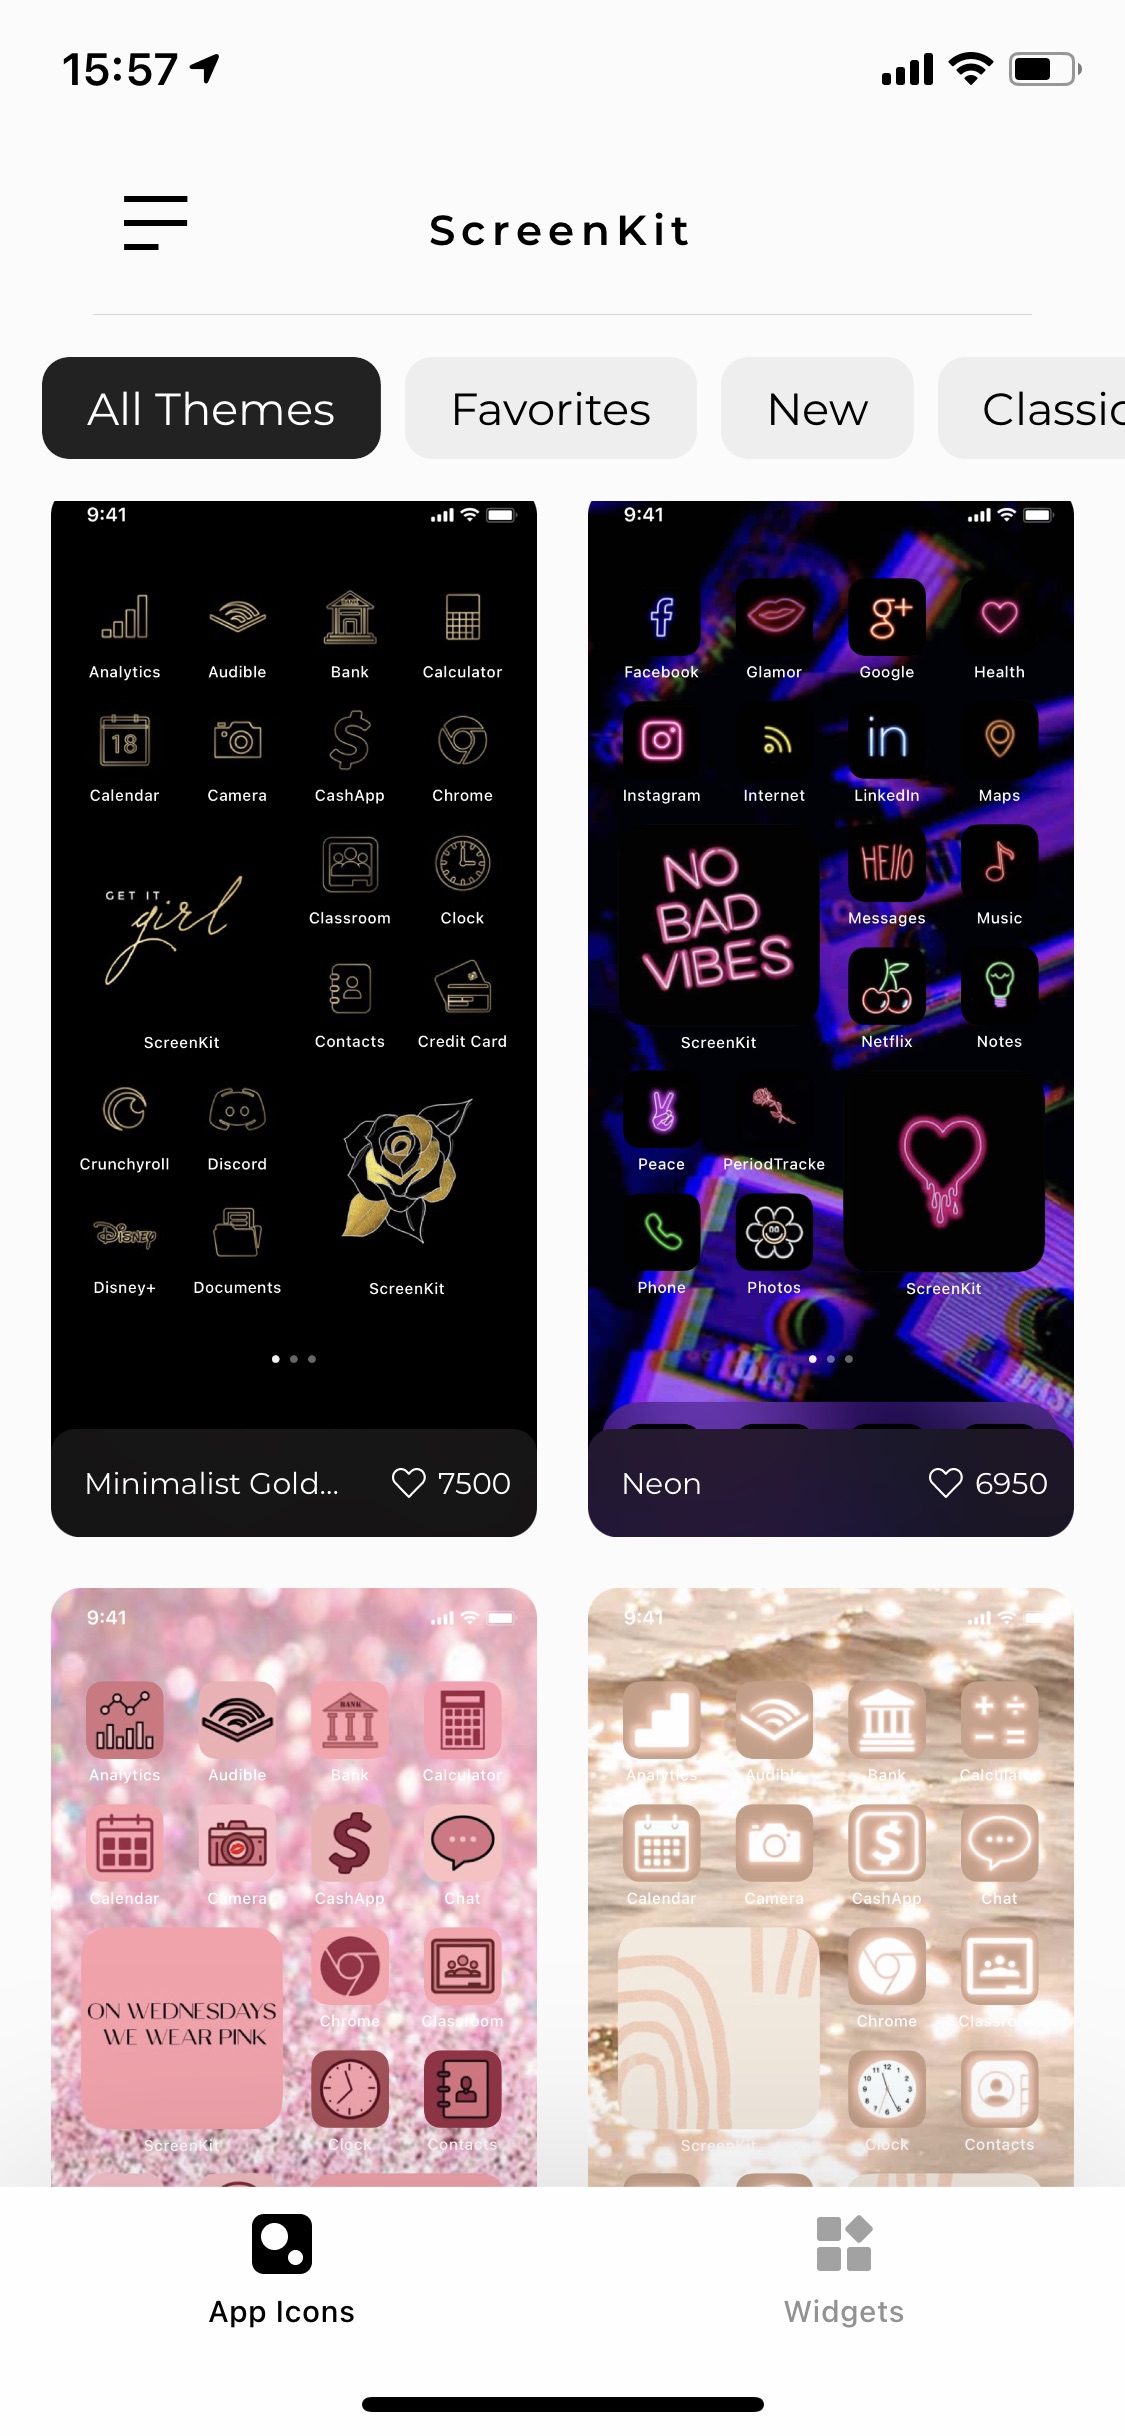
Screenkit allows you to change your icons based on various themes. The main view on ScreenKit allows you to pick from various styles.
Tap on one of the themes and the app will bring up a full example of what it will look like with a button for Easy Install. If you want to apply the theme, tap this button.
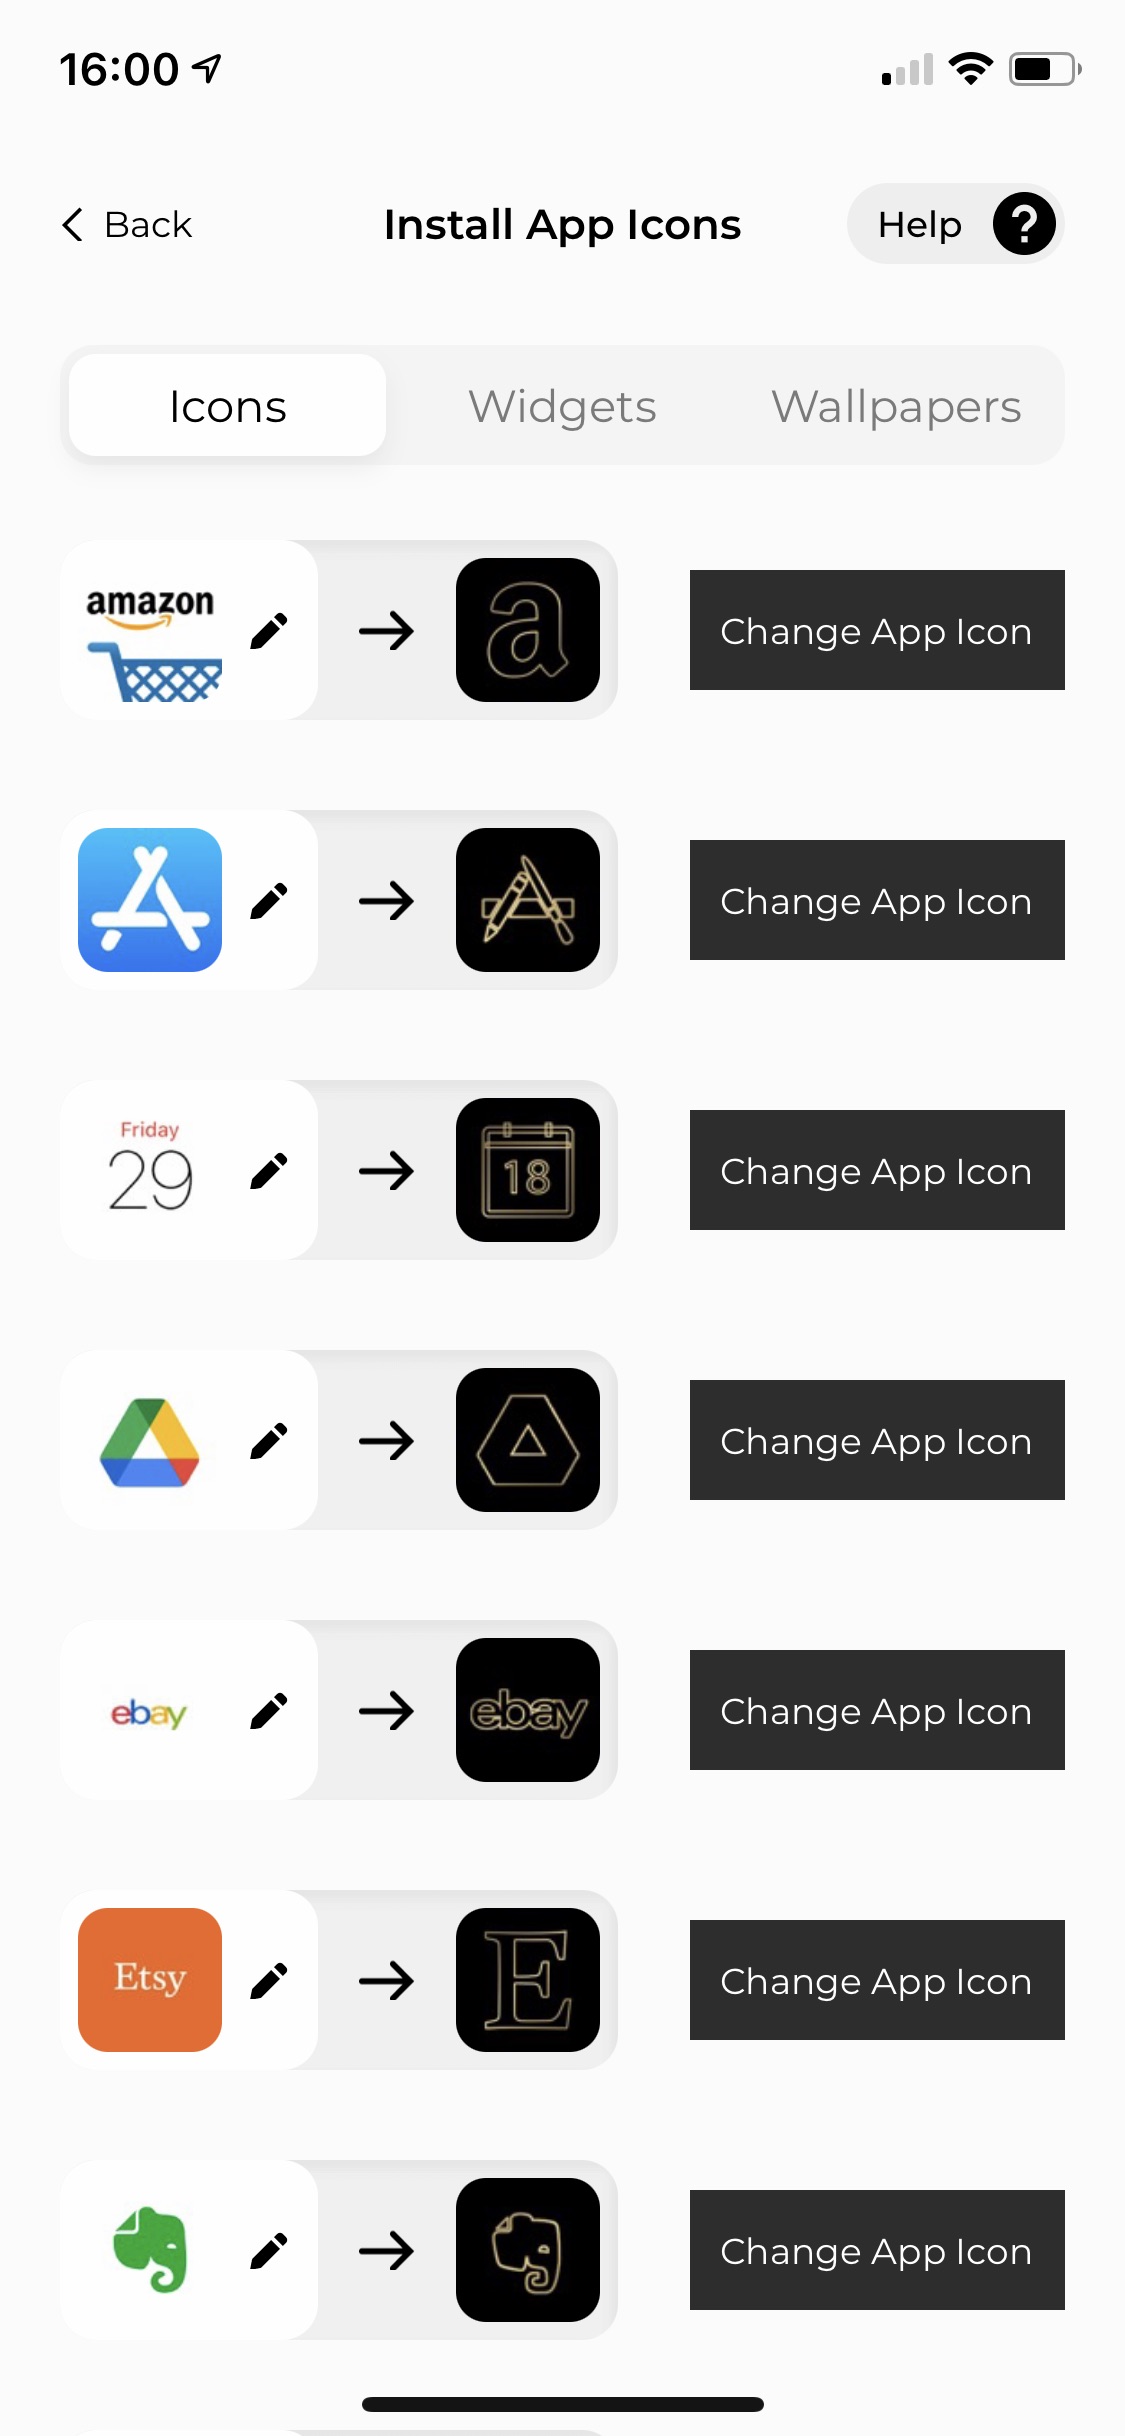
Be aware it’s a little fiddly as you’ll have to manually set up each icon – but the app does most of the legwork for you, making it much easier than jumping through these customization hoops yourself from scratch.
On the next screen the app will highlight the apps you have and the corresponding alternative icon for your chosen theme. You can opt to change these individually but tapping the ‘Change App Icon‘ button next to an app icon will take you to a confirmation page. If you tap to confirm the change, ScreenKit will open up your iPhone’s web browser and load a page that gives you instructions on how to add that icon to your Home Screen.
We’d recommend having Safari set as your default web browser for this as we had some trouble using third-party browsers.
The process is a little roundabout as it’s not something Apple really encourages. Essentially, in order to customize an icon, this app uses a workaround that utilizes the ‘Add to Home Screen‘ option on the Share sheet.
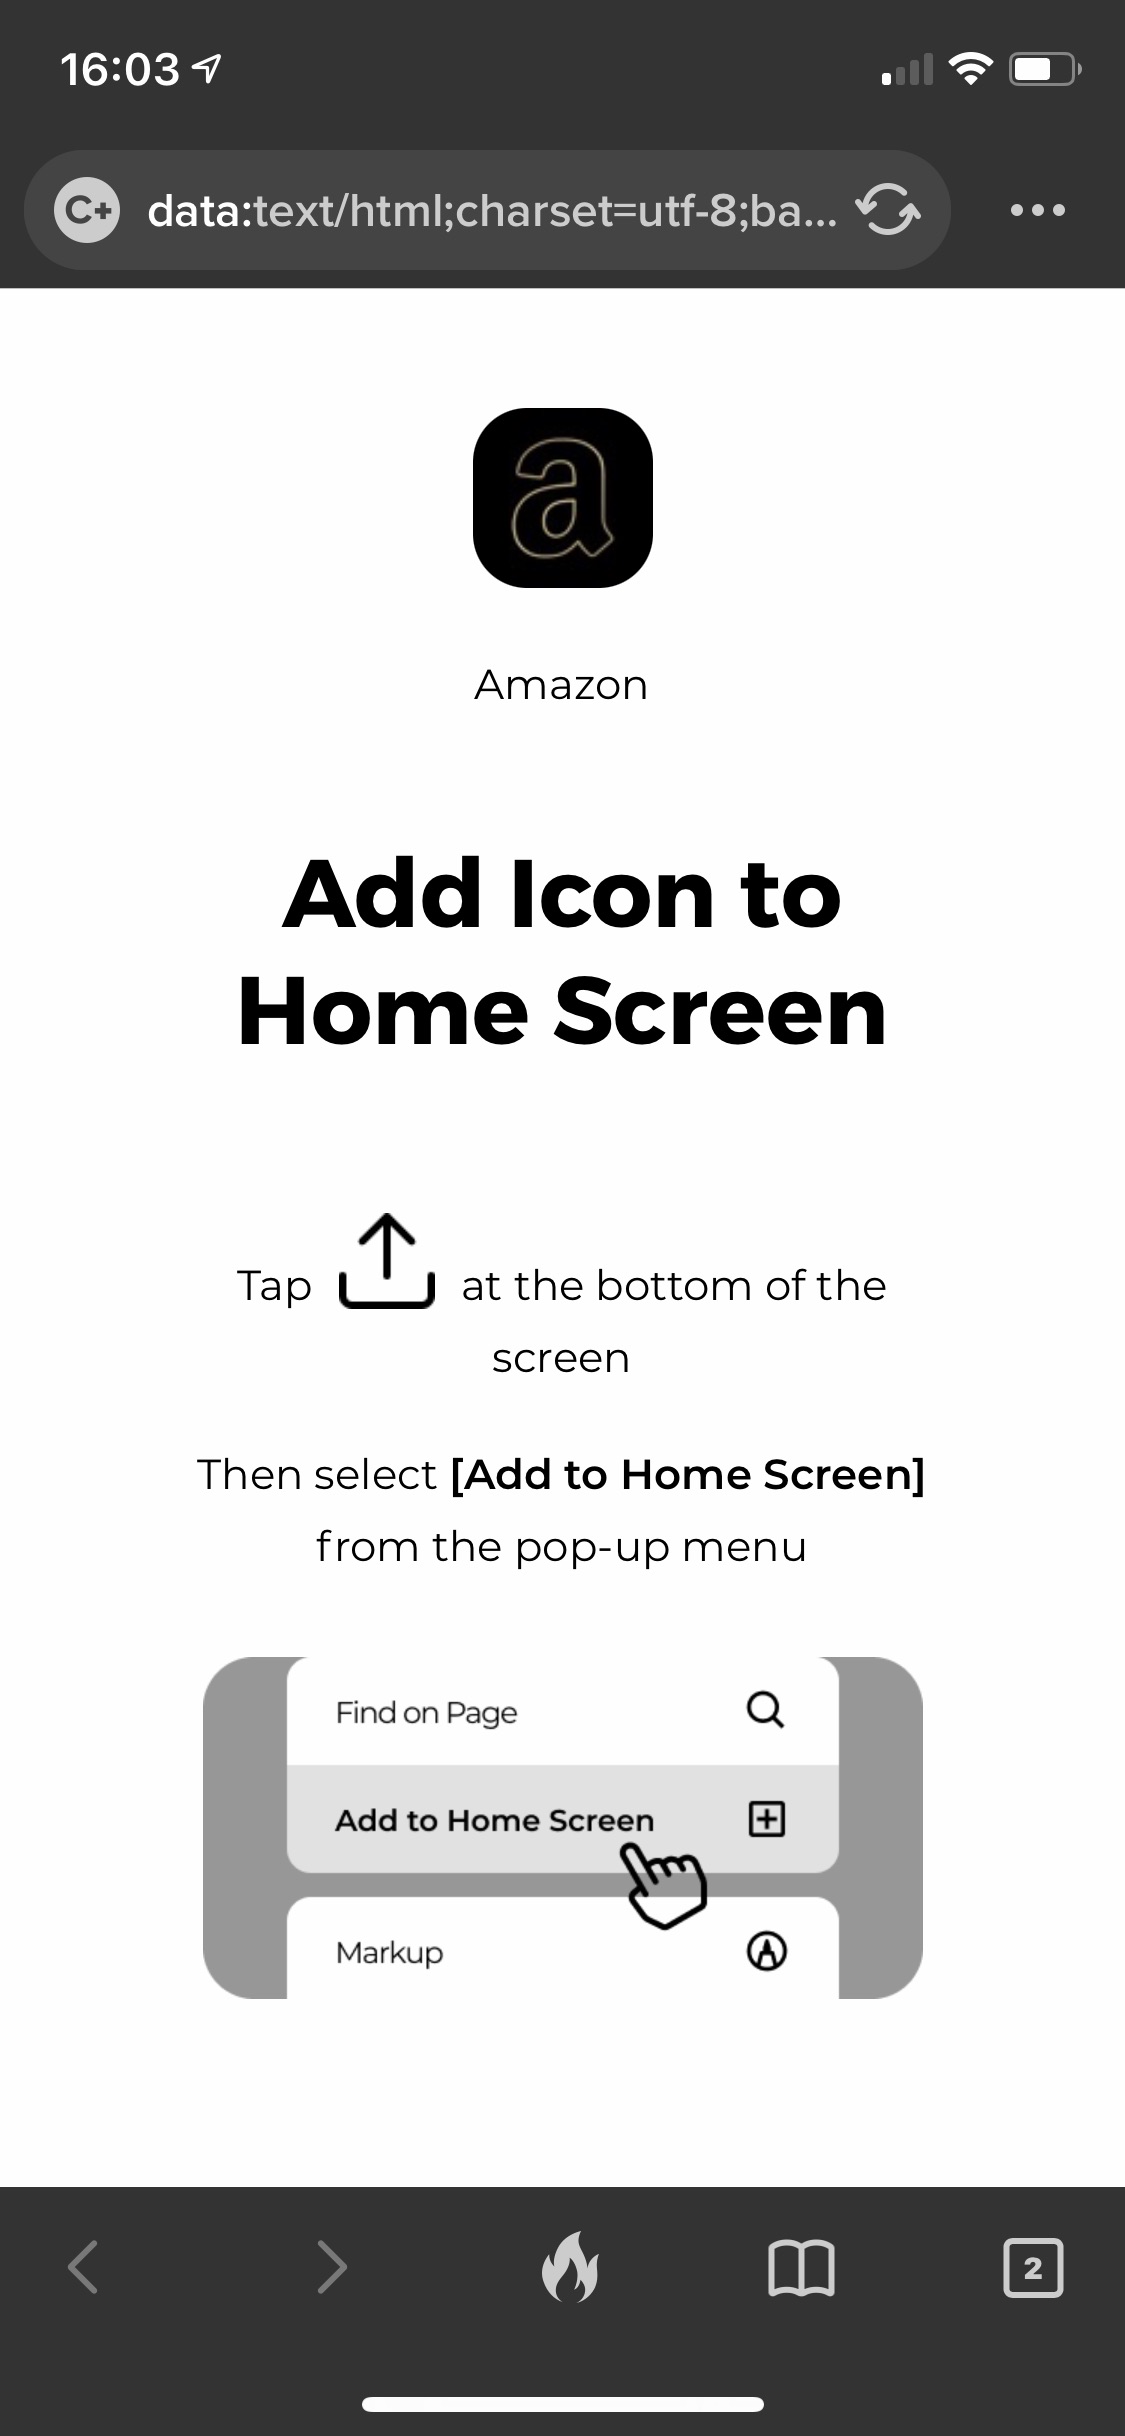
As instructed, tap the share icon, then ‘Add to Home Screen’ and the new icon will be added. You can now move this app icon around. Tapping it will automatically open the app this new icon represents. Neat!
How to add matching widgets and backgrounds
Adding the background to your device is even simpler – tap the ‘Wallpapers‘ option under the theme you’ve chosen then tap on the background. This will save the photo to your Camera Roll.
From here, you add it in the same way you’d usually apply a new wallpaper, by heading to the Photos app, opening the background image, tapping the share icon, and then selecting Use as Wallpaper.
Widgets are a little more complicated, but when you tap on the ‘Widgets‘ tab under your chosen theme, the app guides you through the process. Tap Install Widgets and the app opens up a list of step by step instructions which involves adding ScreenKit itself as a widget, which you can do by long pressing on any app until they jiggle and then selecting the + icon in the top left.
The app will then talk you through the rest. Happy customizing!