

Selfies are a big game these days – here’s how to make yours that little bit more awesome
The thing is, taking a snap of yourself and posting it straight to social media just doesn’t cut it anymore. At least, not if you want to stand out. The app Werble lets you rise above the social media dirge by animating your selfie. (Or just impress your friends offline, if social media’s not your jam.)
First thing’s first – download the app using the button below. It’s free, but you can still read our full review first if you need convincing.
Now, here’s how to make that photo pop:
1. Tap that big purple ‘W’ in the bottom middle of the home screen.
2. Now, either choose an image from your photo library or tap the camera icon at the top of the menu bar to take a fresh selfie.
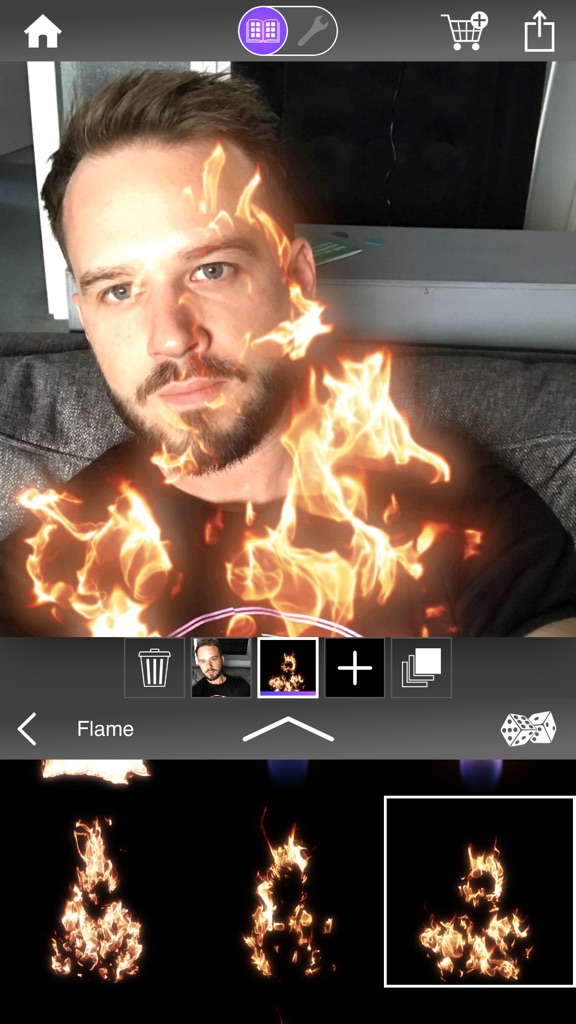
3. Next, scroll through the library of effects below your selfie – if you don’t find one you fancy, you can always press the ‘more art’ option to browse the effects store for IAP. Once you’ve got an effect you want to use, tap on it, then tap one of the options within the effects pack.

4. The effect will now be placed on the image – use your finger to move the image to the desired place on the photo, and you can also use two fingers to change the size of the effect.
And you’re done! Or are you… if you think it needs a little more, you can add another effects layer. Here’s how:
1. On the middle bar, between the viewfinder and library, press the + icon, which will add a new layer.
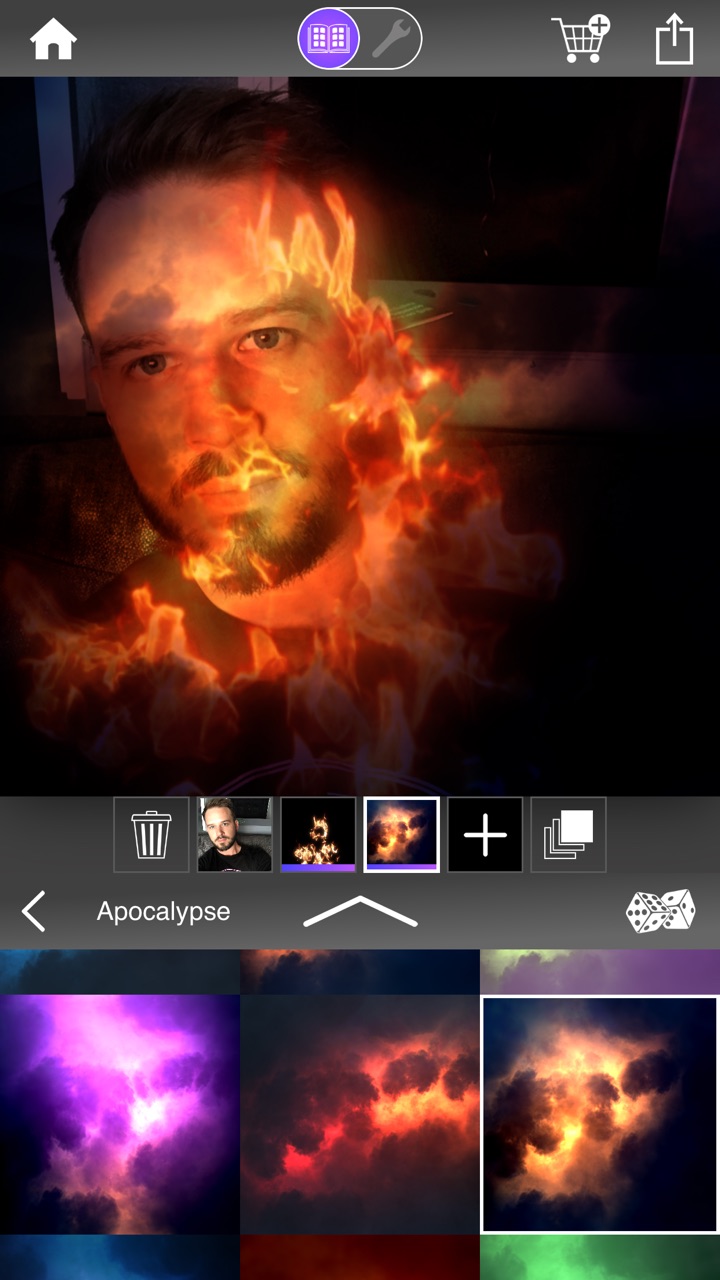
2. Follow the steps above to choose and apply a new effects layer.
Done yet? Oh, you know what… that second effect is a little intense. But good news! Each effect can be edited – here’s how to tone down that intensity.
1. Whether you’re using one layer or many, you can edit each one. Go to the top of the screen and tap the spanner icon. This will change the library to a list of potential tools.
2. Now, pick a tool based on what to change – you can change the original image to fit better with the effect, or edit the effects themselves to be more or less intense, add a camera shake, or a tilt, or even add text to the image.
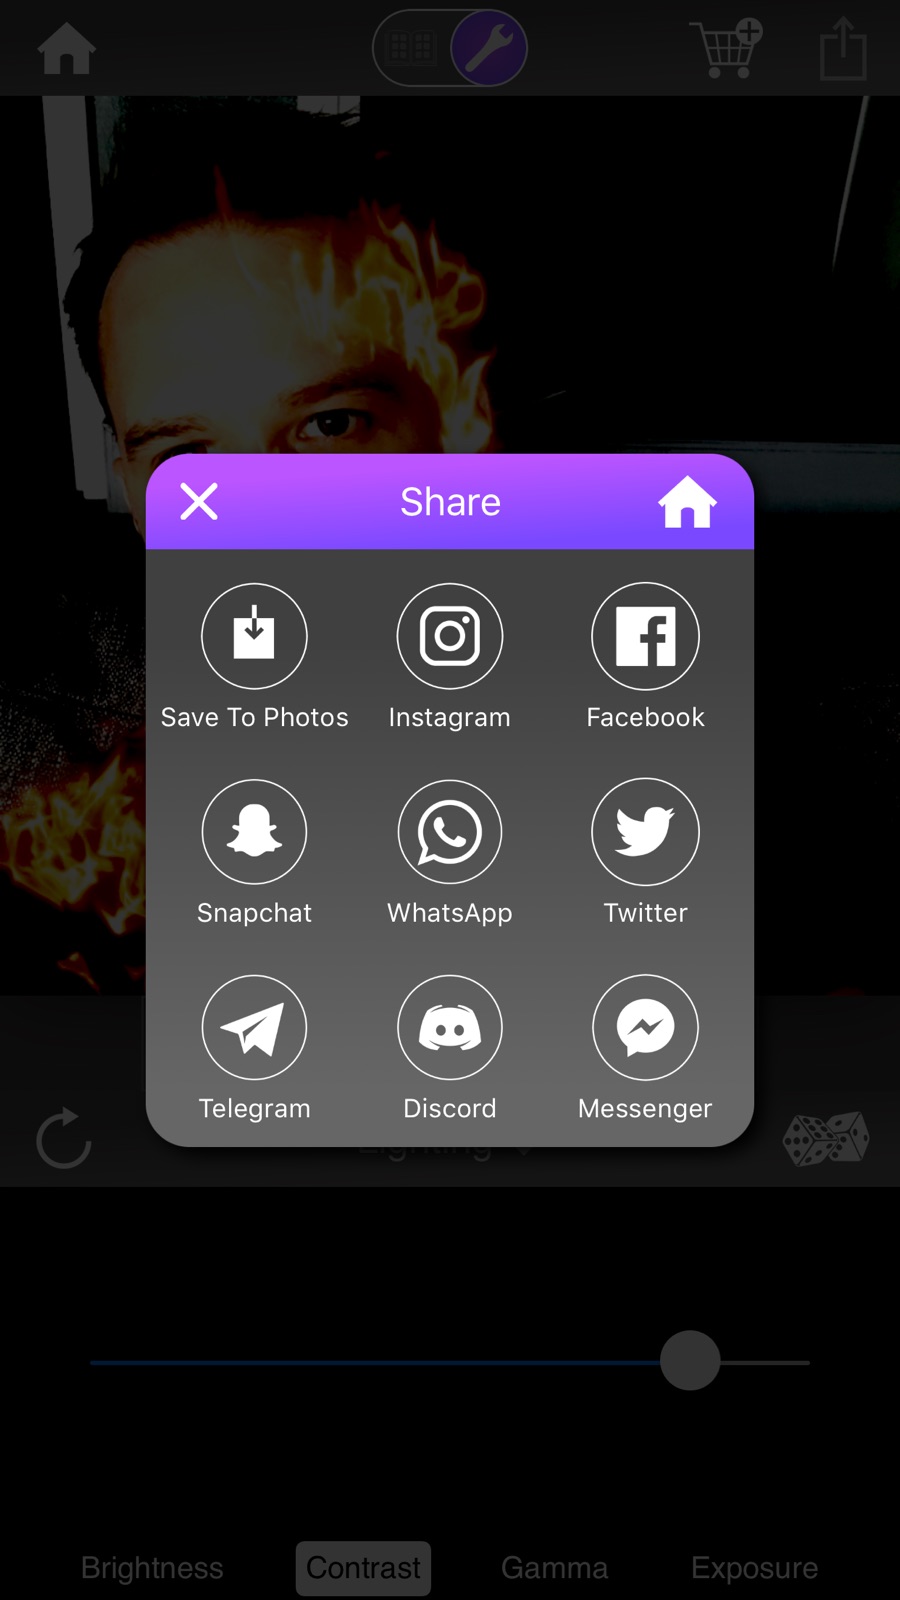
3. Now you’re ready to finalize and share. Once happy, tap the share icon in the top right of the screen and choose how to share. You could save a video or a GIF of the video for later use, or share it directly to a range of social media apps.
Bonus tip! If you can’t decide which effect to use, roll the dice! Tap the dice icon and the app will randomly add an effect from your library to the image.